I agree 100 percent. Another fantastic job!
Ed
I agree 100 percent. Another fantastic job!
Ed
Here’s a quick update of the downtown collection I have coming together. Not arranged in any particlar order. The models to the left are from custom model railroads and are kit structures you can buy. But I 3d printed their interiors myself. The towers to the right are entirely 3d printed.
I rarely light these all at once. These are drawing about 5 amps on a 1.5 amp power source, so I need to get that resolved before I start lighting them up more often.
 Downtown highrises by Ravenswood Scale Structures, on Flickr
 Downtown highrises by Ravenswood Scale Structures, on Flickr
Very neat!
Very cool! Remind me, will these buildings become part of your layout? What are you modeling in terms of location and era?
Rich
Hi Rich,
These will be at the center of the layout. It will be present day and represents a fictional suburb of Chicago like Aurora, Elgin or Joliet It’s not the most exciting layout in terms of track. A simple elevated 4 track viaduct through the center of downtown. But there will be working lift bridges (already assembled) and an industrial area with yards and switches.
The buildings shown are the only high rises on the layout The rest of it is modest 1 to 5 story structures.
Im doing things opposite here. I’ve finished buildings and bridges. But there’s no benchwork. Still working on those modules and when it’s all done, I’ll sign a lease in a nearby commercial building to set it all up.
ahh, that really sounds like a neat layout to be. Look forward to updates from you. The working vertical lift bridge sounds very cool. I recently scratch built the PRR vertical lift bridge at 22nd Street on my layout, but I didn’t dare attempt to make it a working bridge.
Rich
All this is very interesting, and the finished models (painted, lighted, interiors, etc) are terrific, but I’d be curious to see the raw pieces and parts as they come out of the printer. Plus a few details about the process as it applies to your specific Prusa printer.
Based on this thread and on NScale4x8’s threads, I decided to get into filament 3D printing. So, I purchased a Qidi X-Max printer a few days ago and have printed several structures ranging in size from about 1.25" by 1.25" by 1" tall up to about 9" diameter by 11" tall with print times ranging from about 1 hour up to about 60 hours and with filament weights ranging from about 3 grams up to 470 grams. No failed prints or scar-damaged surfaces or hanging threads or anything like that, but everything so far is printed in candy-apple red filament. That was the color of the 1 kg print spool supplied with the printer. I have since ordered (and received) 1 kg spools of beige, matte light brown, and cool gray filament.
I tried to PM you (NorthsideChi) and NScale4x8, but that didn’t work, so I am asking a few nosy questions and making possibly impertinent requests in open forum. Apologies.
Thanks, Robert
Hi Robert, I can generally acheive a matched look of bricks and textures as the Walthers kits, which is the benchmark I aspire to. It does take longer though. For example, if I use the iron setting to eliminate lines and add 0.05 mm resolution it adds maybe twice the time.
Just to give an example, I’m creating a curved viaduct that has plate girders that match the walthers steel urban overpass. My 3D printer can match the resolution of the rivets, flanges and railings with no problem along with the iron setting to erase those 3d print lines, but a 3 inch long girder takes 1 hour! Still worth it, to make something custom and it probably costs less than a cent to make!
I am envious that this technology wasn’t available 20 years ago when I started my current and last layout. I see endless possibilities for it. I would have put it to great use. As it is, I need so few additional structures that it just wouldn’t be cost effective to buy a 3D printer. Maybe in my next life.
When you say resolution of 0.05mm, do you mean 0.05mm layer height? What nozzle size are you using in this situation? What horizontal stepover distance? And what is the feed rate, and the filament temperature and flow rate? In this kind of ultra-minute detail scenario, can you fiddle with slicing software settings to appropriately match layer height, nozzle size, stepover, travel feed rate, filament temperature, and filament extrusion rate?
Thanks, Robert
That’s correct, 0.05 layer height, though I usually print at 0.10 for models with brick walls as the mortar joints will be 0.10. The nozzle diameter is 0.4, though I’ll sometimes trick flat prints for things like window frames or fences with a high first layer Z level to make the bulb a bit “taller” so the frames structures are 0.3 mm, but that can be difficult to do and ultimately reliable prints is the better outcome.
I can post my settings, but they aren’t going to make any difference. I don’t think anyone should deviate from the default settings of the slicer program unless it’s something really specific. Like if I have stale filament that was near the sink and soaked up moisture, I might turn down the temperature to reduce stringing. I do sometimes use lower speeds, but it has nothing to do with print quality, but only so the printer operates in silence. If I’m going to be running a 60 hour print, the best process will be the one I never have to hear even if that means adding a few more hours.
Ultimately, it’s 90% down to modeling. For example, the bridge plate girders I’m creating. I made the rivets just a bit too close to the flange in the model. The results were some strings bridging across the rivet dots. I moved them just 0.1mm away from the flange and the re-print was perfect.
Another major thing is to replace the nozzle every 6 months if used several days a week. I’ll see people complain how messy their prints look and the nozzles are worn way down.
Any chance we can get copies of the files? Also how do you convert your SkechUp files to stl?
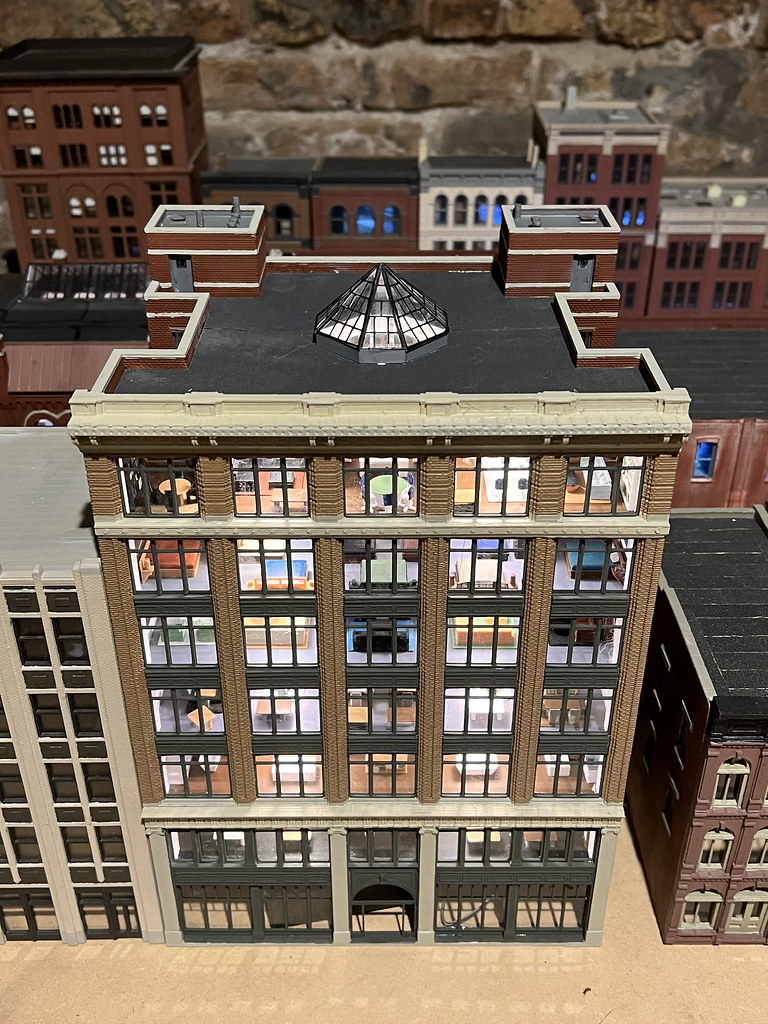
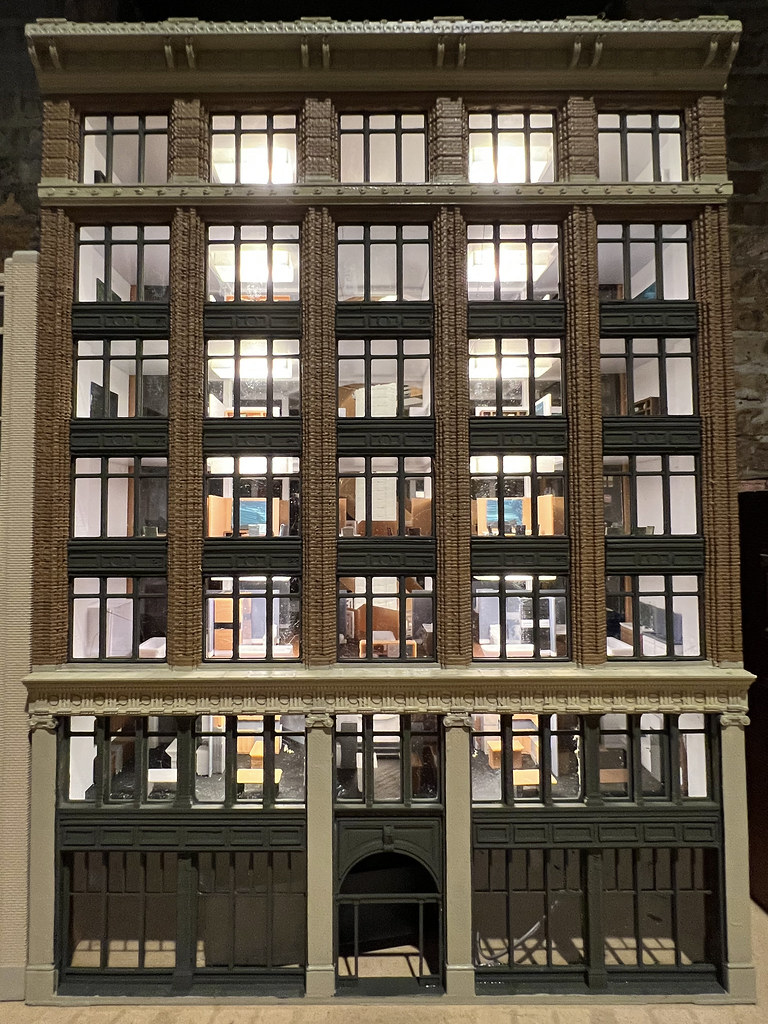
Just a quick update on the furniture store. Still printing the first floor interior and I’ll be creating more detail on the sides as well as a rooftop sign. But it’s close to completion.
 Furniture Store by Ravenswood Scale Structures, on Flickr
 Furniture Store by Ravenswood Scale Structures, on Flickr
 Furniture Store by Ravenswood Scale Structures, on Flickr
I love seeing your progress and the attention you devote to lighting and interior spaces. It reminds me of this modeler’s work (https://shin-yukari.weebly.com/) with micro-displays in his N scale Uniqlo and Starbucks storefronts. Please keep sharing your work!
Thank you! And thanks for the sharing the link. Incredible to see such detail in a small space.
I plan to show how I have an entire city stored in custom built crates to fit city blocks on a standard shelving unit. In my 6 years of building, I’ve never set everything out all that once. But someday I will. Taking advantage of the full workshop in my condo building until someday I have a basement all to myself.
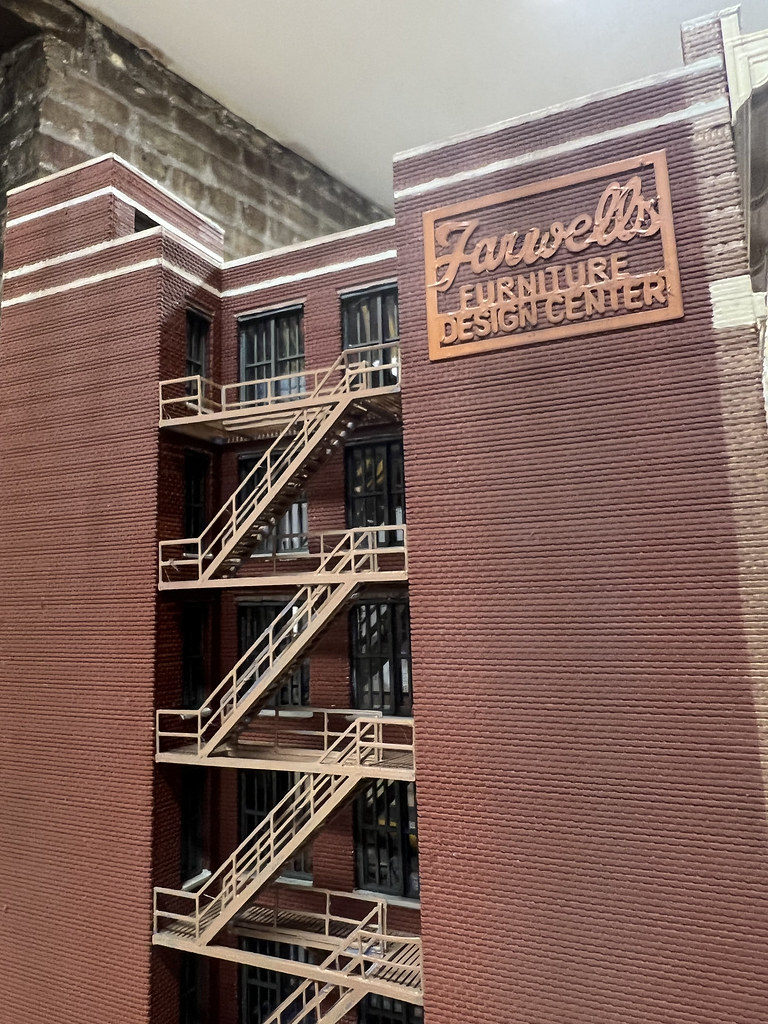
A few finishing touches. Since this model is an adapted version of the Farwell Building in Detroit, I’ll call it Farwell Furniture store.
 Furniture Store by Ravenswood Scale Structures, on Flickr
 Furniture Store by Ravenswood Scale Structures, on Flickr
 Furniture Store by Ravenswood Scale Structures, on Flickr
This fire escape has no glue! Snapped together and it won’t be moving anywhere
 Furniture Store Fire Escape by Ravenswood Scale Structures, on Flickr
 Furniture Store by Ravenswood Scale Structures, on Flickr
Your structures are maginificent. You are becoming the George Selios of 3D printing.
Well, baseball is back and I’ll be finding my evenings and weekends at Wrigley Field and of course all the other outdoor activities that summer brings. Therefore this will be my last major update for awhile. Here’s what was done in the last couple of months:
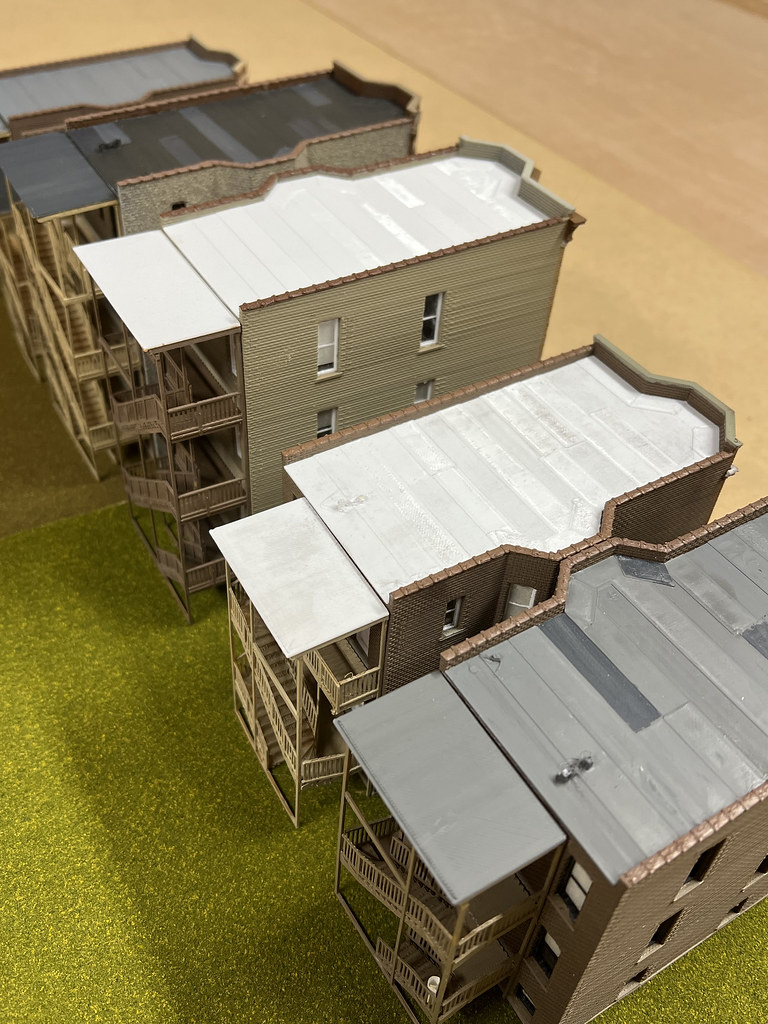
Chicago 2 and 3 flats. These are pretty much the most basic of housing in Chicago. You’ll find them everywhere in this city. Not as embelished as the city’s greystones, or 1800’s era Italianate, Romanesque or Queen Anne, but they were fast and easy to build and yet very durable and have been easily adapted into modern homes today. I created a basic model for the back and sides, and the facades can be interchanged and redesigned for all sorts of different styles. I do have intentions of possibly making these files available
 Chicago 2 and 3 Flats by Ravenswood Scale Structures, on Flickr
 Chicago 2 and 3 Flats by Ravenswood Scale Structures, on Flickr
 Chicago 2 and 3 flats by Ravenswood Scale Structures, on Flickr
 Chicago 2 and 3 flats by Ravenswood Scale Structures, on Flickr
Next up are 2 structures that many of you would be familiar wi
Very nice work! Doing all that by hand would take months, if not longer!
Dave
I was born in Chicago and have been back many times since. Your structures definitely capture the feel of the city’s architecture. It would probably be too much to create a 3-D Wrigley field but maybe you could recreate those apartment buildings across the street with the rooftop bleachers.
PS. We were southsiders and my mother was a lifelong White Sox fan. Sadly, she never lived to see them finally capture a World Series title. You finally saw the curse lifted back in 2016.