Of course, I wouldn’t build a canopy forest by using individual trees, but would use some sort of mass application. Just make sure the canopy looks like its taller than the foreground trees.
Great additional thoughts.
Also agreed, a forest can be modeled with only a few actual trees, and a “canopy” of “leaves”.
More later, got to go.
Sheldon
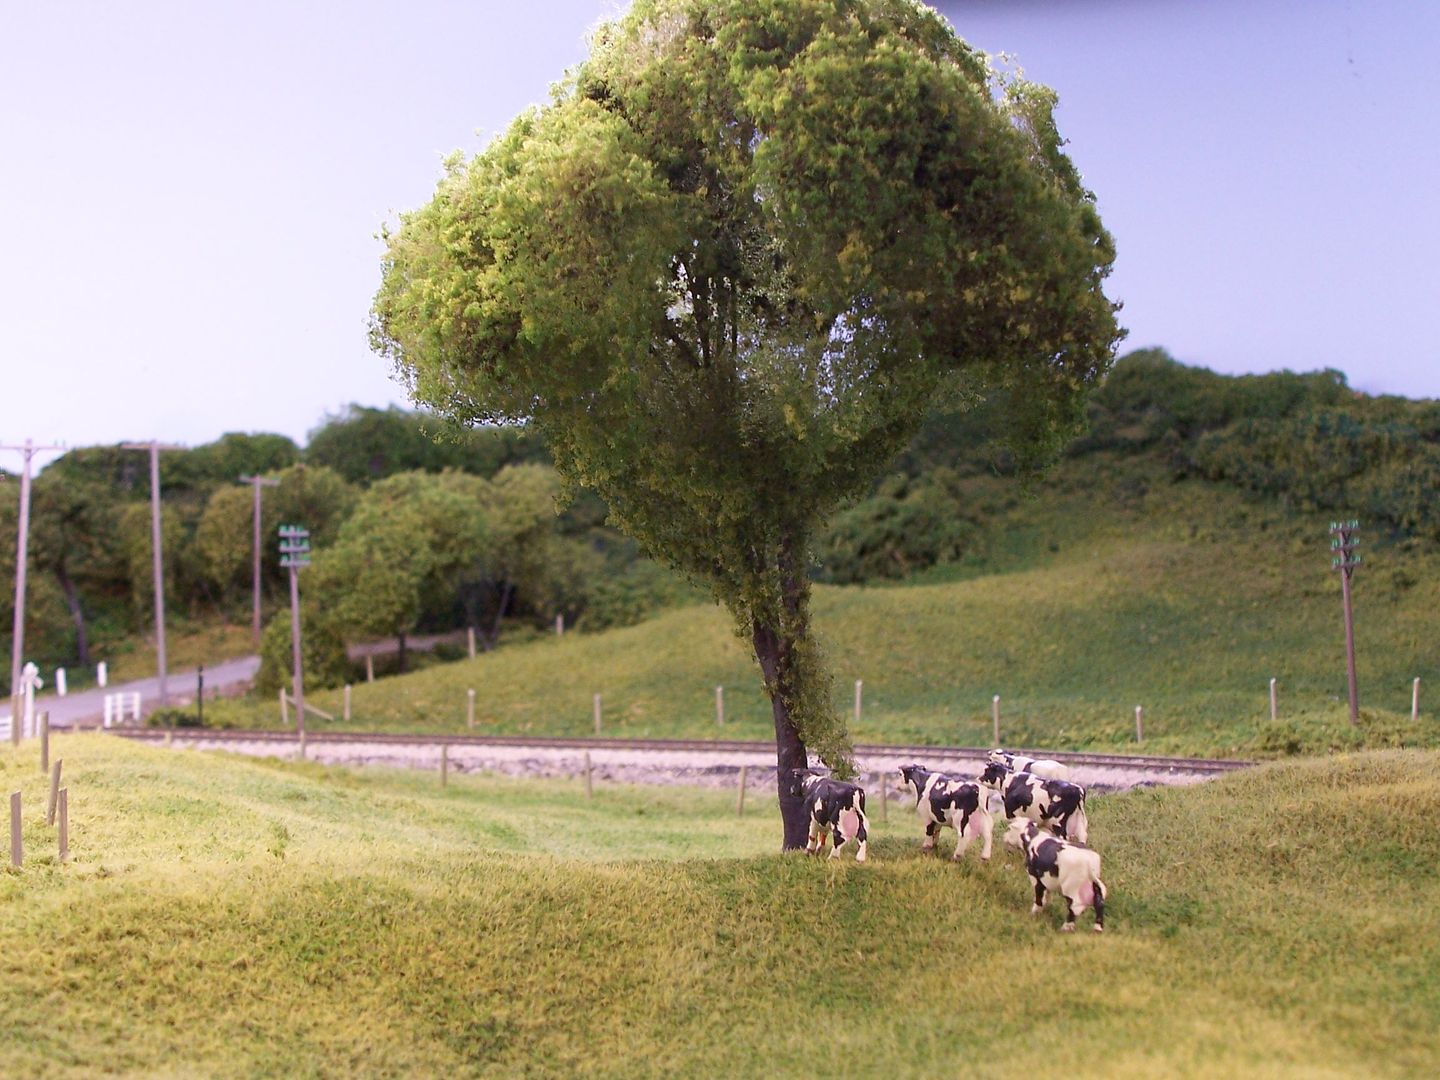
I’m not at that stage yet, but I will try to avoid trees, large trees in particular, in the foreground and near the tracks of my layout. Based on the experience of our club, trees can really get in the way when maintenance work is done on the tracks. I might consider using plugs to remove them more easily.
Simon
I hear ya about the challenge of being able to reach tracks with trees blocking access. Plugs work, but removing trees isn’t too difficult. The hard part is remembering where to put them afterward and not removing the foam in the process!
~Lee
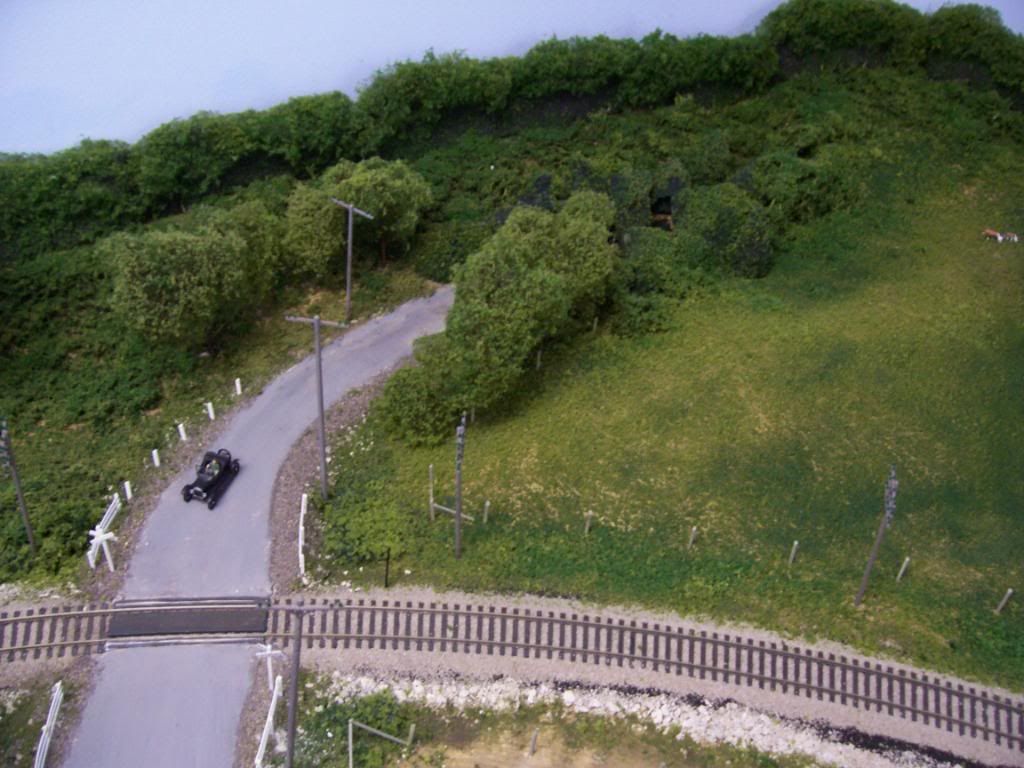
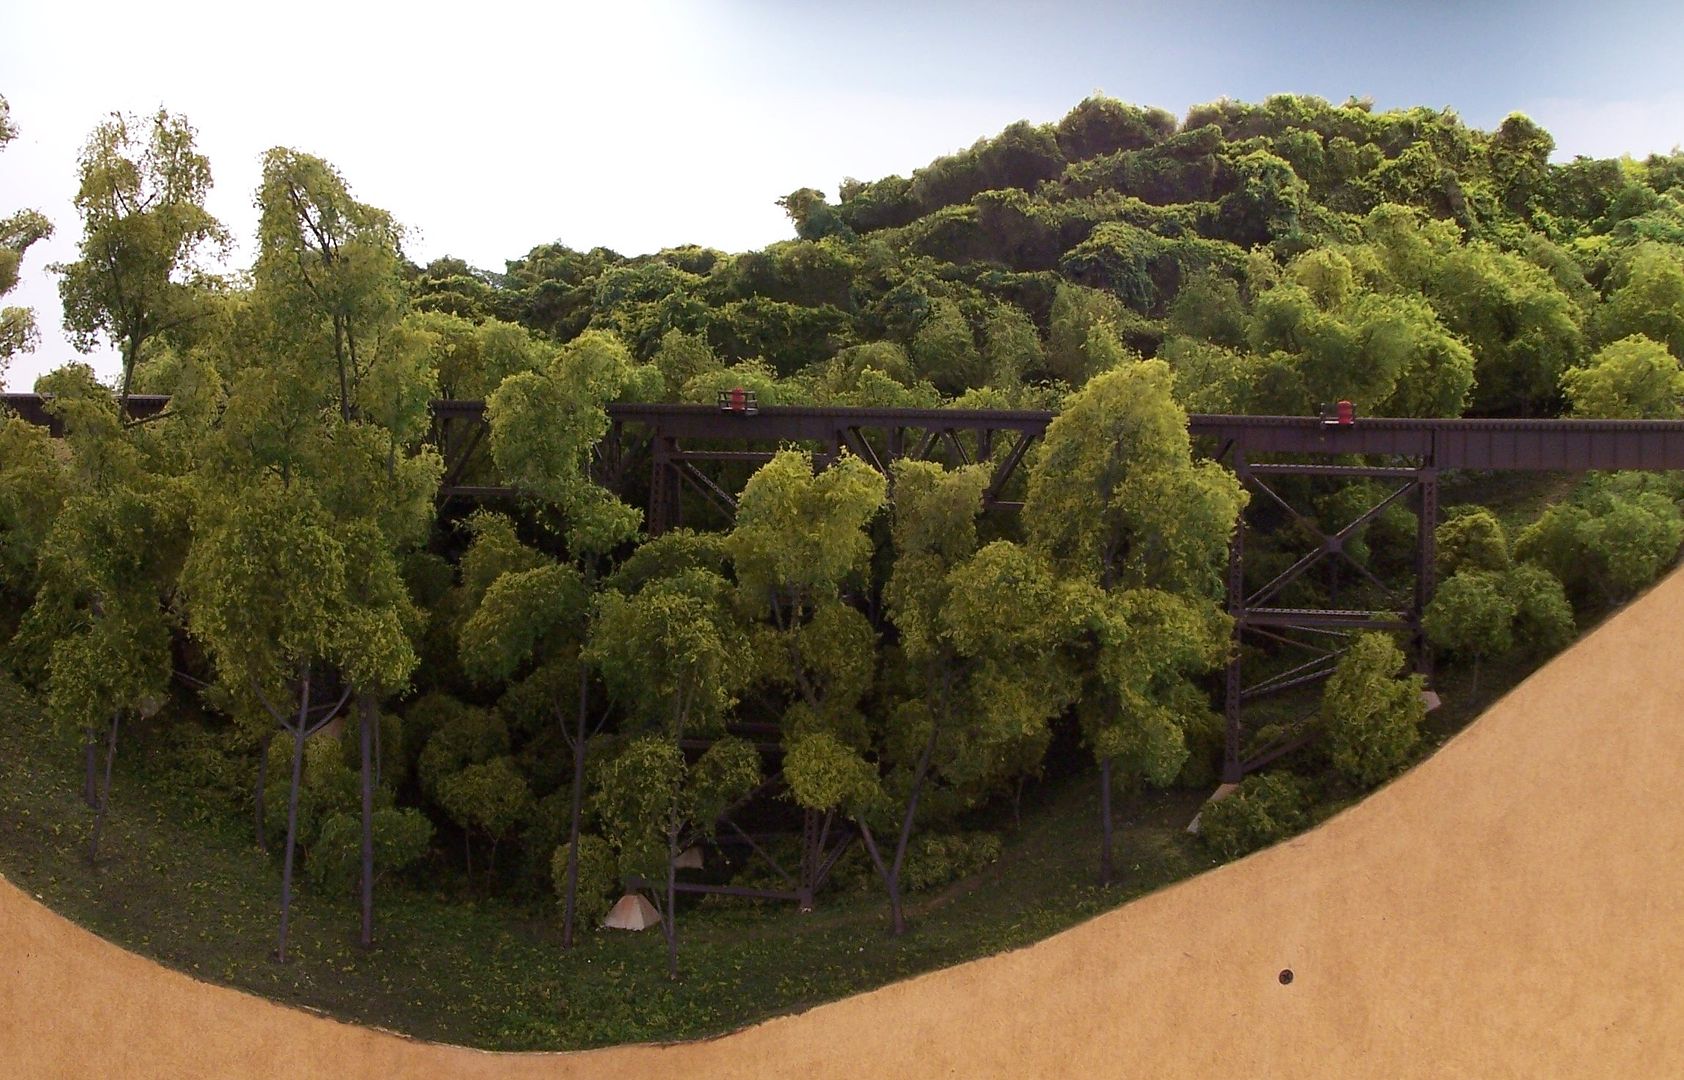
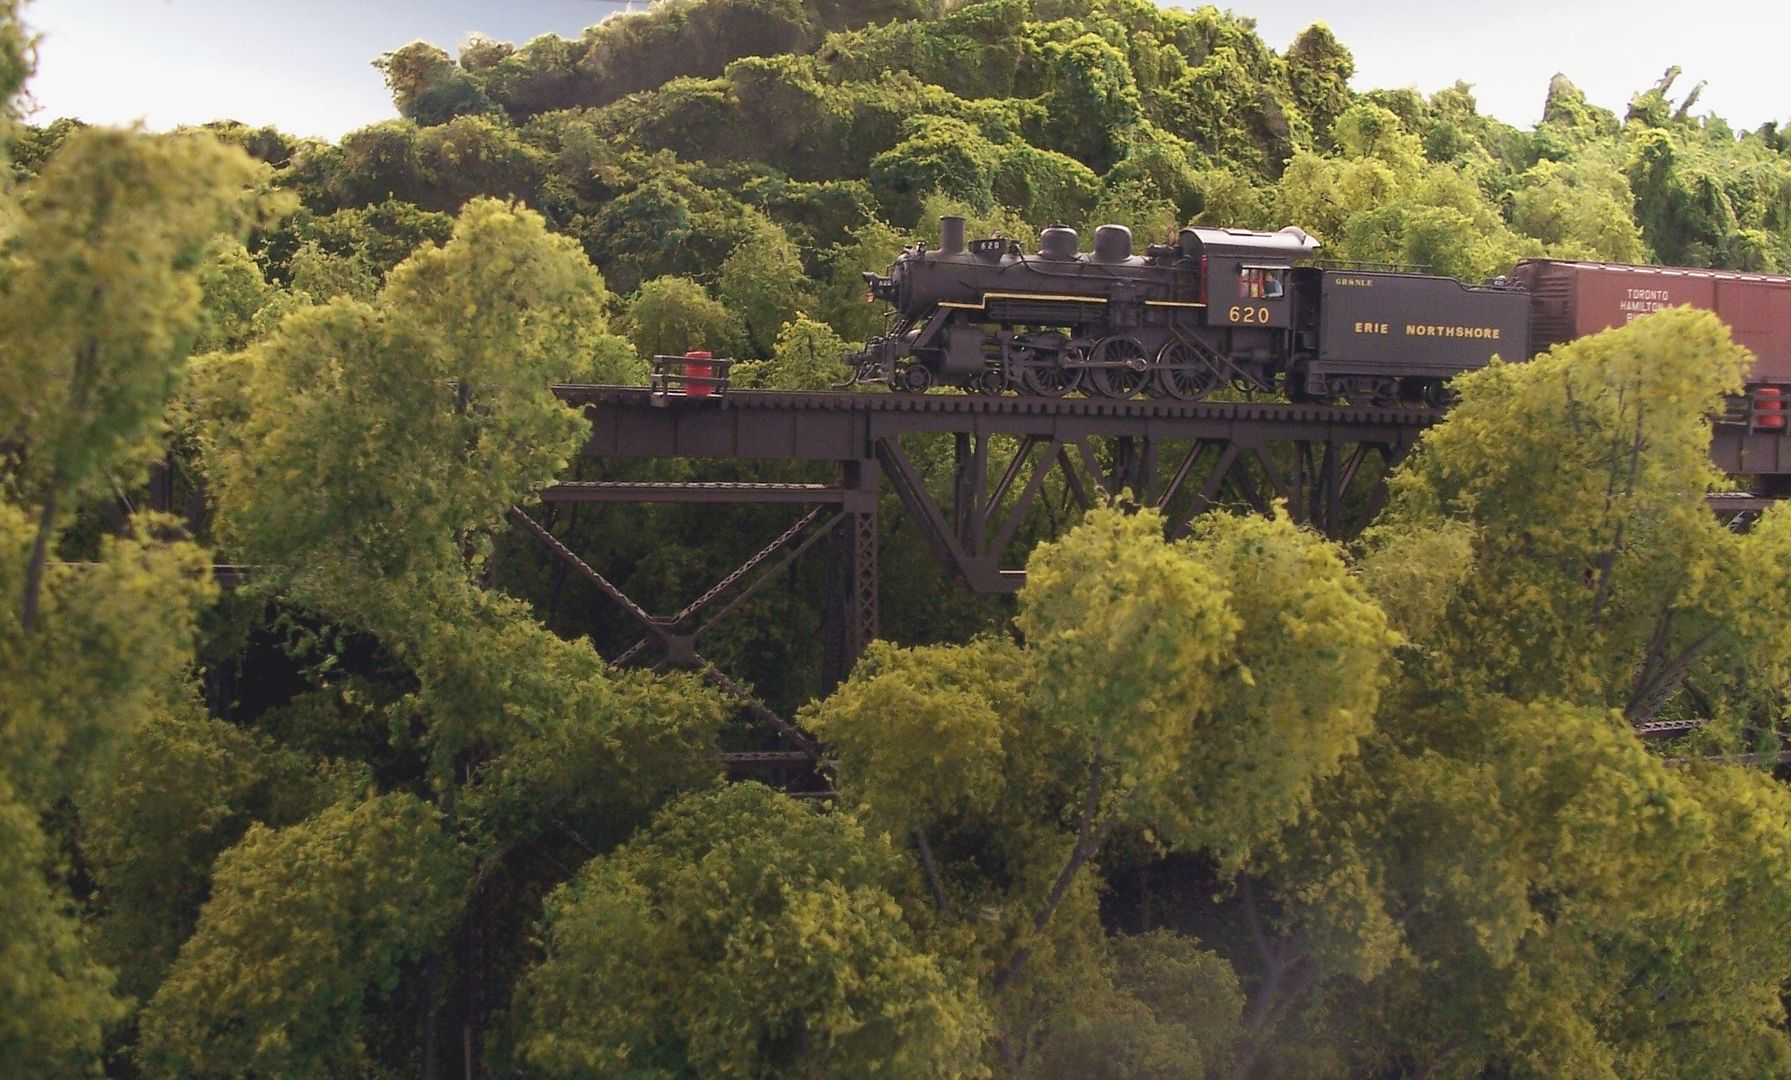
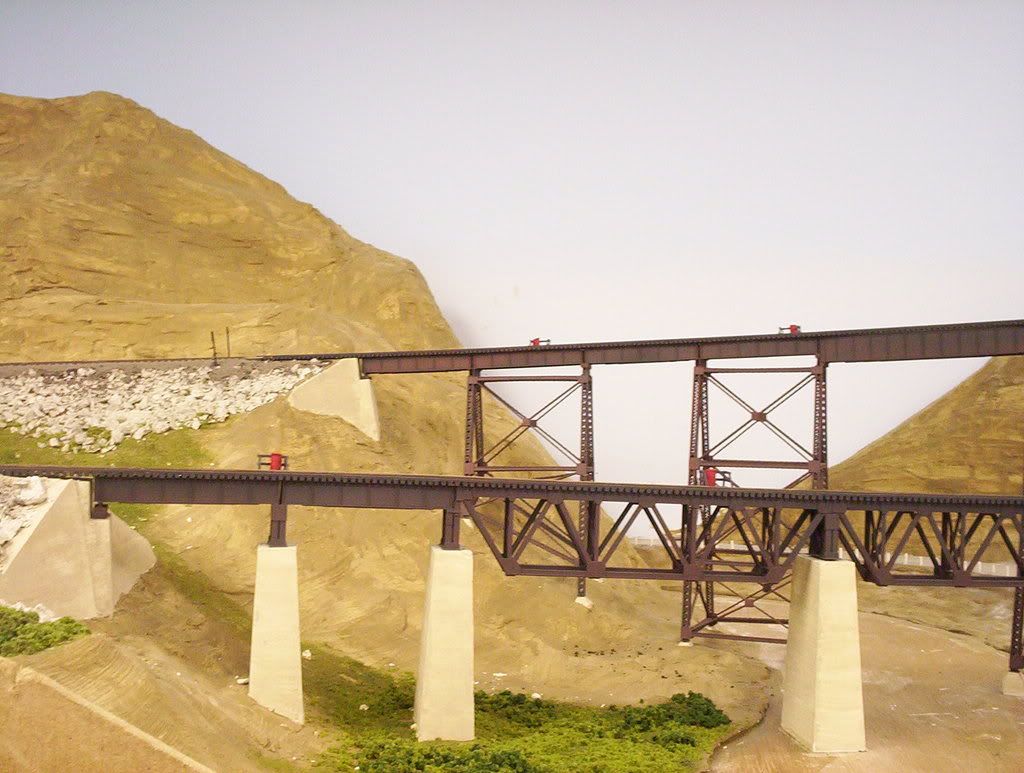
If you model a river valley, with a bridge of trestle crossing the valley, then some large trees back a bit from the stream would look right, and would be in the near background, not between edge/operators and tracks.
Dave
Another interesting question would be when to stop using individual trees.
.
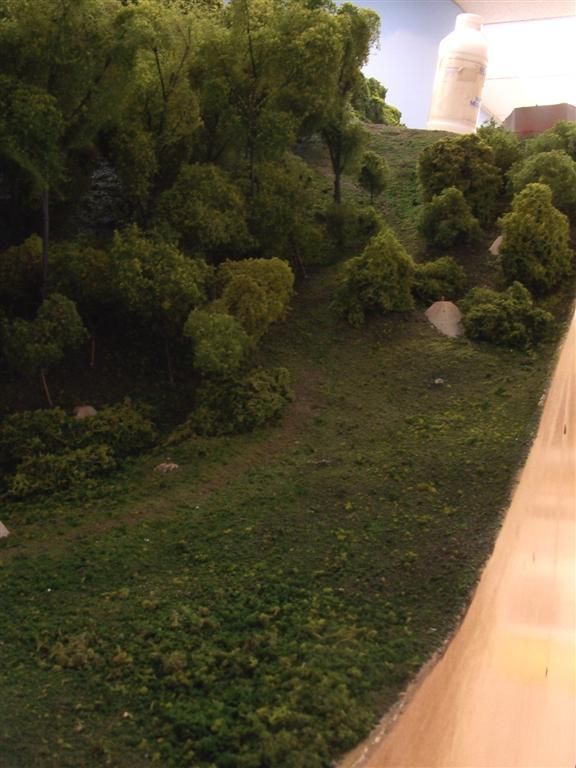
My trees have been divided into foreground models, further back models, then the canopy going up the hillside maybe 18 inches away or so.
.
Results have been mixed. My freind Randy’s N scale NORFOLK SOUTHERN had beautiful canopies of trees going up the hillsides. My layouts never looked so good.
.
-Kevin
.
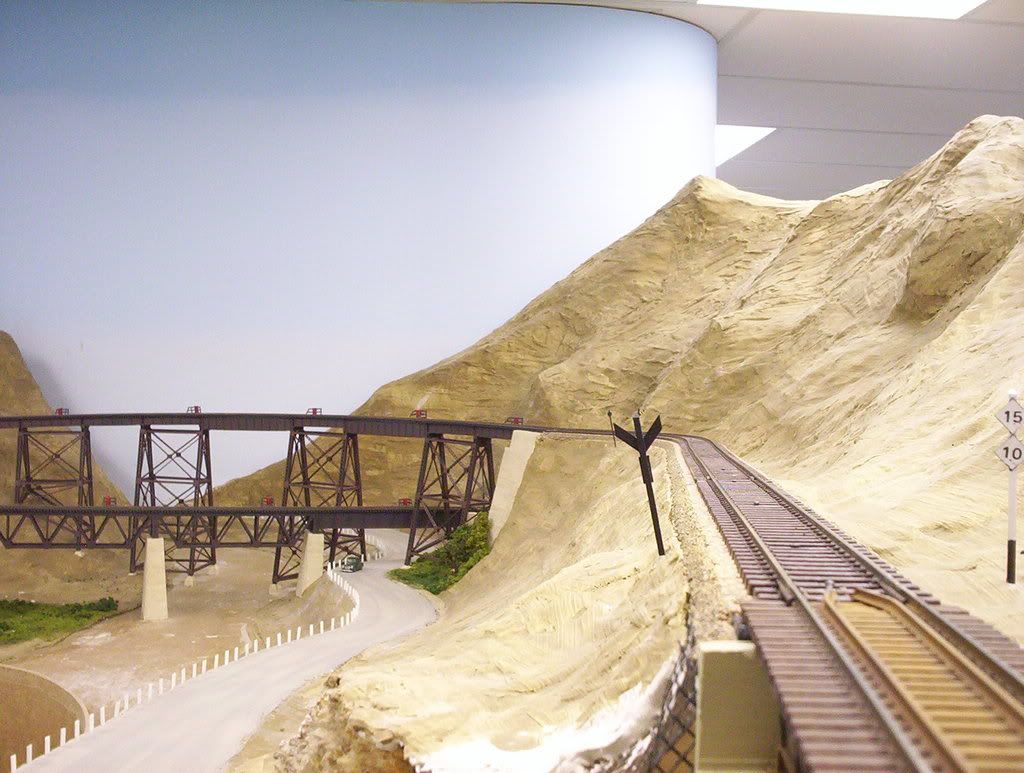
Great back drop Gary.
I happen to like tall trees on the layout. I prefer trees that are closer to scale height because it makes the scenery “look right” to my eye. As was pointed out earlier everything on the prototype is pretty big, be it streets, telephone poles, buildings etc. We all have to use selective compression. However, I think that when it comes to tree height we tend to overdo it a bit.
I model the Sierras and California foothills on the upper deck of my layout. The trees in 3000 - 5000 ft. elevation range can get very big especially the Ponderosa Pines, white firs and cedars. Many can get as big as 150 feet high (or bigger). That is nearly a two foot high tree in HO scale. From the time I have spent in the mountains and from looking at lots of historic photos of the areas that I am modeling, smaller trees don’t look right to me.
I have about 75 trees on the layout that are at least 15” tall and they make the scene. While the trees dominate the scenery, the trains are still the star. Layout viewers are still drawn to the trains. I also have series of around 12 trees that are in the foreground between the viewer and the trains. This gives a feeling of being “in the forest” looking at the trains go by. Most of these trees are on special pins so that they can be removed and moved
In some areas, I tend to prefer the taller trees in the foreground, with the ones in the not-all-that-far-away-distance being considerably shorter…
This one, in a pasture near Indian Line is about 65’ tall, with those in the background (about 250’ away) being around 25’-or-less in height…
…while a closer look at those in the background reveals not much in the way of actual trees…
In the photo below, some of the taller trees scale-out to 125’ in height - tall and gangly, just fighting for their share of sunlight…
…while the stuff hidden below them (shown before the bigger trees were installed)…
…will often be of different species, content with less light.
The trees in the distance vary in height, but most are quite short, their height created only by the terrain on which they were placed…
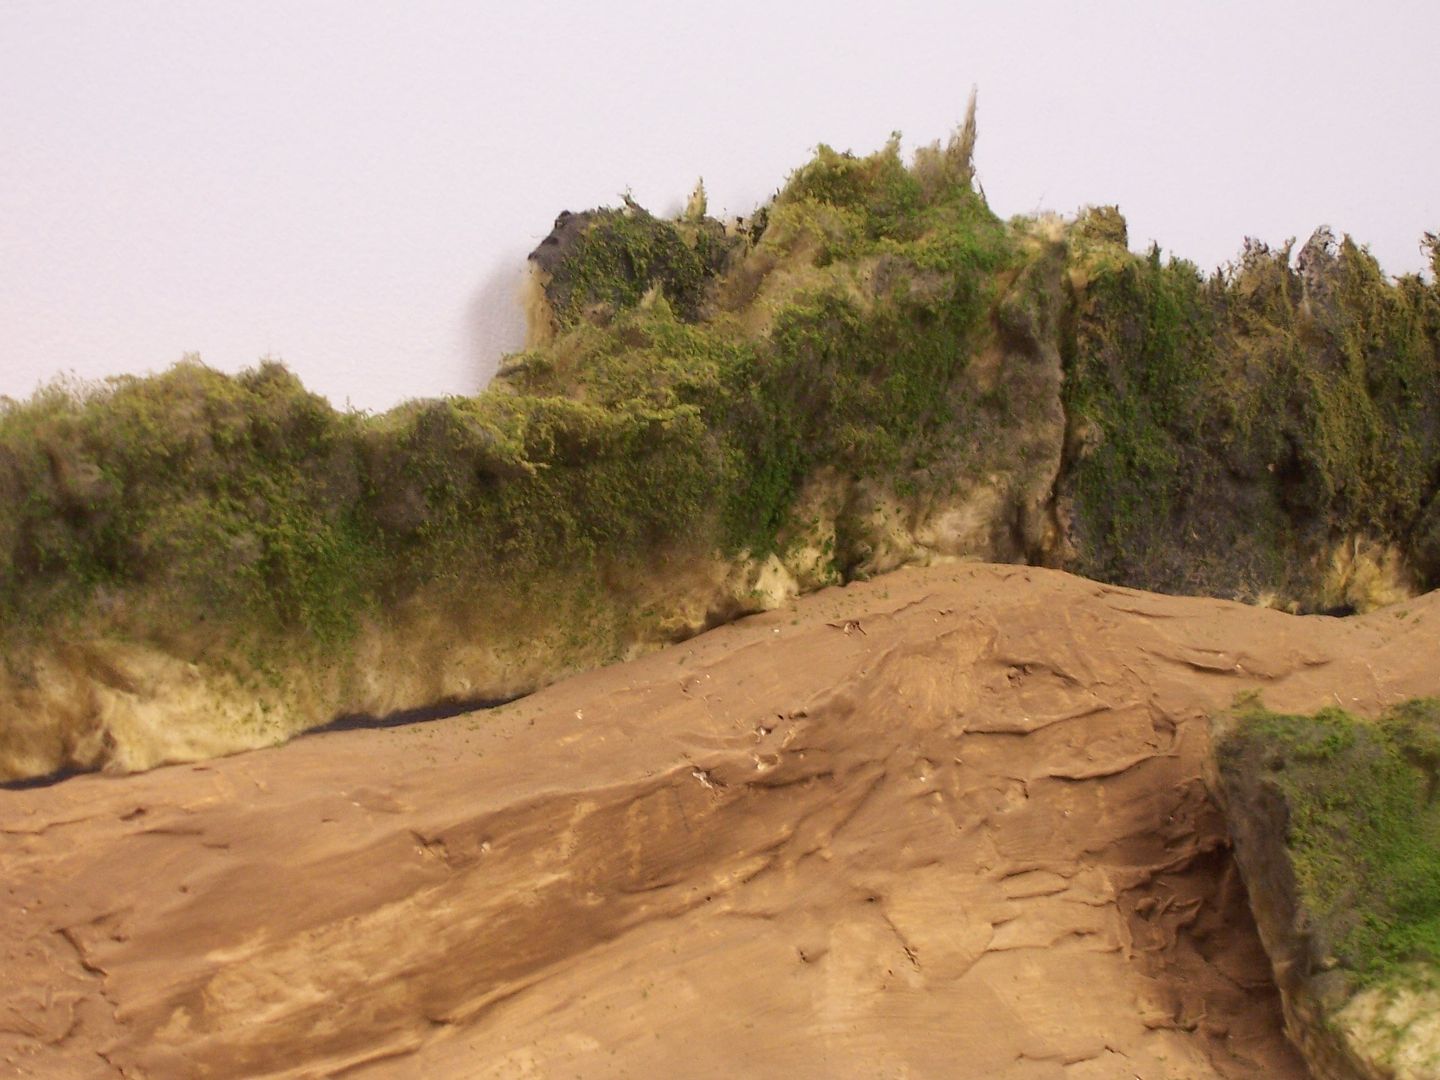
None of them have trunks or branches, simply chunks of insulation material, spray-painted green, with some ground foam added…
The trees here aren’t much more than 30’ in height…
…growing alongside a small creek almost choked with undergrowth
Wayne´s pictures certainly prove, that if you want to create more visual depth, place the taller trees in the foreground and smaller trees to the back of the layout.
Wayne, I think this an excellent representation of a forest, and a great use of the canopy. IMO, the foreground trees seen in full set the tone for what my eye perceives to be the size of the trees in the canopy. They don’t look like shorter trees (IIRC, your canopy isn’t even trees at all, but home fiberglass insulation worked to a frenzy and painted) They look like the same height trees, but more of them.
It probably also conceals the true height of the mountain you built. Whereas the tops of the foliage of the foreground trees might be 10 inches from the ground, the fiberglass canopy could be only a couple of inches from the actual mountain floor, simply being the thickness of the insulation strip resting on the mountain.
You can adjust the perceived grade of the mountain by simply playing with the height of the canopy.
Thanks for your kind words, Douglas.
Your perception of the background trees is pretty-much dead on, with the insulation trees done in a manner which lessens the steepness of the terrain. It’s actually “rock wool” insulation, so no harmful fibres to inhale or itchy arms and hands like one often gets when handling fibreglass.
Here’s that same area before the trees showed up…
…and the other side of that scene, which will likely use-up a fair amount of insulation-type trees (it’s on a peninsula which affords access to a partial upper level)…
There’s some more info and photos to be found HERE if anybody wants to take a look.
Wayne
Thanks Wayne! Great examples and ideas. Nice work.
Are your trees made or purchased?
I completed one 2’ section of the 40’ backdrop with the forest edge at the bottom. These trees are about 6" tall and will be behind some kind of separator (wall, Fence, rocks) not sure yet and the mainline is 3" from the backdrop.

Most of them are homemade, but I do have some of those “evergreens” made for Christmas displays. My wife found them in a box of junk from a garage sale. I worked them over with scissors to make them a little-less uniform, then covered them with ground foam…
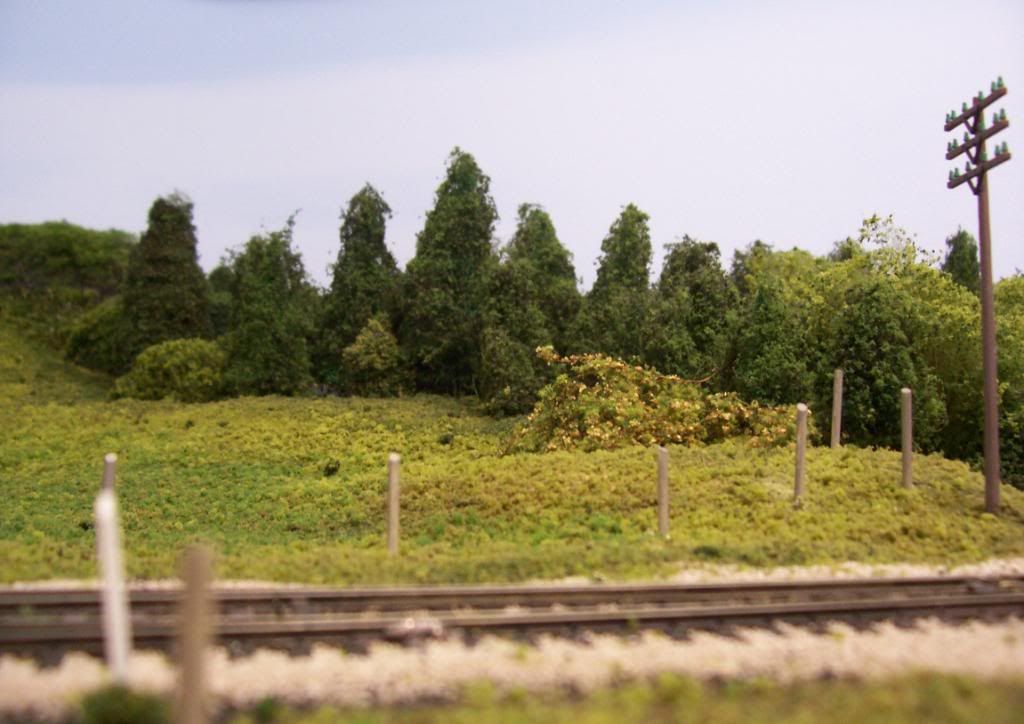
They’re quite close to the backdrop, and I’ve decided that they look more like cedars than pine or spruce trees - a good fit for their location, with Chippawa Creek nearby.
Wow! That’s a very well-done backdrop, with a lot of depth!! A fence would set it off nicely…perhaps just a farm-type wire fence, but my first thought while looking at the scene was of a dry stone wall.
Wayne
Gary!
You are an excellent artist! The backdrop is enviable.
Dave
Thanks for all the nice comments.
I guess thats what makes this forum so good, there are many Model railroaders with many different talents.
I have availed myself of several who have helped me a lot.
Currently there are some helping me to build a curved Truss deck bridge and when I finally get some track layed I look forward to the assistance of another to re-power and DCC a 1990’s Riverossi 4-6-6-4.
Happy Model Railroading