Your other thread about constant spline construction shows the issues involved in these questions.
You are forming constant radius spline…the subroadbed…which dictates the shape of the track. Since I don’t think its possible to re-iterate spline that has been formed, glued, clamped, and dried; you need a precise plan to be able to determine what radius of curve you want, what easement length, and any length of straight track there will be. And the supports for the spline need to be fairly precisely planned as well.
Since you have the narrow spline, I don’t think there is now much need to draw a centerline on it for the roadbed/track. I would eyeball it by judging the space between the roadbed and edges of the spline.
Choosing this method of subroadbed construction sort of renders the second possible option for tracklaying pretty moot in those areas of the layout.
When using table tops benchwork, you can use templates or actual track to arrange a layout before you commit. What I have found however, that its possible to have kinks when attaching track to turnouts that would probably not happen if you followed a precise centerline…provided you laid the center line precisely the same as the frog angle of the specific turnout you’re using.
My success at that would have me drawing and erasing centerlines for weeks, so I just wing the freelance method with actual track pieces and align it correctly as I go.
And of course, what we’re really talking about is a method to lay the roadbed, since the track sort of just gets laid on top after the roadbed has been placed correctly.
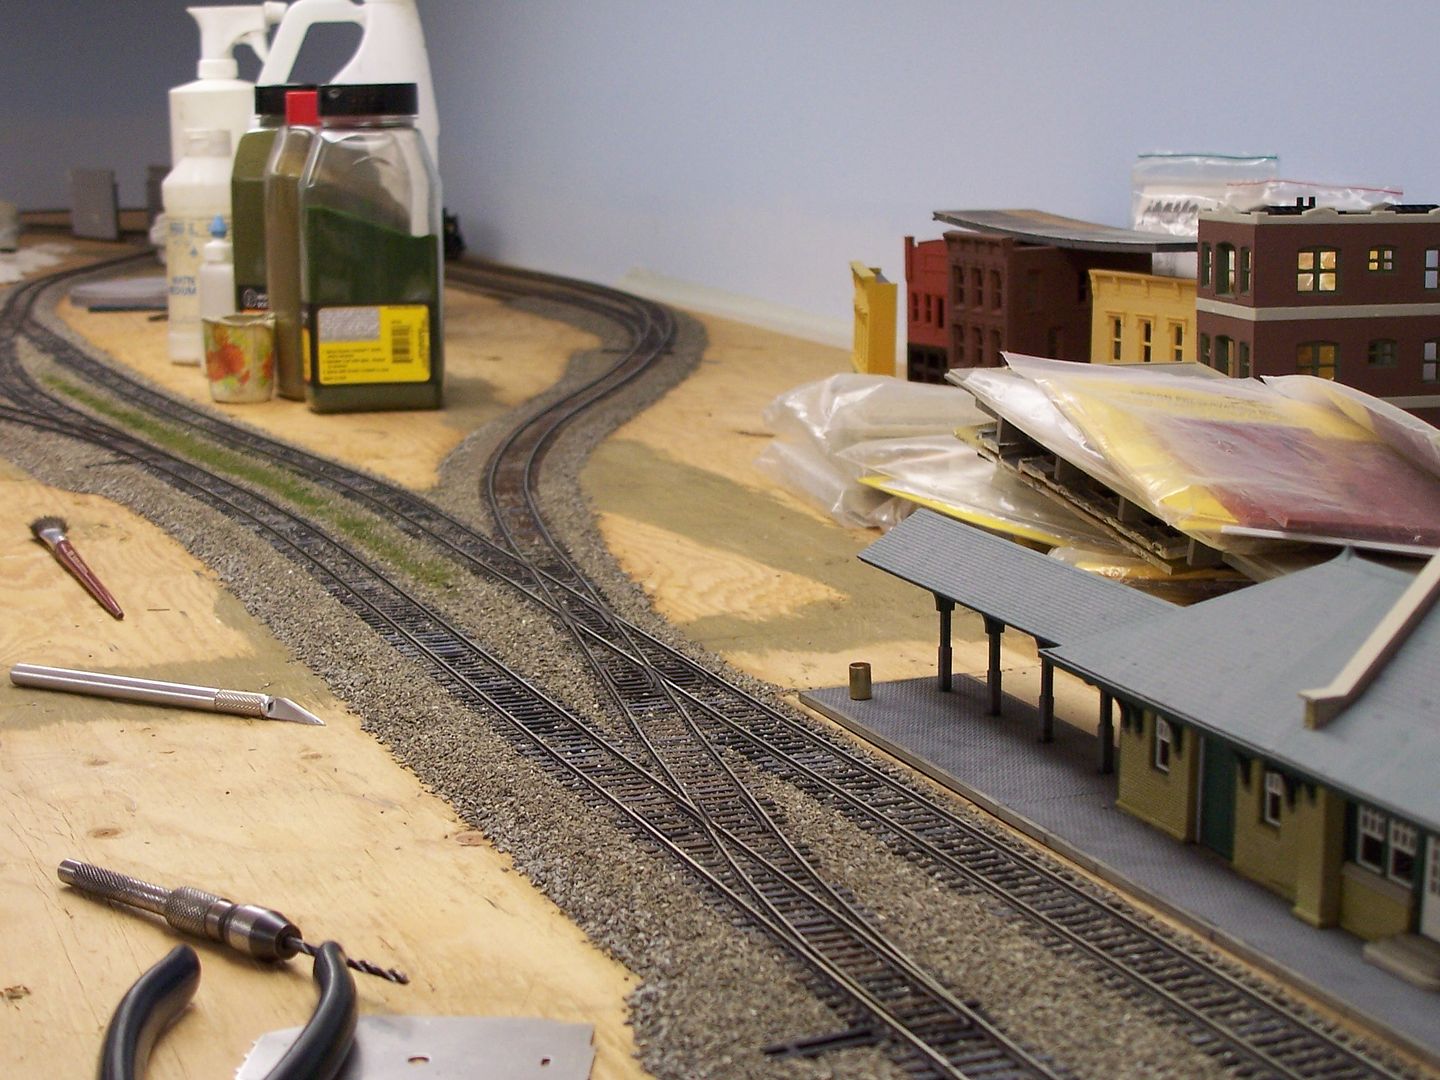
I drew a plan on paper and did option b above, combining flextrack with some sectional track. I nailed everything down. Since them, I learned how to use the Atlas trackplanning software, and will use that in the future (for our club). I recommend the book on benchwork by Jeff Wilson. Learned a lot from that book…
For my 4’x8’ HO pike I began with a rough sketch on a bar napkin…really!
The final concept of the pike was based on loading and unloading coal hoppers with live loads.
I explored many options, from a rotary dumper to a conveyor belt system and an operating coal tipple.
Finally, I decided on vintage Tyco 34-foot operating hoppers.
These cars need to be shoved over an unloading platform with a waiting car underneath to receive the live loads, thus requiring an elevated section.
Next, I used graph paper, a mechanical pencil, and a LARGE eraser to explore different track arrangements.
After settling on an initial track plan I used homemade trammels to set the radius of the curves.
I chose sectional track to make the curves, over flex track.
Once the centerlines of the curves were scribed in the foam I put these sections down first and then filled in the other track features; turnouts, sidings, and risers.
In my particular case with my current layout (and all previous), I use sectional track unless I have an area where sectional doesn’t work either for length or curve.
As to planning or just laying, it was a little of both. Most of the main yard was planned using an older version of Atlas’ planning software originally intended to be an addition to my old one. Circumstances changed and it became a new layout. I ended up changing the plan on a few points to allow the operations I wanted which was done on the actual benchwork.
Trainroom on second floor of 2 car garage. Original plan was to build layout into wall with islands and scenery. However, I wanted to run the Lionel trains bought for me when I was born. At that point the entire plan changed. I assembled a two level walk around layout with Lionel on the bottom and HO on the top. Lionel is 2 feet high and HO chest high. Built with many 2x4’s and 22 sheets of plywood from Sal’s Midnight Lumber Supply many moons ago. Biggest factor in track laying was the spacing at crossovers . HO spacing with 6" straight between #6 switches was 3". That set the standard for HO and the whole thing was freelanced from there. Don’t do mountains and stuck with heavy industrial and urban setting. The Lionel was based on Gargraves switches back to back and that turned out to be 5 1/2 inches center to center. Curvature in the 6 to 10 foot range, working PRR signals and all switches powered by compressed air. Went with an urban setting and place to run Lionel trains. Some additions and changes made to both layouts through the decades but this will definitely take me to the end.
Why would you put 6" straight tracks between the turnouts on a crossover? Many brands of turnouts make crossovers with 2" track centers which are reasonably prototypical and work fine.
Perhaps the OP is concerned about having a long enough straight section as to not form an S curve…having read that part of the track laying manual before reading the part about 2" spacing.
On my layout, double-track centres vary from 2" to 3 1/2", but all are merely to allow one train to pass another, which is stopped.
The one crossover that I have, donated by a friend, has the paired tracks on 2 1/2" centres…
…which takes-up much less room than the two turnouts that I had originally planned to use.