Sorry, but I must disagree. I’m using that right now for a project I’m working on. It works fine if you are able to apply it to one of the joints and then hold the parts together.
But it is too thick if the plan is to hold the joint together, apply the cement to the outside of the joint, and hope that the cement is sucked into the joint to form a bond. Ambroid Pro-Weld, Micro-Mark Same Stuff, and Testors Plastic Cement (in the bottle) are all better alternatives.
Concerning the Touch and Flo applicator. I had purchased two of those. One of them never worked. The other one failed after awhile, but that was probably my fault. You have to make sure that you use it in a fresh bottle of the watery-type cement. Any impurities in the cement will clog the Touch and Flo. For example, I try to use a small brush to apply the cement. When the brush touches the joint, sometimes “stuff” from the joint transfers to the brush, and then transfers from the brush to the bottle. This especially happens when working on an item that has previously been painted.
And forget about using the brush applicators that come with the cement bottle caps. They aren’t worth a darn for any fine work.
Yes, the windows are the same styrene as the rest of the kit.
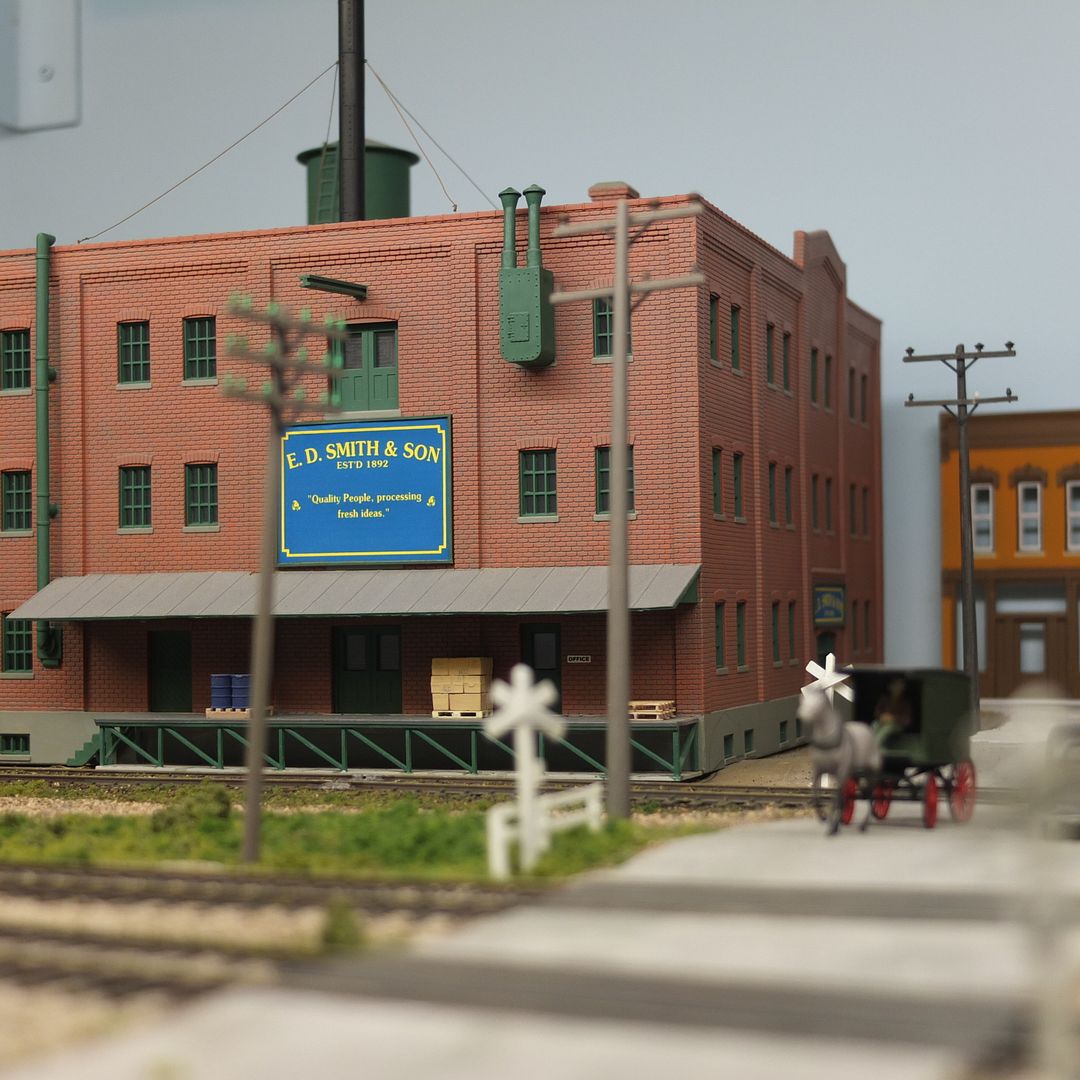
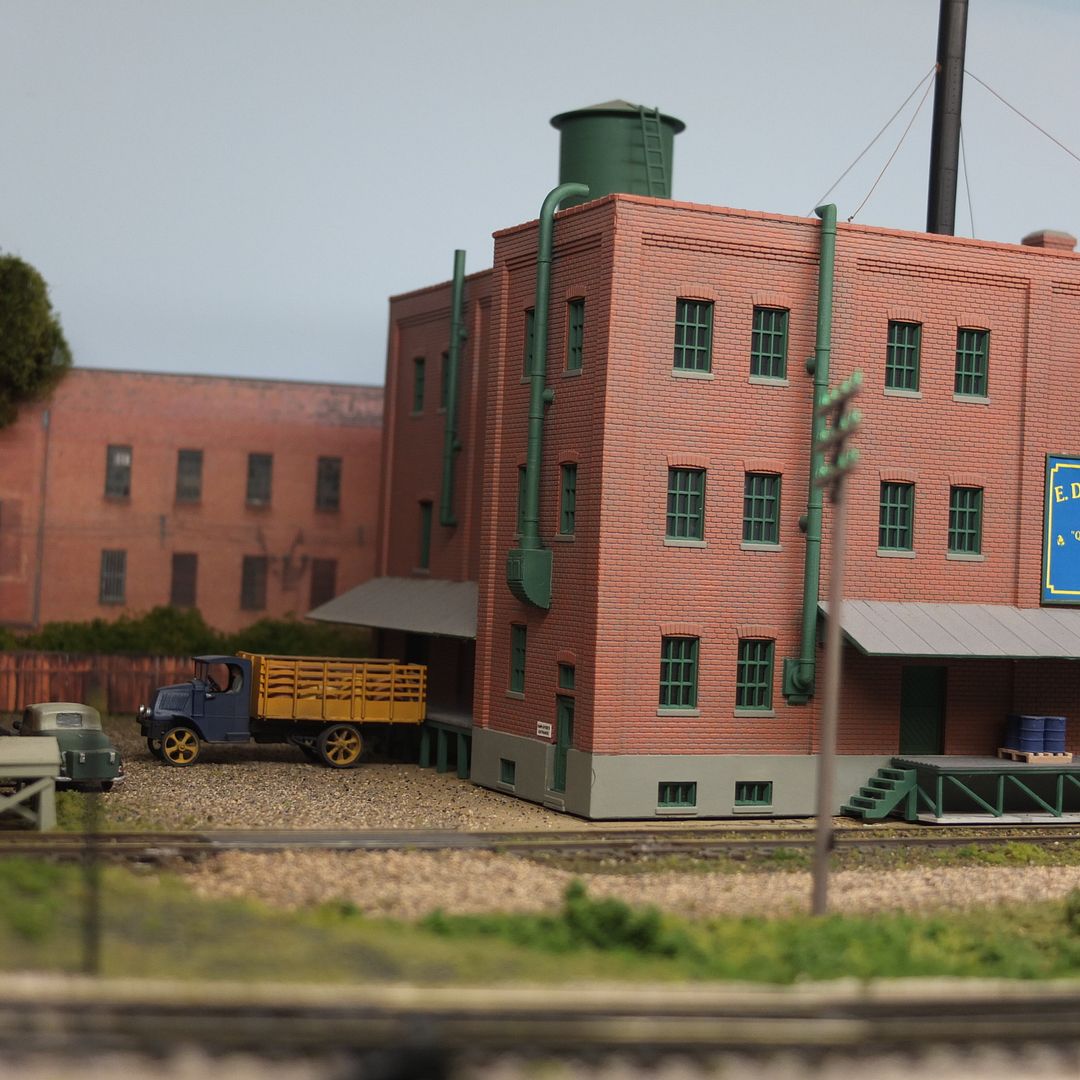
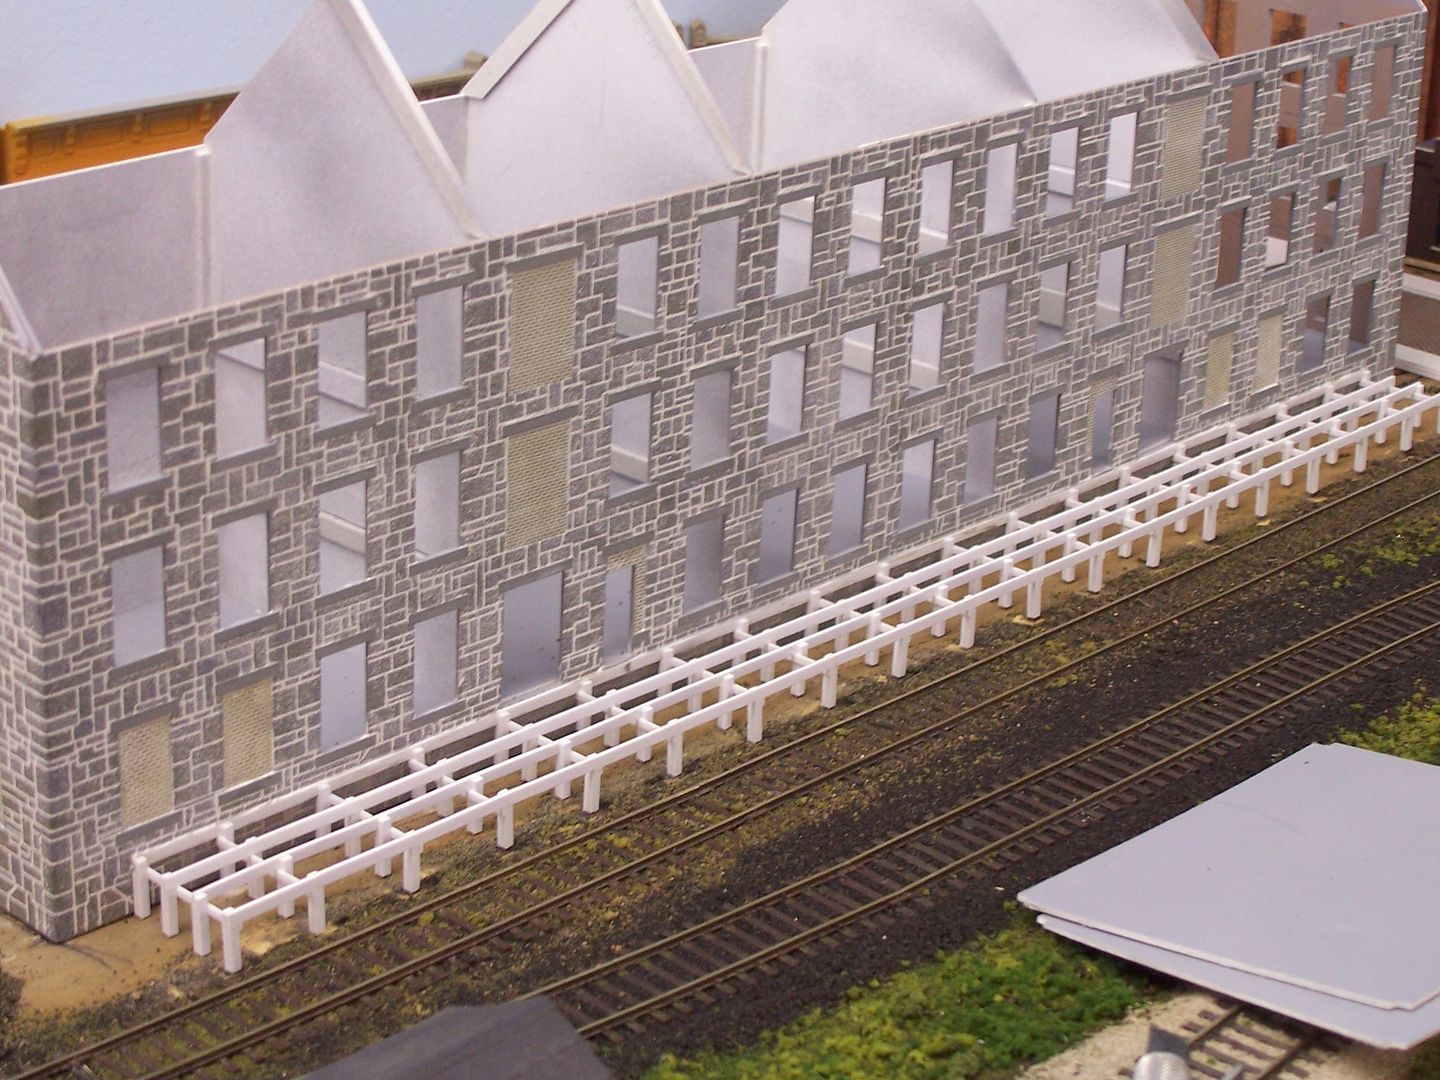
I built that kit as a small fruit and vegetable cannery, making it roughly rectangular by using plain .060" sheet styrene for the unseen back wall:
There’s a loading dock for railway cars alongside of the building and the side modelled as the rear is for trucks. There’s a jog in this wall where I used the kit’s short wall to add some interest:
As you can see, the structure’s not yet permanently situated on the layout, as I need to paint a backdrop on the wall and add some low relief background stuctures…Shoulda done it before adding a second level to this part of the layout. [banghead]
Be very careful, Bruce: I used to work with wood, too, but once I began working with styrene, gave away all of my wood building materials. Styrene is easy to
maxman, on that point, we agree. Model Master Liquid Cement must be applied to the joints. It is not intended to be applied externally and then drawn into the joint.
I used to always use the old Testors orange tube model airplane glue. I still do sometimes because it melts the plastic together permenantly, but it is a stringy mess unless you constantly wipe the tube off with a paper towel.
My choice now is medium strength Zap a Gap. It is CA (super glue). I don’t place a drop on the part, I place the part onto a drop that is barely coming out of the bottle because you only need a partial drop to hold. It doesn’t melt the plastic. It just glues things together with just a drop.
If you get any of the plastic cement on visible areas of the model, DON’T PANIC! Resist the temptation to touch it, wipe it off, or in any other way mess with it, and just let it dry completely. As long as you leave it alone, the styrene details will reharden with the only “damage” being a slight sheen where the glue was. A sanding stick or jewelers file can then be safely used to lessen the sheen. Once weathered and a flat clear coat is applied, you’ll never see the mistake.
Great information in this thread. However, my question is about using a small paint brush to apply the glue. After you use the brush, do you have to clean it with something so that you can use it again?
I usually just dip it into the same solvent, swish it around a bit, then carefully wipe it dry with a paper towel or rag.
Don’t limit yourself to only a small brush: some jobs require it, others need something bigger, so size the brush to the job.
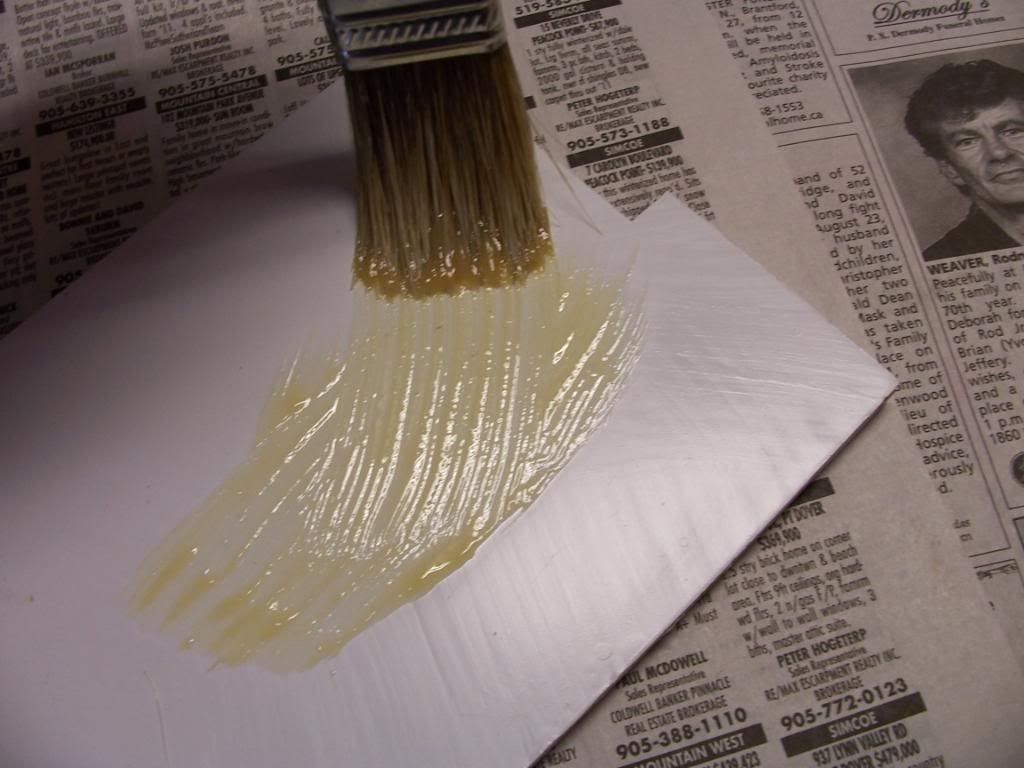
I use contact cement to affix printed building flats to styrene backing, and have found that the contact cement, even though it’s solvent-based, will adhere better to the styrene if it’s first prepped with a solvent which softens its surface. For that, I use a 1" or 2" brush.
For rough styrene construction which will not be seen on the finished model, like these interior partitions which give the structure strength and help to align the roof, a 1/2" brush delivers more solvent to long or wide joint surfaces: