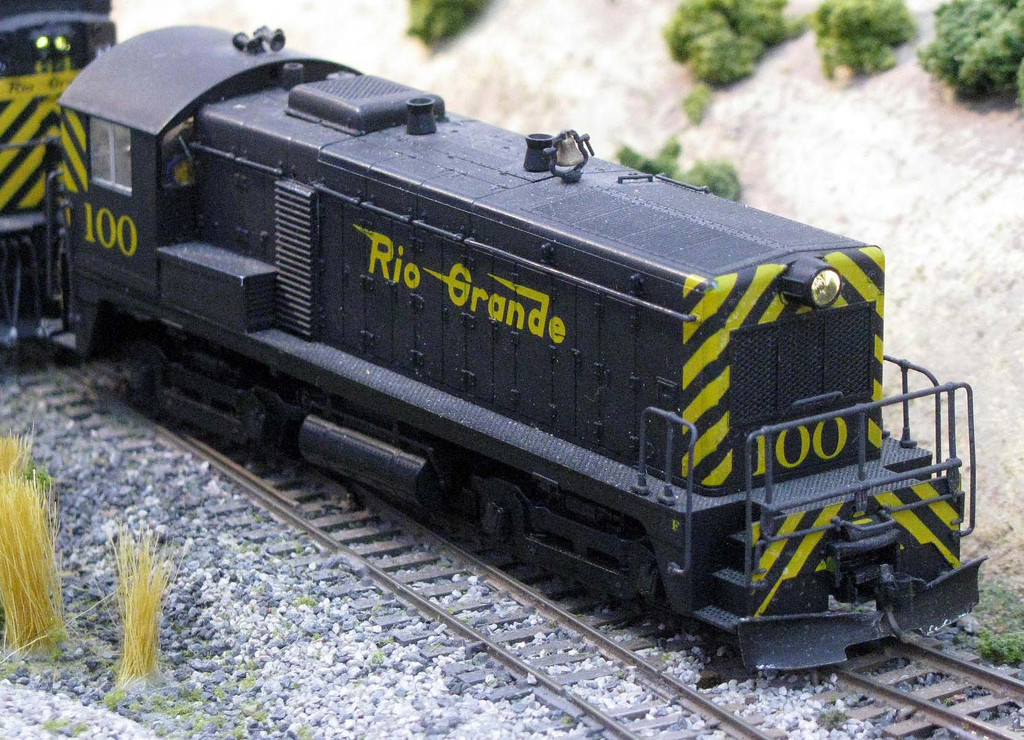
It’s the K5LA I like to use, although this wasn’t the only air horn in use by the Rio Grande. I see that Walthers now has some much lower priced Cal-Scale examples in stock, so may have to pick some up now that they’re much more affordable.
Yeah, I went with the snow shields on mine, because seemed like an option to take up for working in the mountainous West. And they do look cool[:D]
Now here’s something that’s a more radical bash, what I call a NW2M. It’s a NW2 adapted to narrowgauge and with dynamic brakes and a steam generator added. I build them from the easy-to-narrow Kato model by hacking another hood to remove the taper and add space for the DB and SG. What this does is add a little room for the decoder , given the space in the original model is all atken up by the massive weight that helps these Katos run so smoothly and powerfully.
I consider these Tythearn GP20s. They are Tyco GP20 shells mounted on modified Athearn GP35 drives. The frame has been filed down in certain areas and the coupler mounts removed and the shell has also been modified to allow the shell to mate with the drive. The handrails are a combination of Tyco rails and modified Athearn stanchions. They also all have brass airhorns and antenna with rotary beacons. (Been too long to remember who made which detail part.) The couplers are body mounted Kadee 142s on the rear and 149s on the front (to clear the plows).
The passenger unit stripes are Microscale 2" silver stripes. The silver decals on the first two pictures (Nose on the first unit and lettering on both) and the green lettering on the pink engine are all custom lettering done by me. (Silver was done on an ALPS printer. The Green lettering was done on an inkjet. Ii’s been too long ago remember which one.)
While the pink engine doesn’t show it, all these engines and their other 5 stablemates are equipped with front snowplows. The first engine and one other are equipped with passenger plows (Details West 217s). The other two and four other stablemates carry a freight plow (Details West 206s).
Great work by all you guys. I really like the work on that AC9. Ambitious kitbash it was and is.
Here is one of mine completed in the days before Athearn made a GP60M:
She started life as a GP50 and I modified the shell with a Train Station Products Safety Cab, dynamic brakes and truck side frames. Additional parts came from Details Assoc, Details West and Canon. It was not a difficult bash, but I just hadda have on of those GP60Ms and the GP50 looked like a great place to start.[C):-)]
Thanks, Kevin. No sweat, Walthers has them in stock at a nice proce now.
Here’s something you don’t even see the parts for everyday, my Lilliput Gemeinder diesel #82.
The drive is basically stock, the only drive that exceeds the Kato, except that it’s now HOn3. This is much easier than t sounds. This model comes on HOe/HOn30/9mm trucks, but a kit to widen it to HOm/12mm is available for around $20. HOn3 is in the middle at 10.5 mm gauge, so it was merely a matter of reguaging the wheelsets and adjusting the wipers supplied in the kit to get to HOn3.
I did the paint and added a K5LA horn.
For around $200, you get a powerful diesel that will run on three different gauges if you grab a Lenz Silver decoder that plugs right in to take full advanatge of the lighting.
I have a luxury cruise train that it pulls when I’m feeling modern. Lately, 82 spends much of its time as a very effective helper at the start of the Cascade Branch.
Gotta agree, tbdanny is doing some very nice work after a few initial mechnical difficulties that frustrated him greatly. Steam is just more complicated than diesels, etc. Shows how if you stick to things and work through the issues that arise systematically, you will end up with both a great result and a good understanding on how to get there again. That’s the basics of building your skill set to kitbash locos. Just do it, learn some, than come back and do an improved loco the next time. Seems to have worked for many of us, because most of us learned by doing.
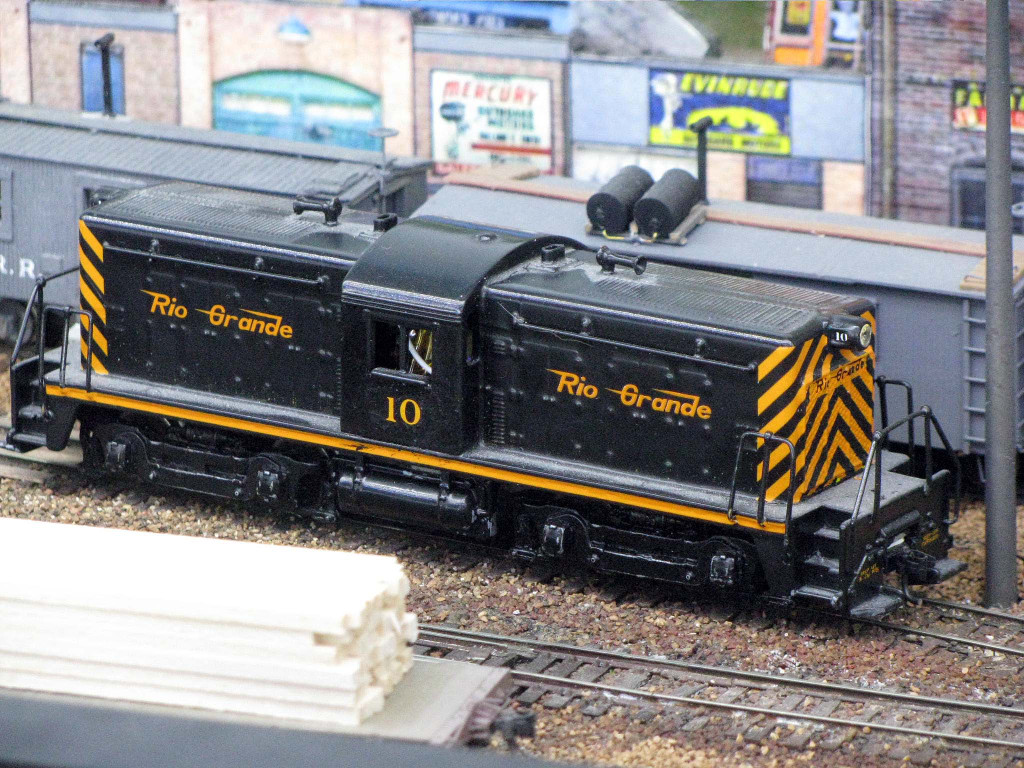
#10 is a vaguely Whitcomb-looking loco and the only one of my kitbashes I didn’t build myself. I bought it off the Jeep Capt. on the auction site. He used to produce different bashes of HOn3 locos from HO standard ones, so there may be a sister loco to this one out there. It’s made from two Hustler shells and the chassis of the old style Athearn SW.
It has a lot of heft and works well on my logging branches. I added a decoder and LED lighting. Several tuneups made it run better than ever. It crawls with a nice growl, so like many of my HOn3 kitbashes, doesn’t really need a sound decoder if you use a little imagination.
Here is a center cab kitbash using two Athearn Hustlers and an Athearn SW9 shell and frame. I saw this in an old Railroad Modeler from the 70’s and thought it looked cool.
I cut the Hustlers in the middle of the cabs and glued the two shortened shells together and braced them. I cut the steps and part of the apron off the sw shell and attached them to the front of the Hustler shells. I used squadron putty to hide the joints. Krylon flat black paint and some custom decals finished the job.
I replaced the original motor with one from a proto 2000 switcher. I had to custom make the drive shaft to get the proper length. I installed a TCS decoder with BEMF and it will quietly and smoothly creep along. The next step is to add a few more details like hoses and do some weathering which will help highlight some of the details. Overall, I am pleased with the way it turned out.
Have there ever been any manufacturers that have considered making the ‘massive’ C&O H7 in plastic rather than just brass?..HO scale
I had a fellow who at one time was going to kit-bash one of my Proto 2-8-8-2 into an H7 lookalike, But it fell thru. And I wanted mine to utilize a vandy tender
Just found this Youtube video of an O scale one,…what a sound !,
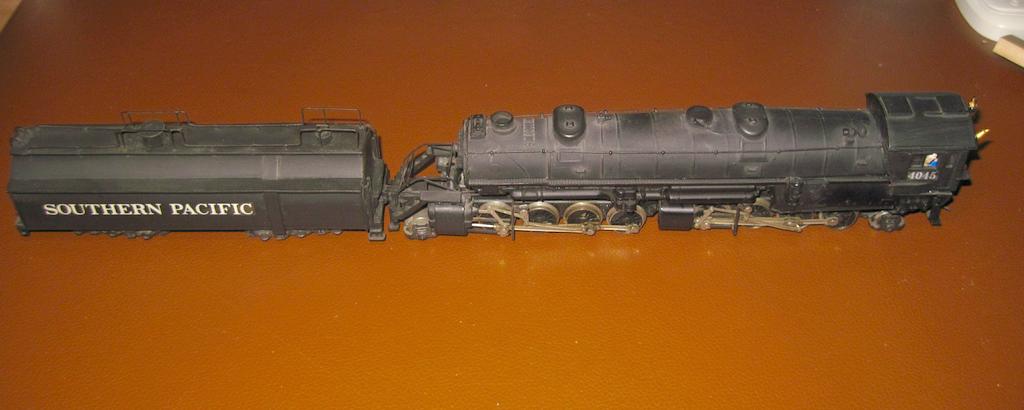
Sorry Brian, I’m a SP guy through and through. Thanks for the good words on my AC-9. I currently working on my fourth AC-9, taking more time on this one to improve the detail.
I kitbashed a couple of Y6Bs into AC-3s, they turned out pretty good but I don’t like them very much. Just not my thing, they are way out of my era of the 50s. The scratch built tenders did come out very nice.
I did a dual motor installation/experiment on an articulated Rivarossi a long time ago, but I can’t remember the details, and likely I have no pictures,…pre computer days for me.
if I recall it ran rather well as I used identical motors,…pre DCC days (for me) also.
Two Projects Utilizing Proto 1K, DL-109 Locomotive frame/chassis
Creating a ‘B-unit’ or DL-110 for the SantaFe
There were several roads that had B-units for their DL-109 locomotives. I’ve chosen to model the Santa Fe one. I had to make a choice where I would cut the two shells such as to end up with a proper window placement, and a reasonable duplication in the roof details. I need to finish the diaphram on the one end and the coupler mount.
Then it needs to be painted and decals added.
Creating a ‘plastic model’ of the PRR, BP-20 Shark
I’ve always wanted one of these extra-long Sharks that PRR had…only ? of them as far as I know. So likely you will never see them modeled in plastic in a production manner.
The few attempts to provide a model for this BP20 never had a chassis of the proper wheel base. I’ve chosen the Proto DL 109 chassis. It has the proper trucks, and it has great weight and running qualities…even good speaker locations for a sound version. Had to do a bit of filing to get the shells to fit over the nose.
Lets take this one up first since it is the easiest. Basically I had to get two DL109 shells so I could cut the front off of one and replace it with the tail of the other.
I did not desire to do horizontal cutting, nor individual roof segmenting, so I had to make a choice as to where to make the single cut and still preserve the closest possible spacing of the side windows. Here is my project so far.
Naturally this new ‘b-unit’ fits right onto the stock chassis. So both units will have power, and perhaps DCC and sound.
With the stock weight of these engines, the combination of the two should pull the walls down !!
Now I need to add a few more details including the door diaphragm, then paint and decal it. …any good painting volunteers as
It’s because you linked to the photos from an outside website from where they are hosted.
This is generally a frowned upon practice by the people who are hosting them - because you’re using their bandwidth to post content from their site elsewhere.
The links to the photos aren’t actually the photos themselves, but a reference to an ID number of the photo which is cross referenced in the forum database to the actual image file and location…