I may actually stick with the 16" oc spacing even though it is probably overkill, mostly because it will give me a bracket that I can mount the backdrop to and a joist I can mount track risers to. Of course, the particular wall shown above is load bearing so it was framed by the home builder before we moved in–the stud spacing is more like a string of random numbers between 10 and 20 rather than a nice even 16. Before I finished that room, I replaced a stud on that wall that looked more like a twisted licorice stick instead of a piece of lumber! Jamie
The cross-members on my table benchwork are spaced at 16 inches. I probably could go with 2-foot spacing, but there are other considerations than just supporting the weight. When you’ve got a foam base, you can’t easily fasten stuff below. So, I find it very convenient to have 16-inch supports to attach terminal blocks, or to fasten wires to.
Also, the closer spacing gives you more solid places to attach risers.
The only thing I would add is to emphasize the need to glue those joints. The suggestion to use Gorilla Glue is a good one, but at least use yellow carpenter’s glue.
Agree completely. Well said [tup]
Update! I spent the last few days starting over with my benchwork using boards ripped from plywood instead of plain old pine lumber. Wow! The brackets are obviously sooooooooo much better in quality…I am really glad I switched to this method based upon the sound advice given by the members of this forum. I have posted a few pics below and have included a complete construction update on my CSX Dixie Line* blog. Thanks again everyone! Jamie
*Since my last update, I have switched prototypes from the CSX former Clinchfield route to the current CSX route between Atlanta and Nashville via Chattanooga. After much debate, I concluded that the former Clinchfield–while still one of my favorites–just did not afford the switching possibilities that I wanted to include in my operations. Fortunately, I can use the exact same track plan in the “new” layout that I had planned to use previously, so I did not lose any work that had been done prior to the change.

You know, all of the advice that’s been given thus far about good benchwork construction practices has been pretty sound. That having been said, in seeing your brackets with the short outstanding legs and tight spacing, you’ll likely find that, should you decide not to build the layout, you could use those brackets for shelves to display your prized bowling ball collection!
Nice work, and keep those progress picture coming!
Jim
Jim, This is VERY eerie…but I made almost the same comment to my wife when she looked at the completed brackets for the first time yesterday. I told her that if we sell the house and the new owners don’t like trains we can pull up the tracks and market it as shelving for a bowling ball collection…spooky! Better to overbuild than underbuild, plus the benchwork will go to 18" deep along two of the walls. Still, it is incredibly solid; not even the slightest wiggle on any of the cantilevered joists (the same could not be said for the few pine brackets that I managed to install). Jamie
PS:
You know, you could call the attached brackets an “art exhibit”. Give it some sort of postmodern name. I suggest “Fabrication No. 1”.
Haha! [:D] I need to get those front boards installed before I have to start calling them “The Slashers”! Jamie
Great minds think alike!
Though if you’re thinking like me, you might consider counseling…
Folks:
If you guys have this continuous mindlink, why doesn’t just one of you get the counseling so you can split the cost?
(Wasn’t that a Star Trek TNG episode?)
Or maybe we just need to put together a bowling team [:D]
Jamie
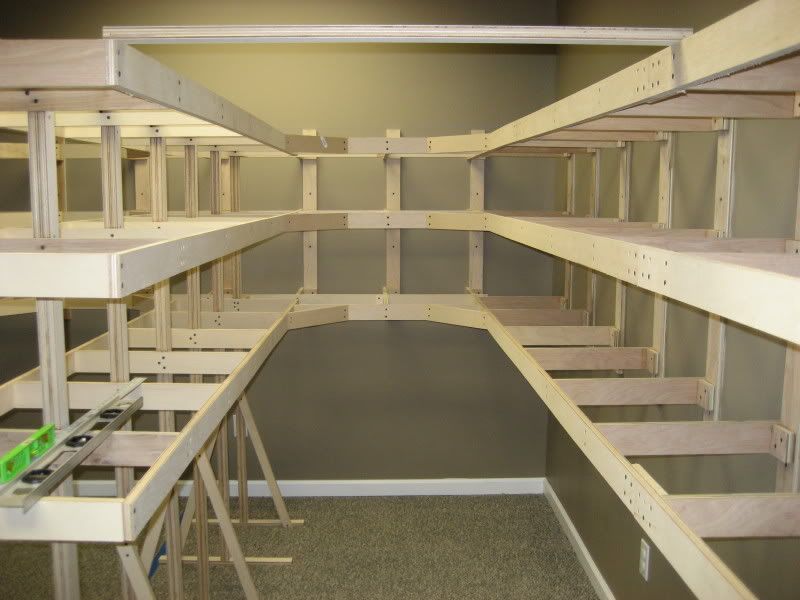
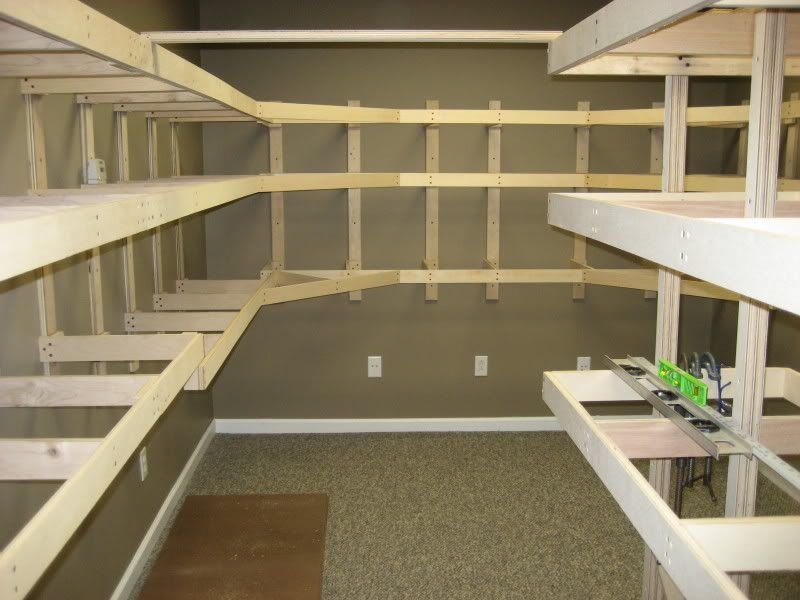
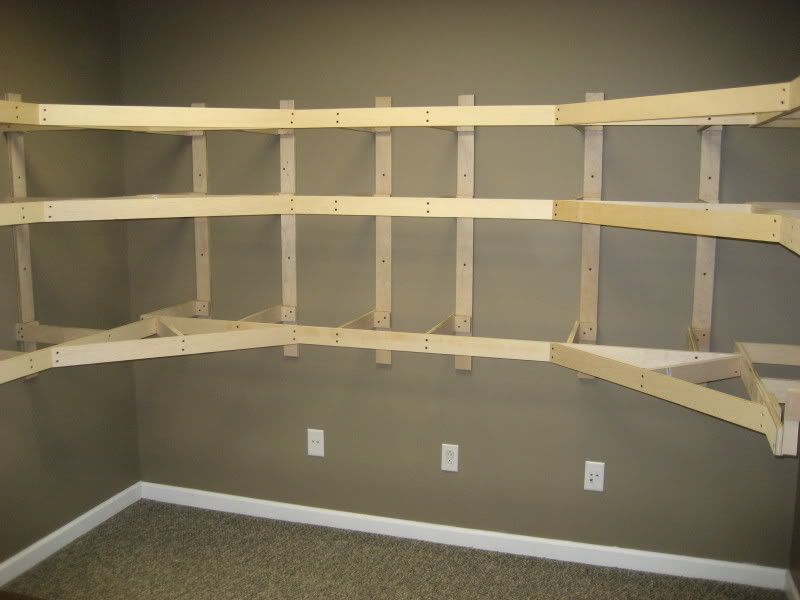
Hi gang, hope everyone is having another great weekend! I just wanted to post a quick update on my benchwork progress and again say thanks to the forum in general for providing guidance in getting me started off on the right foot. Jamie
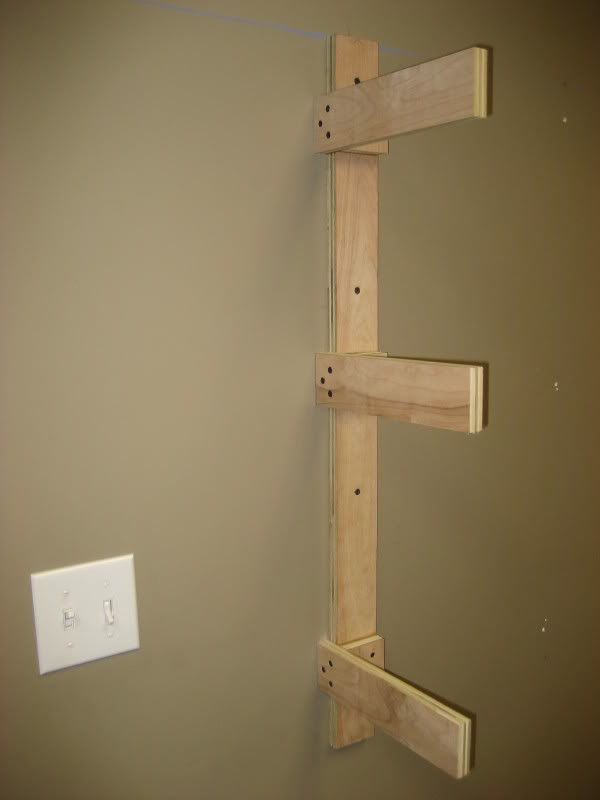
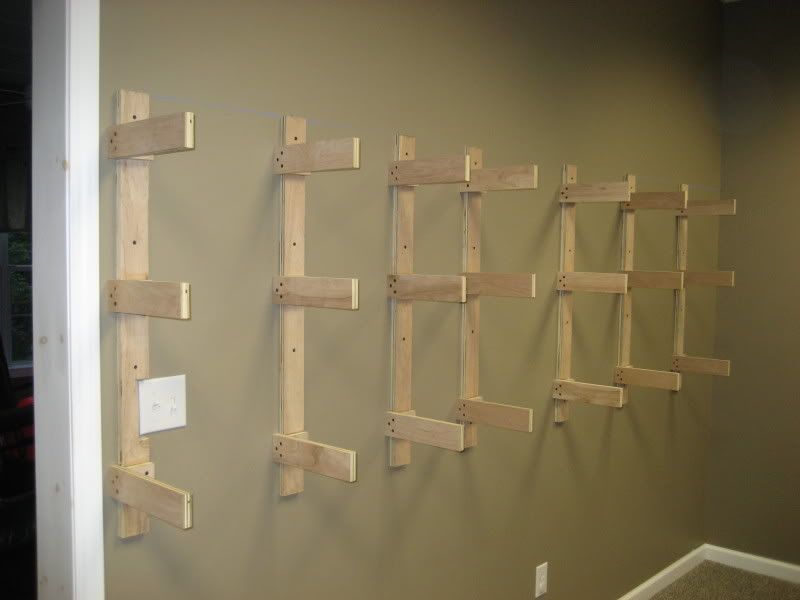
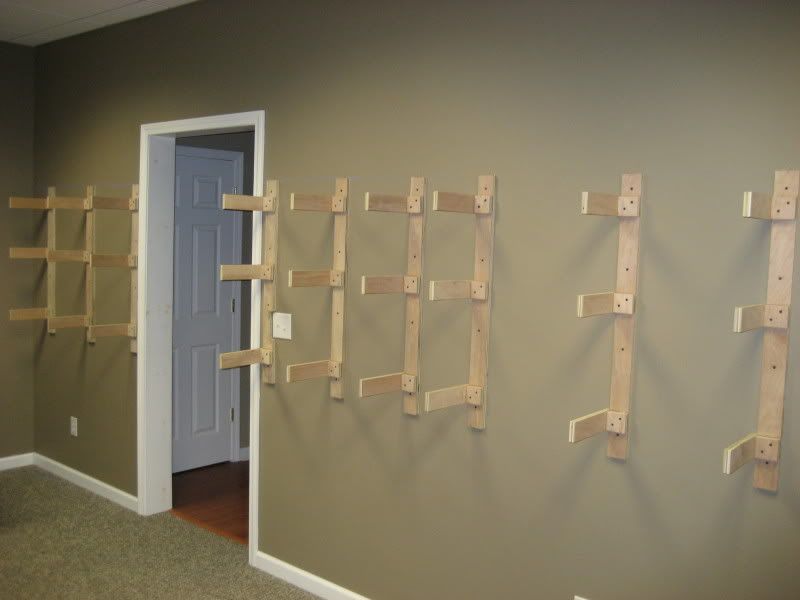
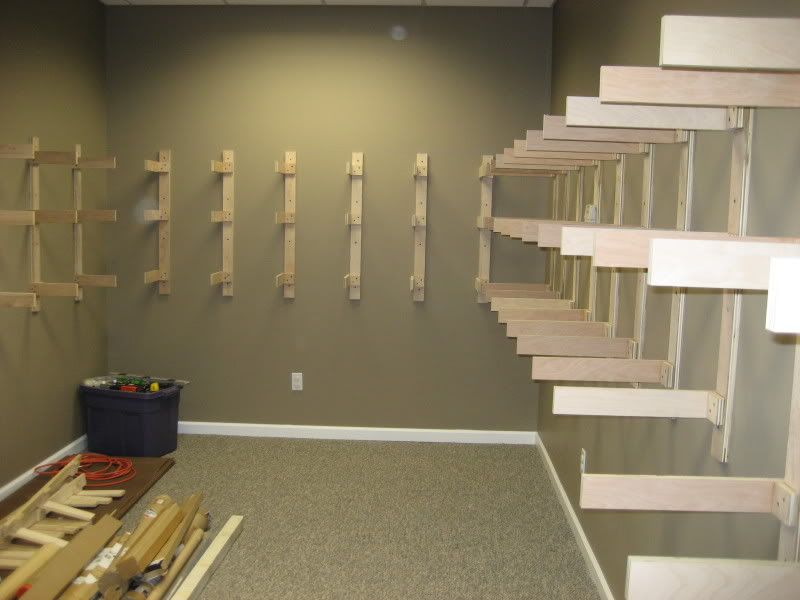
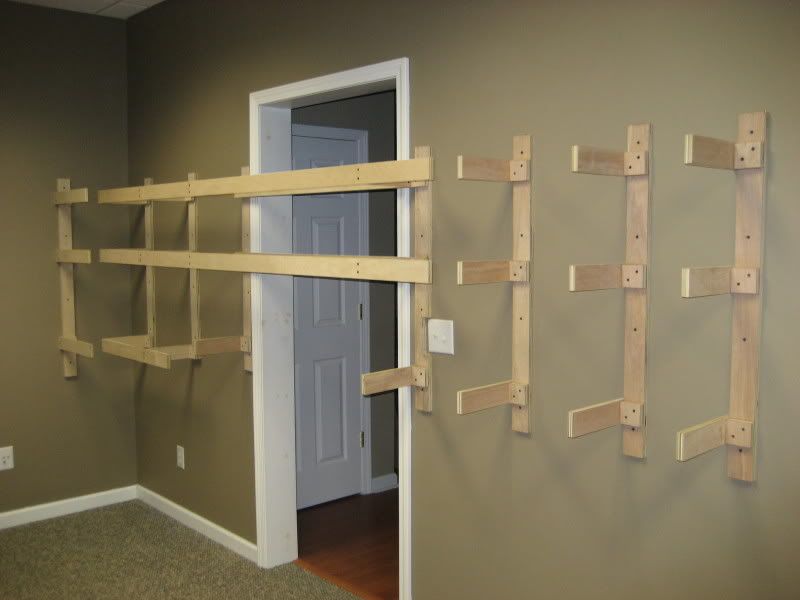
Wall brackets completed:
There will be a drop-down gate on the lower level across the doorway:
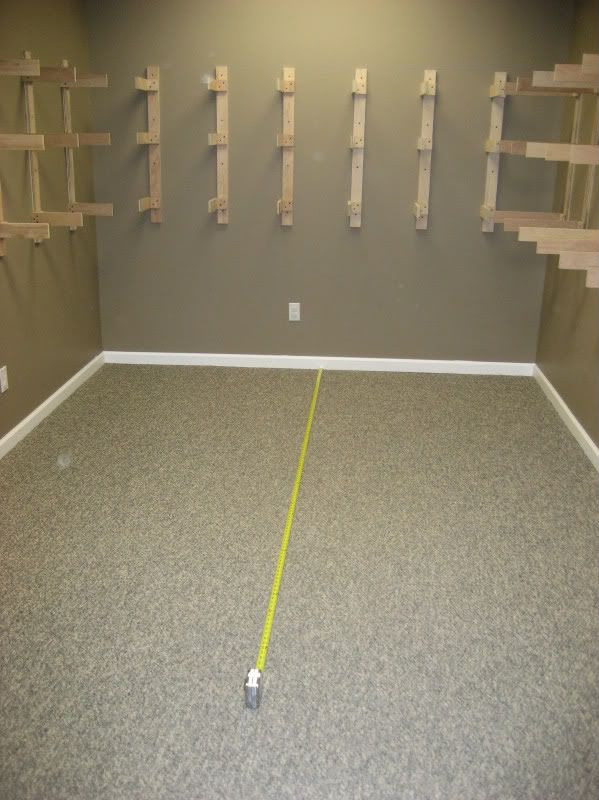
Measuring for the peninsula:
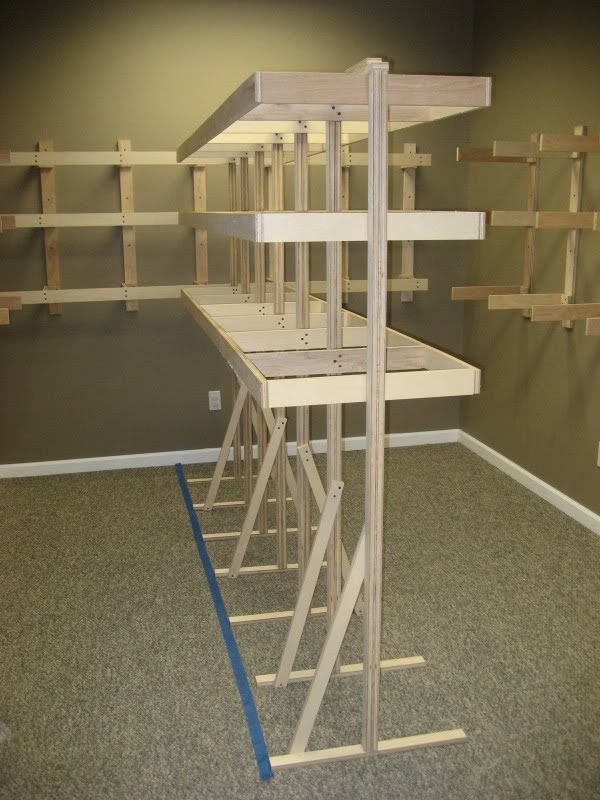
Peninsula completed including front boards:
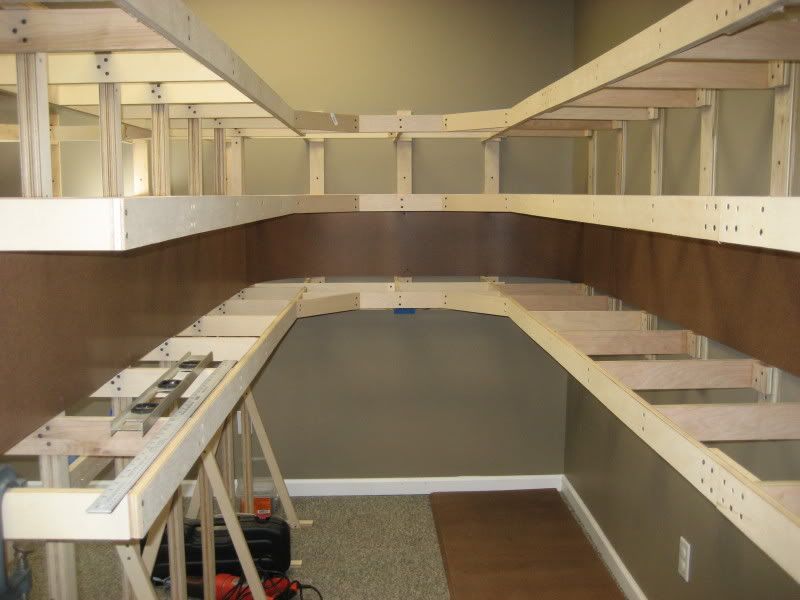
This week I managed to finish all of the major benchwork on the CSX Dixie Line layout. This basically means all of the benchwork has been completed with the exception of two projects: the helix and the swing down gate into the layout room. It took exactly 4 weeks from starting construction to get to this point, which is pretty surprising considering I was planning on a couple of months for the wall brackets alone!
Looking down the aisle along the left side of the peninsula. Note the 1x2" brace across the top of the aisle to stabilize the end of the peninsula until it can be permanently attached to the future helix:
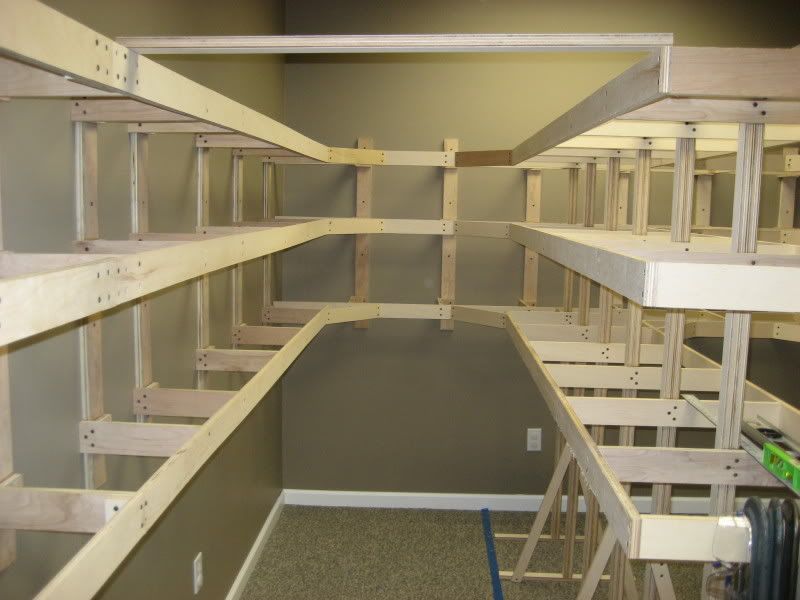
Looking down the aisle along the right side of the peninsula. A temporary 1x2" brace similar to the one in the previous photo also goes across this aisle. If you look closely, you can see where I extended the depth of the layout to a full 24" at the end of this aisle. This will allow for some foreground structures or scenery to be placed to break up the horseshoe curves the mainlines will need to make on both levels:
Looking up from the end of the aisle along the right side of the peninsula. This view clearly shows how the lower level drops down to allow for the elevation change between the town of Cartersville, GA down to the Etowah River valley:
The wall opposite of the end of the peninsula:
Jamie
Nice work!
It’s good to see a step by step pictorial with design rationale included. Very encouraging for those others about to take the plunge into a full scale layout build for the first time.
Thanks, Kevin! I have gained a ton of knowledge from these forums–I hope that my posts will help or encourage others in the same way others have helped me. Jamie
The family took a Labor Day vacation so I have been away from the layout for most of the last week, but I did manage to install all of the backdrops on the lower level. I used 1/8" Masonite which is quite flexible and allows the corners to be curved nicely. I also completed some of the lighting for the lower deck, which I talked about on this other thread. Here are a few pics:

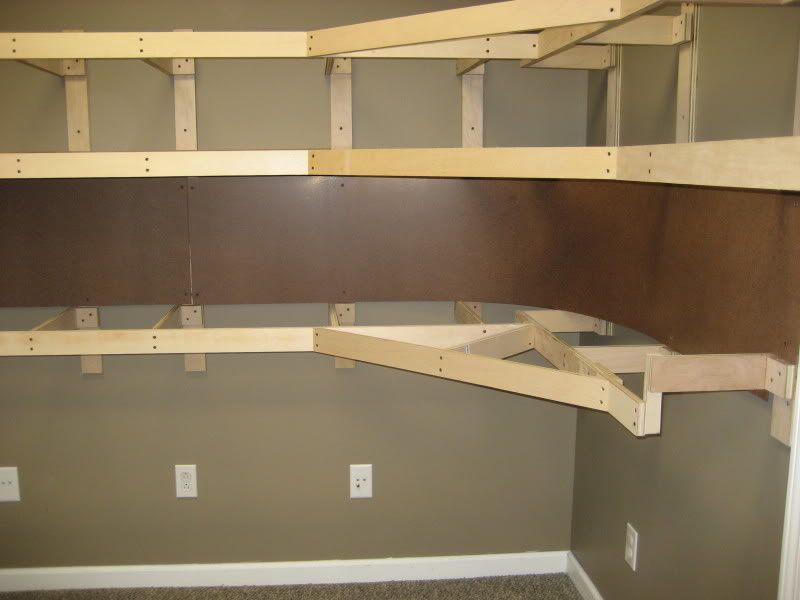
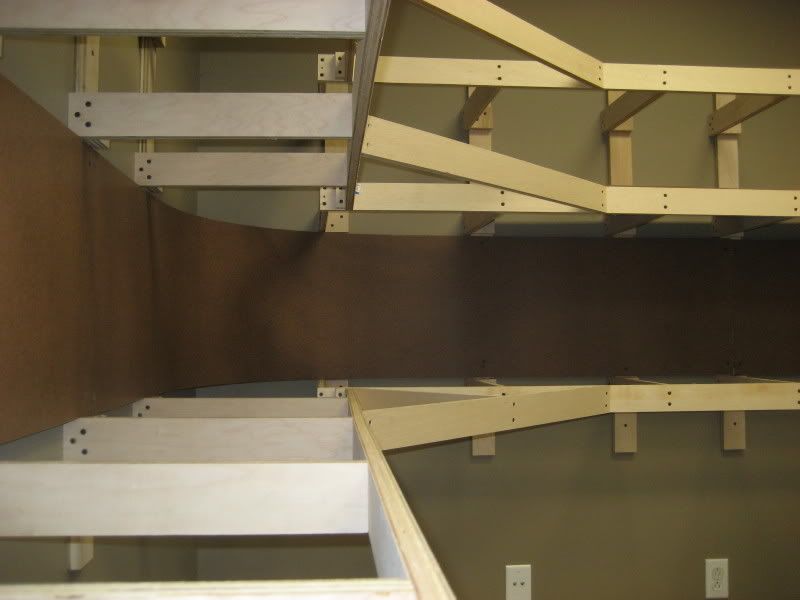
Next up I am going to continue working on the electrical outlets “power strip” along the bottom of the benchwork and the rest of the lower level lighting. After that, it is on to the dropdown gate across the doorway and–finally–the helix. Jamie
Fantastic. This is really a great thread, keep it going. The layout is looking great.
Thanks Larry! Hope to keep it going–right now I have a whole lotta wiring to do so I can get the rest of the lower level lighting in. It is unbelievable how much darker it is in that room with the unpainted (dark brown) backdrops in place. With the lights in, I should be able to patch/sand/prime/repeat the backbrops, then get the doorway bridge and helix going. Going to be a busy (and fun) rest of the year! Jamie
Again, great work!
It is inspiring to see what someone else is doing and the methods they use.
BTW, what are the blue boxes? Junction boxes, or are they related to the layout wiring/DCC?