cool proves there are 3 rail lines out there so we are proto correct [:D]
It is interesting to see this thread revived. When I first started it nearly 2 years ago it was after seeing pictures of Frank Ellison’s Delta Lines and I was curious about trying it. Today I am the moderator for the Friends of the Delta Lines Yahoo group and own a few outside 3rd rail engines. I bought the remnants of an OTR layout that was built in the 30’s and the engines were from a different layout from the late 40’s. I am hand laying the track using old code 172 rail. I have also bought a couple of dozen old Athern outside 3rd rail pickups for use in conversions. It’s funny how things have changed in that time.
Fred,
Please don’t take this wrong, what are the Advantages to outside third rail? It seems like a LOT of extra work in track laying, maintanence, conversions, etc. without any benefit that I can understand.
Doug
The benefit is that it interests me. From a practicality standpoint it isn’t as easy to do as conventional 3 rail or even 2 rail anymore as no one offers anything for it any longer. However I have always had a fascination with it so I decided to go that route for a small switching layout. It wasn’t about practicality but rather just something I wanted to try. There is still a use for it if someone really wants to pursue subway type of modeling that uses it.
However, to me having an outside 3rd rail is less visually offensive (don’t take that term wrong) than having one on the inside. I am using old techniques with a pretty large outside rail that was a standard in the 30’s and 40’s so it does stand out. I am combining it with newer modeling techniques and standards though so mine is a sort of fusion of old and new even though I could use all modern techniques and make it look more real than I am. Later on at some point code 100 rail for the outside became the standard. The NMRA track gauge today actually still has the outside rail location on it. With a code 100 outside rail blackened, it is hardly noticable at all and if you really go to the trouble of having some detailed trackwork (mine is all hand laid), your attention is diverted away from it.
The nice thing about having an outside pickup shoe is that all rails, frogs, etc are all negative polarity. You don’t need to worry about a pickup roller crossing over a rail and shorting out. However you do potentially have gaps in the outside rail at switches. There are ways around this where you don’t need to though. You always have gaps at grade crossings or other track crossings though but if done properly it isn’t a problem. For certain things, the outside rail can be completely disguised such as at loading docks. If done well you can integrate the outside rail into the edge of a dock and never see it.
I have a couple of do
Hi Fred,
I am 44, and grew up in the pacific North West, so even though prototype third rail is something that I am aware of, I have never seen any in real life. To me, the outside rail is more noticable than center rail, but I sure wont say anything but WOW, about your track laying skills, your track looks GREAT.
Do your locomotives have power pick up shoes on both sides?, or is the track operated in a directional method?
Thanks,
Doug
Thanks. I am actually redoing those sidings right now to extend them a bit. They were originally just display tracks but now are integrated into a small operating layout. I am also adding tie plates which requires pulling up the rails and respiking them. It is tedious but the results look really good. I start with Midwest scale lumber basswood ties. I prefer them to the white pine ties from Fast Tracks or Mt. Albert although the longer ties are white pine. One by one I rough them up with a rasp and then go over them quickly with a smoother file just to get rid of the fuzzy stuff hanging off. Then I stain them with a stain pen one by one. Sometimes I’ll soak a few ties in an alcohol/ink wash to get some base color in them before staining. On these I may rough them up before or after they have soaked up a bit of a wash. On other ties I start with a lighter American Oak stain and then go back over it later with Dark Walnut. On most ties I use straight dark walnut. On some of the ink washed ties I’ll go back over them with varying stains. It is a lot of work to get inconsistency but to me uniformity doesn’t look real. I am also about to rip up the ballast in those pictures and replace it with something finer. If you think this looks good, you should see my stud rail!
After it is all detailed, the outside rail really doesn’t stand out that bad. Those pictures were meant to highlight the third rail but if you see it from the side in a complete scenic surrounding, it blends in pretty well. It isn’t invisible by any means but some people may not even realize that it is still 3 rail track but may think it is a guardrail. The pickup shoes are actually just a 1 piece pickup that attaches underneath the engine. If I remember, tonight or tomorrow I’ll try to get a picture of a couple of different styles. It is very simple and easily adaptable to any engine. Even my Polar Express train that only runs in a circle under the Christmas tree is going to either be converted to stu
Hi Again Fred,
You have definitely EARNED that Great looking track, the HARD way. I will be interested in seeing it when you have the tie plates and finer ballast done. There are those out there that think that I am insane for finding ballasting track at the club RELAXING, they would probably find you permanently certifiable and beyond hope of recovery, after reading your tie preperation method, but it does look Great.
I guess that I didn’t phrase my question on operating outside third rail very well. Do you use pick-up shoes on just one side of the locomotive or both? If say your outside rail is on the North side of the track, and you only have a pick up shoe on the engineer’s side(right side) then your locomotive must always be faced West regardless of direction of travel. I know that many, if not most or all, pure electric prototype locomotives were dual ended, I imagine for this very reason, but what about your model Steam locomotives? Would they always need to be faced West? Is your track directionally oriented, with Westbound outside rail to the North, and Eastbound outside rails to the South? or do you have shoes on both sides of your locomotives?
Thanks Again, I am curious about your outside rail project, but am Definitely just going to be an interested observer, ain’t NO WAY that I am goin there[:D], but then again, if someone had told me in 2003 or 2004, that I would be this involved in 3 Rail O Gauge, I would have LAUGHED at them, Long and Hard, Never say Never.
Doug
I have a correction to my description of the 700E-258 outside-third-rail pickup that I described in the other outside-third-rail topic. It appears that it is not mounted lengthwise as I thought, but transversely, with one pickup shoe on each side of the locomotive. The shoe protrudes between the drivers and should be very unobtrusive. This eliminates any problem with which side of the track to put the third rail. Either side would work; and I suspect that it would be a good idea to use both sides wherever possible. Since there are two mounting points, you could easily put two complete assemblies on the locomotive, to have two shoes on each side.
It seems that the 701 0-6-0 switcher and the 701T tender also had provision for outside-third-rail pickups (701-26).
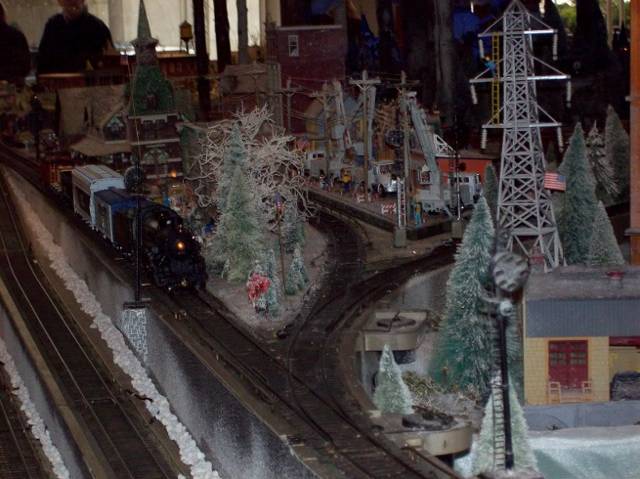
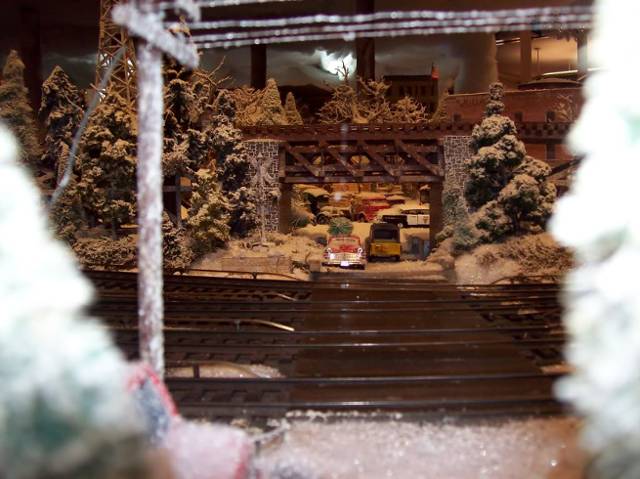
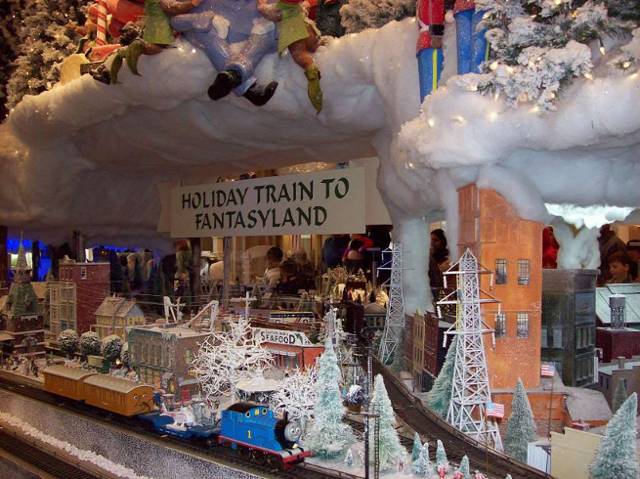
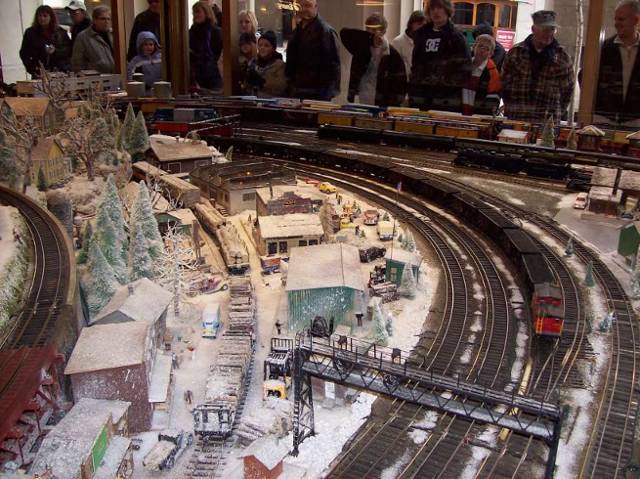
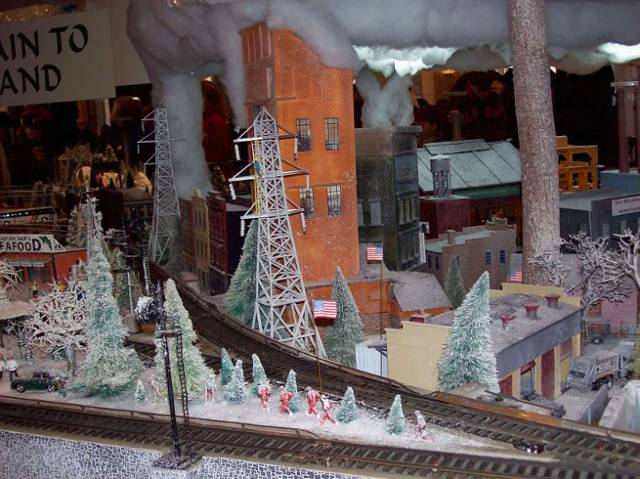
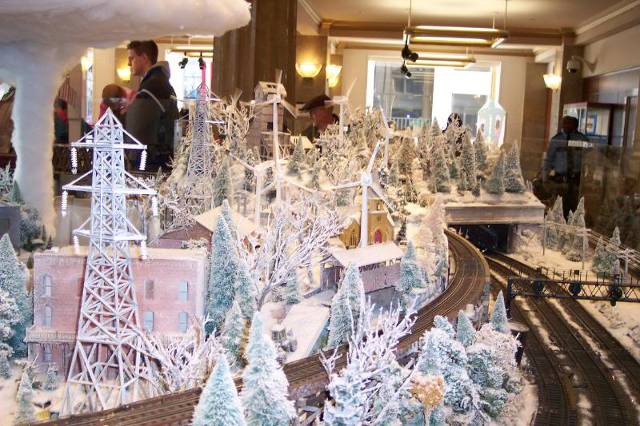
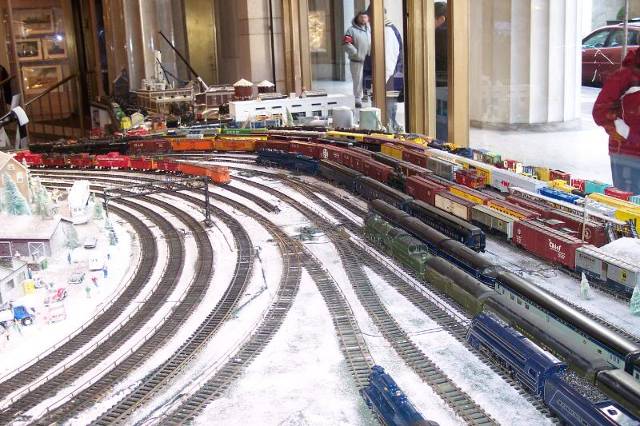
If memory serves me correctly the annual Christmas display by Cincinnati Gas & Electric was done in “outside 3rd rail”. Not sure if the current display is or not.
1 Like
I have a couple of 700E outside rail pickups and a 763E chassis which is very similar. I can show you exactly where and how they mount. Those pickups are nice as they are stamped steel that is spring loaded on each side.
The outside rail pickups are one long piece that extends all the way across the engine and protrudes from each side. They are sprung for flexibility so that they stay pushed down against the outside rail. Some are larger than others. From end to end they are 2-1/2" long but could be up to 3" long total. I see no reason to go this wide though. By comparison a standard railroad tie should be 2-1/4" wide. They just attach underneath the engine in any way that the installer sees fit and the power wire attaches to it. It is a very simple device. I didn’t have a chance to get a picture of them yet.
It isn’t always possible to keep the outside rail on the same side of the tracks depending on where you are without having a very large gap. On my switches is a prime example and in places the same track will have the outside rail change sides. Since the pickups extend out both sides, this isn’t an issue nor is it an issue to turn the engine around. It would be very difficult to design a system where the outside rail is only on 1 side and where a pickup shoe is only on one side. That would be very limited to something like a Christmas tree loop where the train only runs in one direction.
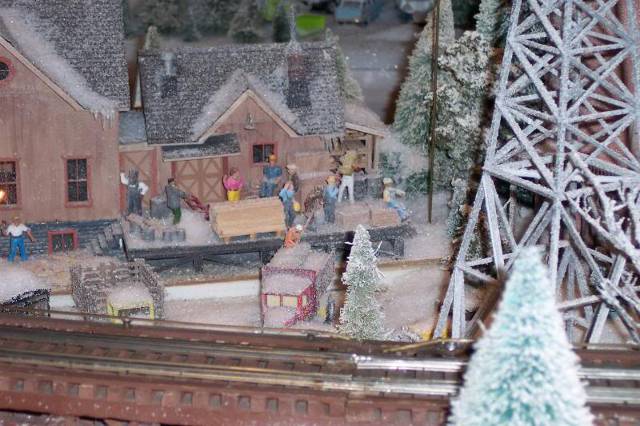
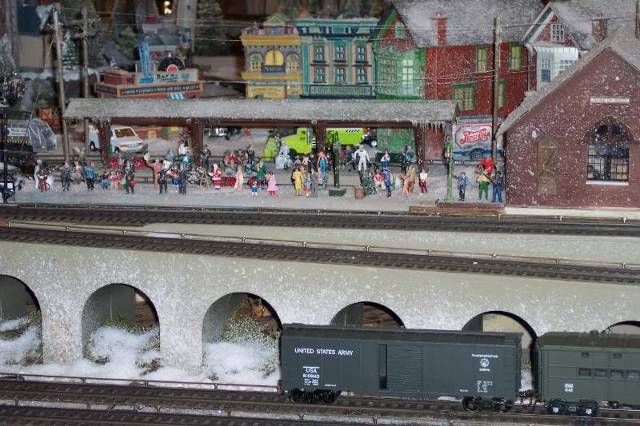
The Cincinnati layout still exists and you can find videos of it on youtube if you do a search for Duke Energy train display or some variations wiith Duke Energy in it. That layout was first started in 1938 and has been set up every year since. They have never bothered to change it to 2 rail. The rail code is taller than today’s standard size and the ties are still a different size from prototypical. Their outside rail is a bit more tedious to install as they did it like John Armstrong did his. They use screws attached next to the trac
Lionel 700E Outside Third Rail Pickup (1937 - 1941)

I have 2 of the 700E outside rail shoes and they are both different from that one. The center section is the same but the outer parts are flat and more winglike rather than stainless steel rods. Both of my pickup shoes are slightly different from each other although completely interchangeable. One went on the engine and the other on the tender. I have a couple of dozen shoes from Walthers that are very different from the 700E pieces but they all do the same thing and work the same way.
I thought I’d bring this topic back as I found some pictures of the Duke Energy display. You can still go see this outside rail layout running every holiday season. I am still of the opinion that the third rail being on the outside stands out less visually than on the inside.

1 Like

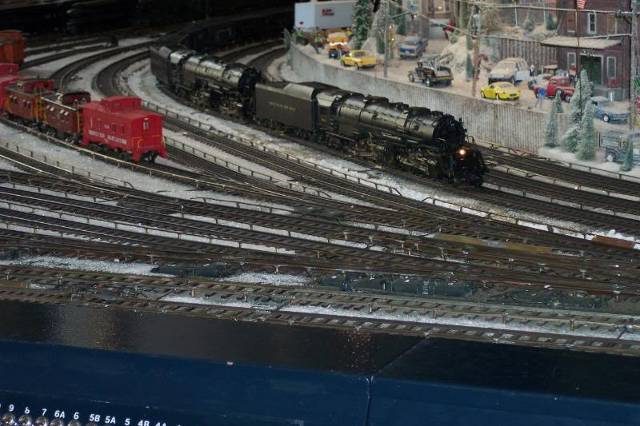
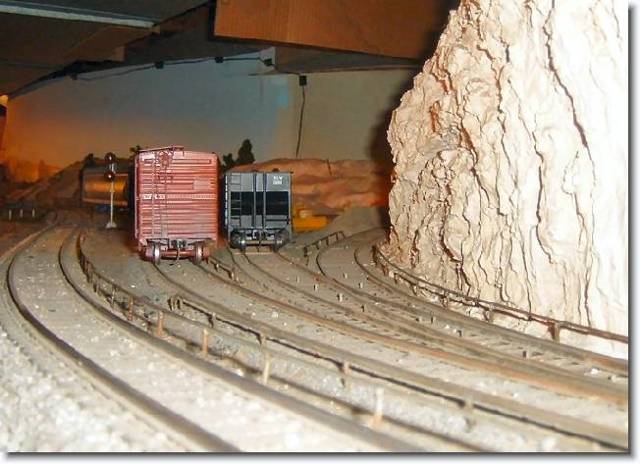
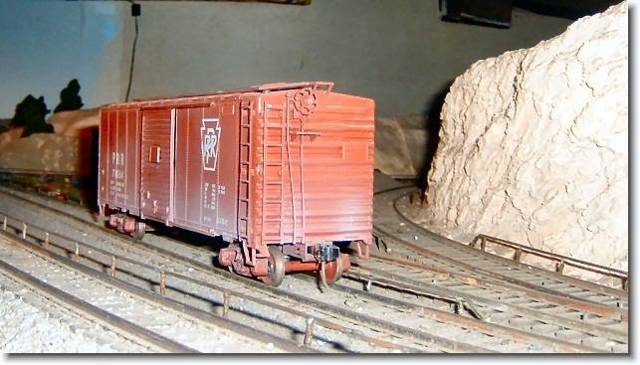
These 2 pictures are from John Armstrong’s Canandaigua Southern. While you can see his outside rail in these shots, you can also see his stud rail branchline as well which was nothing more than simple nails hammered down between the ties with a wire connecting them underneath.
That is one amazing layout!
Makes me consider selling all my Altas three rail.
I think that outside rail is gorgeous and I’m very proud of the outside rail track that I have handlaid. I have a couple dozen outside rail pickups that I bought on ebay so if I ever had the urge to go all outside rail, I’d have the pickups to convert the engines with. Some engines are very easy to do. Others are a little bit more difficult but not too bad. I will say that with my stud rail project that I am having more issues with under engine sliders that clip onto rollers than I ever would by using outside rail. Outside rail just might be easier!
Outside rail used to be fairly easy to install. Some did it the hard way and others made it sound difficult but it doesn’t have to be. Back in the day you could buy track such as Gargraves that had every 5th tie longer to hold an outside rail chair. You could probably still order it this way if so desired. Outside rail chairs came in several styles. The type that I have are very easy to install. I have a track gauge that has an outside rail guide on it. The chair installs in the gauge. You center the chair over a long tie and then run a small nail or spike down through the hollow center of it to secure it. Then you move on. The outside rail slides into the chair and you just crimp it in place. Simple. No one makes these anymore though. There may be an alternative in Europe though that isn’t quite as easy but allows code 100 rail to be used for the outside rail. No crimping necessary but you wouldn’t have a gauge that could hold them in place while you attach them. The above layouts were done the hard way. They used small brass screws as the chairs and these were inserted into the ties. Then a rail was hand soldered to each screw. Very laborious and I’m sure the main reason why so many still feel it is difficult to do. It is if you do it that way!
I really do wish some people today would attempt this technique. They might be surprised how easy it actually is. It is just so neat to see. I know some say it isn’t prototypical in most cases b
The more I check out those pix, the more I like this concept. Even knowing what to look for, everything seems to blend so easily.
There are videos of this layout on youtube. Just do a search for Duke Energy train.
Although I have many pictures of Frank Ellison’s Delta Lines, they are all in black and white. This one however is the only color one that I know of. I’m sure they exist somewhere but this the only color image I have. In it you can see the Ob Long Box company. Notice that the siding does not have an outside rail. An engine can not go this far down the track but it also never needs to. You only need the outside rail where the engine will be. Since an engine almost always has a pickup on or near the front and back of it and you only need one to make contact at any time, even the engine can go quite far down before it can’t get power so depending on the length of the siding, an outside rail may only be needed a short way into it or on practically none of it at all. You can see the mainline to the left and it does have the outside rail.
Frank’s rail was also large by today’s standards. No one quite knows what it is but we know for a fact that it isn’t Code 148 as it wasn’t made until at least the 60’s if not later. We do know that it was ordinary steel. In his book from 1955 he mentions that NMRA standard is Code 172 and that no one makes it in a smaller size which he found unfortunate. We also know that his layout isn’t code 172 as it didn’t make it’s appearance until after WWII and the Delta Lines was started in 1936. It is possible that he mixed rail sizes though as the rail sizes that were available before WWII were different than those after WWII. He could have had plenty of bulk rail from before the war that he continued using but no one knows that code it is. It could have been as heavy as code 198 although I doubt it. His outside rail could have been one of 2 things. He mentions that code 100 HO rail is a standard outside rail in O scale but 1/8" brass square was also common back then. A third option would have been a special shape like the outside rail that I have which is not square and is wider than 1/8" but his doesn’t look like this. John Armstrong’s layout by comparison used code 172 steel m