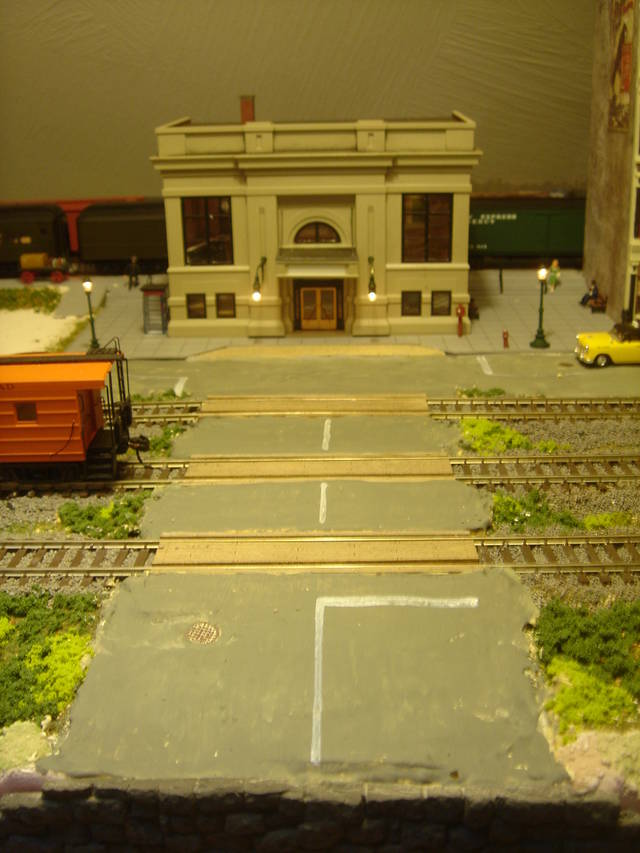
Being my usual self I tried to make the road in as simple and least effort expending way as possible [:)] , so the road is a piece of 1/8" hardboard cut to size (4"wide) with the edges sanded round for a raised look and sprayed with grey 99c primer. The markings are 1/16" model airplane masking tape painted appropiate colours and stuck on.
10 minute job, start to finish [:O].
I still need to put the RR sign on the road and some other markings/details and then weather it.
I’ve used post it notes as a guide for small road sections,then brushed on yellow, it’s a little time consuming,next time I’ll try the blue masking tape used for house painting.
Try using a draftsman’s pen. These were included in all drawing instruments set and are screw adjusted to varying line thicknesses. I use any flat paint like Tamiya and this also allows you to use any of the available colours, sorry colors. The only differculty that I have found is doing constant radius curves. These pens are also good for doing the cheat lines on locos and rolling stock.
Hey kevnbtry, visited your web. Really, really nice work ! That custom built chain link fence is a beauty. Keep it up. I hope mine works out this nice when I get to building it; still in the plan stage.
Check out a local “sign shop” that does vinyl graphics and signs.
They’ve got the same thing as the “pen-striping” for cars (real), but they’ve also got better quality vinyl than what you might get at the local “auto-shop”.
They should be able to cut a length for you (say 5’, it could stretch when pulling, so you don’t want too much to handle, for continuous stripes) by approx. 15" wide, with the computer software to give you perfect width stripes. It would also be good for broken lines (dashed), or a double line that would be spaced perfectly next to each other. You’ll need to provide such info, but you’ll get a good amount of striping. Colors and such also check out to pick the right ones. (era or shade, they’ve got a variety)
Then it goes down like any tape. Butt the ends of the pieces to continue. Exacto cuts where you want them. Then with a warm-to-hot heat, (hair-dryer - again careful not too much heat, or it will stretch and/or melt), gently / firmly press the lines down when warmed, and they’ll fill around the road surface textures.
Practice first. I worked in a sign shop for 5+ years, and thought this would be a non-messy way, with perfect sizes, for you application purpose.
If you’re worried about stretching, they can “mask” it for you, but it makes application a little more difficult than you’d probably like it to be, so practice a bit, and you’ll see it shouldn’t be too difficult.
i agree with you…i think colored pencil will work fine. You’ll probably wont get the bright colored affect with the tape, but if looks noticable, thats what counts
Kadee has decal stripes intended specifically for highway markings. http://www.kadee.com/htmbord/decals.htm I was unaware of this product until I saw it at the hobby shop recently.
So far, I only painted one styrene road lane. But to save myself a lot of useless masking, I painted the white first, then used small strips of tape to mask the lines, then sprayed the gray color. Sometimes, changing the “natural” painting order saves you a lot of work.
They do. Try a craft store. I bought a couple. But they don’t make a good white line. It is kind of faded, not a bright white.
I use photo or picture matting, in shades of grey, available at craft stores. Cut it in strips. Then I make a gravel road shoulder with fine ballast. Keep in mind, the white line down the middle of the road is not a solid line. It is dashed.
This past summer whikle at the Oshkosh Wisconsin air show, I purchased a pin stripng tool and use economical acrylic craft paints sold at Walmart and other craft stores.The tool I bought has several widths of striping wheels and does a good job.