That is going to be one nice looking scene when you are done. Will your layout eventually be constructed around the room so you can let the trains run or is it a switching layout only? BTW I had the same cheap stereo cabinet at one time [:)]
My layout’s design is based on Driline’s. I saw his photos and was impressed at how he worked with the space he has. I especially liked the shot of his desk which is almost my same exact scenario!
Since I didn’t have $10,000 to turn my attic storage area into a decent layout room, I had to do the next best thing, which was consider using my back room, without sacrificing my worktable and computer desk.
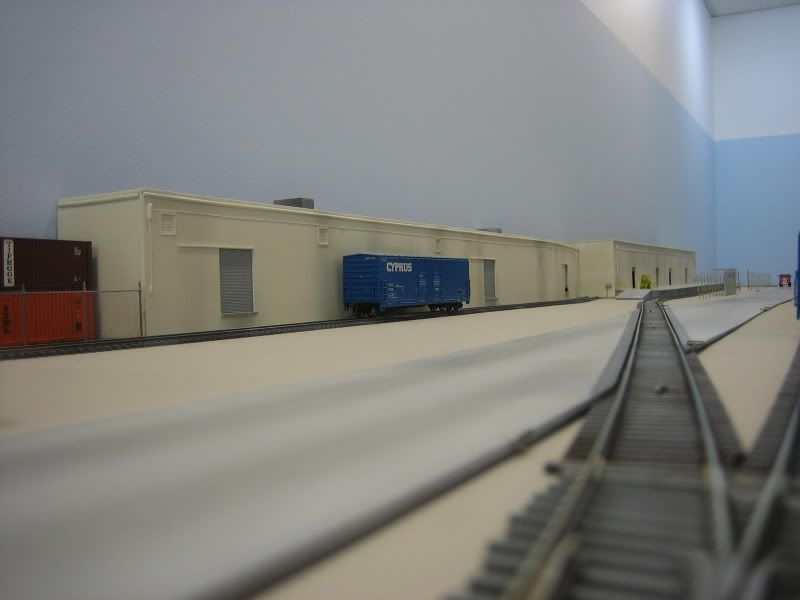
Currently the shelf layout construction sits 56" above the floor (2 feet above my computer and book shelves). This will give me a nice, “close-to-ground-level” view of the trains and scenery instead of the typical “helicoptor view” that most modelers have when sitting at their layouts.[;)] I’ve been slowly building it for the past year, but expect to make some very good progress this summer.
Driline,
It’s suppose to be a prototypical switching layout. As a result, there won’t be any continous running. Construction seems to slow down this time a of year with other outside projects taking priority. I have another section of bi-fold door to hang to the left side of the Colmar building, but that will probably not happen until Fall. The stereo has given way to the storage of various project structures. I think any shelf style railroad is the way to go when room is at a premium. I was initially going to use a similar framed setup, but this seemed to be the speedier way to go. I can’t screw up an “L” bracket bolted to a side wall.
Larry
Thanks AntonioFP45 I didn’t realize that. I’d like to see some pics of your layout.
I did something like this. First you want as many brackets as you can find studs. Wal Mart had an electronic stud finder for $17 that actually can find a stud. Use foamboard as sub roadbed, and scenery base. Lay the track on top of road bed on top of foamboard. Secure roadbed to foam board with latex caulk. Set the foam board into “dominos”. Each domino has a plywood bottom and a 1 by 4 frame clear around all four sides. The plywood bottom can be as thin as 1/4 inch although I used 3/8". 3/4 inch is overkill IMHO. The plywood bottom stiffens the frame and accepts screws to hold under table switch machines, cable clamps, power strips, Tortoise power supplies and all that other stuff that wants to fasten to the bottom of the layout. Foamboard is great stuff but it won’t hold fasteners. With a plywood bottom to hold the fasteners, it doesn’t matter that the foamboard is soft. The outside frame forms the layout fascia. Backed by the plywood, people can lean on it and not crush in the edge of the foamboard. You can screw switch machine controls, block toggle switches, structure lighting controls, track plans, what ever to the front frame.
The foam board cuts well with ordinary power tools. I used a radial arm saw to cut 3/4 by 3/4 inch rabbets into the edge of the foamboard so it settled into the dominos and lapped over the top of the frame.
I use 1x2 frames covered with 2 layers of foam on shelf brackets. My turnouts are hand thrown so no need for any plywood. Hope some of this helps.
Terry
My plan is to use basic open grid made from 1x2’s, screwed right through the frame and drywall and into the wall studs, with extruded foam on top. I’m skipping the whole plywood stage which now means I have a pair of qaurter sheet 1/2" laying around. Will be running ME turn outs, all manual either at the turnout itself or with something like a Blue Point switch control mounted to the fascia so the whole plywood underbelly part could be kept out. I’m trying to do it light as possible so I won’t have to have a support bracket every 32 inches or so, after all I do only rent the place. I’m thinking about this or a lattice type construction that I usually see people build when they use wood spline or homasote subroad bed.
Skip the plywood completely.
Use 2 layers of 1" foam in a tray built out of 1x4s. Light weight, easy to work with.
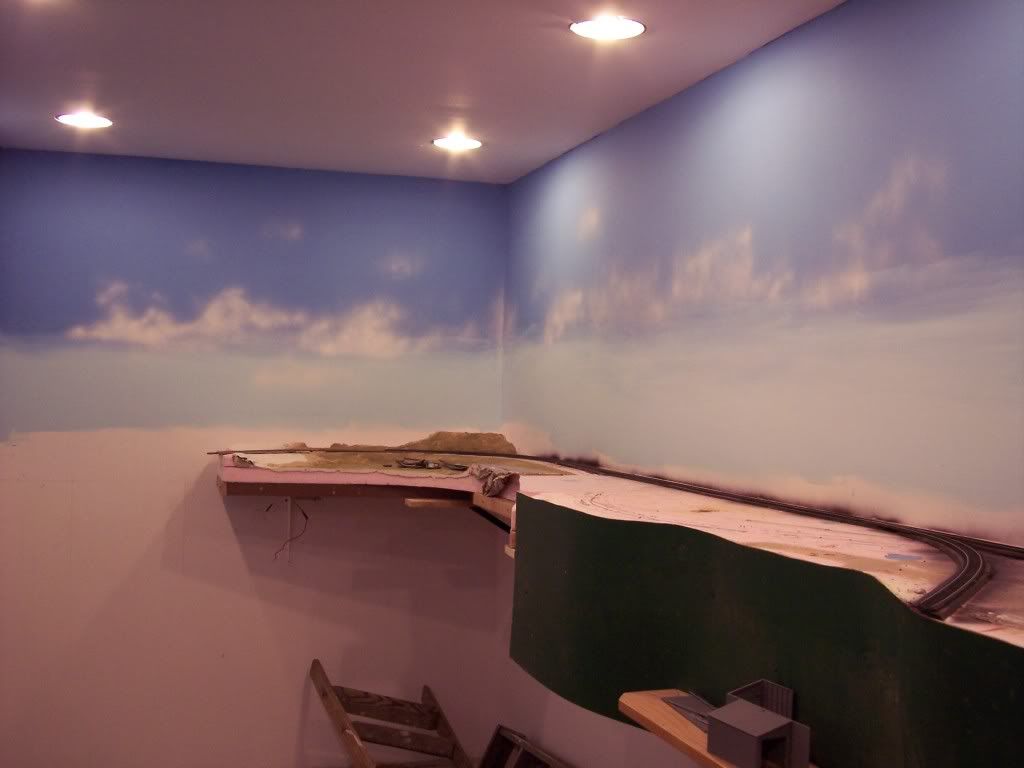
I hope that Im not out of order. Terry I like your sky art very much. How did you do it?
Thanks, DJ.This was my first stab at doing clouds. I started with a sky blue at the top and a lighter blue at the bottom and kinda blended it together about a foot or so up.HO scale. It looked like this at first:
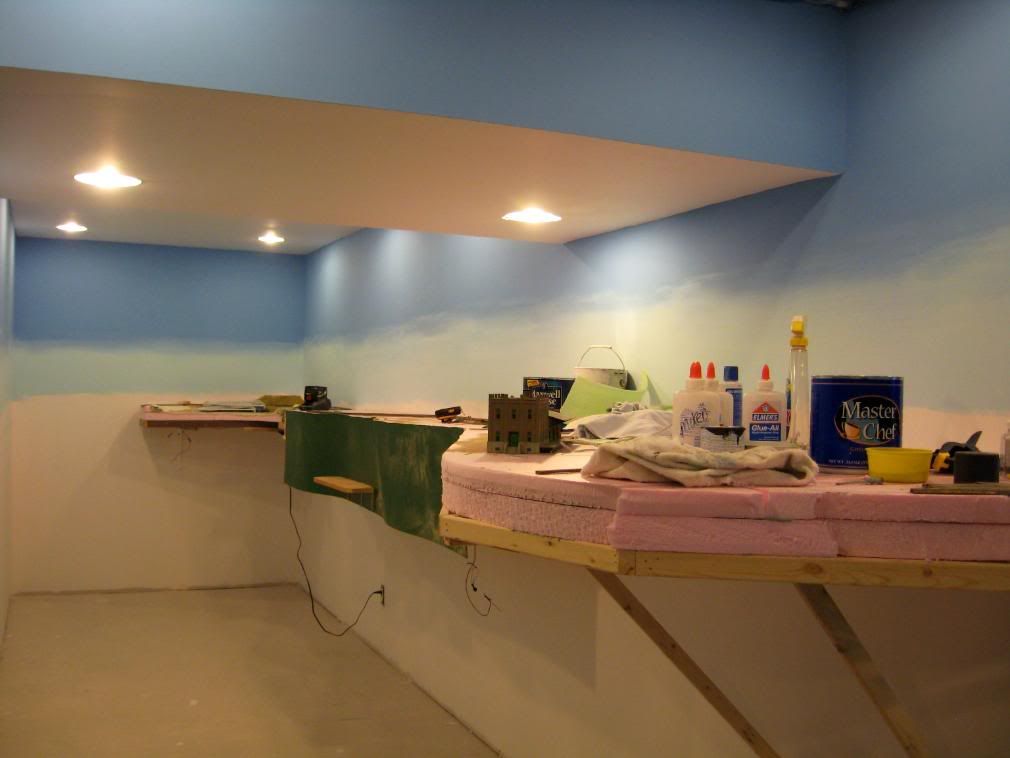
I didn’t do a very good job on the blending, so I used a rattle can of white to apply clouds.I just started spraying small spots and gradually made them higher and longer. The first few I stayed about 8-10" away to get a wispy look then a little closer to fill them in. My aim was to hide the “line” It’s actually very easy to do and if you don’t like the outcome just paint over and try again.
Terry
The clouds look very good. All I ever used was rattle can flat white. Sometimes simple is better and just as realistic.
Larry
Hello Driline,
Most welcome. I’m typing from another computer as mine is currently being repaired, possible courtesy of a nearby lightning strike. I’ll upload the photos through it when I get it back.
Before I started on my current layout, I had been disappointed that my plans to rebuild my attic space into a layout room were actually doable, however, too harsh on my budget. With modern building codes (mindful of potential hurricane winds) in Florida, it would have cost approximately $10,000+ to turn that space into an air conditioned, well lit, 12’ x 20’ room.
Seeing the photos of your layout made me smile and decide to “go for it” again. My current back room / office/ hobbyroom measures 10ft x 11ft. My primary concern is that while I want a double track mainline, it seems that the layout’s 19" width may limit me to a single track mainline to get around the corners with 85ft passenger cars.
I’ll post a thread soon with photos and ask for opinions
High Greens to you [;)]
Terry, what type of ground throw / switch stand do you use? How do you mount them on the foam board? Is it strong enough to hold properly?
I intend do to the same, but have no experience with foam board, yet. Have been working with the “old” cork roadbed on plywood-method…
Hi, Ulrich.
I use Caboose Industries ground throws mounted to cork roadbed with PL300 adhesive, the same stuff I use to glue the roadbed to the foam. Works great and you only need a dab.Yes, you can remove it if needed.Here’s one in the lower right corner:

Sorry for the bad focus.
Terry
Terry,
Are you running a double-track mainline?
Antonio, only where the prototype had it, in this shot just south of and entering Spooner ,WI.
Terry
Hello everone.
I’m just finishing my train room and I was thinking I would start building the upper deck first so I didn’t have any obstructions, because the lower deck will be 30" - 36" wide and set at approx 36" high . My upper deck will be 12" - 14" wide and set at approx 55" - 58" above finished floor. I suppose this will set the helix entrances and exits. Am I looking at this the wrong way.
thanks,
k4Pop
If you think that 3/4" ply would sag, why would you consider MDF? MDF is extremely heavy, will sag under its oun weight and doesn’t take screws well at all. A quality 3/4" plywood would have to have some substantial dead weight to cause sag (consider 8" bookshelves for instance) You won’t find MDF used for this purpose.
Using a quality 1/2" ply, (birch, luan, or even doug fir BC sanded underlayment) with 1x2s glued and screwed staggered at ply joints would produce a fairly light, stong and flat deck. I would recommend scabbing the plywood joints with the scrap ply instead of any steel mending straps. Scabbed joints will help to eliminate some of the slight wave at those areas.
I have gone with 1x8 1/2 ply on a 1x4 pine sides. Placed this box on twin slot shelf brackets. Set up is solid. If I did it again I would go with 3/4 ply over the 1/2 ply, just to make it a little easy on mpunting the swithc machines. Screws poke out the top of the 1/2 ply.
I did not use foam board, In Arizona this stuff (Foam) is hard to find. The 1x4 make a great place to screw in wire holders etc.
Eric G. Hall
www.GSMrr.net
goodmornin’, my HO layout runs around the walls of the basement, into/through existing shelving & through existing cabinets: 314’ to date. i use 3/4" straight, dressed cedar fencing in 8’ lengths. most is cut to 2 3/4" width with buildings and other “activities” on the existing shelving and the corners (I do have a couple of double-wide passing tracks). i don’t join the boards (length wise) as i use box-assembled bridges between the lengths/gaps. i make my own shelving supports* and have needed no more than 4 per board. cork roadbed atop the planks & track atop that. i run a 18ga wire buss along the underside of the boards and painted, steel tube (looks like water pipe) to conceal the buss line where the bridges run. where the layout climbs above eye-level, i run the buss line atop the board along the wall. buss is joined to the N/S track every 6-8’.
i use european automotive screw-connectors for wiring joints where soldering is inappropriate & track-side shacks/buildings to conceal these top-mounted buss connectors.
if you have a bow in the board, put the bow down (like a smile) and, after the ends are locked in, the center supports are added to make it level; easier to hold up than down.
3M heavy duty, doublesided tape works wonderfully to hold the supports in place while i nudge&level before sinking screws into the walls.
i built two curved, inclined bridges of dressed cedar “bending board”: one 5’ and one just under 7’ (the latter is a walk-under - no stooping).
no scenery yet. still planning how to do the roundtable at one terminus.
the 32" sloped trestle was a fun build. forget dowels/skewers - too little an adhesive contact patch. go directly to the long fireplace matches. just remember as you’re cutting the match heads off those heads need to