great work guys…Here’s some more photos
Local switchers cross a bridge near Van Horn
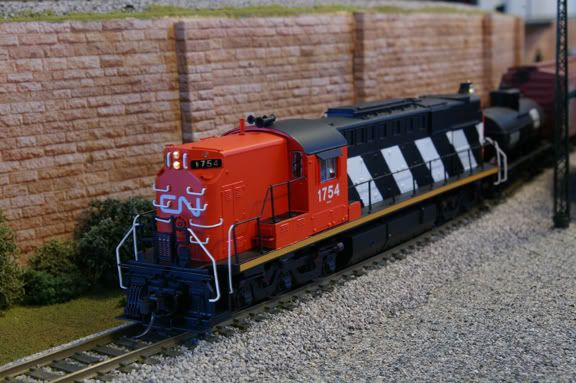
Lead SD70MAC leaving Flatonia
brakeman sets the turnout to drop off a boxcar on the siding
chuck
a couple of easter eggs for you, not dialup friendly, sorry
challenger excursion in N
http://www.youtube.com/watch?v=PaWXzFmlNIA
UP train#9 City of St. Louis in N
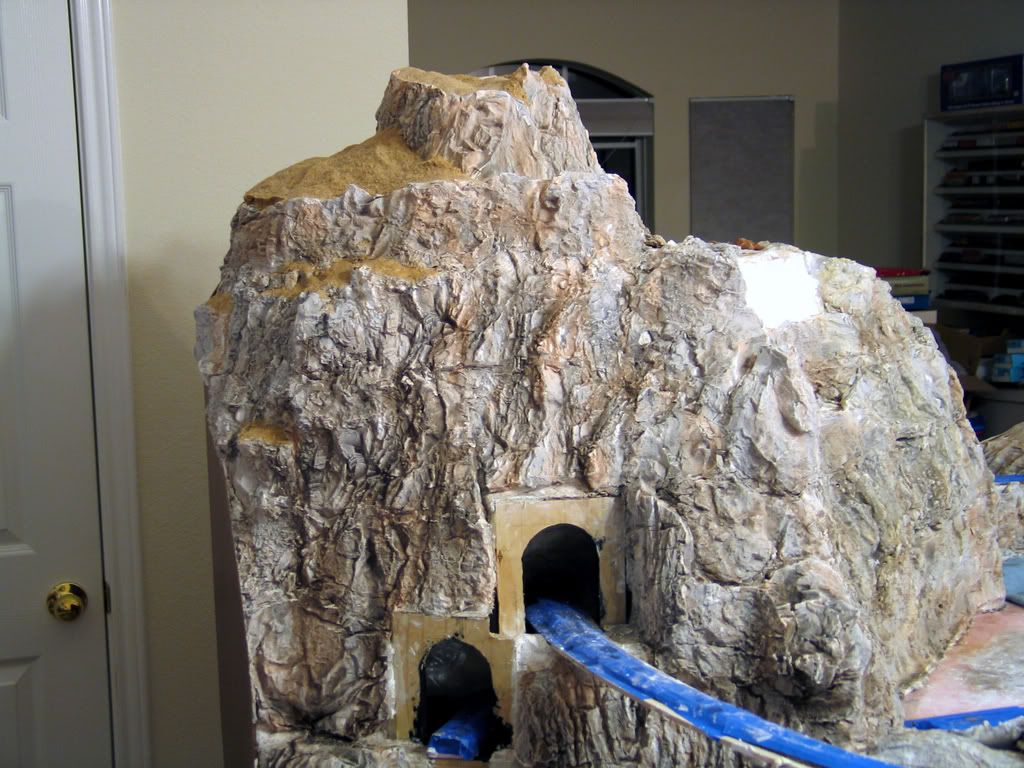
On the Platte Valley & Western, we’re in the middle of a scenery building project. The current project is the town of Ft. Steele. This week it was the rockwork that was being completed. Here’s Tarry putting the finishing touches on one half of the rock wall behind the town.
The town of Eagle (seen above the rock wall) is still in the re-design phases & will be included in future postings. Additional work in-progress pictures will be posted on the PV&WRR’s club website.


The PV&W’s Next Open House is Friday, March 29th from 7pm to 9pm in the basement of Denver’s Union Station. For a schedule of events & more photos of the PV&W visit the club website at www.pvwrr.org.
Chris
Great Pics, as usual.
Dahle Lumber takes an early morning delivery of plywood in Haugen, Wis.:
Terry
Terry, great scene & photo. I really like your backdrop, especially the hazy cloud effect towards the horizon. One of the best I’ve seen. Is that all backdrop we see in the photo, ie all wall-mounted, or does it wrap up onto ceiling? Hard to tell from the photo. The painted background trees are quite effective also. Is backdrop masonite?
CNinFE,Thanks. you made my day!
The backdrop is painted drywall from layout to ceiling.I blended a light sky blue at the top into an almost white blue at the bottom for that look. I suck at clouds, so it is always a hazy hot August day here.I should have coved the corners but I wanted to get the trains running.[(-D]
There’s 3 bays(pennisulas) ,around the walls of a 30x42’ basement.The tree line is a layered effect of 3 colors stippled with a 11/2" brush. It needs work.Next is experiments with hay/ corn fields.I’m NOT looking forward to that!
Terry
It’s been a while since I’ve posted…am back home from abroad so finally have something new to post, although it’s not new modeling as such.
Picked up this BLI RSD-15 high-nose this week (DC sound). Nice engine but I need to check out how many wheels pick up current…this baby stalls in switches that 2-axle locos go through without problem.
Also, a few weeks back somebody (I think it was Bob Boudreau) posted what I thought was a really cool and creative loco pic, using traditional dark-room techniques. Today I was servicing an old P2K loco and thought I’d try the same effect in Photoshop. seems to work reasonably well, and thanks Bob for the inspiration (mimicry is the sincerest form of flattery).
Thanks everybody for sharing your pics. Cheers.
That sounds like something crazy I’d come up with. I LOVE IT! [tup][tup] I’d put that set on the head of my passenger trains if I had something like that!
I concure
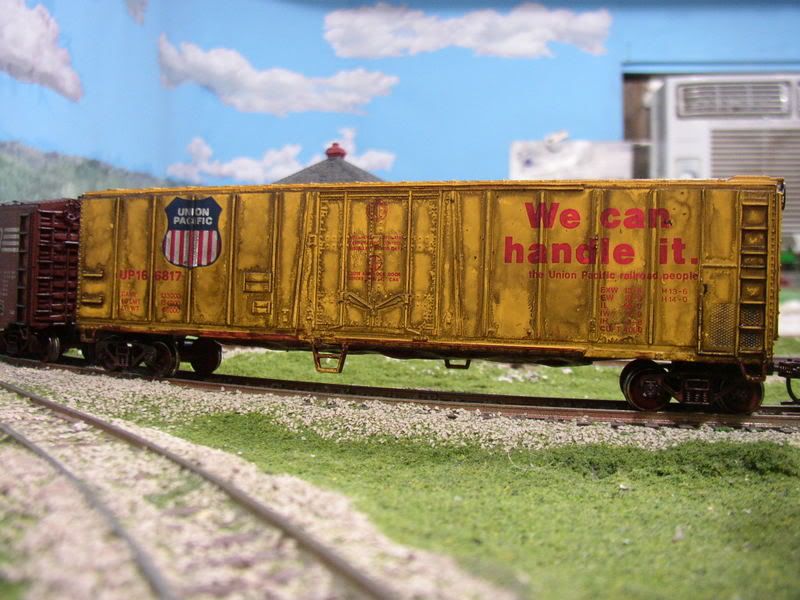
I would have liked for it to be more uniform but it didn’t work out that way. I used a mix of alcohol and black leather dye but as the alcohol dried it pulled the dye to the sides. What would you do?
Thanks. I’m honored.
Jeff: I’m sorry it isn’t the best I’ve seen, though better than I could do. But I could definately see that kind of weathering in Missouri right about now.
I’ve recently completed the installation of my dwarf signals at M&K Jct on my Allegheny & Cumberland …


There’s two more for the opposite direction for these same two tracks at the other side of the jct. Next, I plan on two cantilever signal bridges for the 3rd track.
Oh yeah, brand new SD70M’s have arrived in the mountains …

JW - this is not your first try at using the alcohol/black leather dye for weathering and getting subpar results. They all end up looking like they’ve been dunked and what’s leftover after the alcohol has dried is too dark and looks thick. What would you do you asked? First thing would be to stop using that method. As your reply and the photos indicate it is not a technique that you can control the end result. The final results are more dependent on chance than on technique and controlability. You have an airbrush(es) and a compressor - use them. You’ll have more control over the weathering process. Chalks and powders are another method. As for trying to correct what you’ve already done, you choices are strip and repaint, leave as they even though they are not that good, or try wiping down between each rib on the boxcar with a rag wetted with the alcohol. This might remove what’s dried in the panel between the ribs and leave some around each rib where dirt and grime would tend to accumulate. The dirt and grime accumulate less on the panels because they are smooth and the rain water does a better job of washing them down. Try it, it couldn’t make them worse.
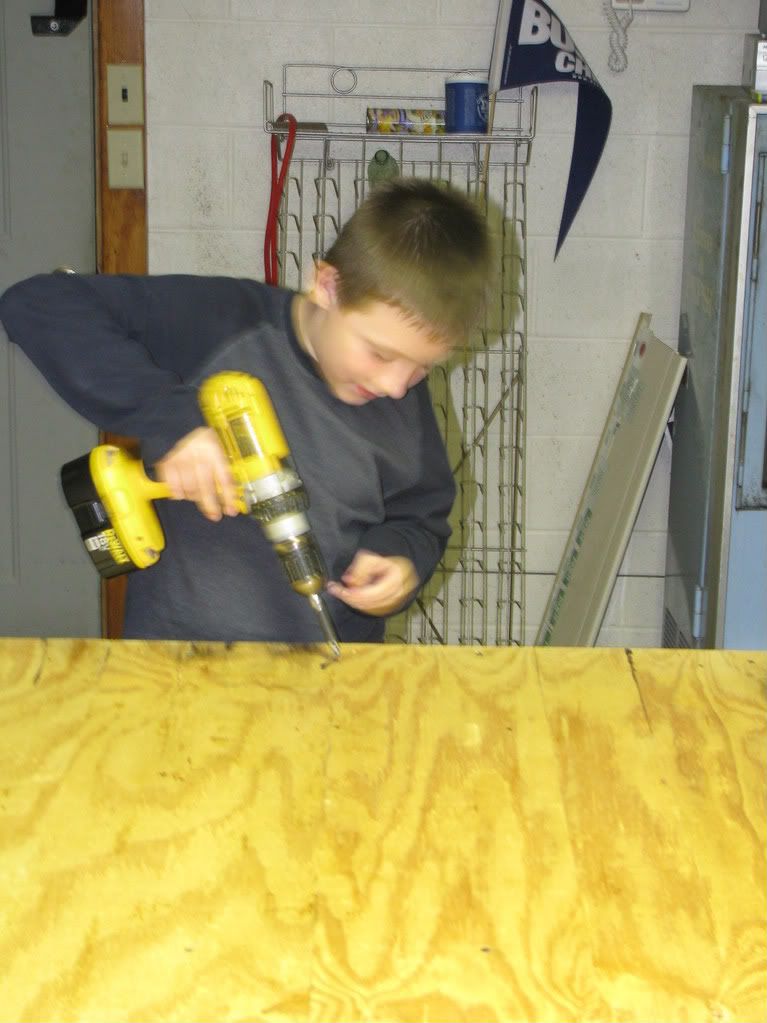
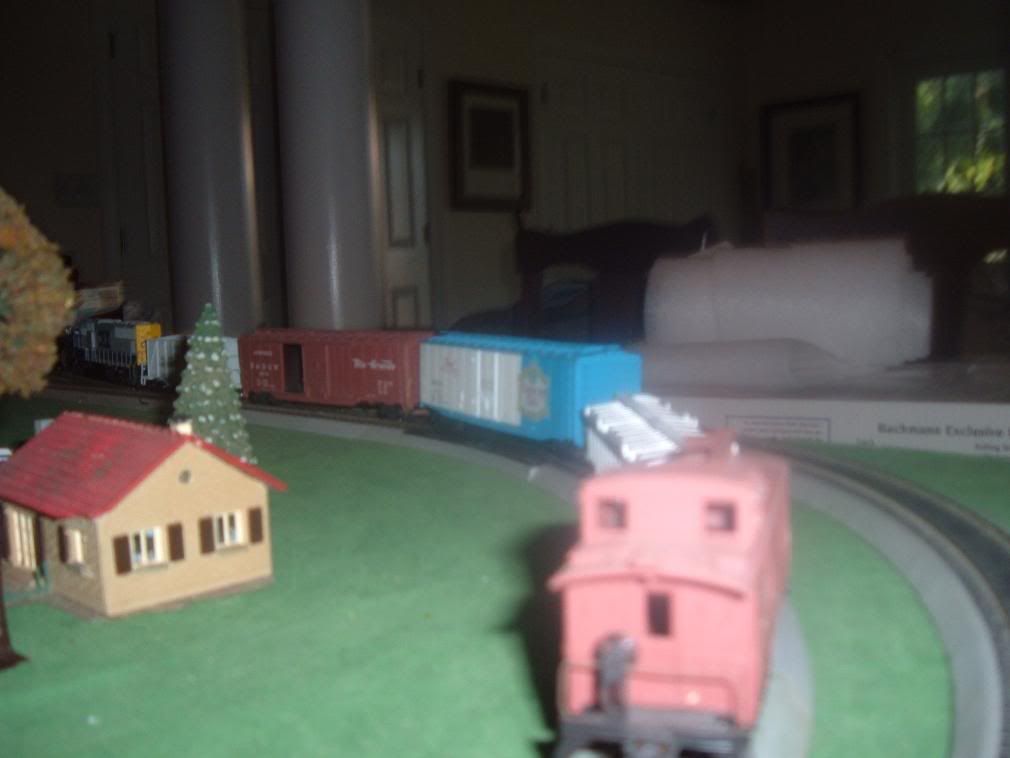
My nine year old getting his first train set

Building his platform
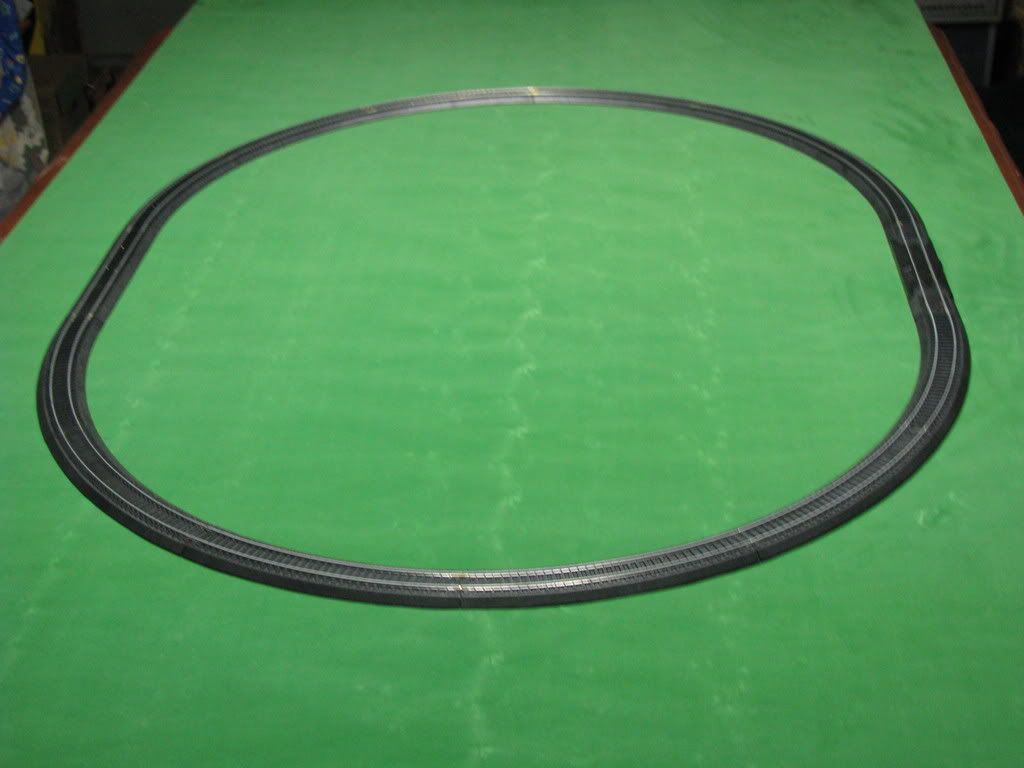
The green “carpet” is down, we are ready for track work…
More to come next week, hopefully. Remember he is 9 and this is his first set…
Great photos so far everybody!
Happy Easter
I’m happy to report I have made some progress on my layout this week. I spent 4 hours on Thursday mixing plaster and applying wet castings to finish up one part of my layout. Here’s the raw plastered area I was working on:

Tonight I spent some time coloring the rock…this photo is after the initial application of color. There’s much more work to do:
I’m very happy with the way this is turning out since it’s my first layout and everything beyond the benchwork has been a learning process.
Don Z.
Very impressive, Don. Way to go…it looks awesome. [:P]
-Crandell
Been workin’ on a D&H RS-3m for the last couple of months and it’s finally ready for paint:  Nose, #board/headlight housing, DB box are my own resin castings.