I have had several cordless drills over the years, and 1 corded drill. The cordless drills sit idle while I use my Skill 3/8 drill constantly, Cordless drills are for when you are not near a power source, since you are close to a power source get a plug in drill, they are less expensive and will always work when you need them. I have worked buildiing furniture and remodeling houses for a long time. Batteries will crap out at the most inoppertune time.
A power mitre saw can be had for about $100. They are great for cutting 1x and 2x sticks at perfectly consistent angles. They are easy to work with. I also replaced and added wood mouldings to our dining room, sort of chair rail and squares, and it was great for that application too. I never use the sabre saw or circular saw any more.
Plywood sheets are difficult to handle by yourself and to haul in a vehicle. That’s another reason why I would have the home-store cut the sheets down for you. Once you have your plywood cut, you’ll basically need a saw just for cutting the 1x sticks. I would definitely have a power mitre saw for making all of those cuts.
If you have never used one, you first press the handle on to get the blade rotating, then press the rotating blade onto the board. Your fingers are really nowhere near the moving blade.
i.e, when you most need them. [(-D]
Rich
Although, they can be, so you really need to be careful around any power saw.
The one limitation of a power miter saw is that you can only cut small pieces of wood like 2x4s and moldings because of the configuration of the saw. If you had the space and the budget, a double compound miter table saw is the way to go.
Rich
Congrats on making the decision to build a RR. It will bring you hours of enjoyment and, yes, I little frustration but in the end, it is your own work of creativity.
I would recommend a couple things. First, buy the Kalmbach book by Linn Wescott Building Model Railroad Benchwork. It should be available at your hobby shop or on line. The book has many useful tables too numerous to mention here. It is very easy to follow and has been my resource for many years.
Second, buy good lumber - I buy Top Choice from Lowe’s. Anything labeled Utility Grade or Seconds will only cause you problems. Also, store your lumber flat - don’t lean it against a wall.
Third, if you don’t own them, buy a chop saw, a cordless drill with an interchangeable drill bit - drill on one end, screw driver bit on the other and a cordless saber saw. Again try Lowes as there are manufacturers that will sell some of these are a set - mine are Porter Cable. A good quality square and other basic tools will make the job go a whole lot easier.
Then, draw a benchwork plan. I did mine once I had the track plan done. It saved me time and a little money since I didn’t buy lumber that I didn’t use.
You might say I have learned all this by experience over the years. I just finished a major addition to my RR and all of this made everything pretty much pain free. Good luck and let us know how things are progressing.
2x4s and not acceptable in railroad construction. This is copnstruction grade timber, and is never dimensionally accurate, most is twisted, cureved and warped in many dimensions. If you want lumber in four dimensions or more, a 2x4 will do.
For your layout you will need to buy better lumber, and that costs a pretty penny. (Usually the gold colored ones)
1x4s are perfectly sufficient. 1x3s are also good.
Spend the money to get the better lumber, or Like the LION, him found lots of good used lumber stored in the ranch barn.
ROARING
1x3s and 1x4s are easily cut with a hand miter saw. Being in an apartment, I could’t very well fire up a power saw, so i cut almost all the lumber for my benchwork by hand. I eventually got a small power miter saw to finish up some of the last bits.
The jigsaw is actually more versatile than other options. Witht he proper blade it will cut plywood, dimensional lumber, foam, metal - you name it. Long term more useful than a circular saw. If you are only going to have one saw - the jigsaw is the one to have. You cna cut stright as well as irregular shapes - like cutting out the plywood for a lake, ir if you do try cookie cutter, cutting along those lines which in most cases will (and should) be anything but straight. Check out some of the older build a railroad books that cover the older peoject layouts that were in MR (or if you have the 75 year DVD, just read the old articles). Also HO Railroad That Grows. You’ll see the ONLY power saw they had was a jigsaw. The only other power TOOL thay had in most of those articles is a drill. Not a nice modern cordless one that can drill AND drive screws, these were the old plug in kind good only for drilling holes. For driving in screws, they often used a Yankee screwdriver. I have a couple of those from my dad and Grandfather - as long as you aren’t in a tight space they are great - definitely better than setting wood screws with an ordinary screwdriver. Still a LOT of work compared to a nice cordless drill/driver. You can still buy the Yankee-style screwdrivers - but you can buy a cordless drill/driver for less!
–Randy
I have cut a lot of plywood and Masonite board with a circular saw. I would never attempt it with a jig saw.
Rich
And you can buy a 3/8 variable speed reversable drill for about $30 at Lowes which I have used on a ton of remodeling projects. It drives screws wonderfully
I really have nothing more to add that already hasn’t been mentioned. However, I may have missed this but in case it hasn’t already been posted…measure twice (or three times) and cut once! Honestly, save yourself money, time, frustration, and waste by making sure your measurements are accurate BEFORE you make a cut. Pencil marks can be erased or covered over with stains/paints/scenery but messed up cut wood is darn near impossible to fix.
Take your time and have fun! Seriously, the sense of accomplishment and site of progress will fuel your desire to continue. Success can be contagious!
Enjoy!
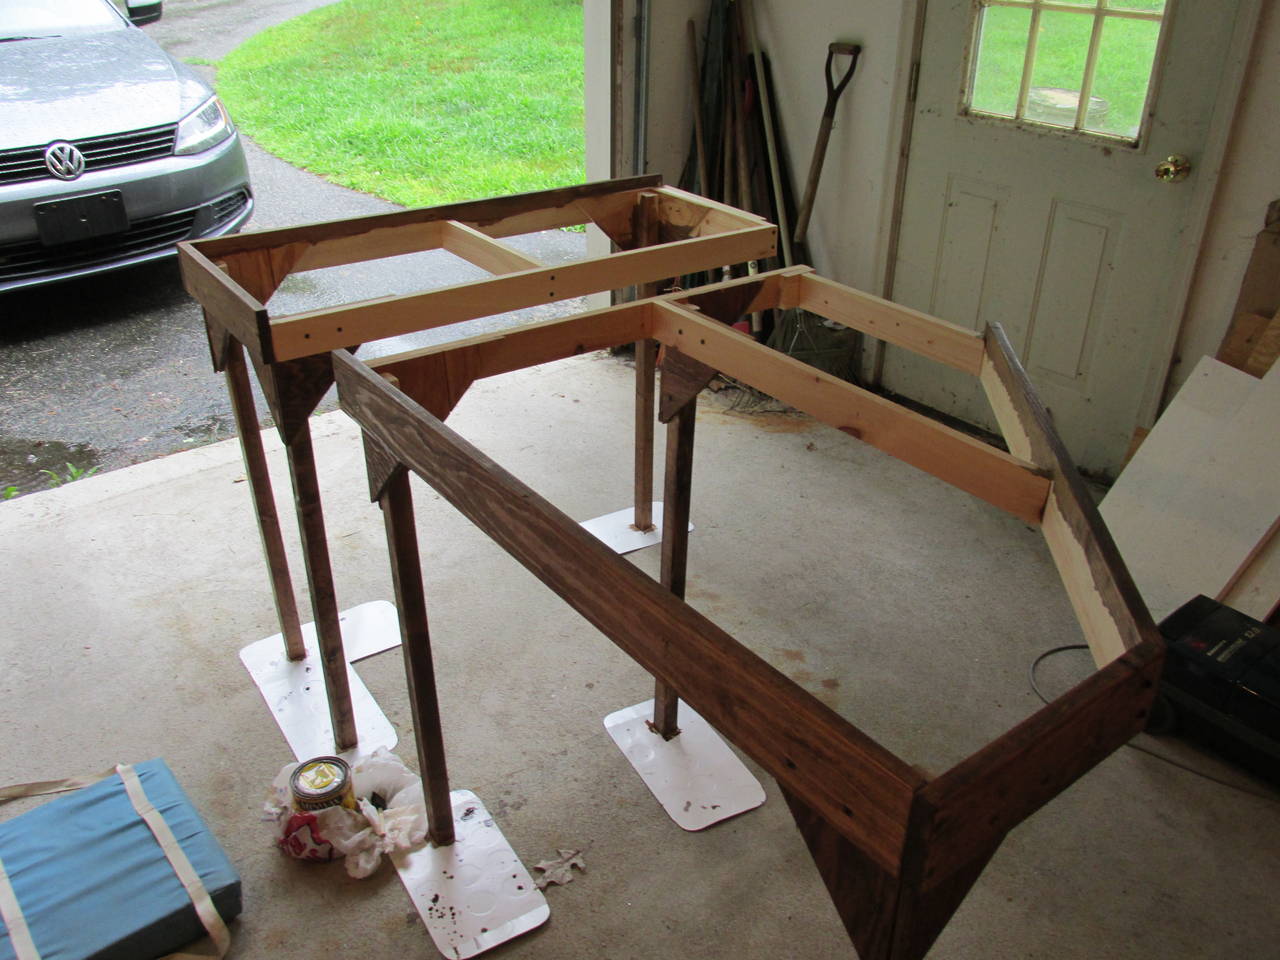
This is my basic open-frame benchwork for Phase 3 of my layout that I started back in the summer:
With some pink foam installed and the sections assembled as designed, they look like this:
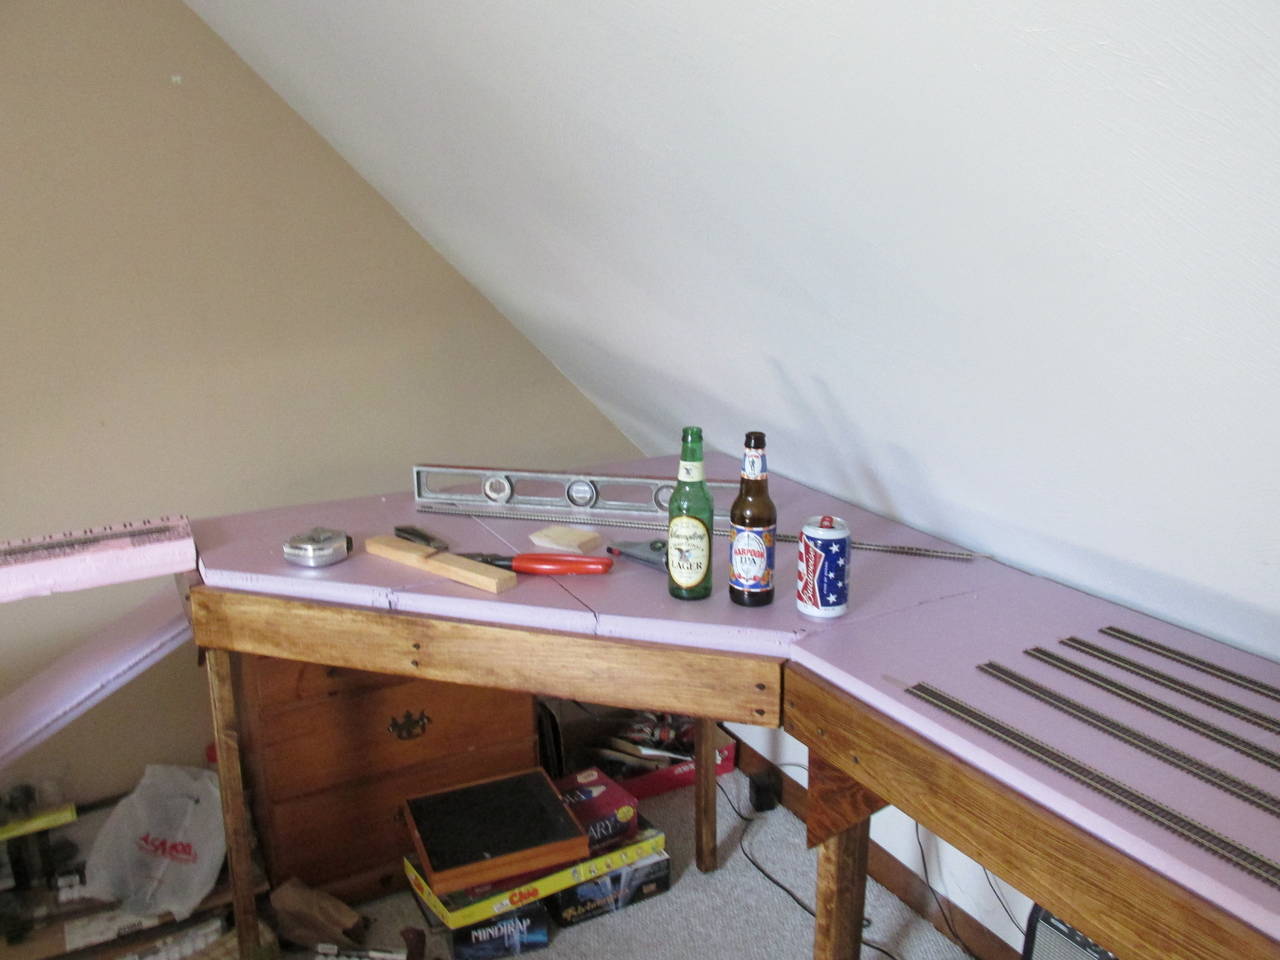
The outer frame is 1x4 and 1x3 lumber. The legs are 2x2. I added screw-in leg levelers to the legs to make sure I could get it perfectly level. I use 2-inch pink foam for my subroadbed (layout base) and Woodland Scenics foam roadbed right beneath the track.
I’m sure I’ll forget something, but here it goes with tools: hammer, screwdrivers, hand saw, tape measure, large square, level. I find this corner clamp to be well worth the $9 they get for it:

My power tools include a circular saw, scroll saw, drill and sander. I would recommend having both a plug-in and cordless drill. For one thing, you won’t be dead in the water if the battery runs down. More important, though, is the time you save when you’re drilling holes and screwing things together. You can use one drill for the holes and the other to drive the screws, without swapping bits every 30 seconds.
Add a few of those foam paintbrushes, too. I give my benchwork a coat of stain and a couple of layers of polyurethane. It looks better, and it seals the wood which reduces warping with humidity. It also keeps down splinters.
Mister B.,
Do you use leg levelers?
Rich
Why not? A jigsaw just slices right through that stuff. There are tons of things my Dad built around the house, the large pieces were cut on a table saw and the fine cutting was all done with a jigsaw. I don’t think he even bought a circular saw until he built the playhouse for us - lots of sawing 2x4s to make the framing, and not convenient to use the table saw indoors for something that big.
–Randy
As Randy noted, a decent sabre saw works fairly well! Plus you can use it to cut curves on subroadbed - a very versatile all around power tool - surprisingly.
You’re going to laugh at me but the layout I am building (photo’s below) I am building using only two power tools - a sabre saw and a cordless drill. Yep, thats it!
I’m on a pretty strict budget too, and given my druthers would like a mitre saw and a few other things but I’ve managed ok with just the Sabre saw and the cordless drill (and it’s real old and only one batter works)
Those two power tools, a level, tape measure, yard stick, folding six foot rule from my geology days, and a square. Oh, and one of those corner clamps shown above to hold 1x4’s together when building the frames, a good $9 spent.
I invested in a counter-sink for my drill, and pre-drill all my holes before driving in the drywall screws I used to hold everything together - otherwise you’ll be splitting wood frequently. I have #6 and #8 size drywall screws ranging from 1 inch to 3 inches long depending on what screwing together. I used longer ones like 2 1/2 inch #8 to hold frames together and shorter for risers etc.
I don’t have much carpentry experience either. As for the major cuts, if anything like that needs done, I’ve just had Home Depot make the long cut there before loading the wood and bringing it home. I can’t fit 4x8 sheets in my Rav4 o
I would agree with those saying to keep the jig saw over a circular saw, i own both but used the jig saw the most for building my layout. Circular saw may cut longer sheets faster, but really how often will you be making long cuts? Have the big box stores rip the plywood sheets for you if you can. With the jig saw you will have the option for cutting curves and making those cuts that a circular saw is too big to do.
Use a square and clamps for cutting with the jig saw and you’ll have good cuts. Use a scrap piece of 1x3 or whatever you have, clamp a square to it that the jig saw base will be able to follow along as you cut. Make a cut across, then measure from the square to the edge of the cut and write that measurement down. Whenever you need to make a square cut, measure out the total length you need to cut,make a mark, then measure back by what you have wrote down, make a mark(both sides if it’s wide) place a straight edge across the second set of marks and clamp it down, line you jig saw up, check that your blade is in line with your original cut mark and just keep the saw base against the straight edge as you cut across.
I have a Makita set of 18 volt cordless drill and hammer driver. I have a borrowed miter saw, and I have a skilsaw and sabre saw. They all are very handy when the need comes. For the sabresaw, you’ll need it to cut out a hole to inset a turntable if you are going with a transition era layout. No turntable? I’d take it back and invest in quality drivers. That’s just me.
Because it takes too long. I can make long cuts through thick wood in a fraction of the time with a circular saw.
Rich
In my mind Mr Beasley has it right. As far as tools needed, you are in luck as HD always has deals on Ryobi tools this time of year. You can get a circular saw drill combo with two batterys for cheap, last year it was only $79.
Yes, I used something like these:

The ones I used have a carpet base, because my trainroom has a carpet. These give me about an inch of adjustment range, which is plenty as the floor is flat and all I’m compensating for is my own sloppy carpentry. If you’re looking them up online, search for “threaded glide.” I got mine at Home Depot.

Once again, Mr. B., great minds think alike. I believe that leg levelers are essential to building a reliable layout.
Rich