The roof on my Tichy coaling tower was originally done in the same concrete colour as the rest of it, but I later went back and, using a brush and PollyScale paint, re-did it to represent one which had been tarred. This was a common practice, as was done on this one in my hometown of Hamilton, Ontario:
By the time of the photo, steam was long gone, but the tower was still used for supplying sand for the diesels. It has since been demolished.
Nice Photo! I really admire these old relics. Its too bad there isn’t enough money in the industry to preserve these historical structures for future generations. I understand they become a liability at some point, maybe we were born too late.
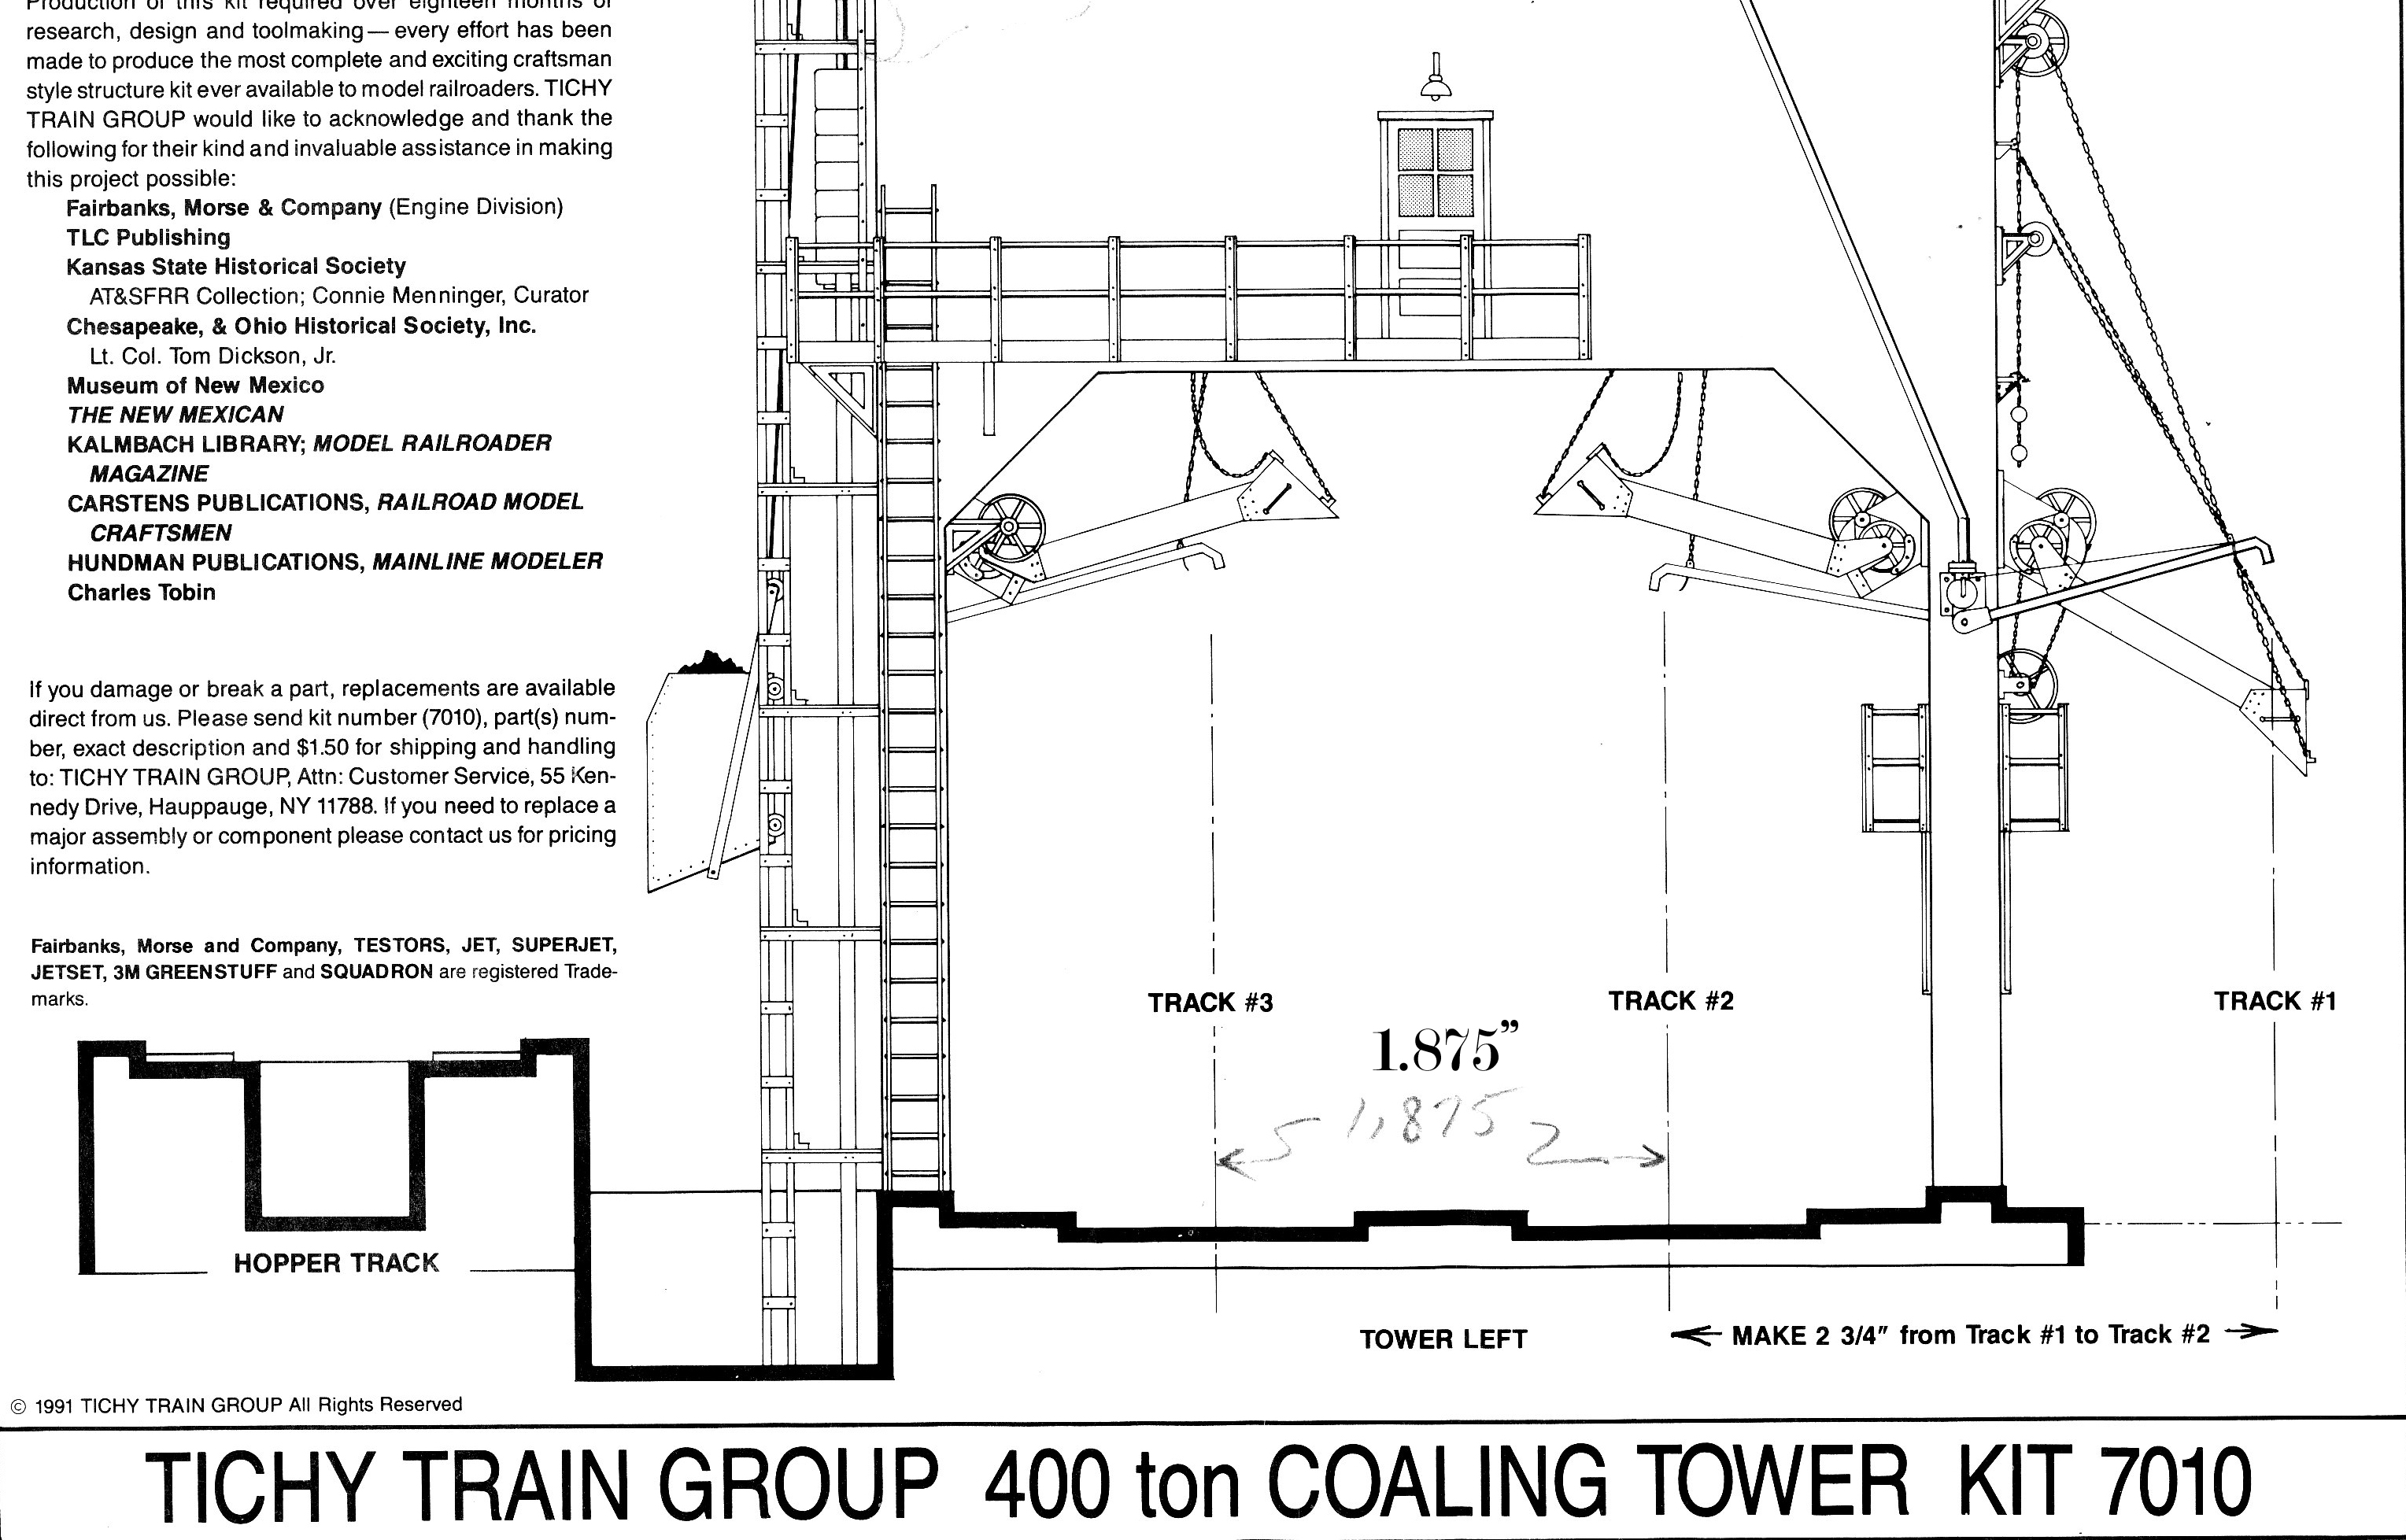
Instructions have track 1 to track 2 as 2.75". Track 2 to 3 is unmarked (if it’s to scale, call it 2"). Track 3 to hopper track is likewise unmarked.
The (2013) catalog page has it listed as being printed at 50% scale. Don’t have a rule here, but calling it a foot square is probably a safe bet, assuming the catalog is letter sized (I recall that being the case, but …).
Edit – well, Ed beat me to it as I was double-checking everything
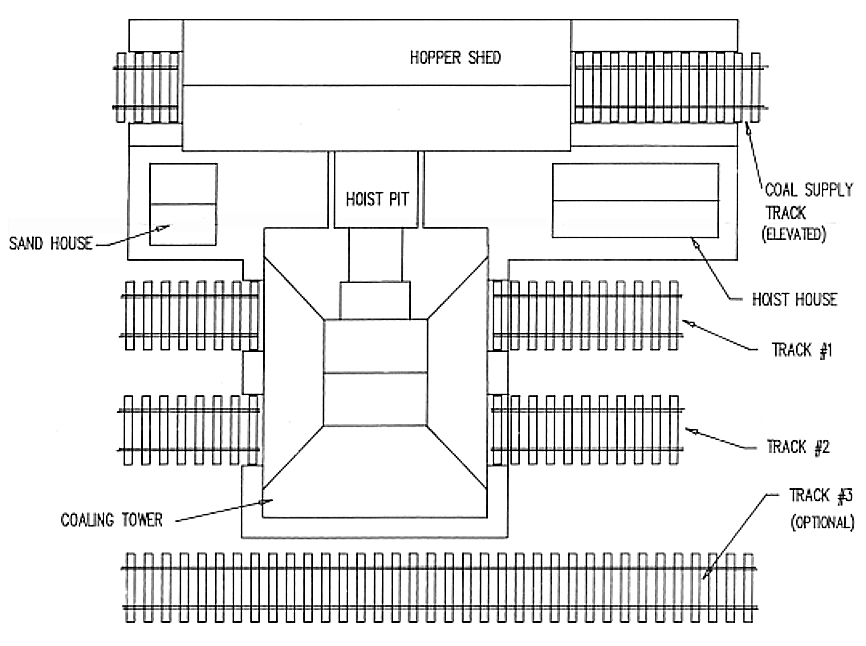
Brian, the track through the coal/sand dump shed fits into a trough cast into the base of the kit, as do the two tracks which pass through the coaling area, as you can see in the photo below…
The two through tracks are 2"o/c, while the dump track is 3.75"o/c from the nearest through track.
The service track outside the tower legs is not fixed by the tower’s base, as the base doesn’t extend all that far beyond the legs. I simply put a locomotive on a piece of flex track in that general area, then lowered the coal chute, jockeying the track and loco until the discharge end of the chute was roughly centred, width-wise, over the tender’s coal bunker. That placed the outside service track 2.75"o/c from the nearest through track.
Since the kit allows the builder to choose chute placement, there are no locating holes or cast-on projections for any of the chutes, sand delivery pipes, ladders, walkways, stairs, or pulleys. Initially, it was a bit intimidating, but photos in the instructions and some logical thinking about placement of the various components soon sorted out any problems.
It’s not all that apparent in most of the photos that I posted originally, but before assembling the “concrete” portions of the kits, I used a modified #17 chisel-type blade and a straightedge to scribe some form-board detail into the surface…basically a drag-and-scrape operation, some of which can be seen in the photo below…
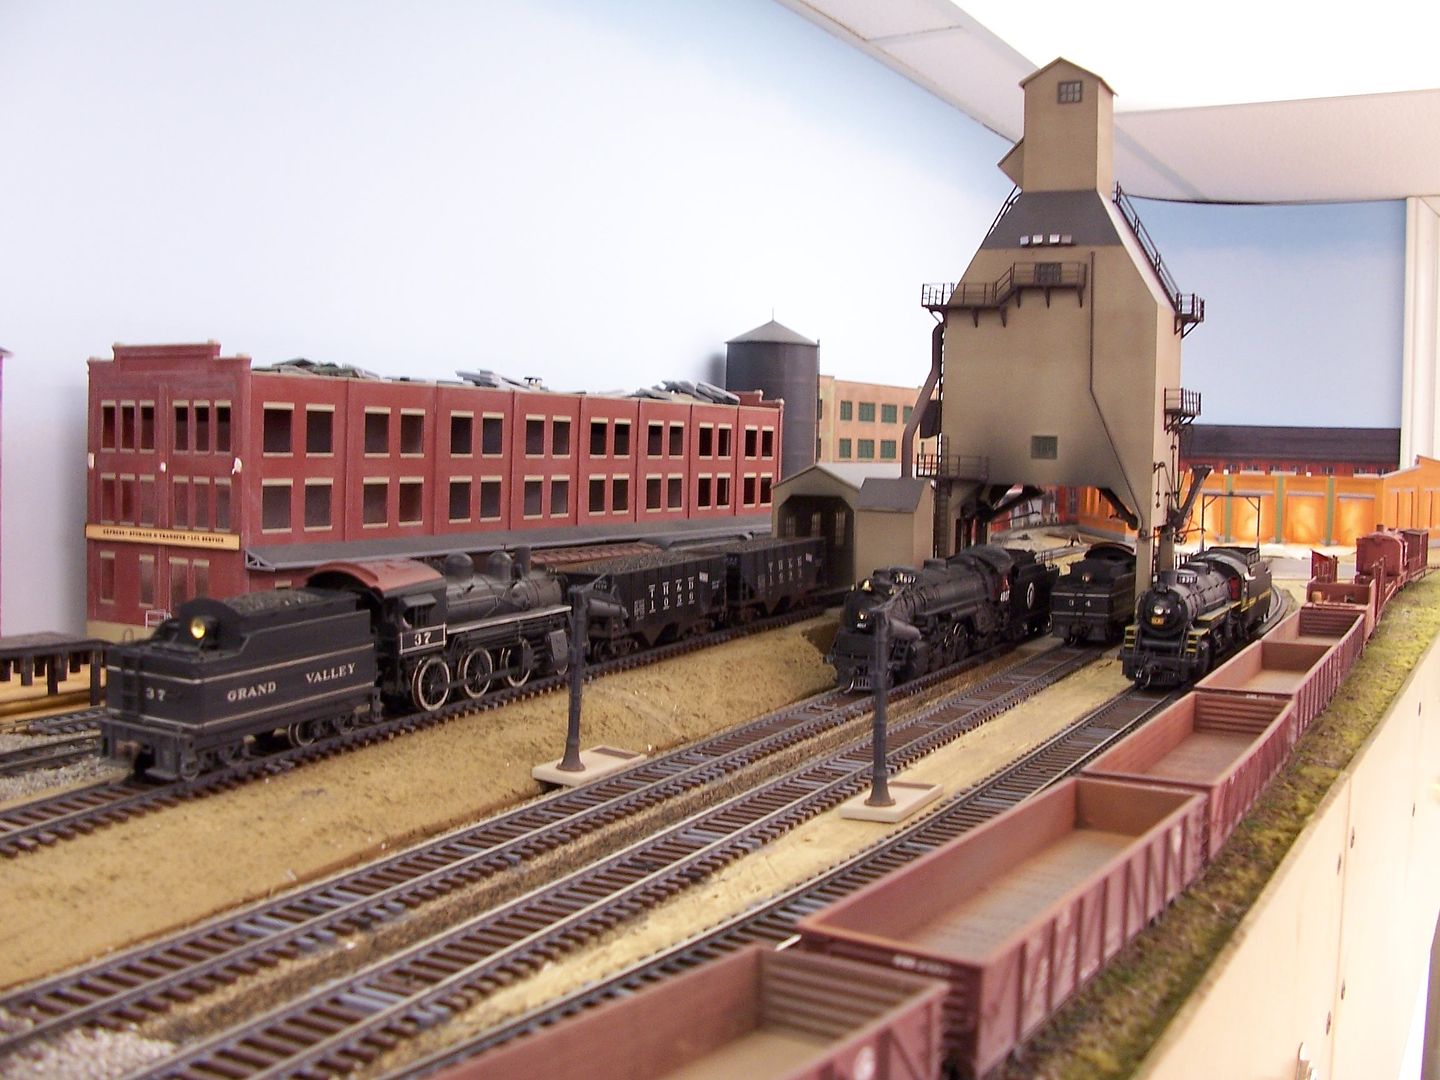
I finally got it installed on the layout’s upper level, but the scene is nowhere near finished…
Another new guy chiming in…just started posting but I’ve been coming to theses forums on and off for years.
It’s the excellent modeling and discussion such as in this thread that have encouraged me to dive back into this hobby a few years ago. I’ve benefited so much and realize I should be contributing as well.
Wow! Thanks so much to all who have posted great images and great advice on these coaling towers! I’m still so new, but I’ve saved this thread for future reference. Your time posting all of this is much appreciated from this guy.


