Looks good Ellie! Best of luck with the restorations!
2 Likes
Wayne, I think for once I’m really going to need it!
I opted to go the route of trying to salvage as many original parts as possible, and this means I have to attempt to repair 12 wheels across the sleeper car and tender, which have sustained some zinc pest damage, but are not so distorted or broken that they cannot be salvaged.
While this does save considerable expense (replacement would have added another ~$50 to the project cost), it comes at the cost of having to put in some serious extra effort stabilizing the wheels to ensure they do not fall apart under use.
There are also a couple locomotive parts I could not find replacements for, including the backhead casting for the cab interior and the axle cam for the smoke unit. For these, the only option really is to try to save the originals. I’m especially worried about the axle cam, it gets put under a lot of stress in normal use.
-El
3 Likes
Ellie if anyone can do it you’re the one!
By the way, did you get the e-mail I sent you a week or so ago?
2 Likes
Wayne, I did get that E-Mail, was going to reply and then out of sight, out of mind it went… whoops ![]()
Appreciate the optimism! I succeeded in getting the sleeper car back on all 8 wheels, though as of yet the interior lighting does not work. I need to confirm if the bulbs are kaput (unlikely, very little wear on the pickup shoe and surviving wheels suggests minimal run time) or if the issue is coming from bad wiring or an issue with the on/off switch underneath the car.
In the meantime, I moved on to the tender. It’s proving to be more of a challenge, but I’m doing my best. Unfortunately, while the quality of the castings for the reproduction wheels are quite lovely, the casting for the back wall of the tender (as well as a few others) are far less nice. Washed out details. The tender back doesn’t line up quite right, and I believe the issue is it is slightly undersize- I bet it was made by taking a mold off of an original part, and as a result did not account for shrinkage of the metal when cooling.
It’s not so bad that I can’t use it, but it is a bit of a pain and will increase the amount of effort I have to put in. As far as could see, there wasn’t really much choice for these parts, so I don’t think there are currently better castings on the market I could have acqired instead. We have it pretty good here in the US with Lionel repro parts I guess!
-El
2 Likes

This looks like an HO scale Mantua model, sold as an 0-4-0 side tank loco.
The originals were die-cast..
Copies were made in China in plastic more recently..
Peter
3 Likes
Thanks, Peter. It is a lovely little loco. Somewhat temperamental at times, but at £4.30 ($5.00) she remains part of my fleet of locomotives.
Hey, it happens! If you can use that article I mentioned e-mail me an address to send it to and I’ll let you know when it’s on the way.
2 Likes
It’s been a few days, and some progress has been made with the partial-restoration of my Paya O gauge items.
As previously mentioned, I have been finding that not all the reproduction castings are of particularly good quality. I spent a good chunk of time grinding away material from the inside of the tender’s buffer beam so that it would actually line up with the tender body. Thankfully, I think I have that sorted.
None of the 4 screw holes had been tapped, but this didn’t matter too much as I found they did not properly line up with the holes in the tender body. I widened them open to a point that they would line up, and then filled the holes with JB Weld. Once that cures, I will line the casting up with the body, and drill new holes. The screws should be able to self-tap into the epoxy.
While the epoxy was setting, I turned my attention to the tender trucks. One of them needed a new truck frame. Again, casting quality of the repros leaves a fair bit to be desired. That said, I was able to install the part. And that’s when I found that one of my axles is too long to fit, and I needed to trim it down. But my most recent test fit went together without issues, so I think we’re looking good here.
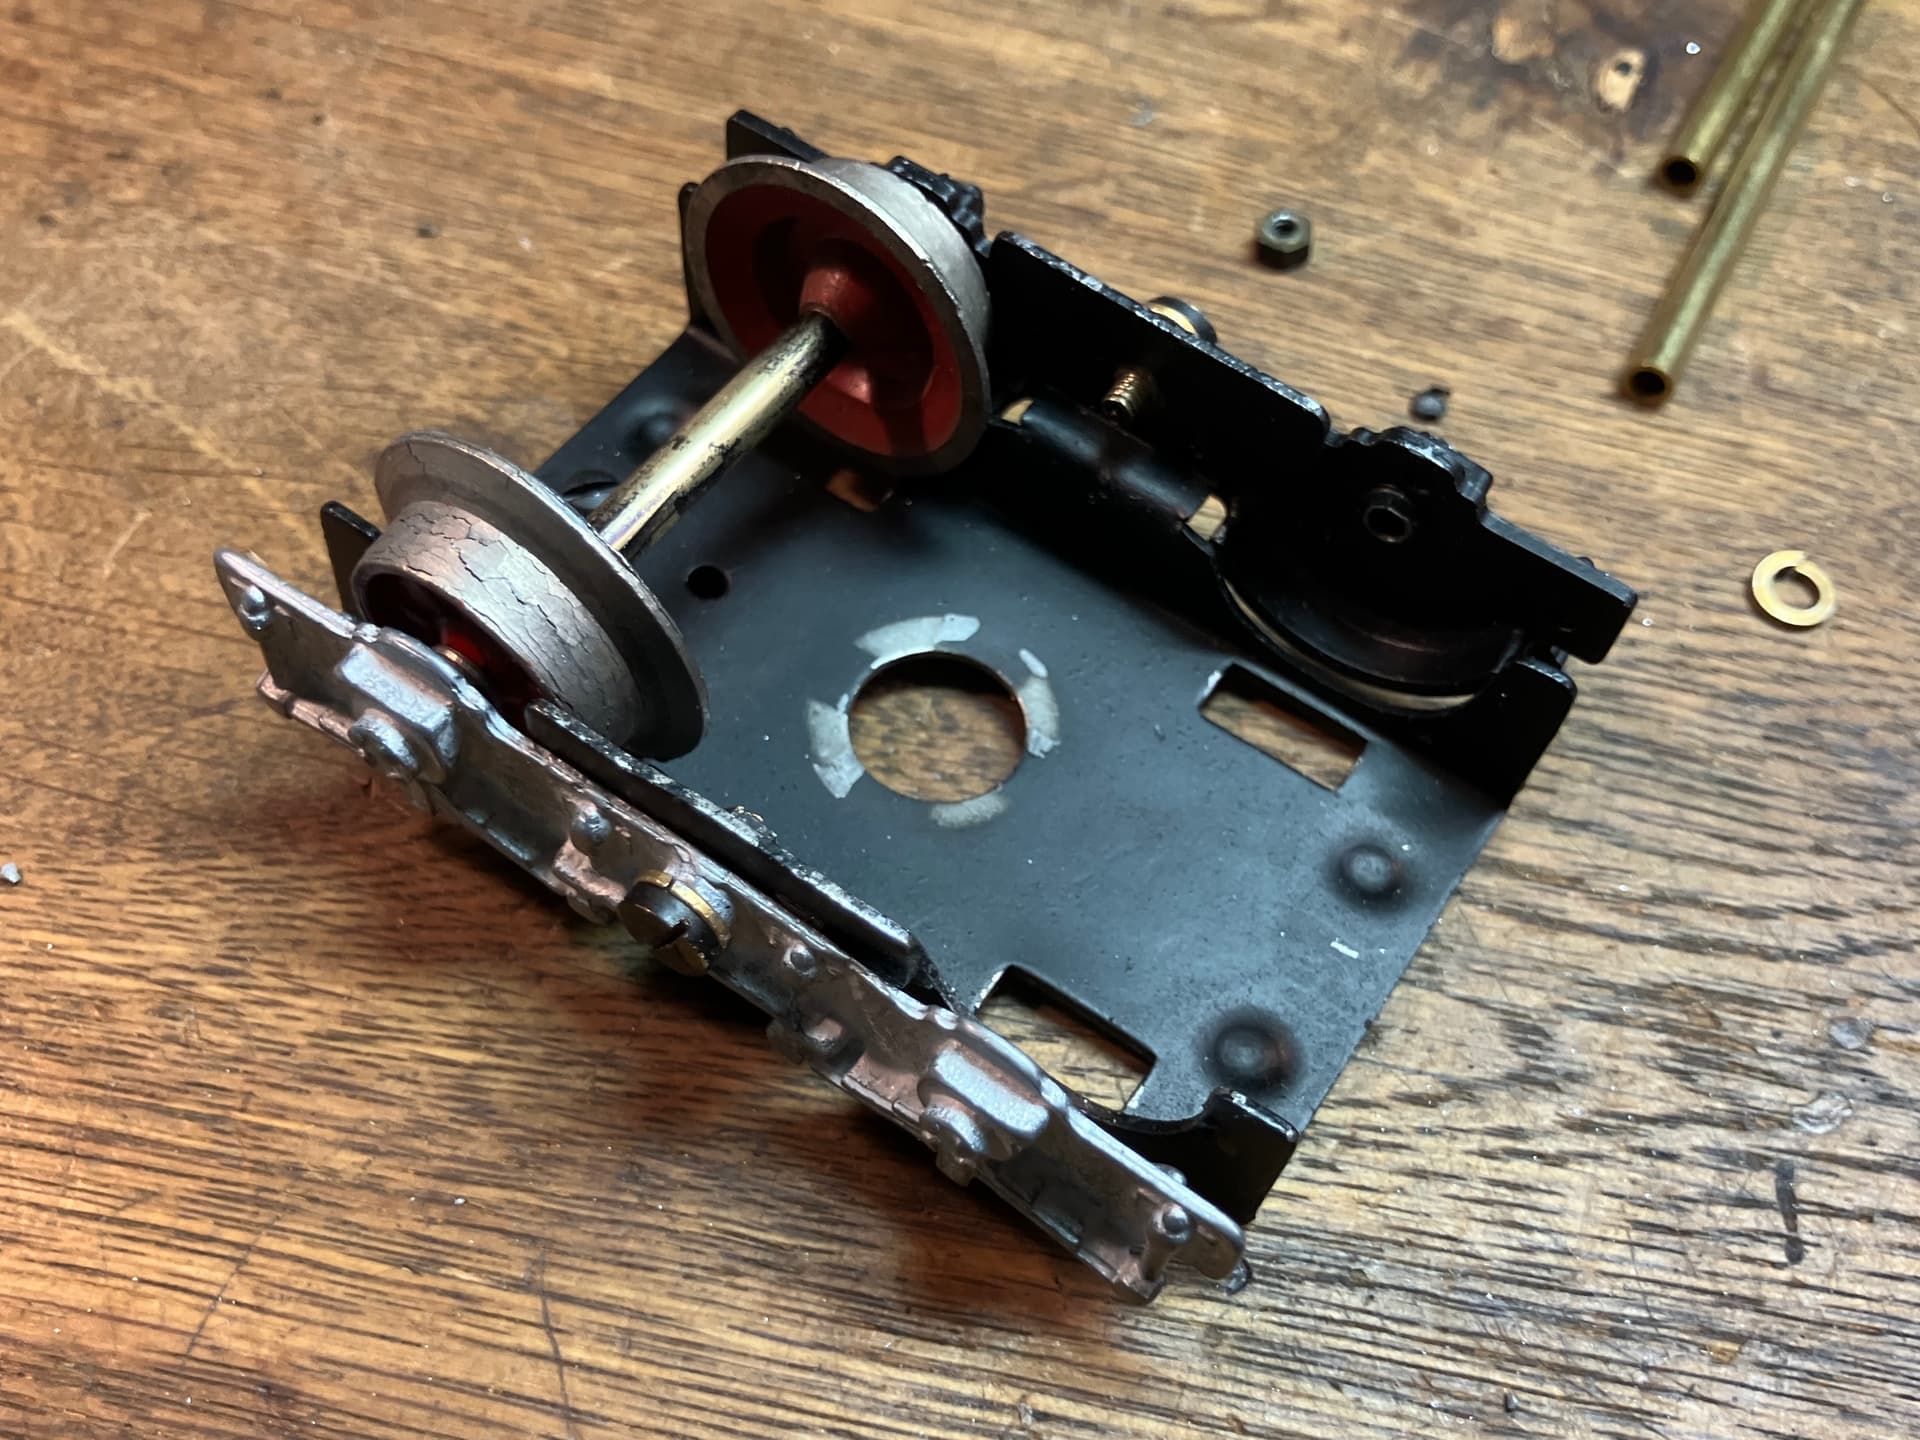
Here’s a look at the repaired truck on the sleeper car. I was very pleased with the quality of the wheel and truck frame castings, the details are sharp and everything lined up perfectly.

These wheels are marked C.G.A., same as the wheels for the locomotive. I do not know what CGA stands for, but they seem to be the go-to option for quality reproduction wheels for Paya. I wish they made the other parts too, as they seem to know how to deliver a quality product!
-El
4 Likes
The adventure continues!
With the JB Weld curing, I needed to work on something that wasn’t the tender. So, I decided to bite the bullet and start taking apart the Santa Fe proper.
I had been hesitant, because I knew once I started there was no going back- the disassembly process would inevitably lead to the destruction of parts that required replacing.
I started the big task by removing the rods from the wheels. I had planned to remove the wheels too, but realized I needed to take apart more to be able to get them off. Removal of the chassis from the body is accomplished by taking out 4 small brass screws- two are accessed from underneath, at the front. The other two are accessed from the top, and run through the floor of the cab.
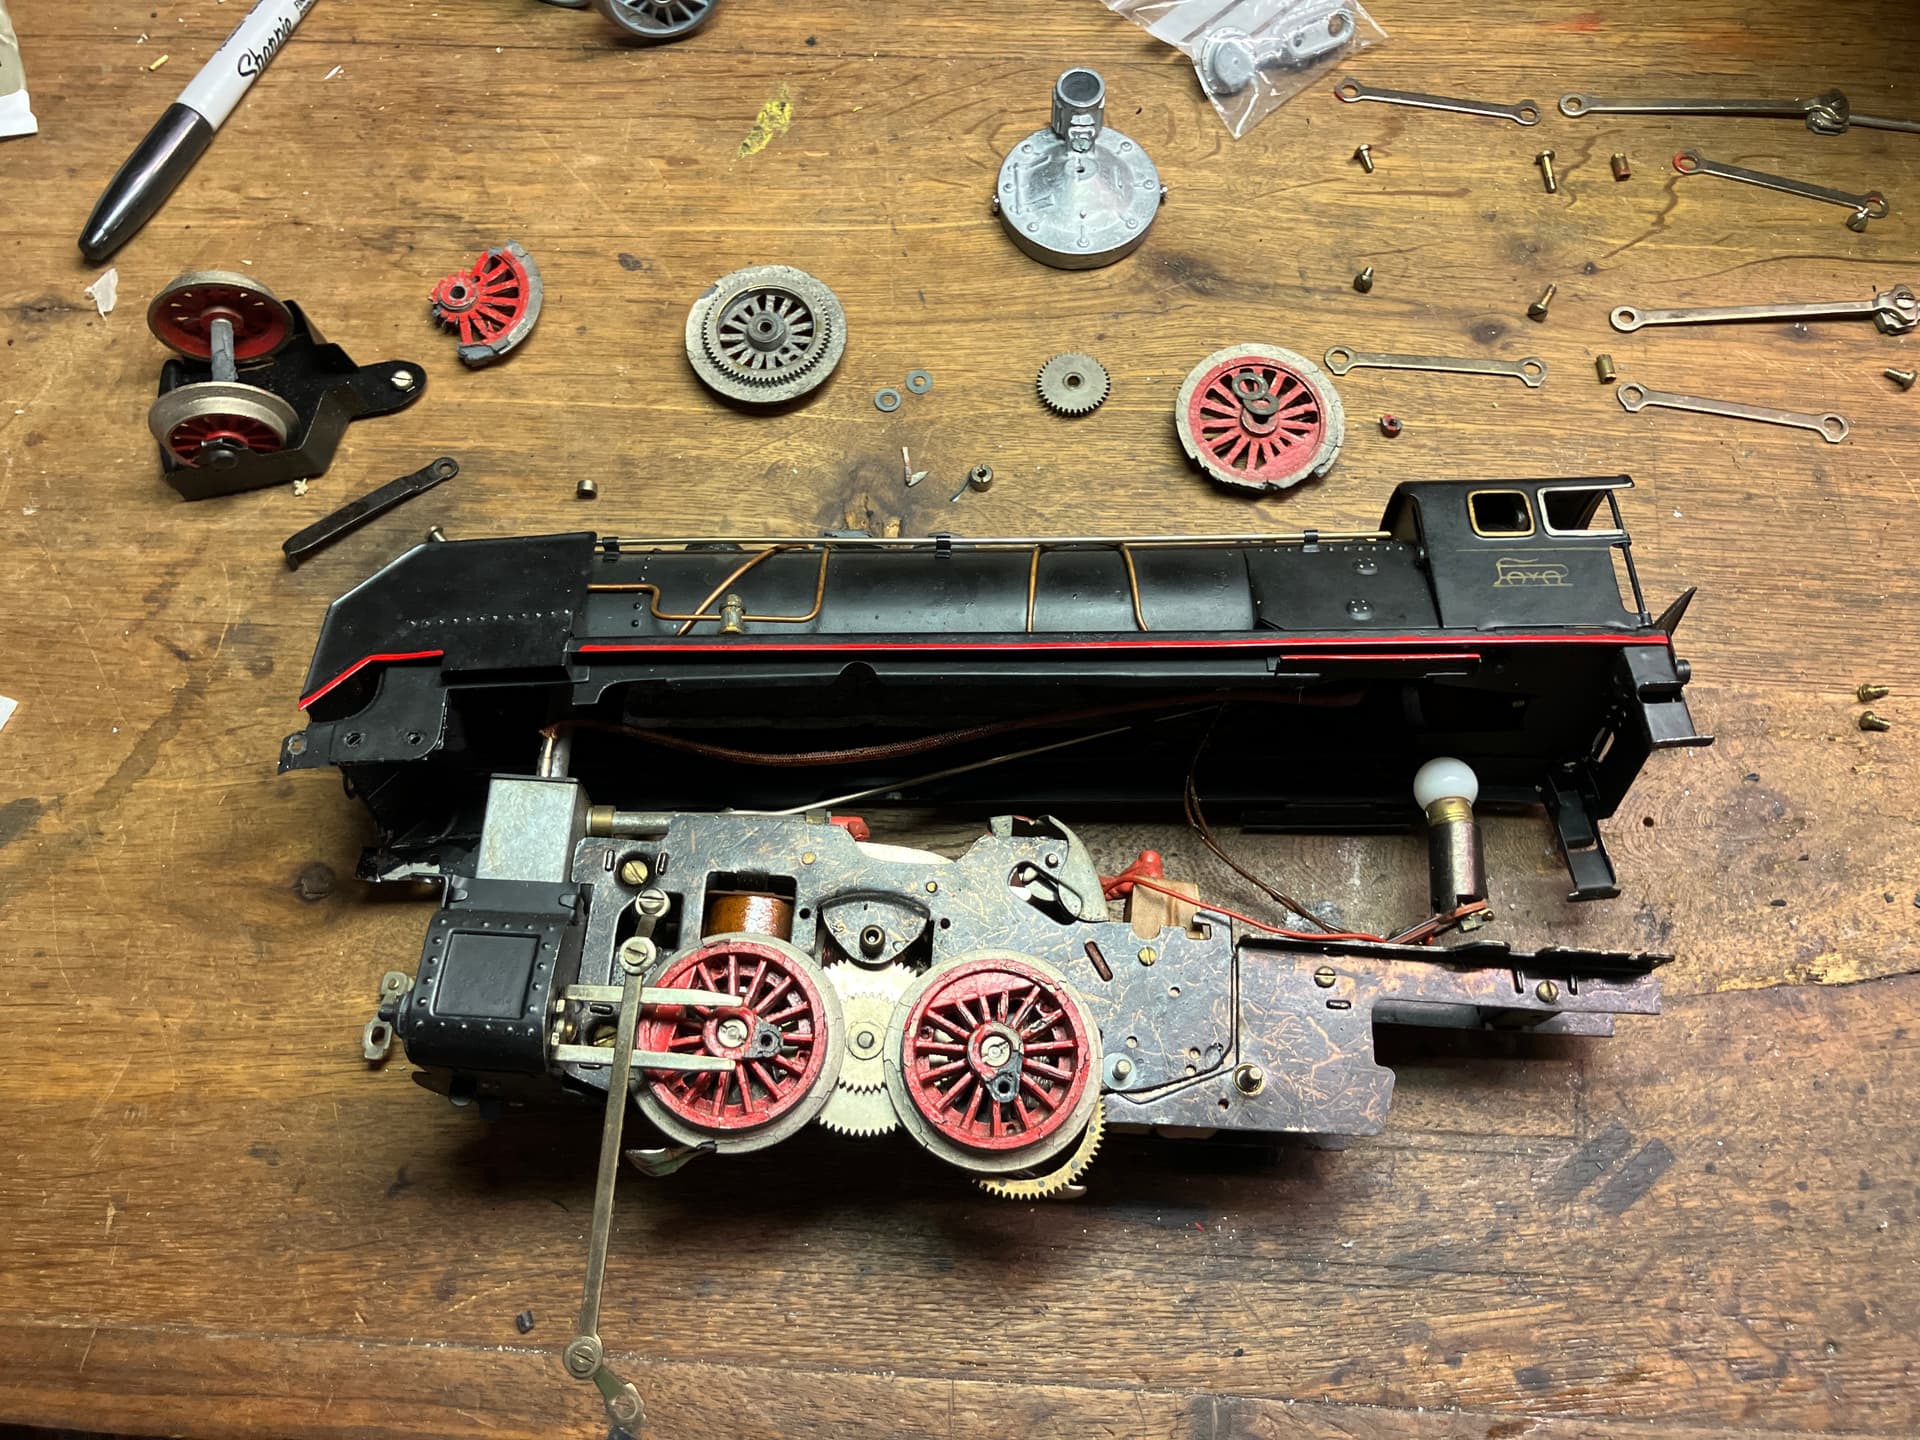
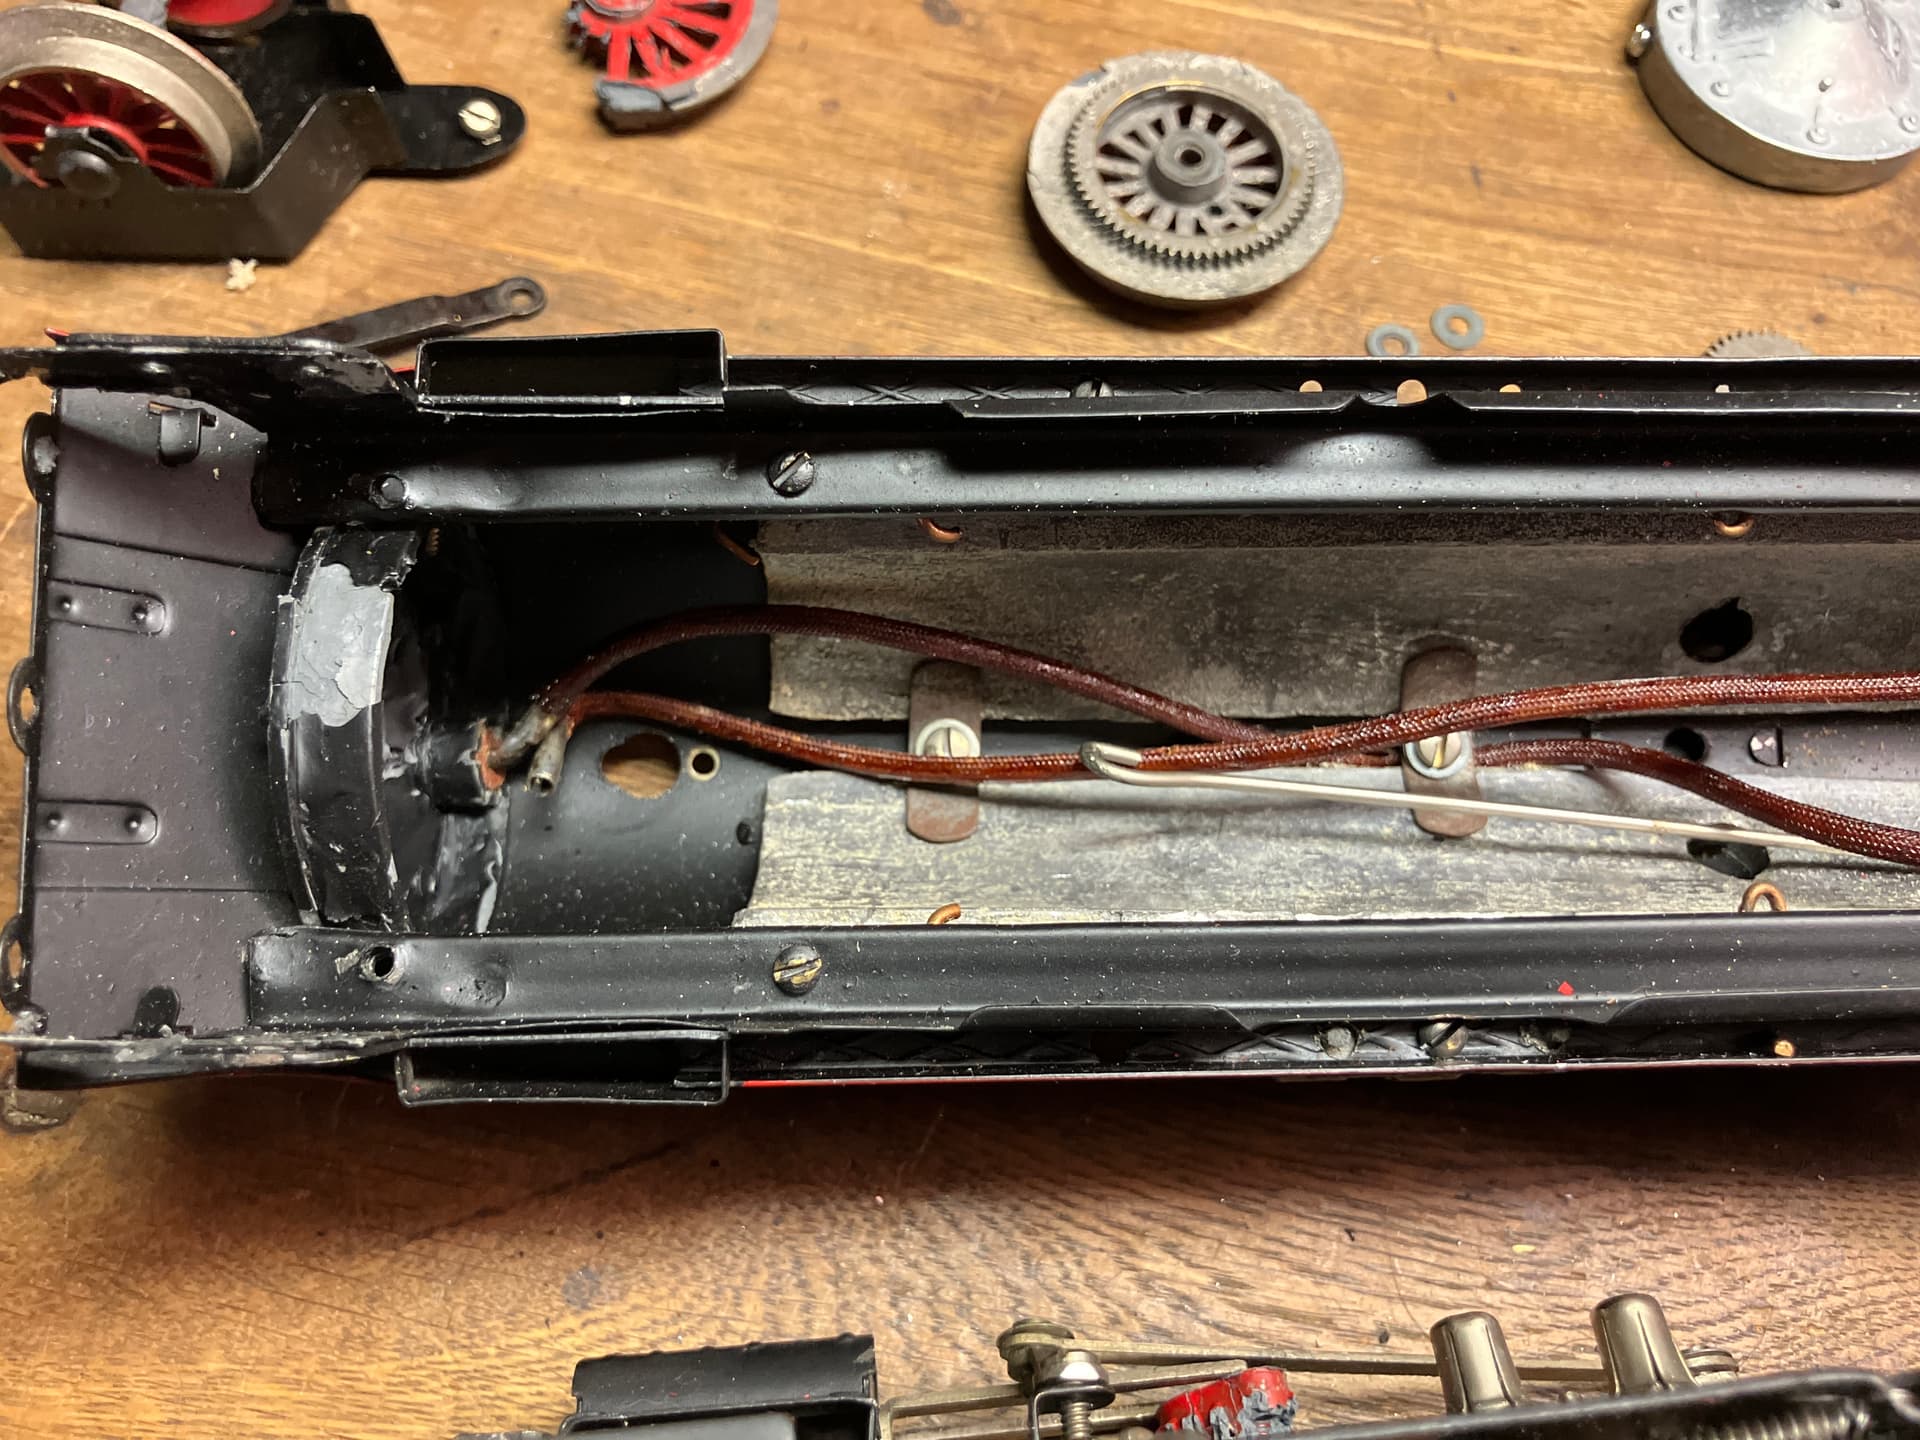
A look inside revealed that the rubber hose for the smoke bellows had melted and made a mess, but otherwise things looked pretty good:
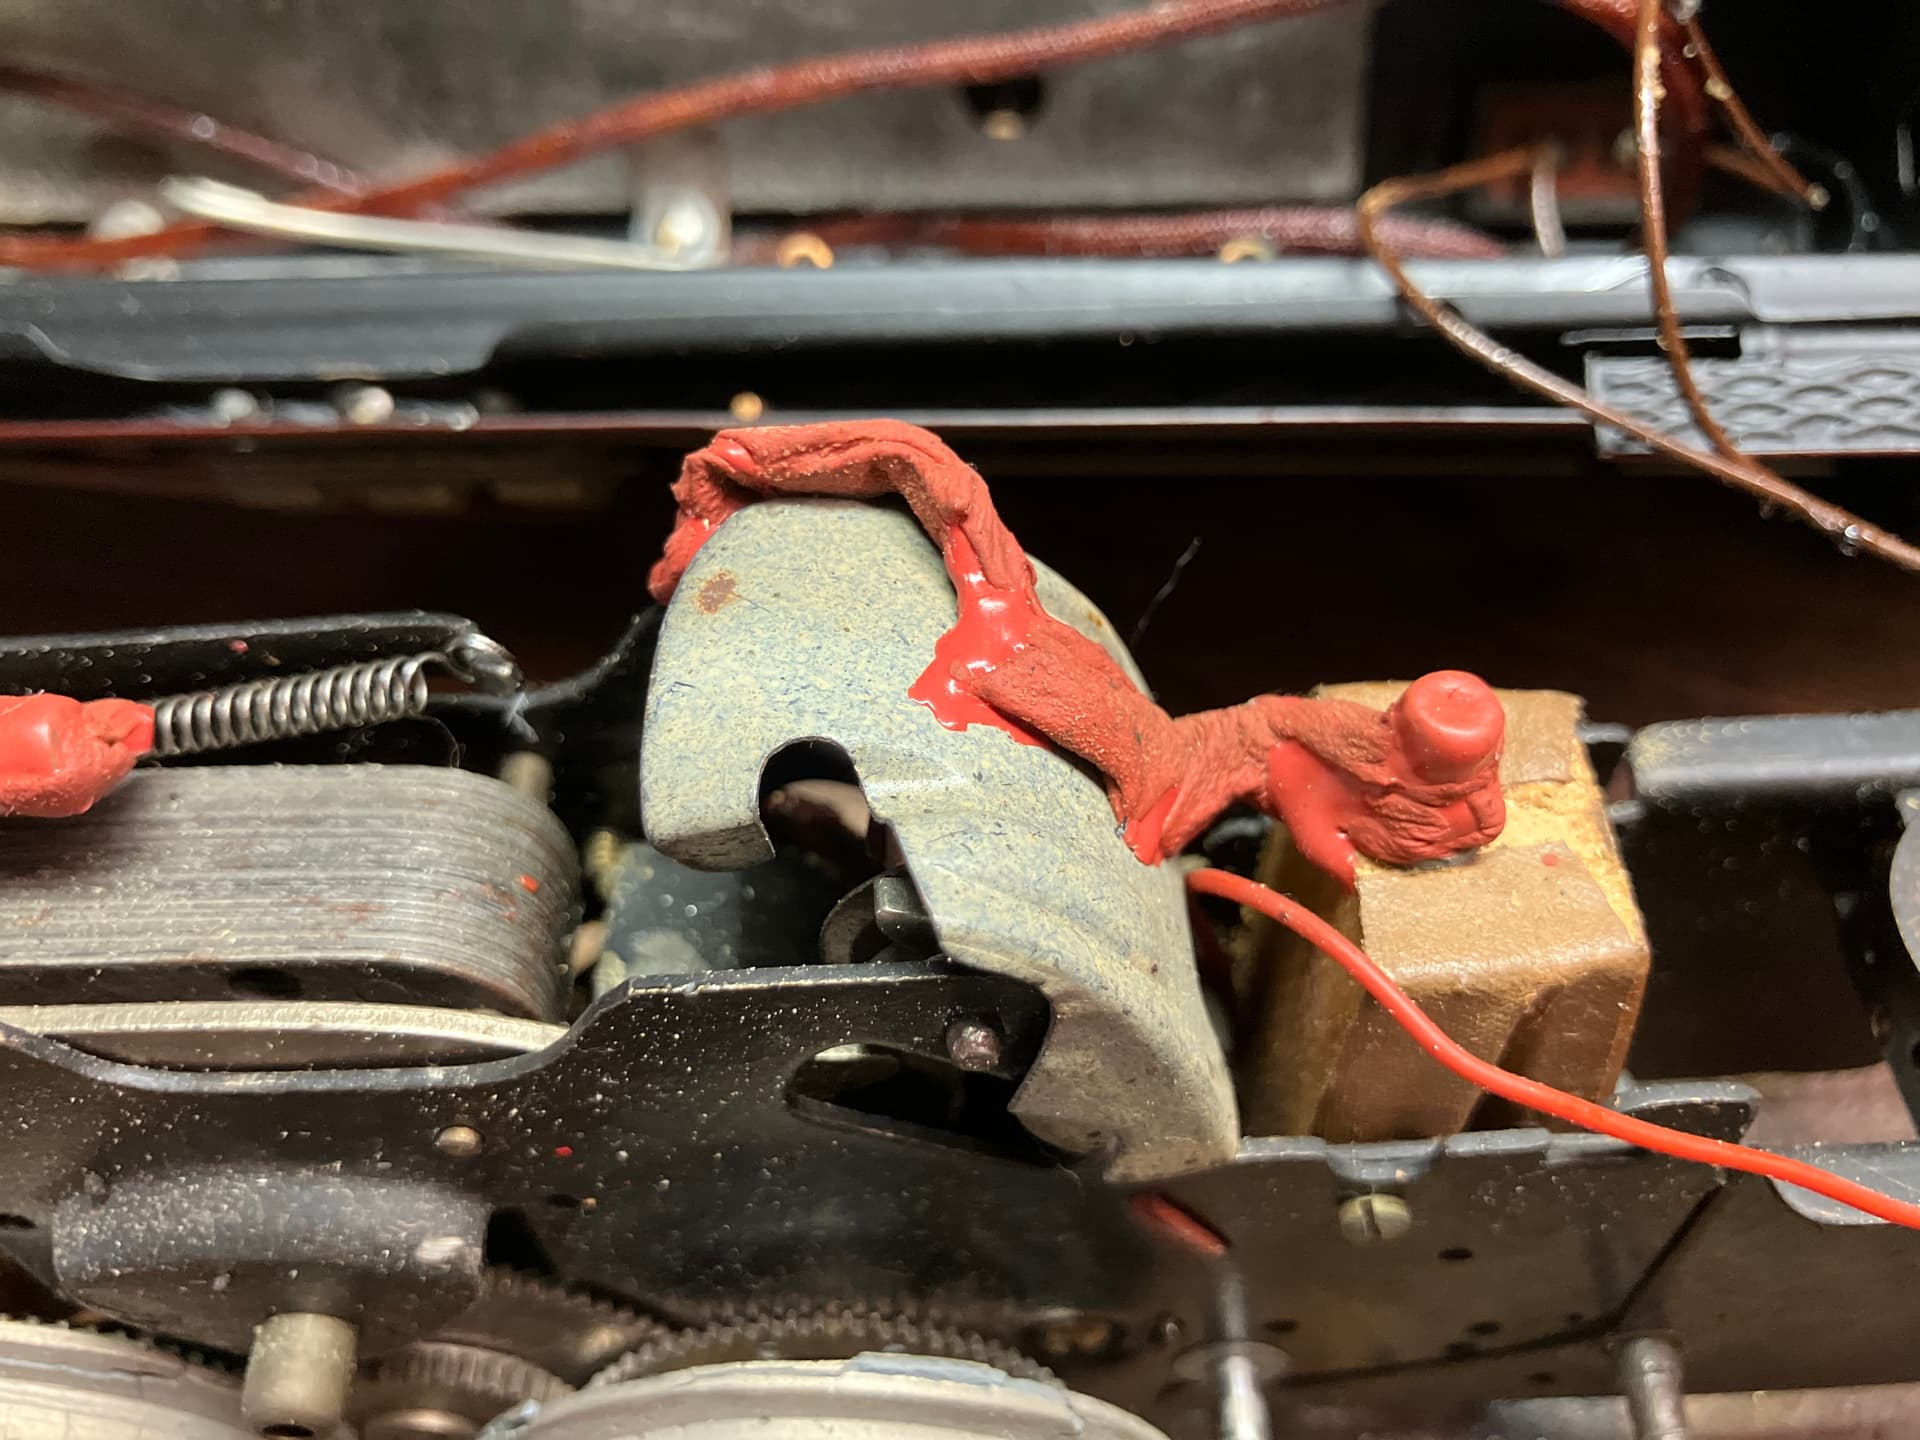
Similar to Lionel’s ‘scout’ motor (later revised and used on budget steamers in the late '50s and the 1960s), the Paya Santa Fe has a reverse unit that is integral to the motor, and makes use of a portion of the motor field to index the reverse unit. Like the Lionel motor, it is locked out mechanically via a special lever for that purpose. That is where the similarities end, though!
Here is a look at the shield/dust cover for the reversing drum. It has 4 indexable positions, and alternates the locomotive between forward and reverse. Unfortunately, any locomotive that uses the motor field as part of the reversing mechanism cannot have a neutral position.
Here is a look at the drum, with the shield removed:
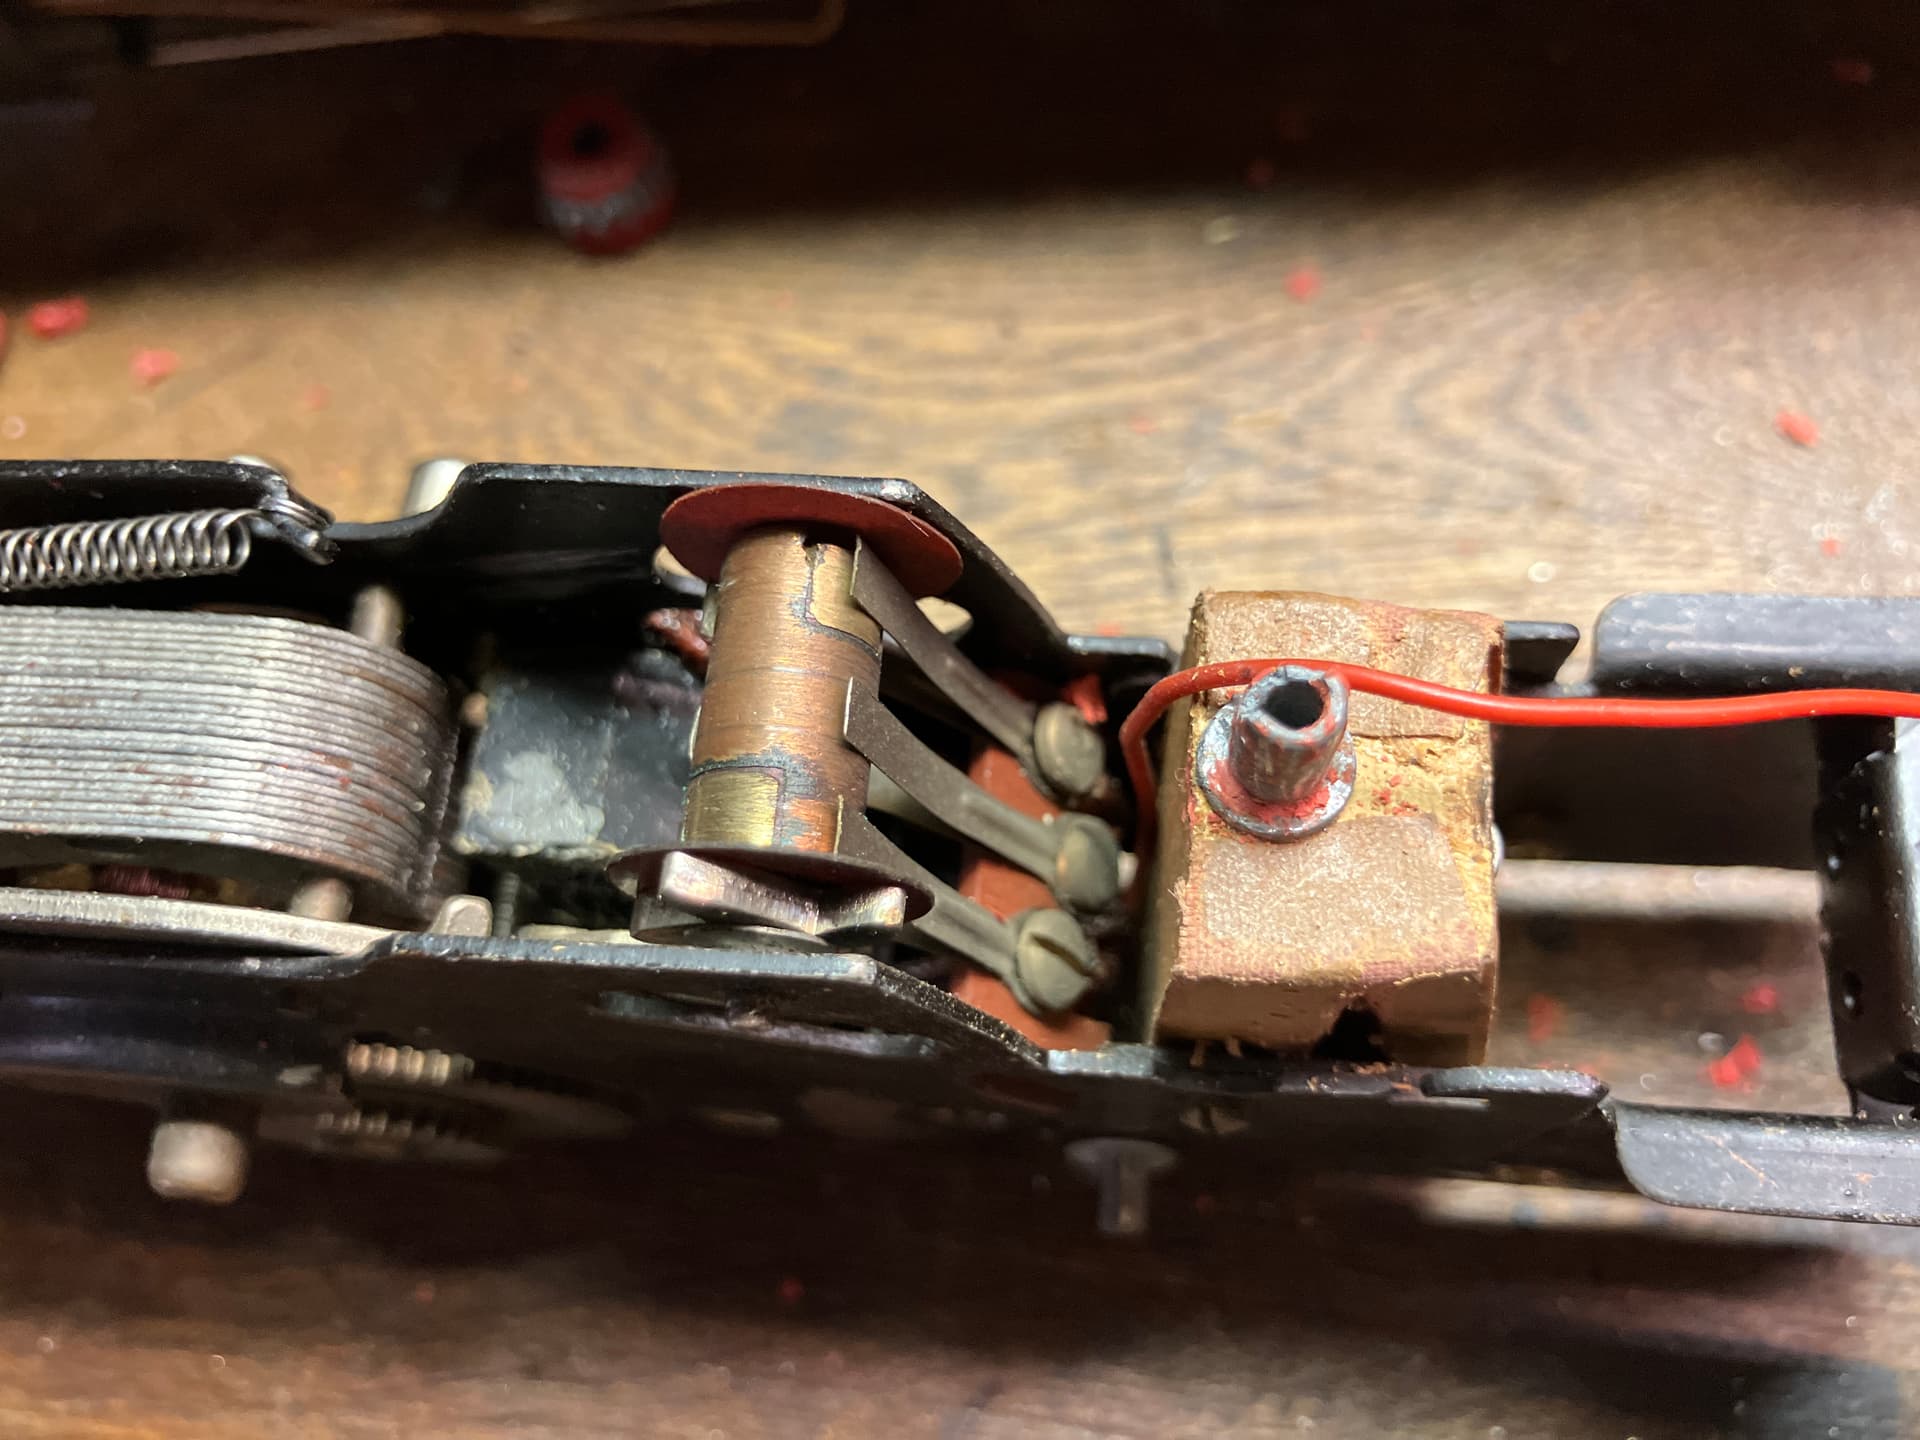
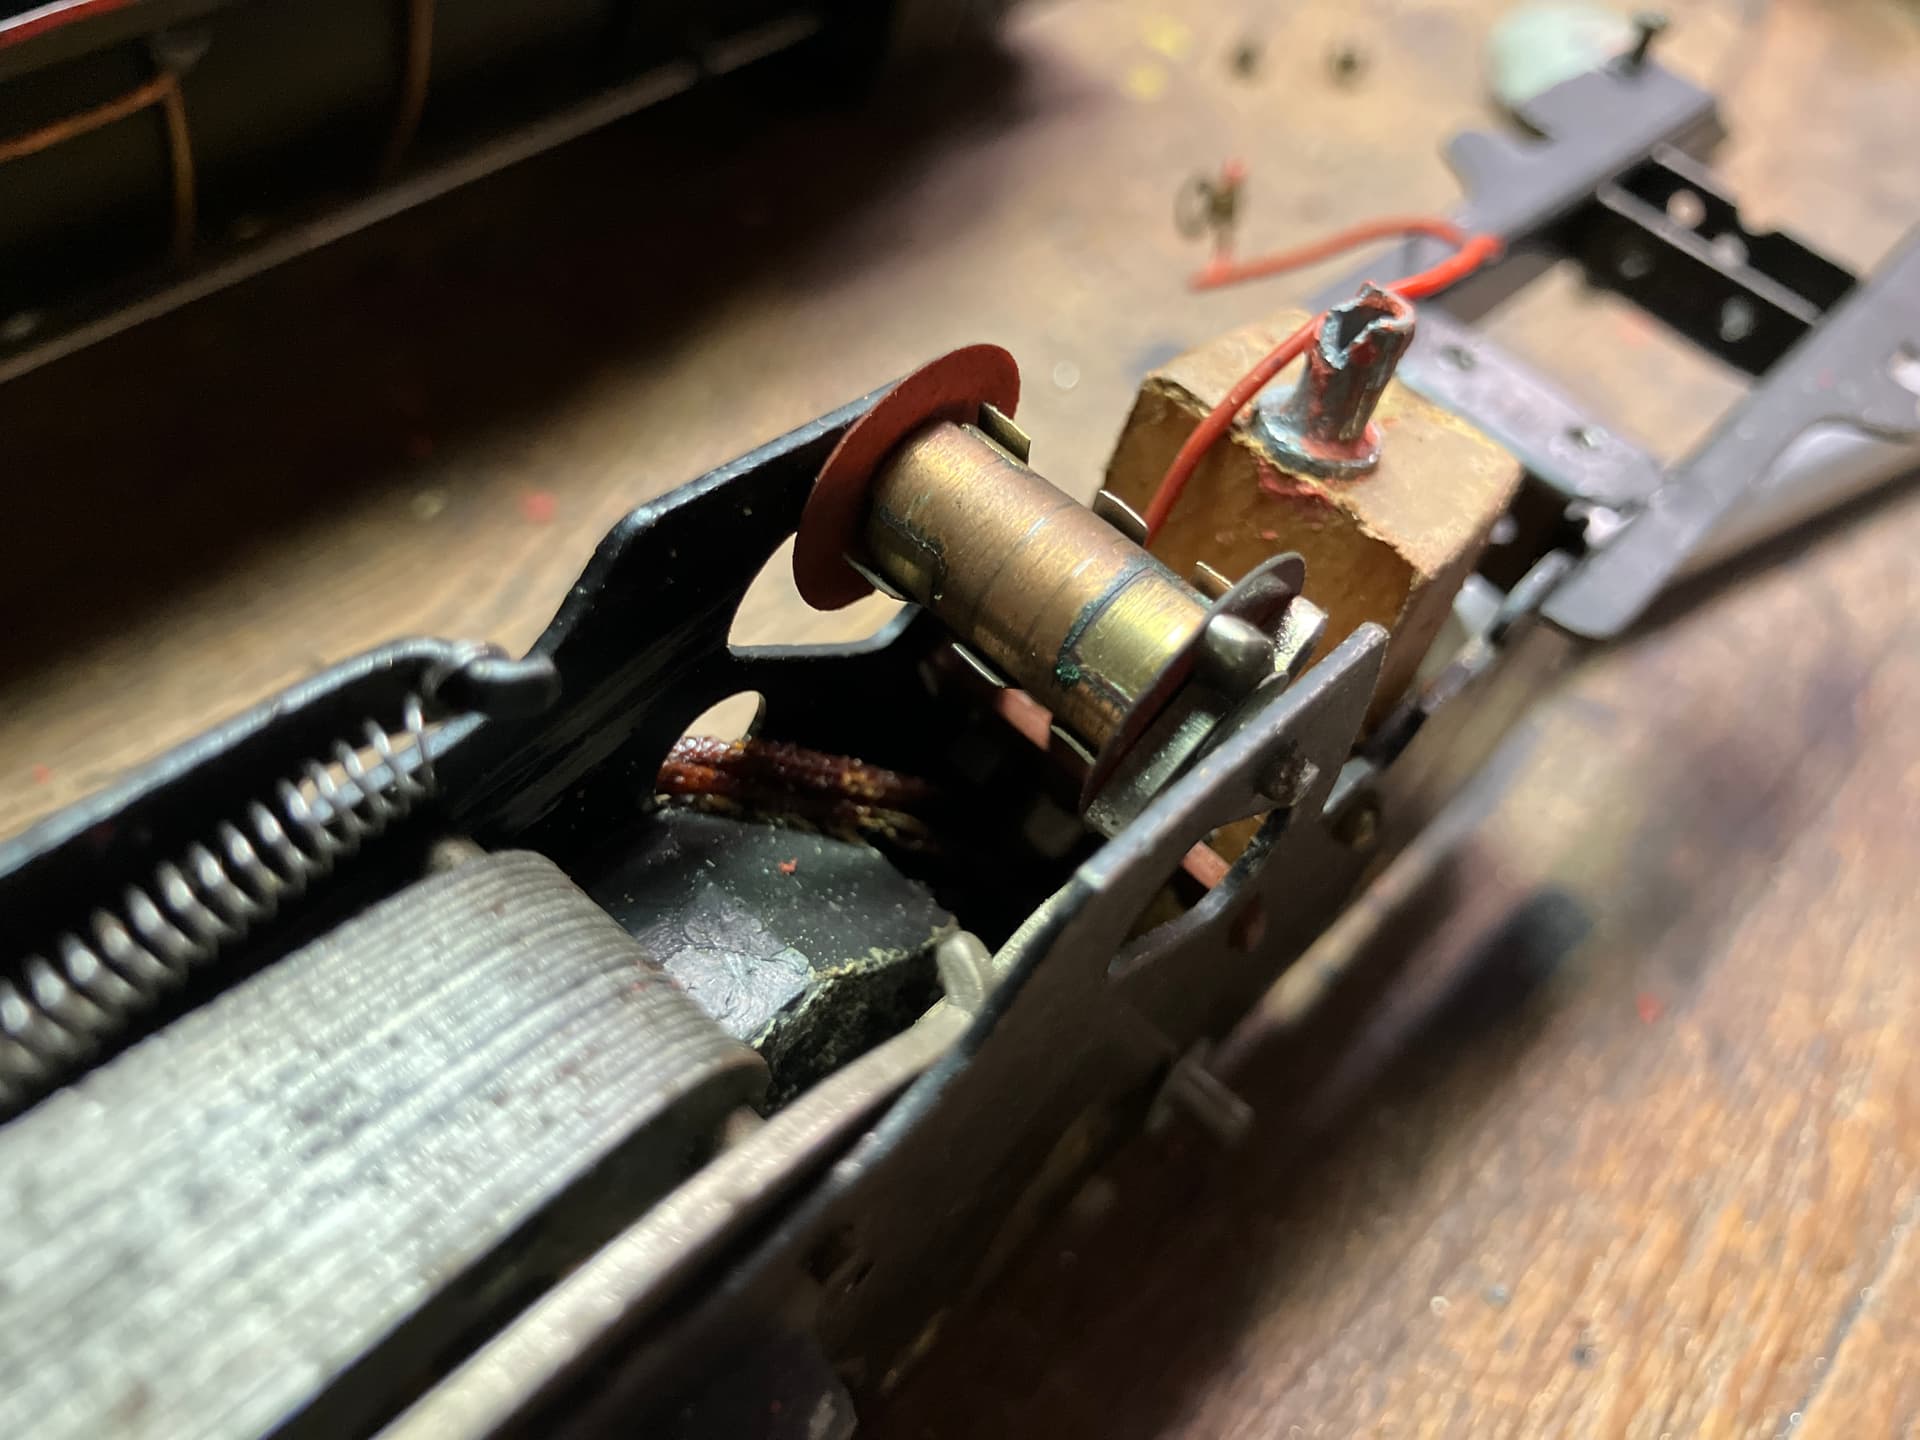
I think a cleaning is in order, but it doesn’t look bad at all!
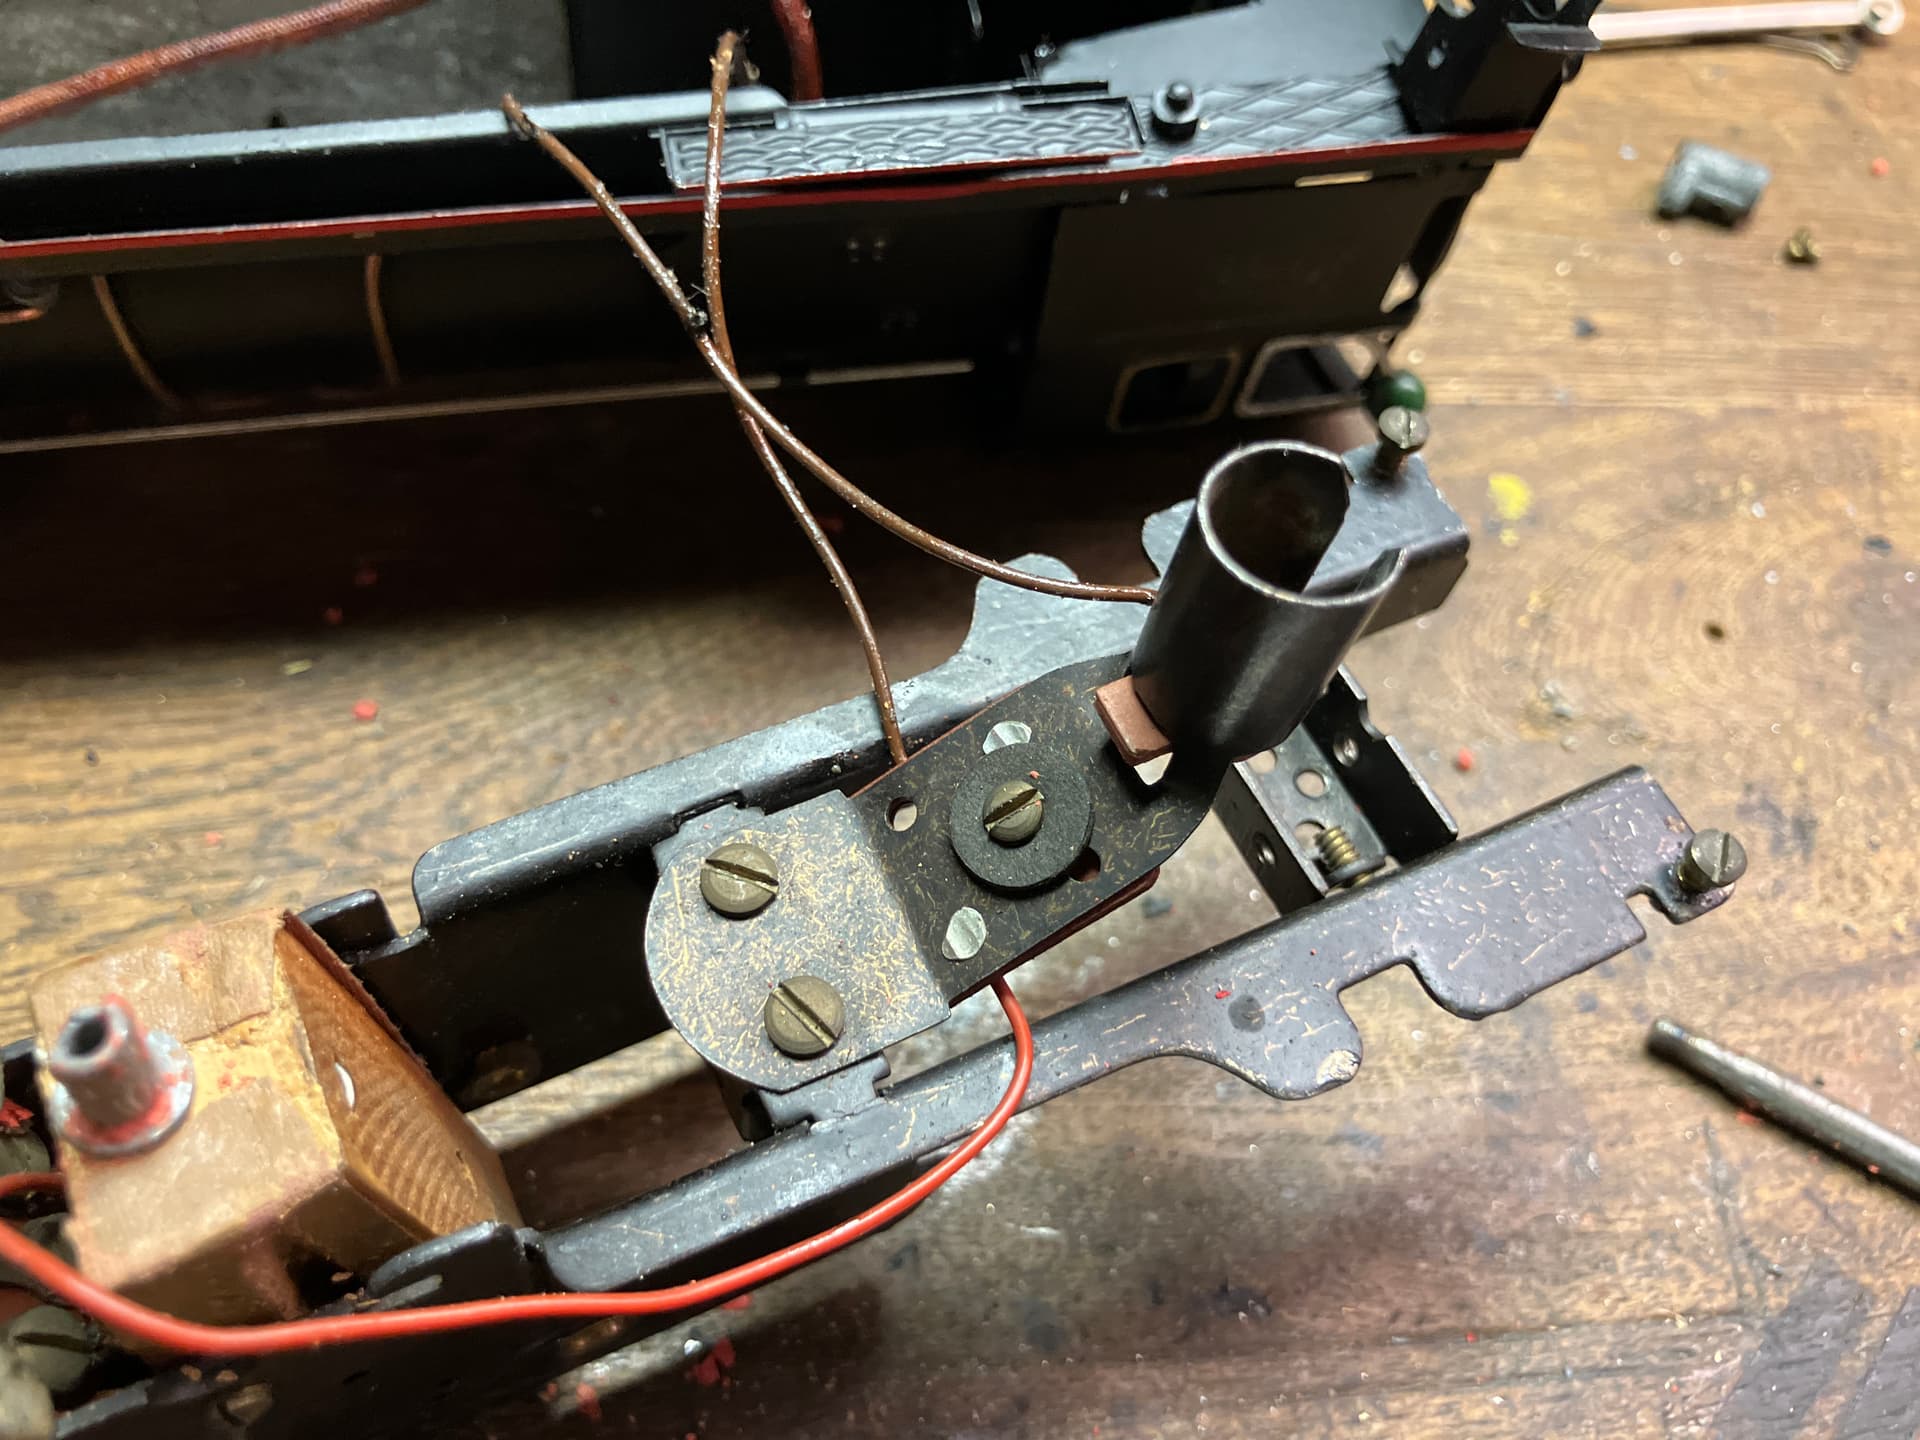
This bracket holds the light bulb for the firebox glow. There is a sprung contact in the socket, but no threads. Instead, a circular divet in the top of the firebox holds the bulb in place from the top, once it is assembled. A frosted white bulb was used, with red cellophane placed over the firebox door. I think I will swap it for a red bulb.
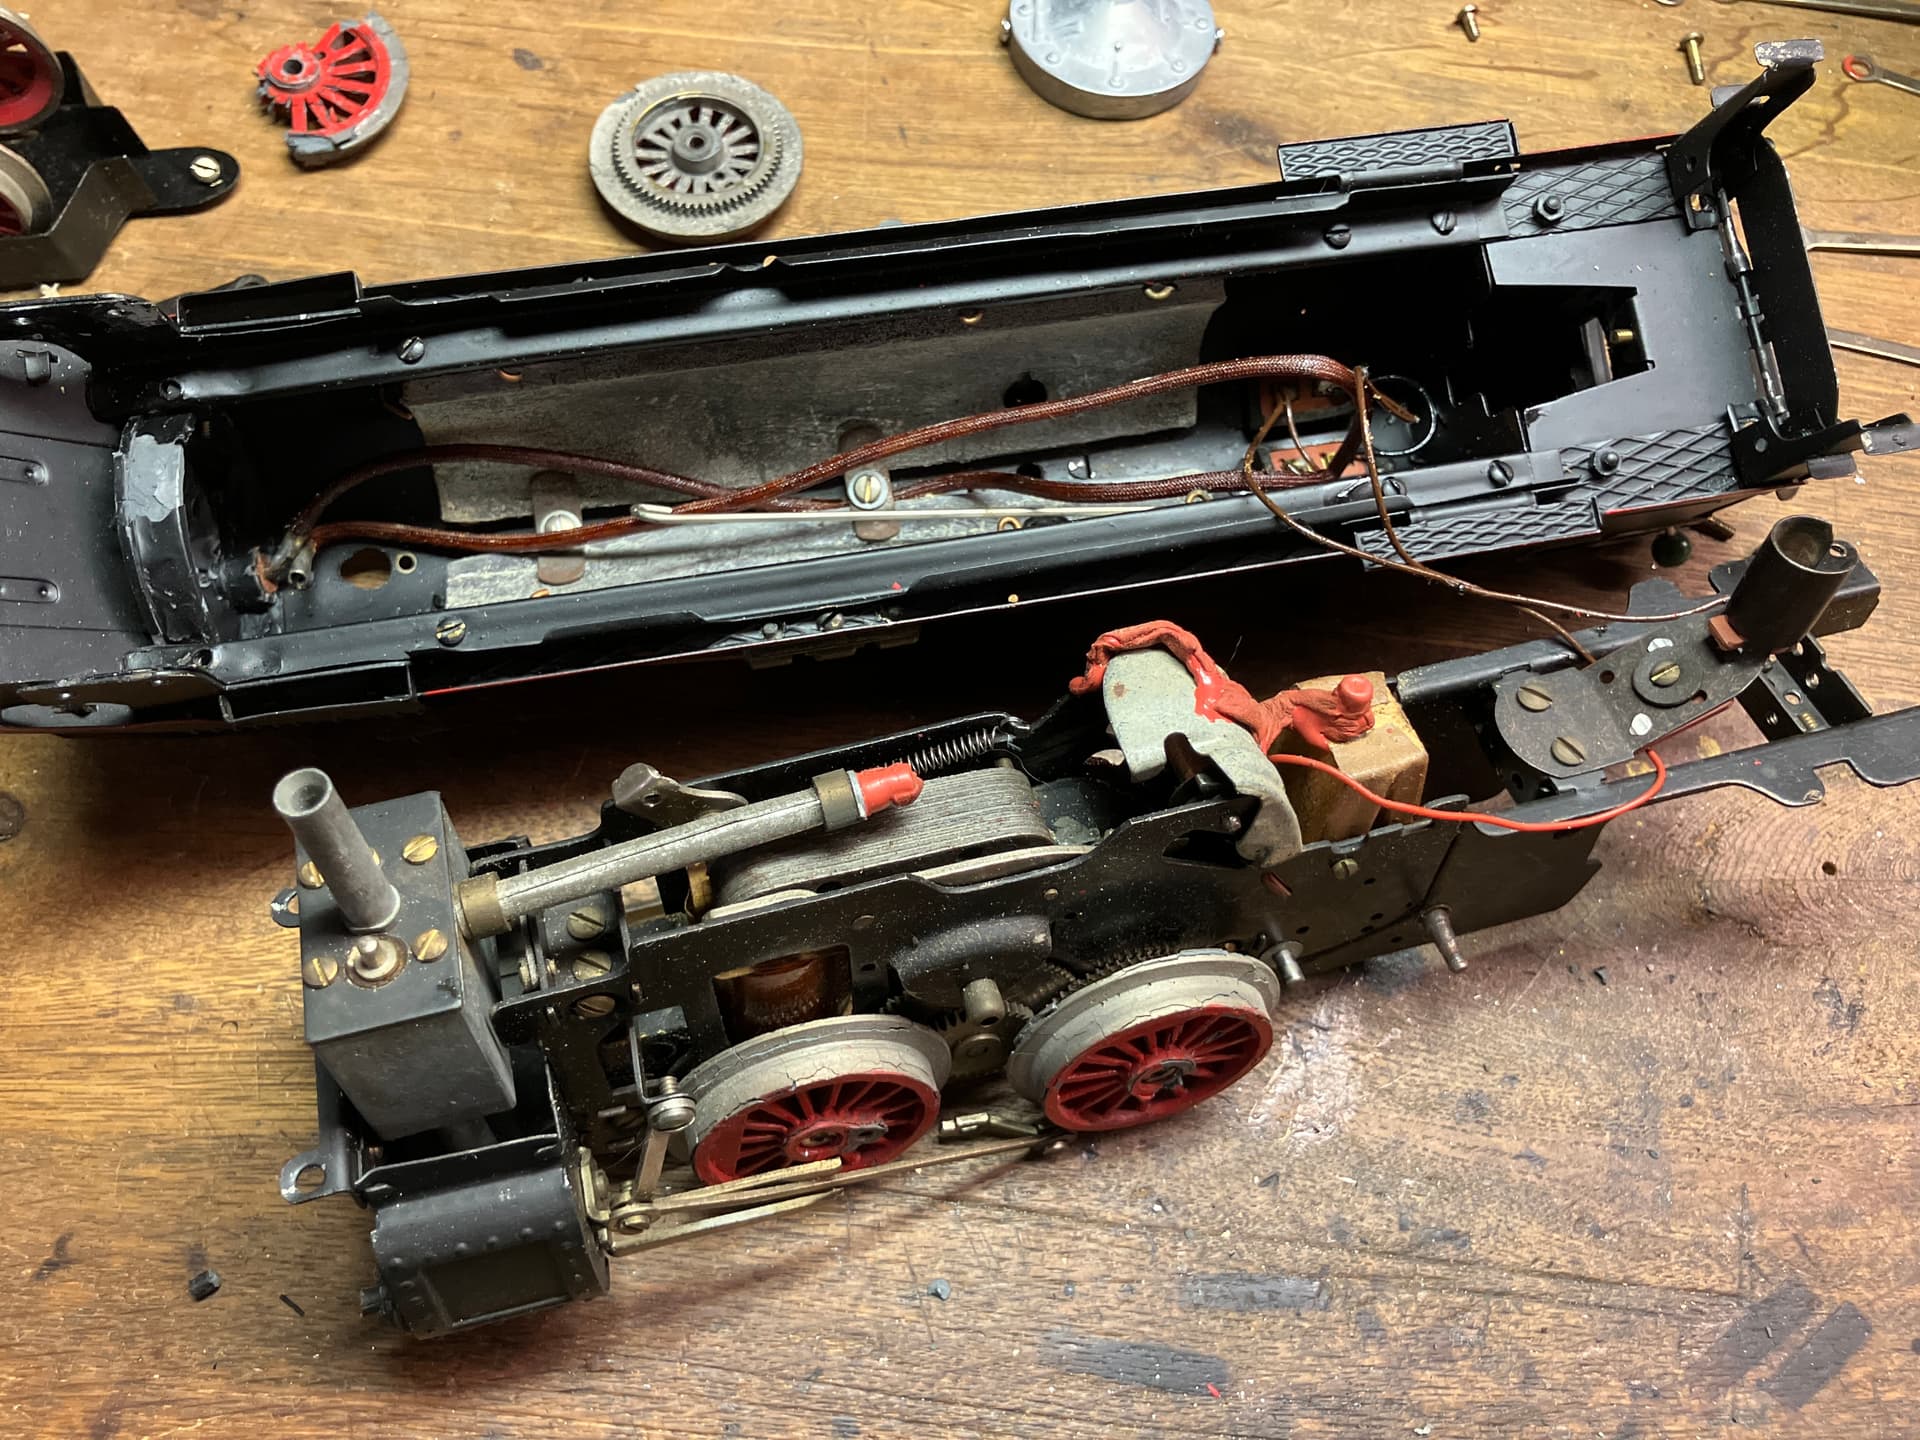
A slightly closer look at the inside of the shell. The two cloth insulated wires run from the cut out switches near the cab- one is for the headlight, the other is for the smoke unit. Note the two large lead weights which help contribute to this model’s immense heft. The screws that hold them in place (via brackets) also hold down the smoke stack and dome castings for the boiler.
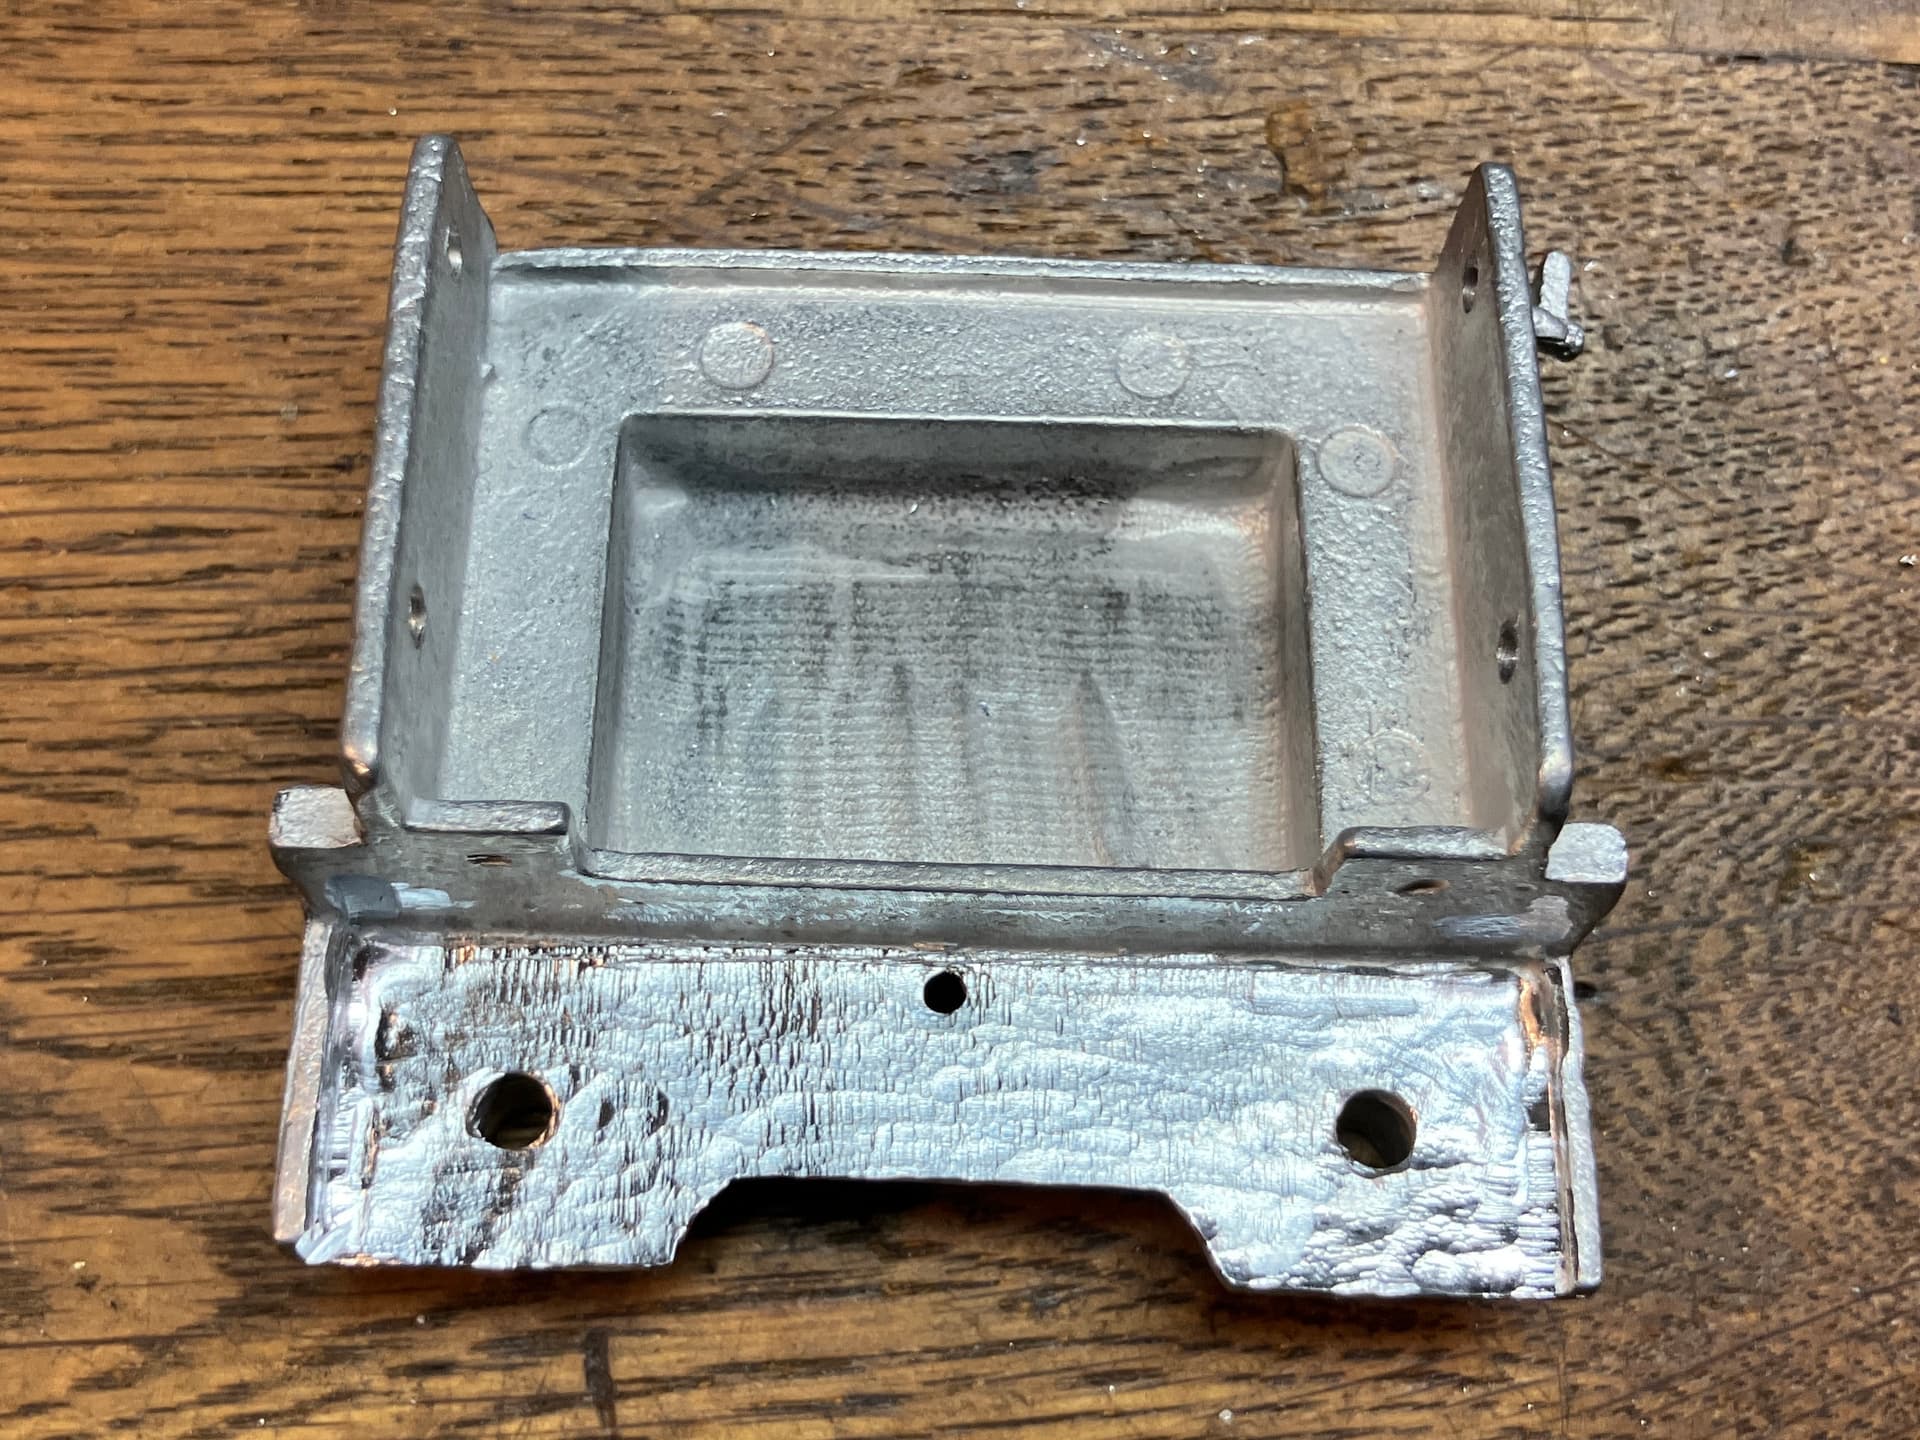
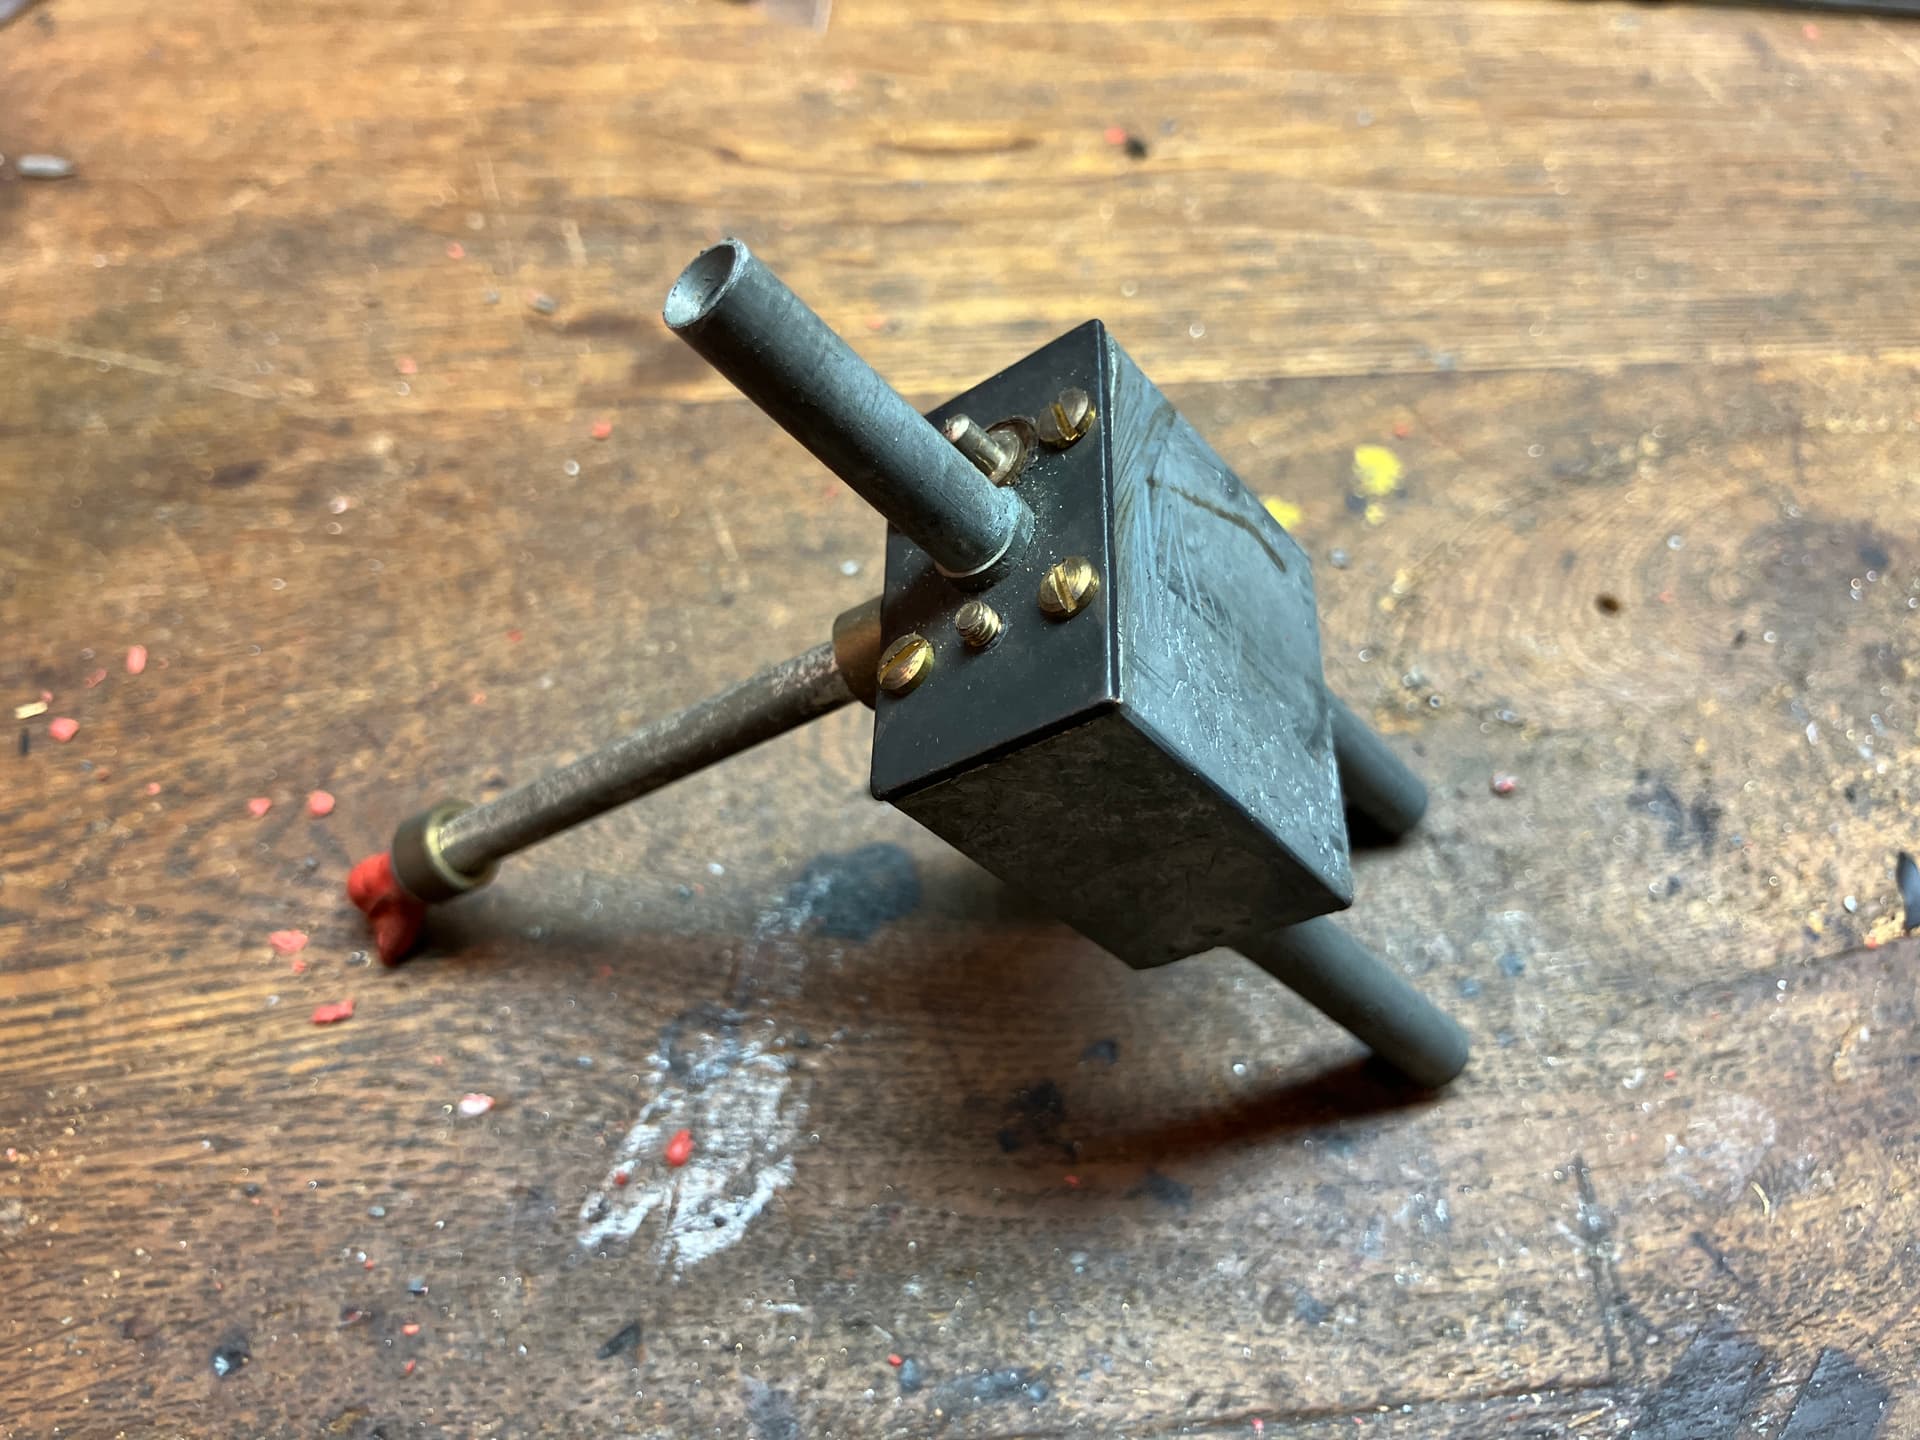
Here’s a picture of the smoke unit itself. By some incredible stroke of luck, the casting appears completely zinc pest free. A huge relief, as replacements do not appear to be available. It is quite tall, standing about 4" from the bottom of the ‘feet’ to the top of the exhaust stack.
The most exciting part of the teardown was easily when I spotted some text on the bellows, and decided to remove them and see what they said.
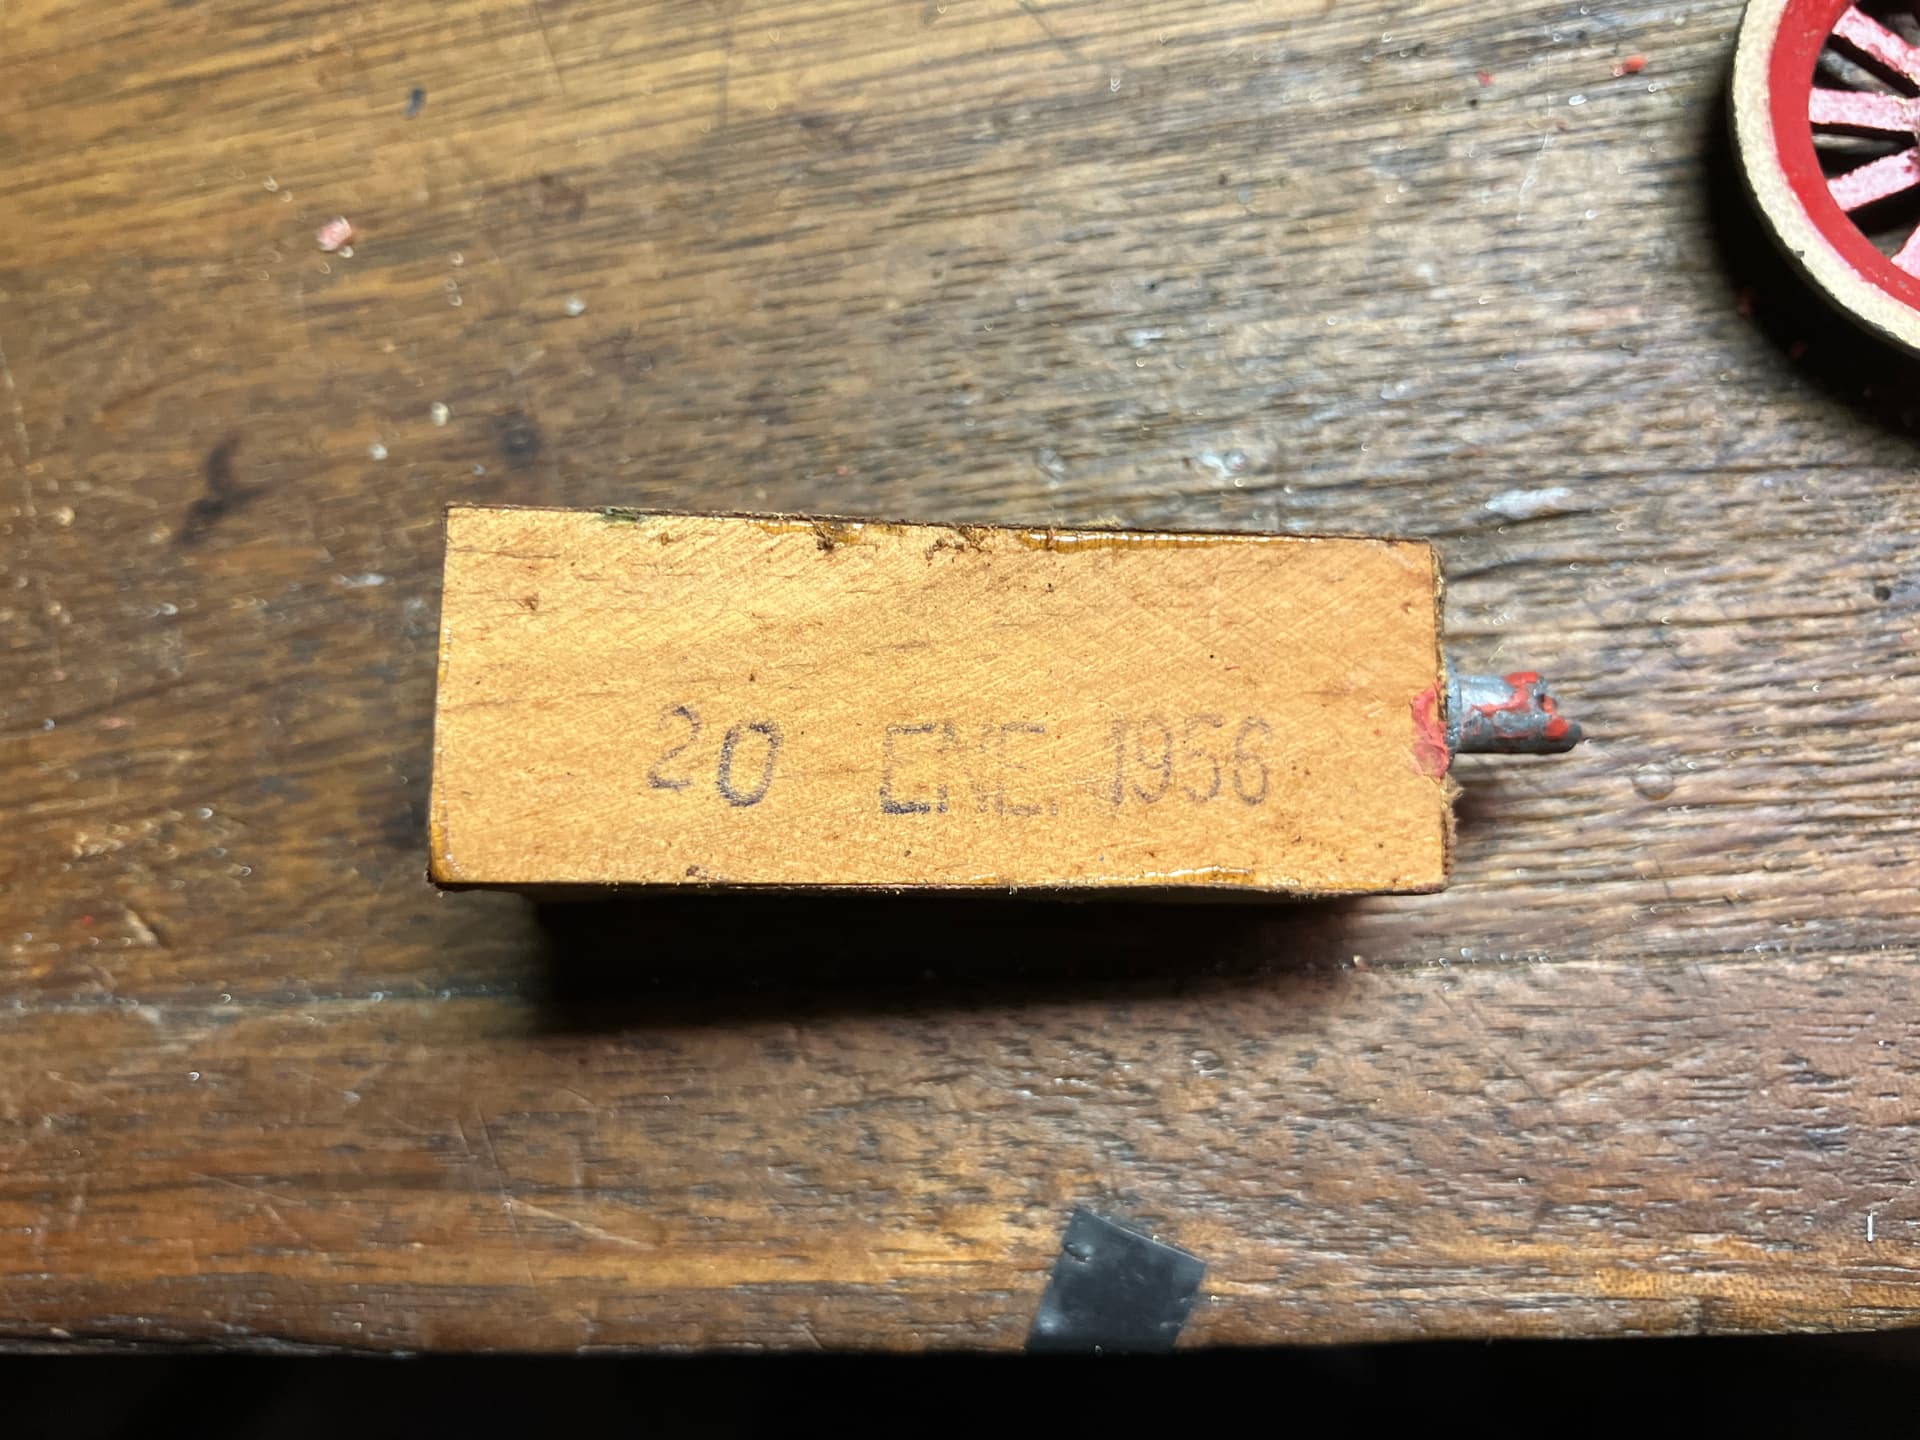
My first thought was “Hey, this looks like a date! But is it?”
It reads
20 ENE. 1956. I looked it up, and was able to confirm that ‘Ene.’ is a common abbreviation for Enero- in the states, we call it ‘January’. So yes, it is a date! January 20th, 1956. I suppose we can’t know if this is just when the bellows were produced, or when the whole model was made, but either way it does give an idea of when the model is from. Most Paya models in the US, as far as I know, are reproductions from the 1980s and 1990s, so it’s especially cool to know I have an original.
I wrapped up my work for the day doing some test fitting of the reproduction wheels. It really feels great to see some wheels back on, and for them to actually turn!
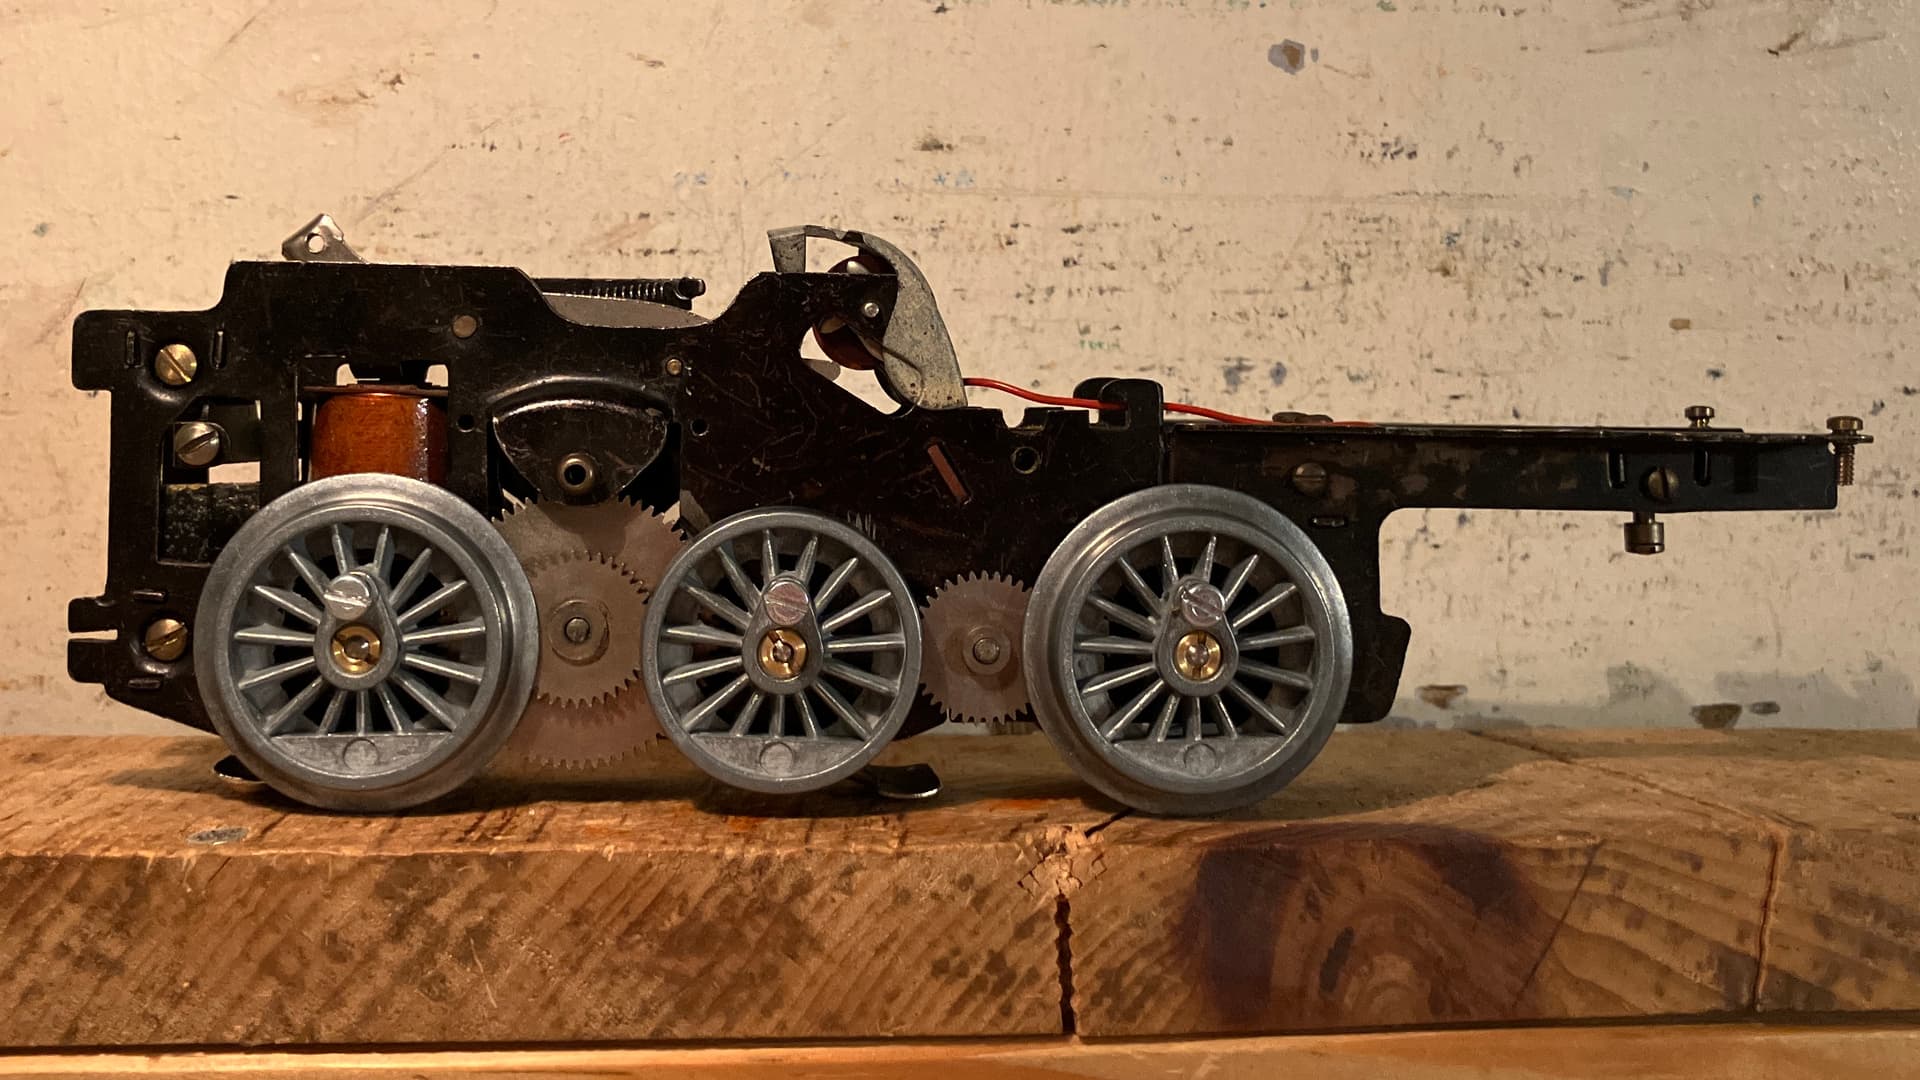
I still have some tweaking to do- they aren’t turning quite as perfectly smooth as I want, but the source of the problem seems to be some slight wheel wobble that I don’t think I have any hope of eliminating. Maybe it can be solved by playing around more with shimming the drivers.
Anyhow, that’s all for the latest progress report. I thought people would enjoy seeing inside this one along with me. I am very impressed and pleased with the craftsmanship of the model, and have a much greater appreciation for it now I’ve seen and felt for myself everything that is ‘under the hood’. Stay tuned for more progress!
-El
6 Likes
Ellie the thought just hit me. (OW! THAT HURT!)
Considering the outstanding way you’re documenting the restoration with words and images you might just have the makings of an article Classic Toy Trains might be interested in.
Keep doing what you’re doing and don’t lose the images!
Anyone else have thoughts along this line?
1 Like
Yes. That or its own thread.
1 Like
As an example of careful restoration of non-domestic equipment – definitely interesting.
2 Likes
El_Fixes_Things - it’s interesting to see the center set of replacement wheels are blind. I’m sure that will allow the restored engine to negotiate sharper curves. One additional item - I suspect the gearing on the center set is going to require the use of non-Lionel switches - of course, the gear could be thin enough so that this won’t matter.
1 Like
Mersenne- the CGA wheels normally come with flanges, like the originals did. However, the seller I bought mine from also offers wheelsets that I believe he (or someone else) has machined the flanges off of. Examining the wheels shows quite clearly a change in finish where the flange was, and now is not.
As for the gears, the gears on the wheelsets do not extend past the tread of the wheel, and the gearing is not very thick (about 2mm wide I think?). I have a single Lionel O72 switch somewhere, I will have to see what the chassis thinks of it. The chassis is far too long to tolerate O-31 switches or curves. I don’t think it will tolerate anything much sharper than O-72.
-El
1 Like
Unfortunately, I was occupied with other things today (including servicing a new addition to the collection!) and did not make much progress with the Santa Fe. The only real progress I made was to clean the commutator and brushes for the motor, and give it a test on some track.
I was pleasantly surprised to find that the motor ran right off the bat! It certainly could use some lubrication, but I don’t want to add any until after the wheels get painted. The reversing unit seems to work quite well, I’m debating if I want to do any work to it or not.

I am contemplating if I should create a dedicated thread for this restoration project… but at the same time, I like that posting here keeps this thread active.
Maybe I’ll put it up to a reader’s vote- should I shift this over to a new thread, or carry on here? You Decide!
-El
4 Likes
I’d vote to stay put. I’d also follow the recommendation of one of the other posters that you give some thought to an eventual article for CTT. I’m sure you will have plenty of material to write an article which would include information not presented here.
2 Likes
I’d keep it here Ellie, it’s kind of like those “To Be Continued…” stories they used to put in magazines! ![]()
Then again, Charles Dickens got his start in exactly the same way! ![]()
1 Like
6 Likes
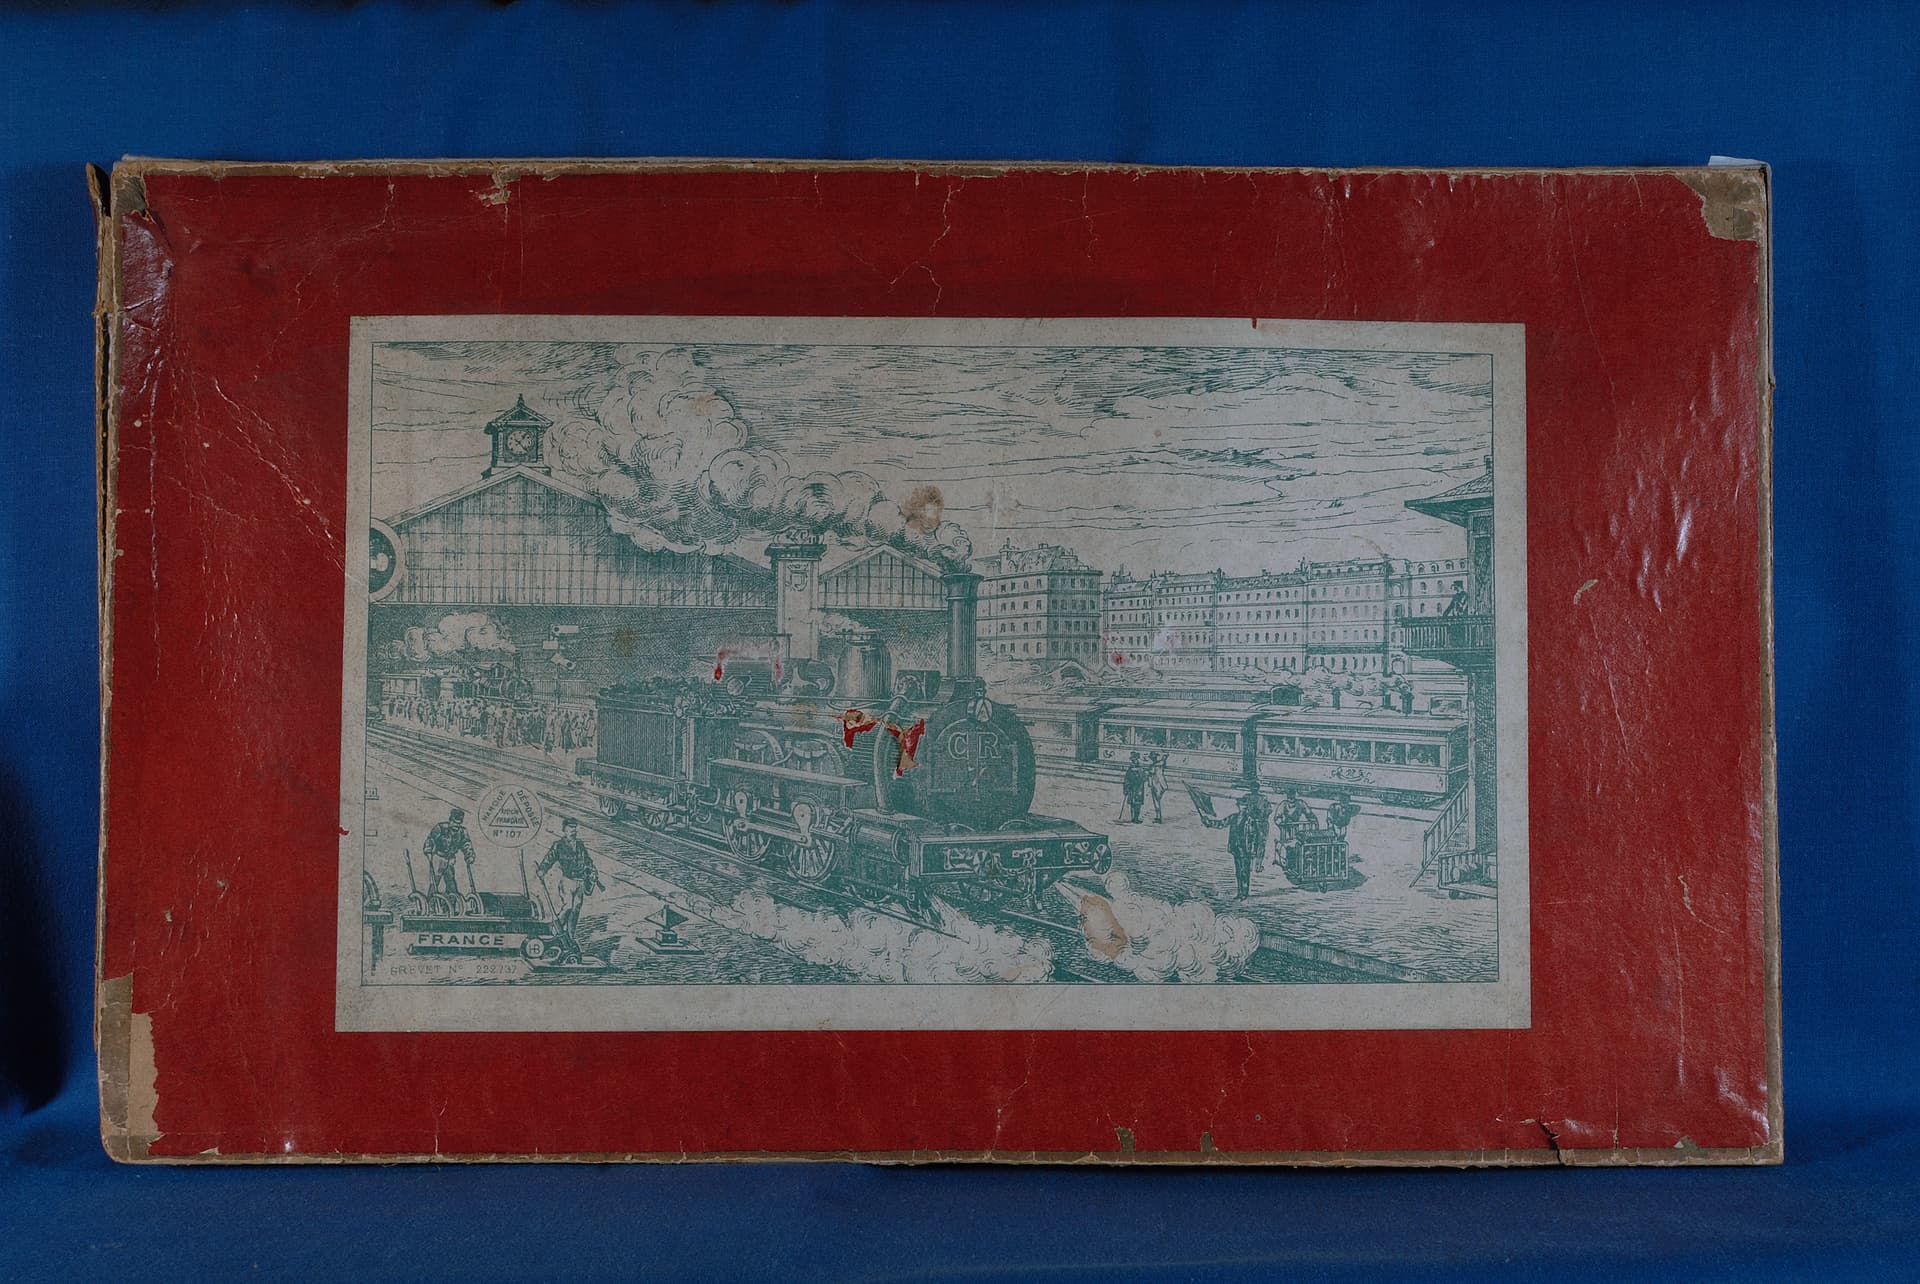
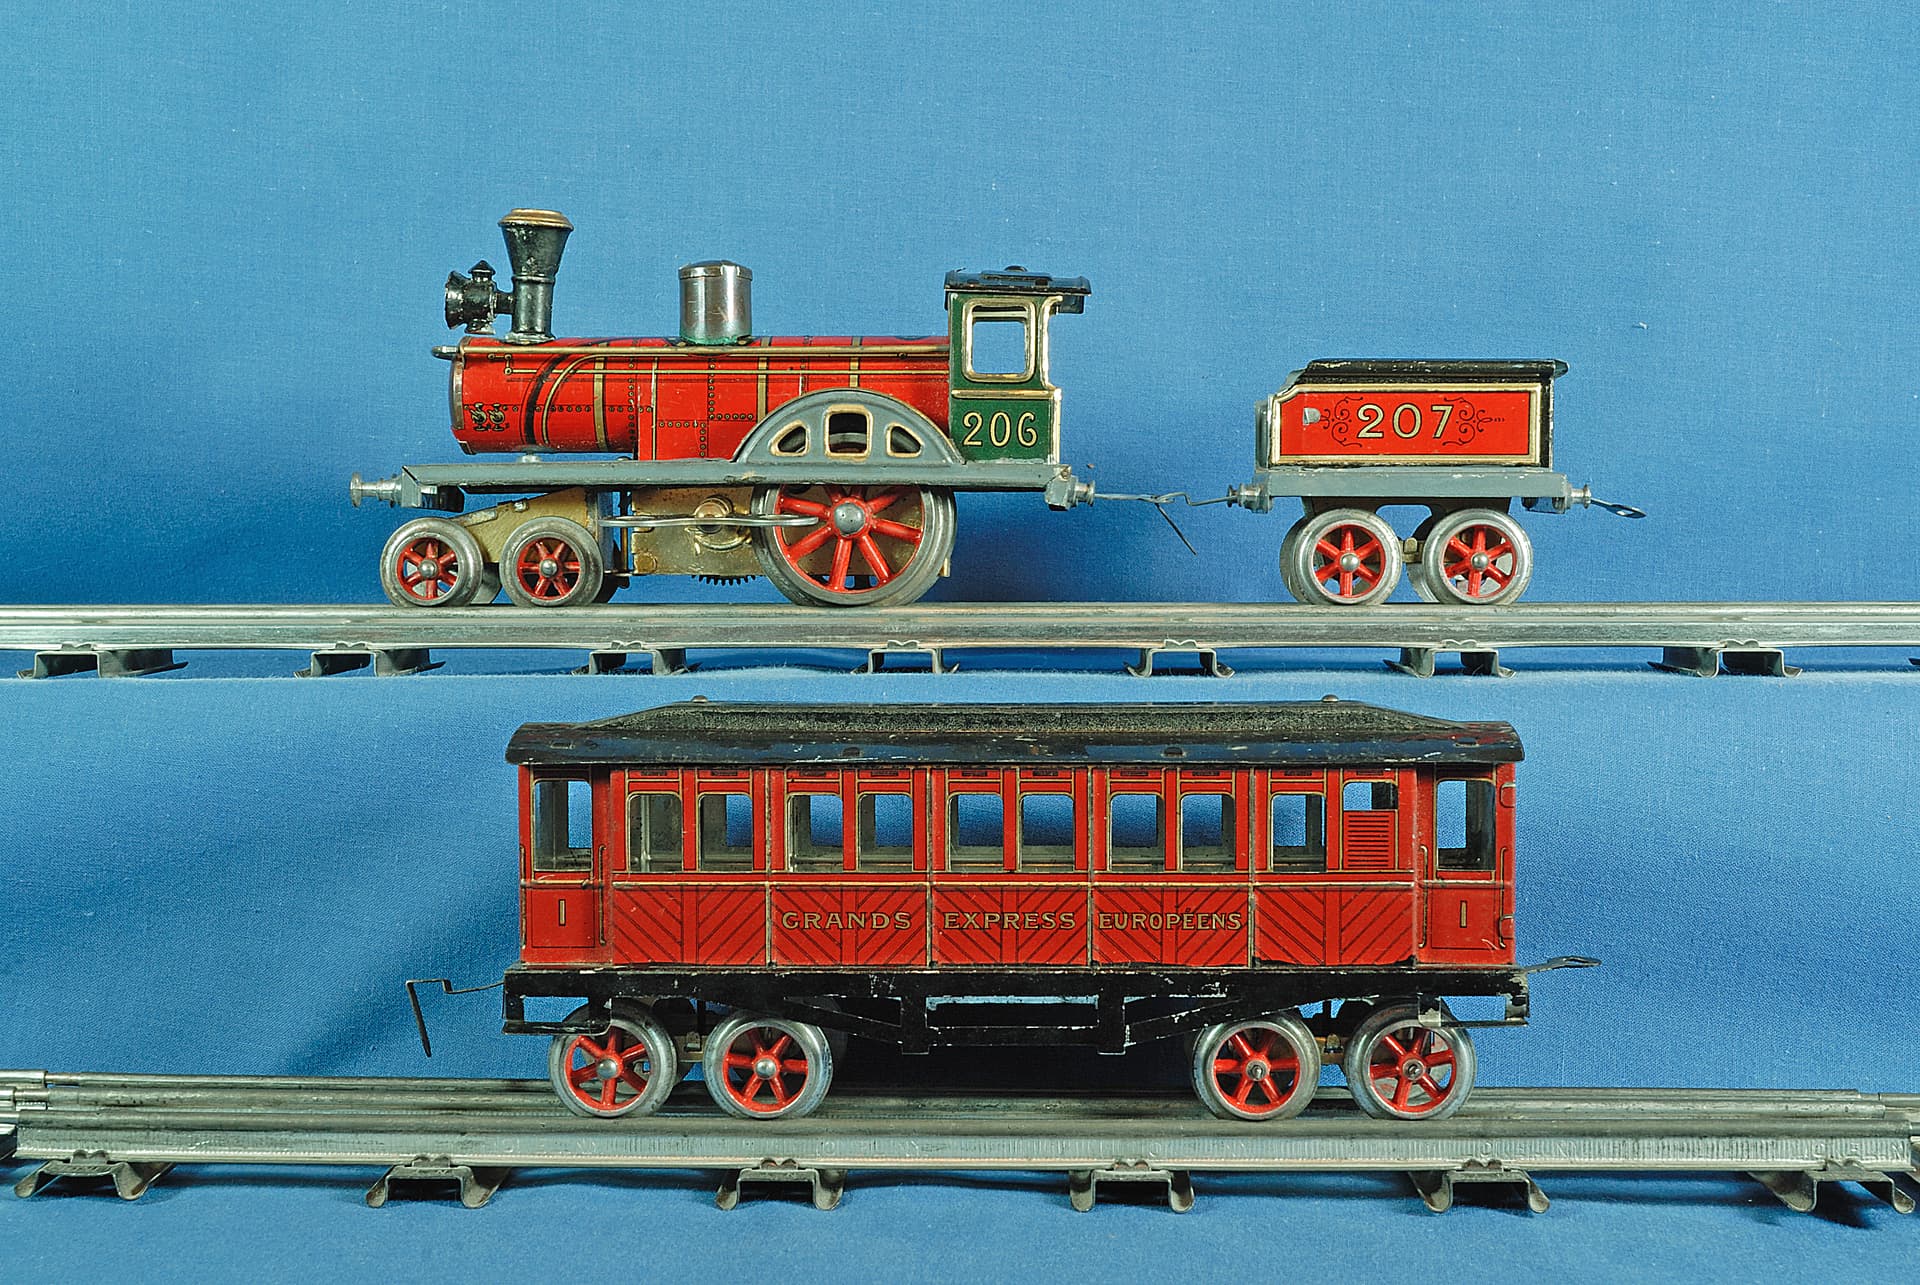
Love the lithography on this one! The details on the boiler are especially fun.
-El
1 Like