What I just found out about the link,although it is the manufacture’r of them,you have to do a search for them,I was looking at rolling step stools,put that in the search and it will bring them up…Look’s
to me like it may be a solution for you,it’s two step on hidden wheels built in to it,when you step on it,the base sits firmly on the floor,when not on it,it rolls out of the way,it said it supports 500lbs,but it is not big at all.
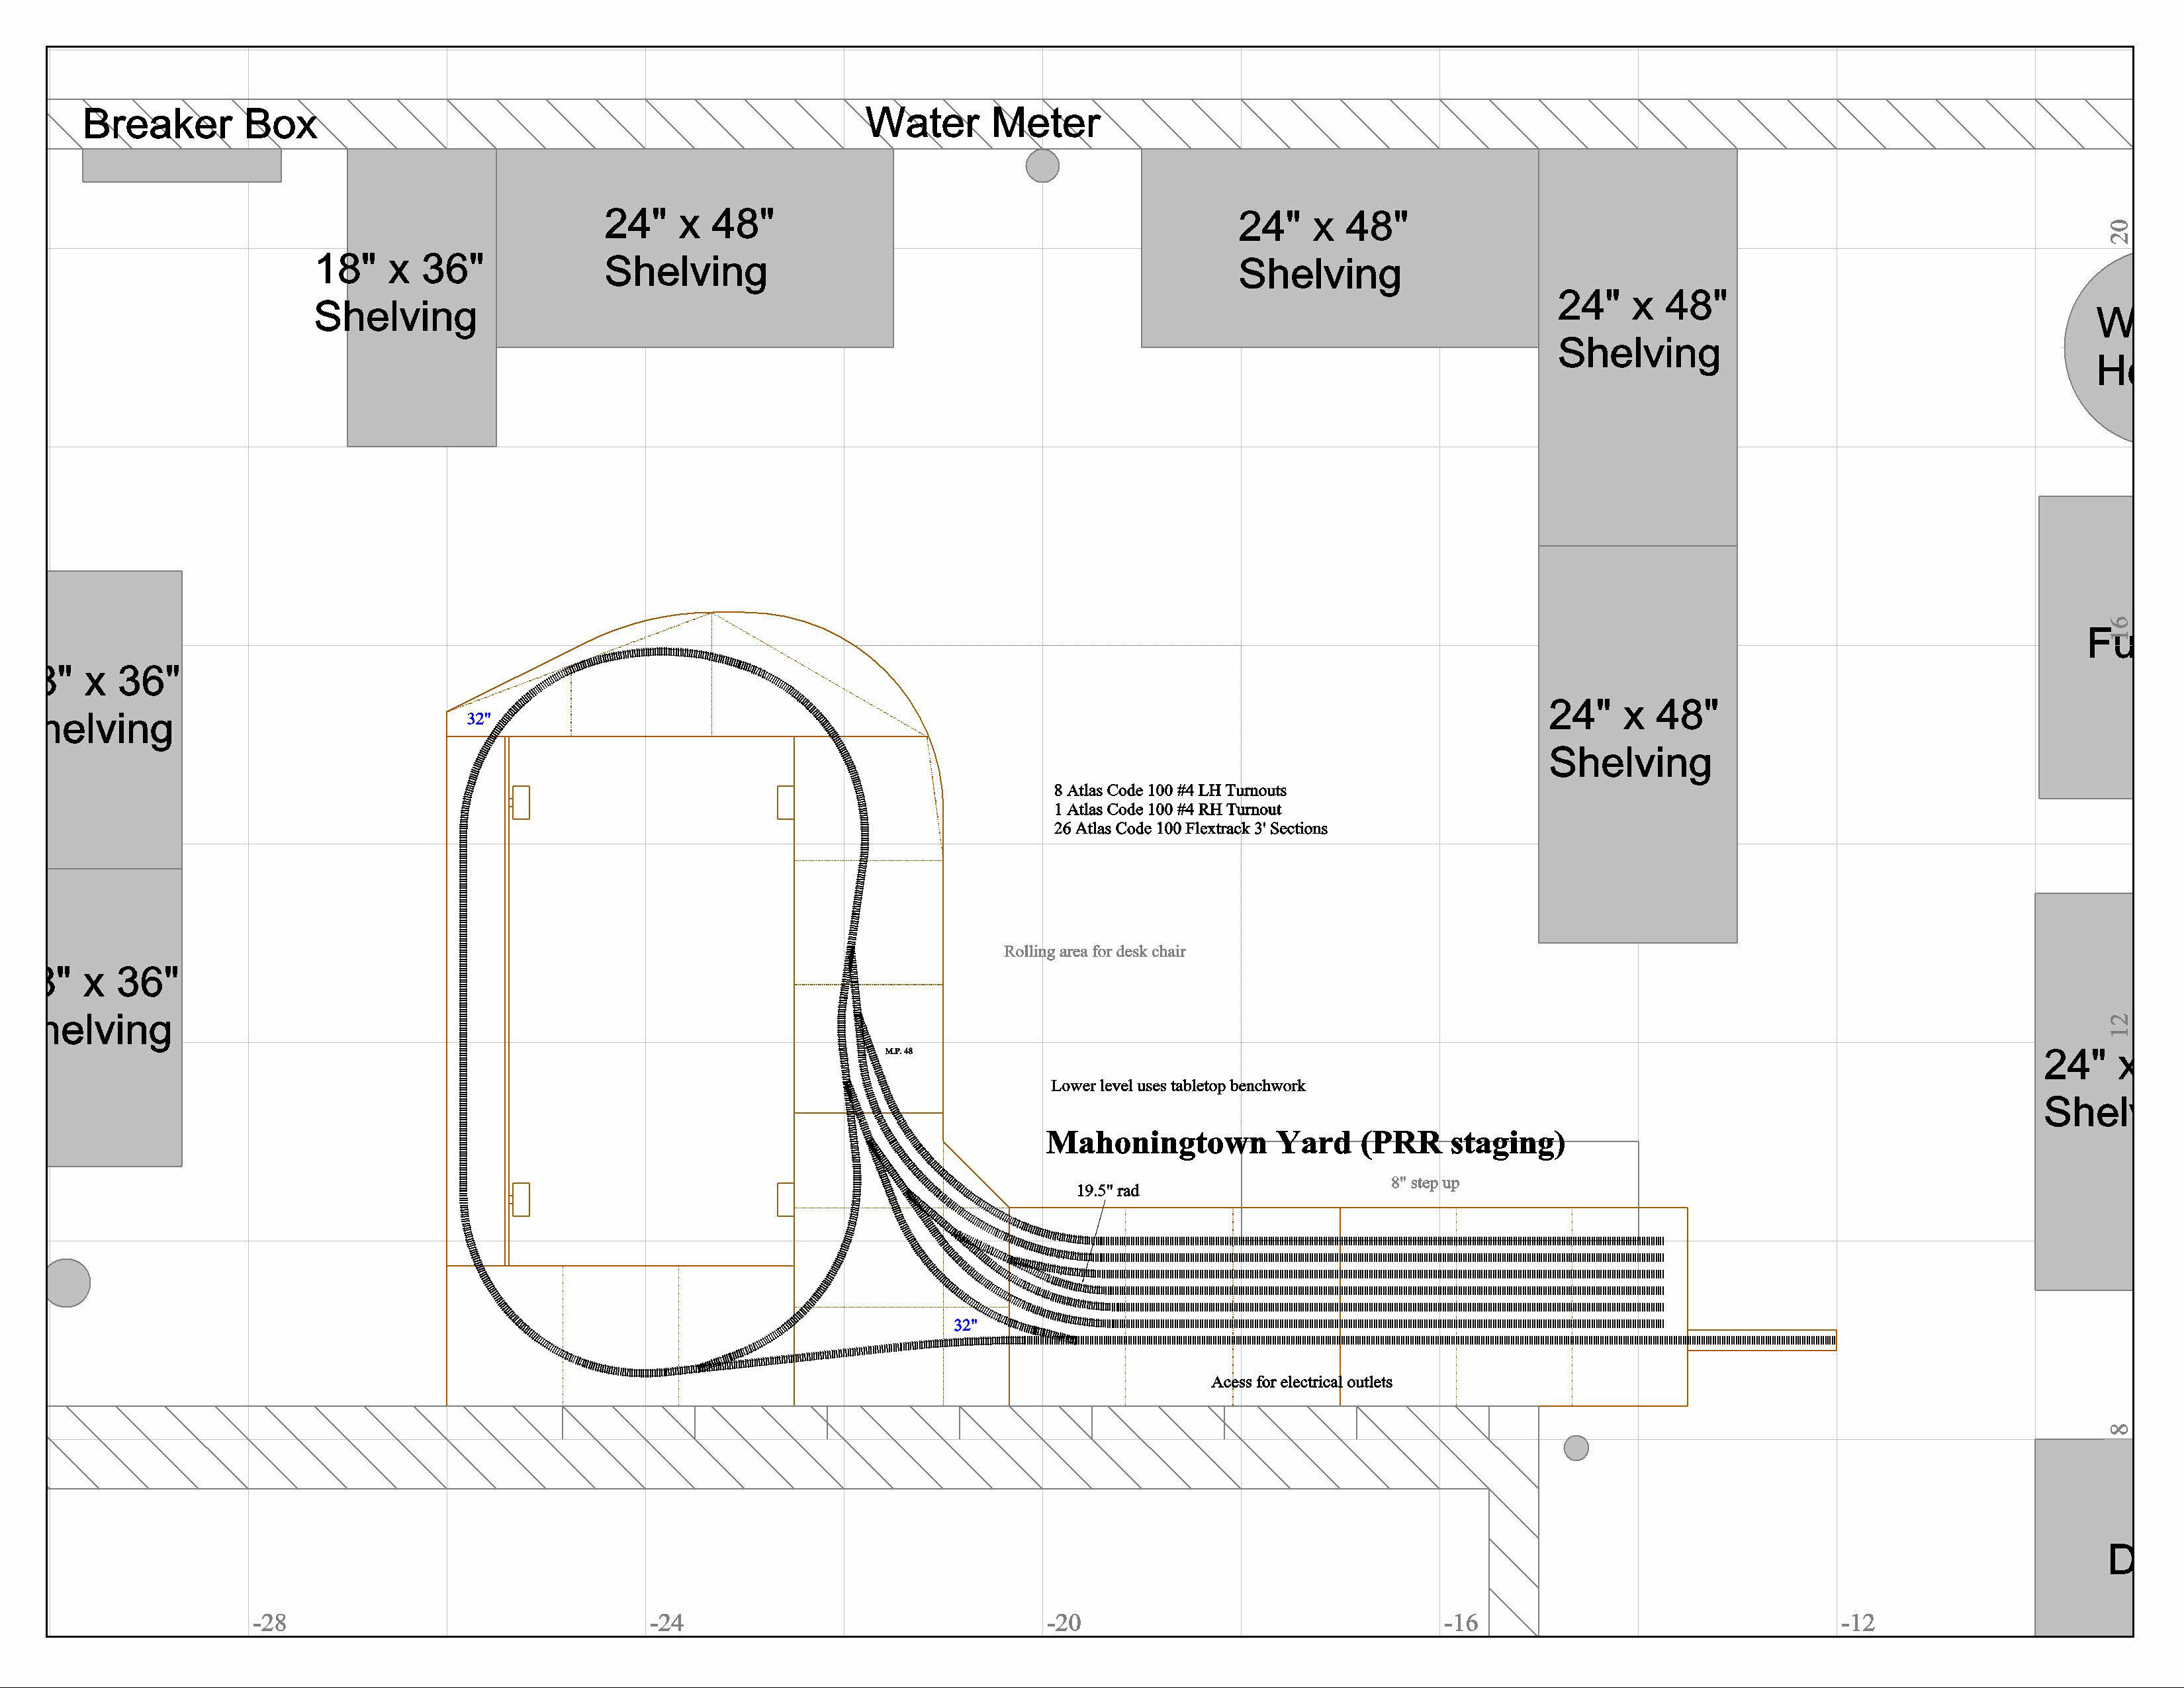
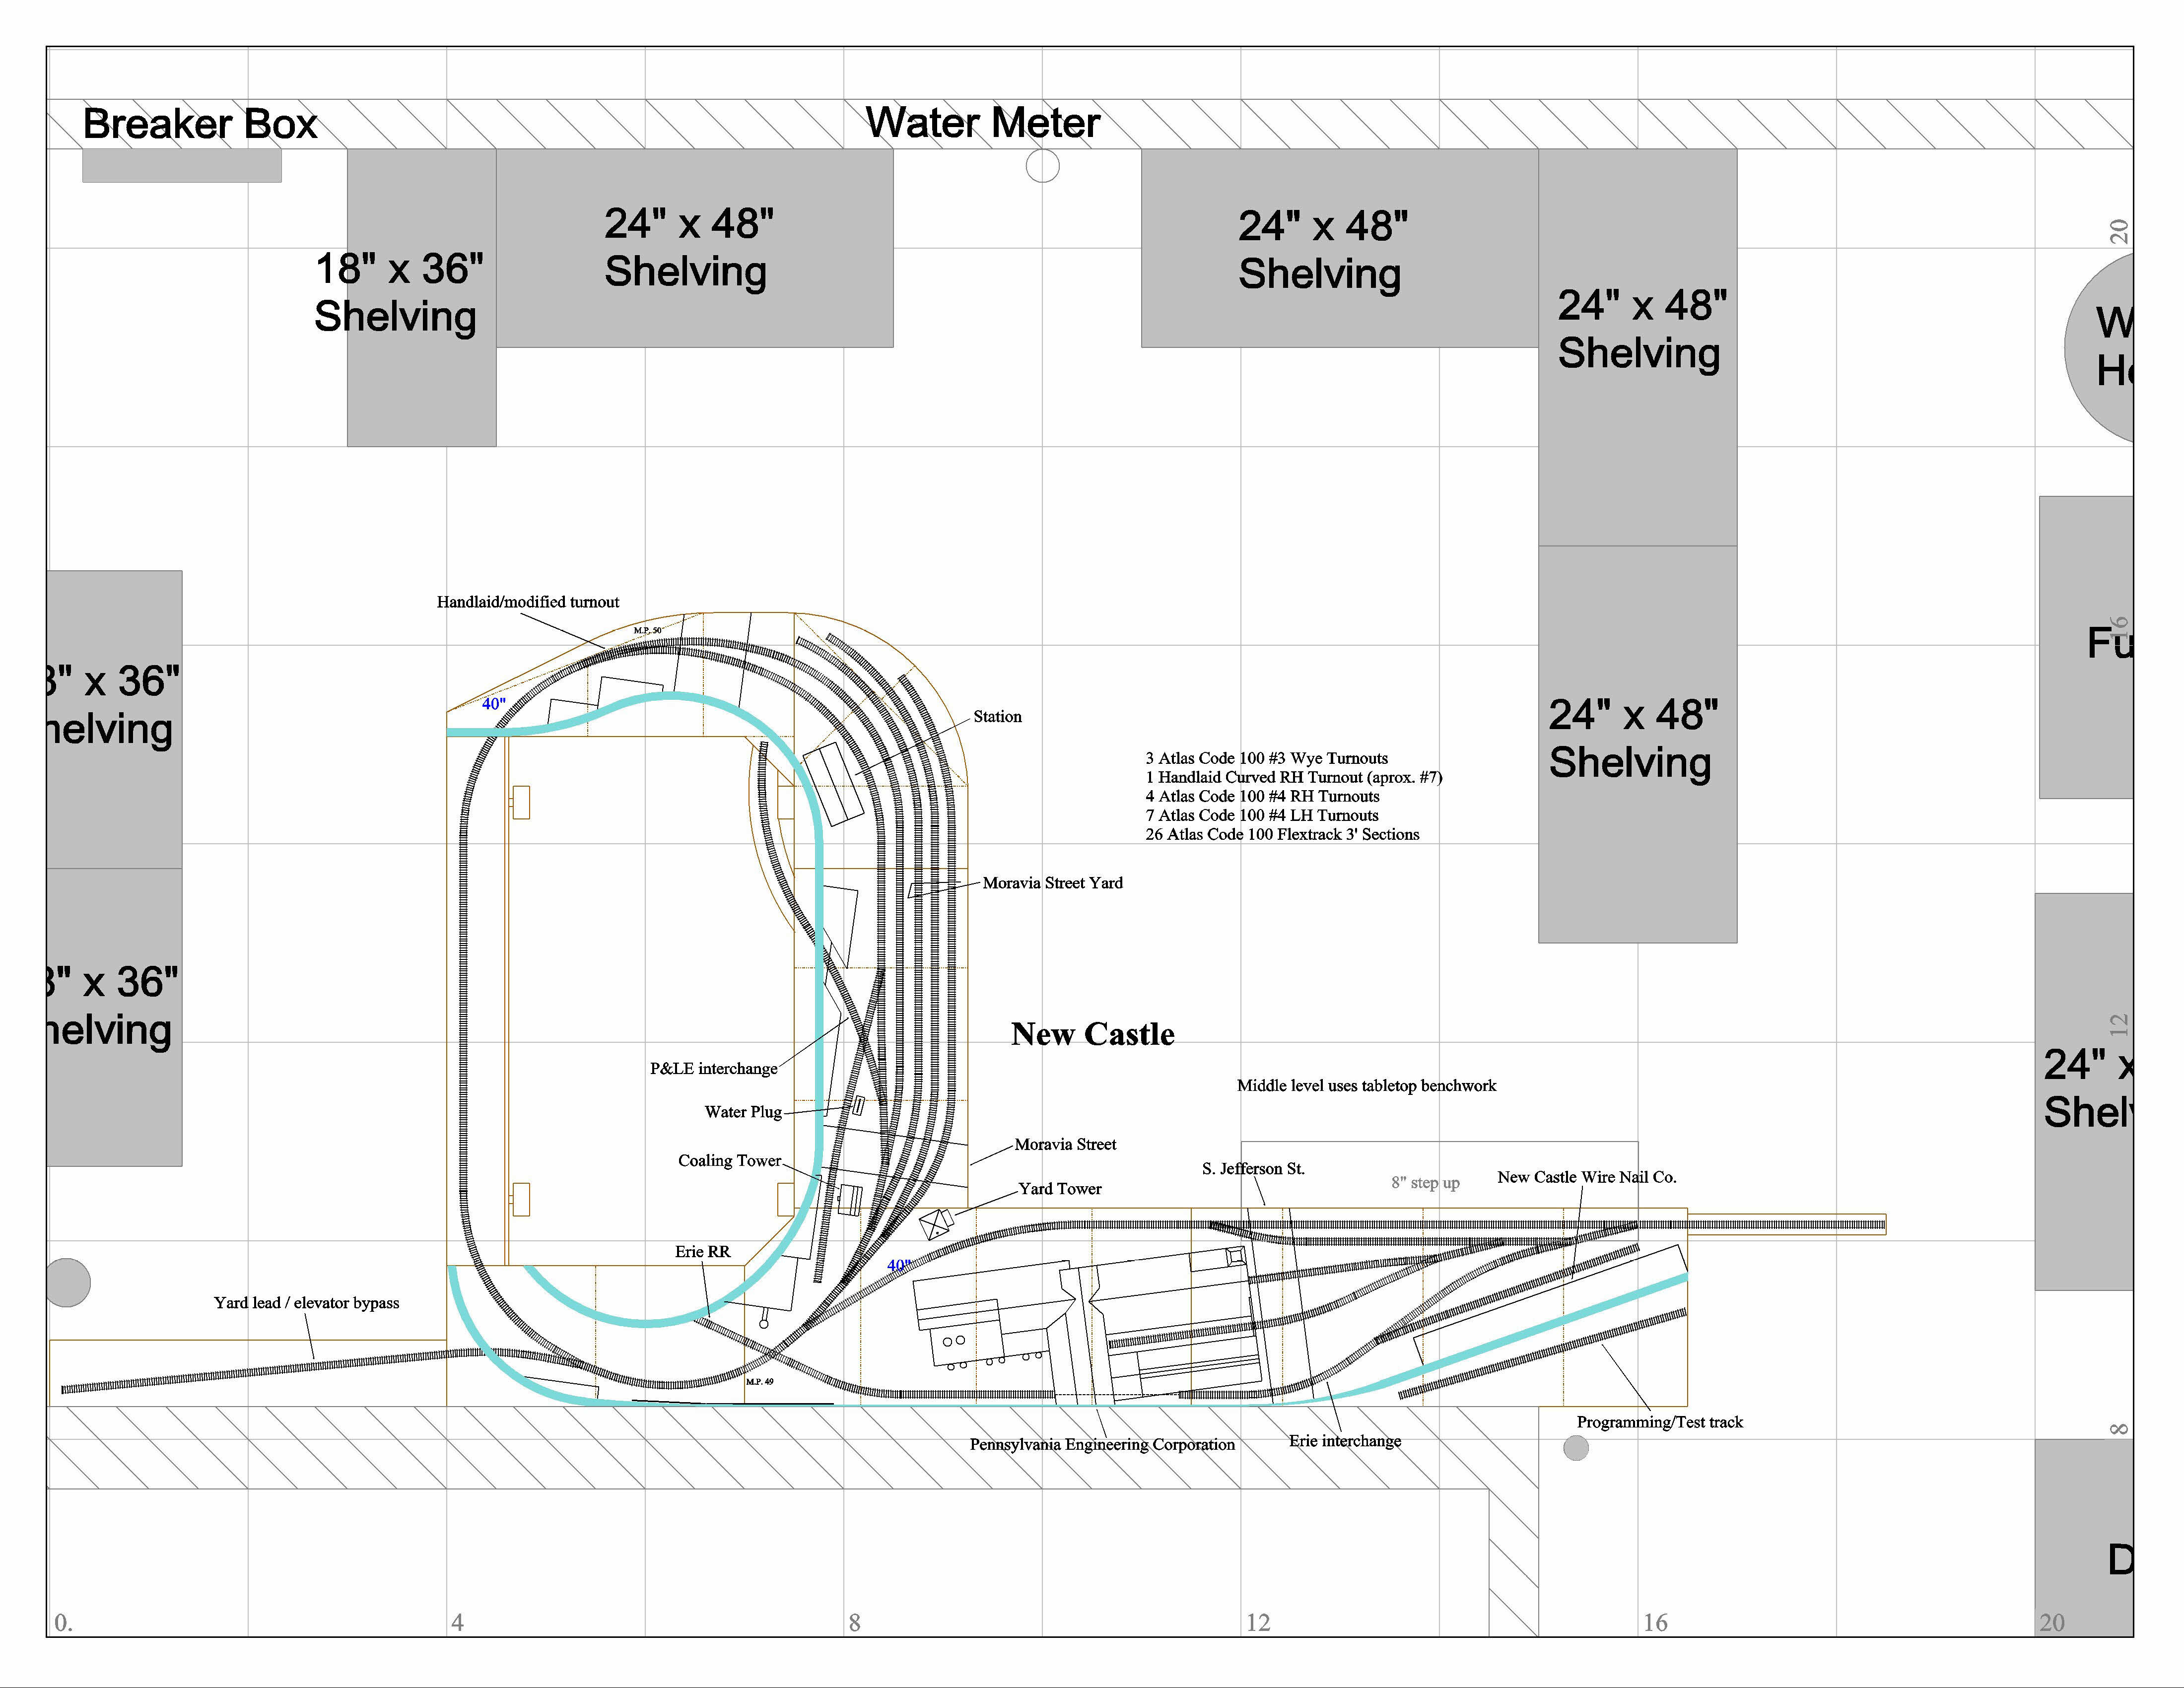
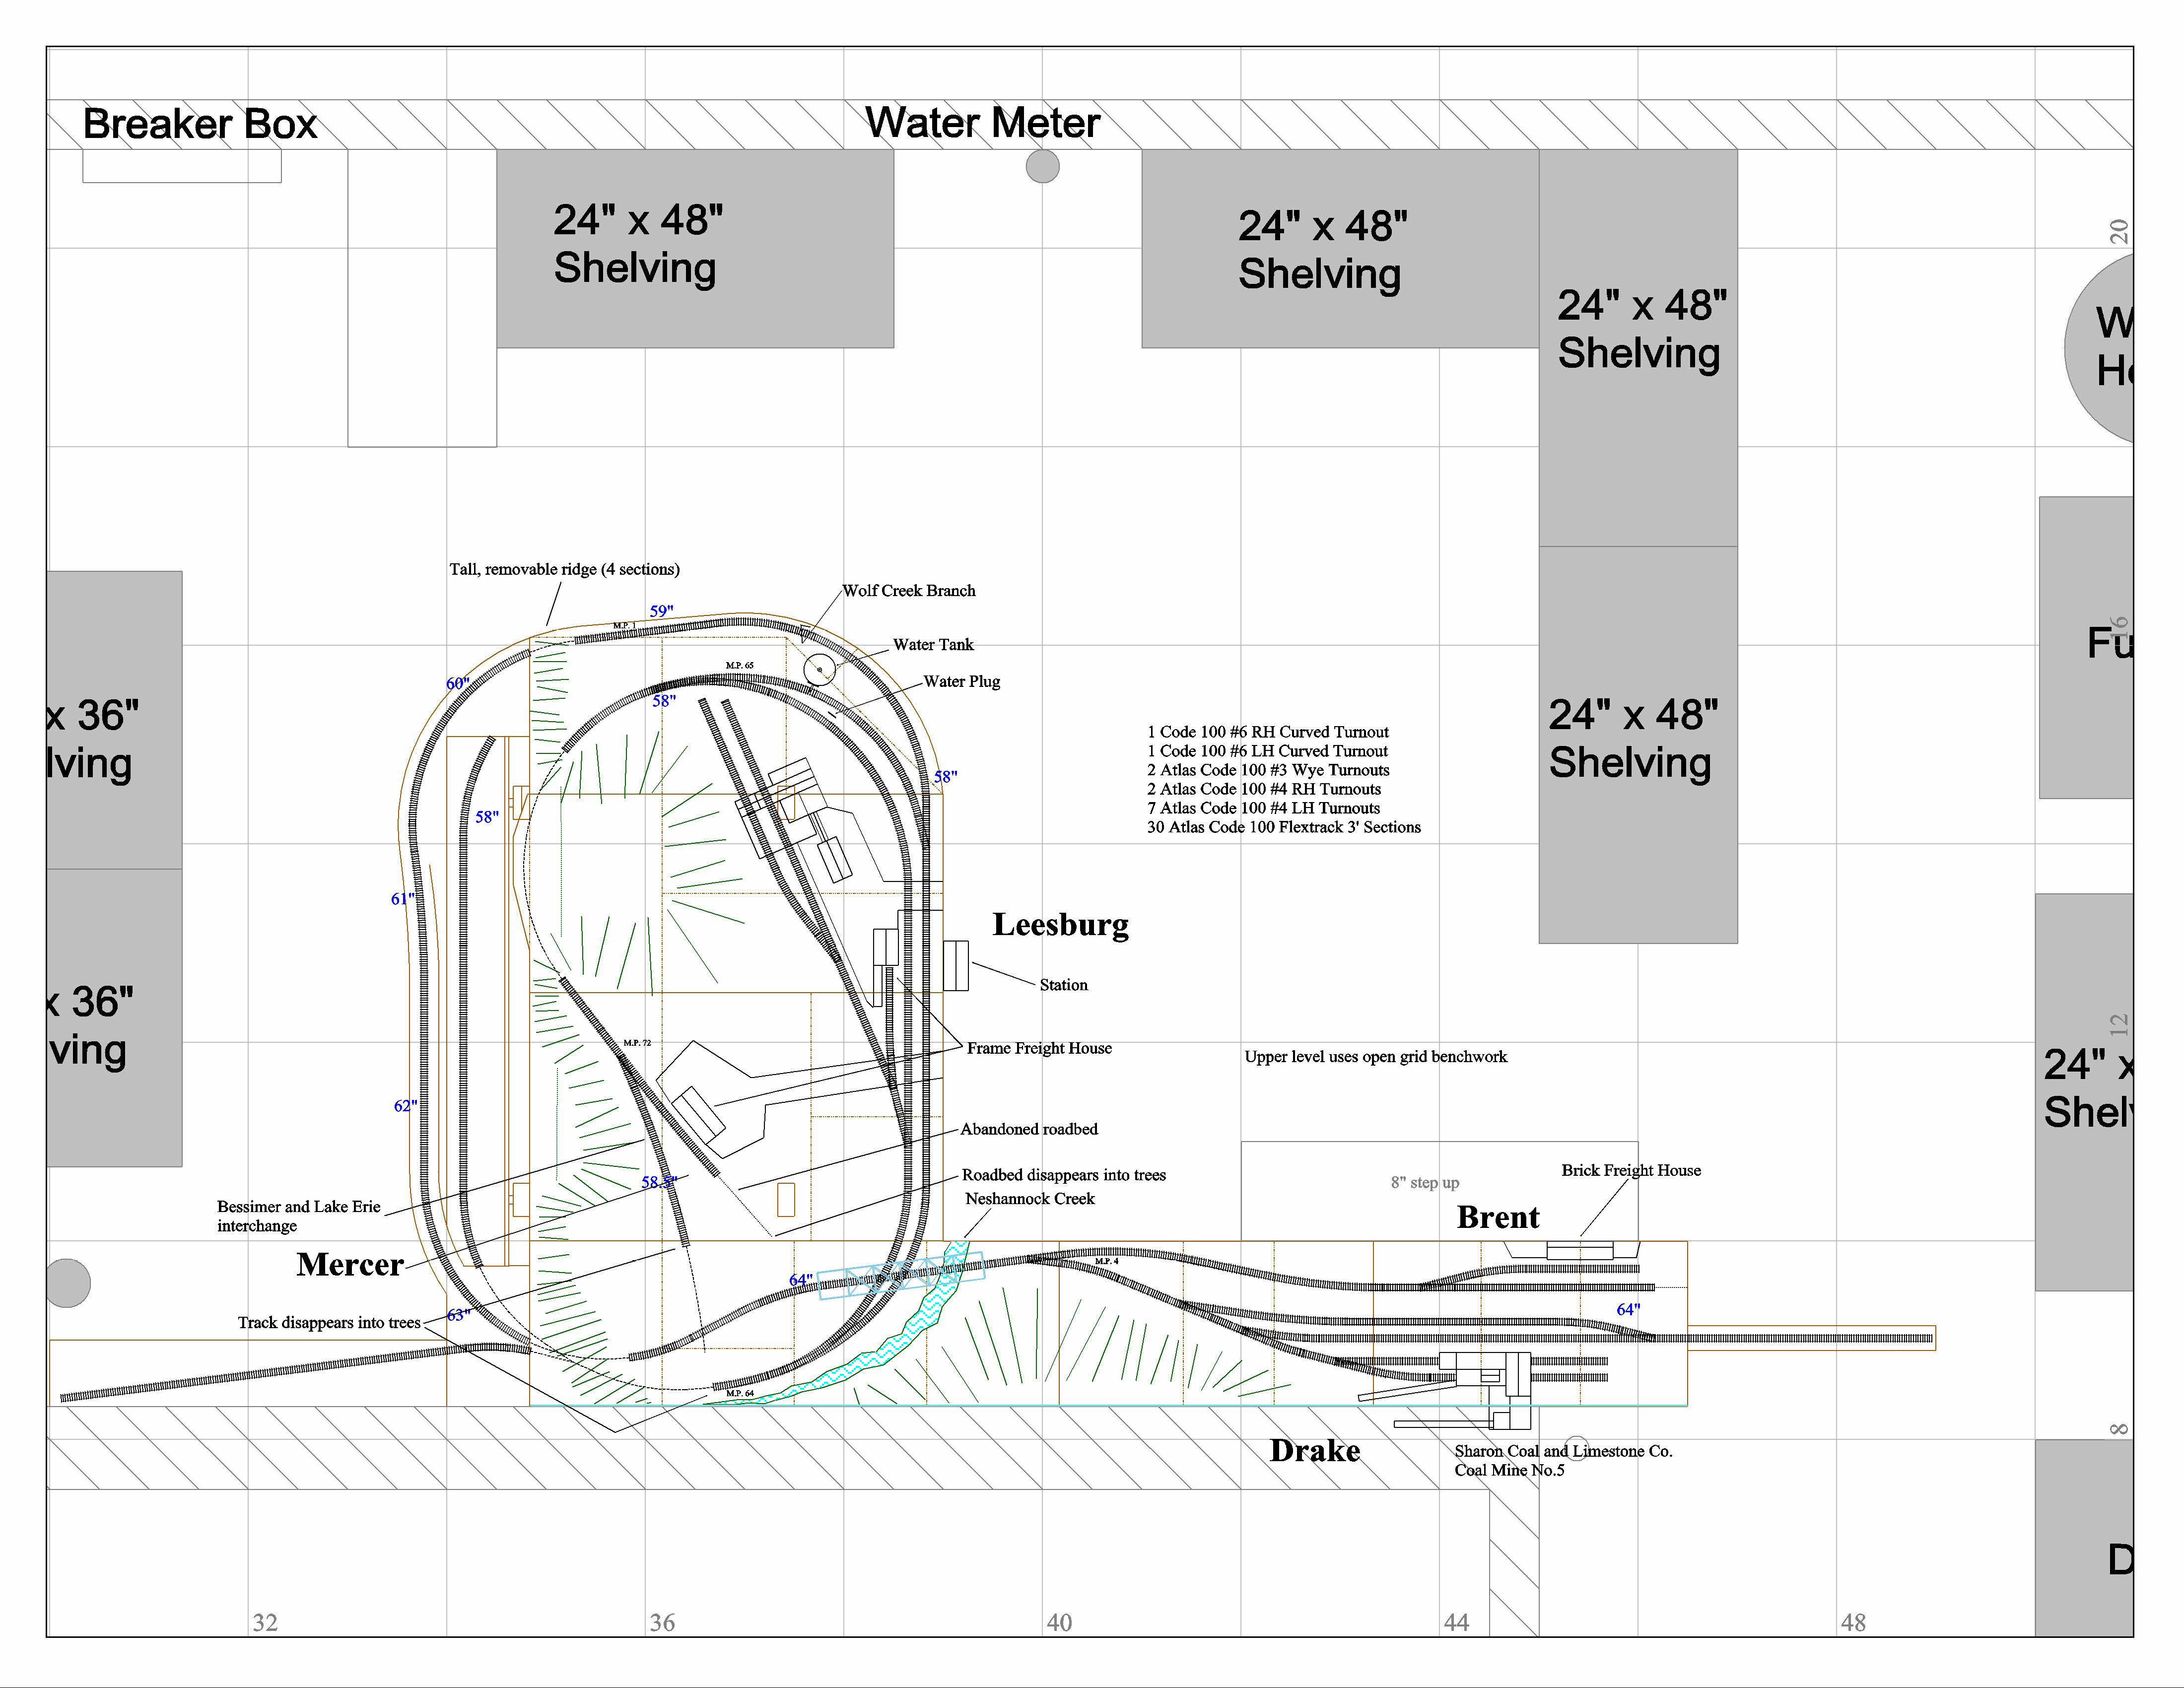
I finally got the higher resolution plans uploaded. We lost a couple of days of uploads (check the dates in the gallery), no idea why. I had to re-upload the plans. Then a busy weekend. Well, here they are.
If you are dead set on the elevator Idea I have two suggestions. Make the elevator track a pssing track on each level allowing operation on each level regardless of which level the elevator is at. Alternately mount five vertical tracks above each other so that regardless of which level the elevator track is at there is always a complete loop on each level.
If I were going to build a train elevator, I’d be looking at ways to get the most return out of my engineering effort. Why not build the elevator like a display case and use it as a vertical staging yard? You could eliminate the bottom level of the plan or even better use the real estate for something else.
You may also want to reconsider whether or not you want it to me manually operated. An interesting market has developed for robot parts. Take a look at the stuff they have at servocity.com. Robotshop.com has cool stuff too. There are a lot of really cool parts available. I’m thinking about one of their liner actuators to operate a drawbridge at the entry to my layout room. Besides, aren’t Model Railroaders all MacGyver wanna be’s anyway?
Is this HO scale? I could not find a reference the scale in your post but may have missed it.
1a. If so have you tested your 2-10-0 on 22" radius curves? I have found that the minimum radius listed is not always accurate.
I would definitely consider a runaround track on each level for the elevator. Also you may want to consider some sort switch that cuts off power to the elevator access track if the elevator is not inplace. What type of turnout throws were you planning on using?
It’s been a while since I checked this thread - sorry for the slow response.
Thanks for all the great comments on the train elevator! I think I will make it with several tracks for additional staging and to allow use of the elevator when the main track is aligned with another level. I took a look at those sites you suggested - lots of great stuff! A motor/gearbox assembly with a pulley would be perfect for the train elevator, and since I plan to have a counterweight, I could use one of the cheap Tamiya gearboxes.
Yeah, this plan is HO scale. Sorry I forgot to mention it with the track plan.
I have my Penn Line engines disassembled for fine-tuning and DCC installation at the moment, but the I1sa 2-10-0 can run fine around an 18" radius curve - it helps that it has 6 blind drivers. My current project is drilling out the brass headlight casting and installing a LED headlight.
Thanks for the tip about the turnouts. I was planning to use Atlas turnouts (or ones handlaid to Atlas dimensions) and then have some small DPDT switches on the elevator leads to kill power to the tracks. The mechanics and wiring may be a little tricky, but it should work reliably (definitely going to do a lot of testing before I operate trains!) I believe that Peco turnouts are power-routing, but I haven’t heard much about them.
I haven’t given much though to turnout throws yet. I was planning on using modified RC servos as show in MR for the inaccessible turnouts, and probably Caboose Industries ground throws for the easily accessible ones. If I were to use them, I would get the ones that are sprung, since the model railroad club I belong to has had problems with the handles popping out of the unsprung ones.
I was thinking about handlaying all the turnouts so that I can have powered frogs and better electrical performance - any thoughts?
Peco turnouts work really well, so well infact that my club’s module standards limit me to PECO or Micro Engineering, Shinohara too possibly. Peco Electo frog turnouts still need the frog isolated so you dont have a short circuit. The frog is then powered from the motor(we use tortoise). For manual throw turnouts we use insulfrog turnouts with the common rails soldered on the back with a piece of copper wire (this eliminates reliance on the points for electricalpower). The copper wires connect the same side rails at the 4.5in mark on the SL-95,96 turnouts for example. This also applies to the electofrog turnout, but a second cut needs to be made on the points side of the frog in addition to the divergent side.
Alternative suggestion: Build the layout in two levels, with a more traditional method of getting from lvel 1 to level 2. Obviously this requires more room. But you have it - perhaps. You’ll have a lot of unused space UNDER the layout where you could put shelves and replace some of those shelving units eating up all thebasement space. Alternative storage, in case you have any dampness issues, are those big plastic tubs. A conventional height (not sitting to operate) lower level would allow 3 high stacks of those tubs underneath. 24" wide benchwork allows them to fit in witht he narrow side against the back wall, put labels on everything. You can fit a LOT of stuff in storage in a 20+ foot row of those tubs stacked 3 high, and with labels on each one, it’s easy to slide out and find what you need. If the situation is anything like it was at my old place, you can probbaly expand the layout around that whole basement are and end up with MORE storage room than the shelf units.