Two of the newest faces in the fleet, both have TCS 6 pin decoders in them.


Two of the newest faces in the fleet, both have TCS 6 pin decoders in them.
Yes Mike, I am pleased with the BullAnt, both from the quality of the product and the customer service. This is a link to their BullAnt ordering page
http://hollywoodfoundry.com/shopdisplayproducts.asp?id=10&cat=BullAnt+Drive+Mechanisms
As you can see, they have a lot options. There is a link ‘click for details…’; it is a good idea to have both pages open when you are making selections. Prices include a 10% Goods and Services Tax (I think similar VAT in Europe) which is deducted when you complete your order. Air mail shipping was AUS$17.60. Final cost will depend of the exchange rate when you order; they have links to an exchange calculator.
The basic ordering dimension is wheelbase; but my critical dimension is overall length. I sent them an e-mail about this, and had a reply from Geoff in less than an hour that included a drawing. [tup] [tup] [tup]
Re G Paine’s post about the Bull Ant power drive:
Geoff was very helpful when I placed an order with him. I was trying to duplicate the late Wolfgang Dudler’s switcher and Geoff was kind enough to look up the specs from Wolfgang’s original order. Doing so allowed me to put in a bigger motor than I thought I could.
Dave
I tried my hand at locating the East Penn tower on my RDG, PRR, CNJ, LV layout…


I contracted the PRR for some layout cleanup. I caught them in the act one Sunday morning…


Nice work all.
My weekend project was much simpler. I put a new decoder in this P2K GP-7, replaced the bulbs for Leds and lubricate the gears. Back to service after a few months on the repair shelf.

Everybody: … All of your photos are very impressive.
Guy: your CN 1721 looks great.
Here is my project of recent days. This is a GN stock car (nearest to the camera) is a Mather Stock car I made from a Proto 2000 kit that has been in storage for a few years. It was made before Walthers purchased Life Like. It includes many fine details.
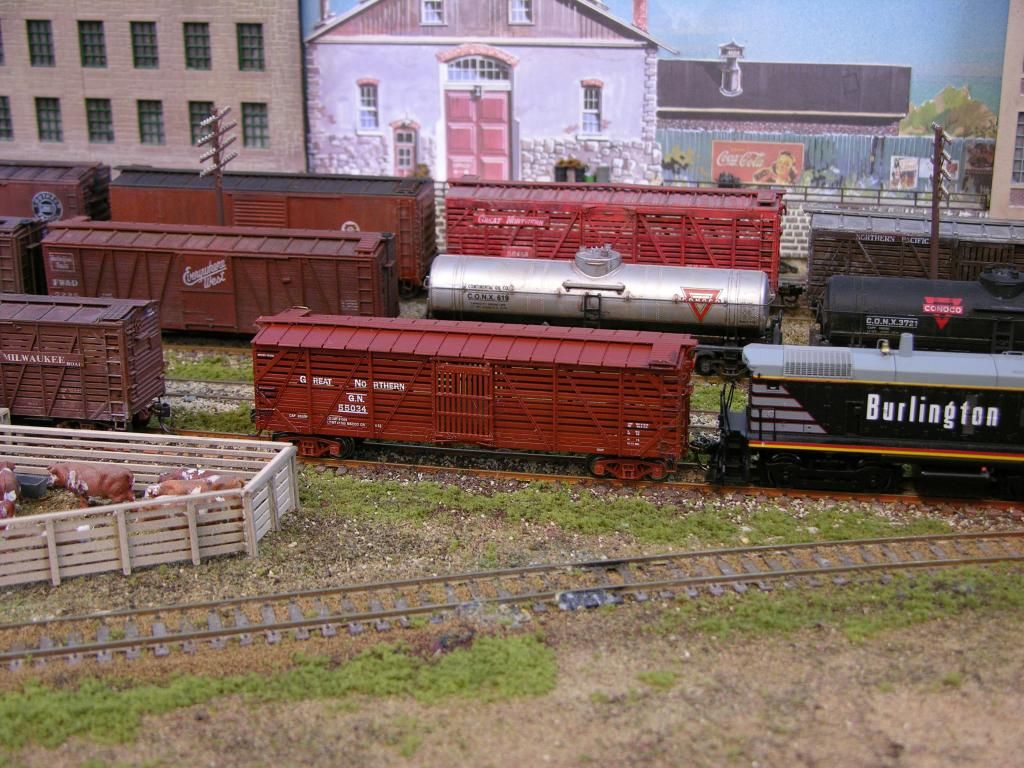
The second photos shows the SD24’s I had in a video here last week. The Tsunami sound makes it realistic.
Crane on the club layout.
This is the model

And the prototype

Many of us will recognize this station, but it’s such an old kit (copyright 1957) that most have never actually built one. I haven’t either, but I needed to do some work inside it, so I carefully took it apart:
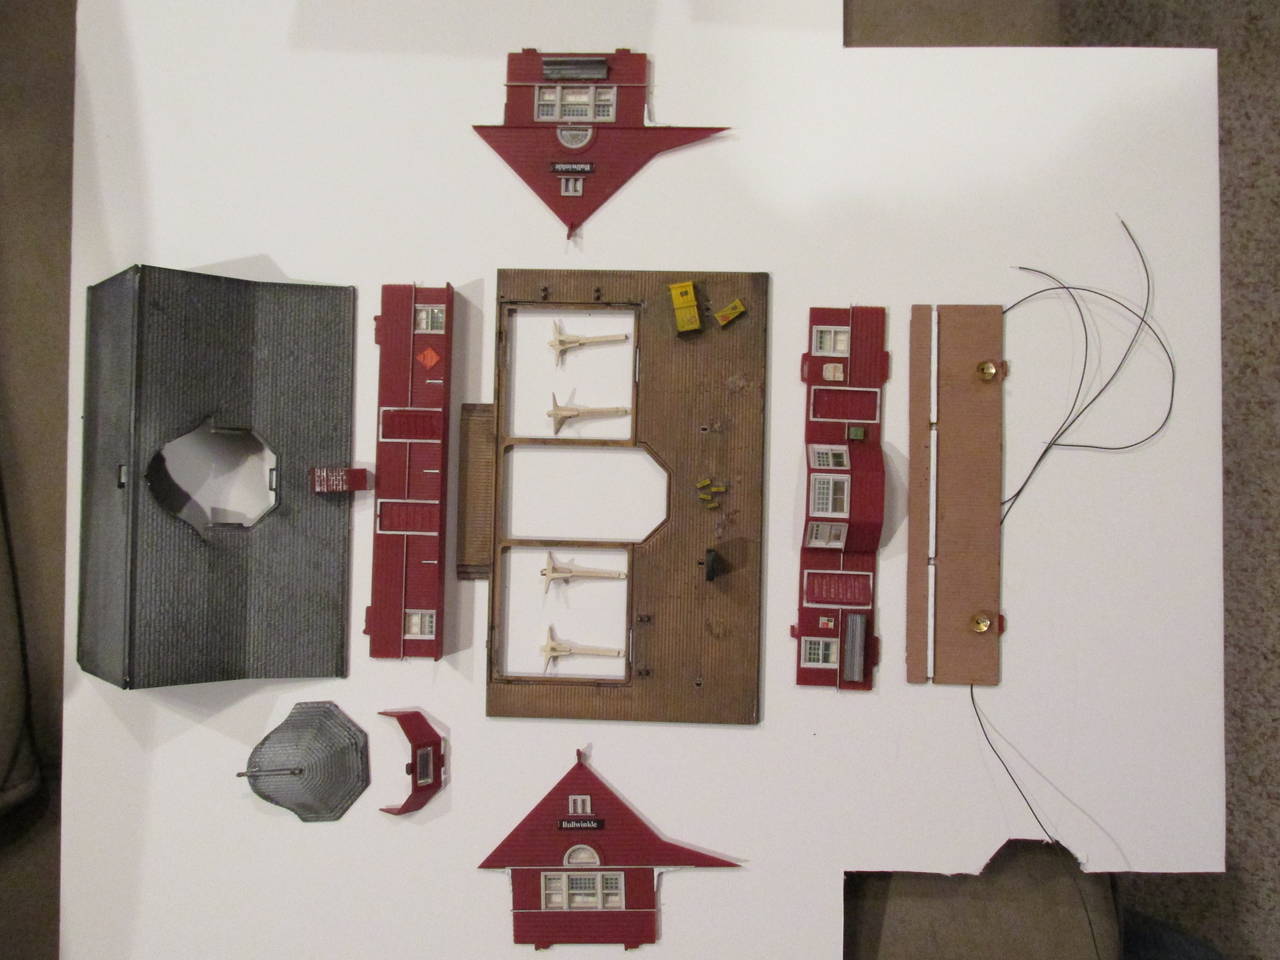
Yes, it’s the old Revell station. This one was put together pretty well, but the walls have always been very thin plastic, so it glowed when I put a bulb into it for illumination. I think it was easier to disassemble it than try to line the walls while it was together. At the same time, I re-installed most of those thin, clear plastic window inserts, and touched up the paint here and there. While the windows were out, I gave the walls a spray of flat finish (still shiny after all these years!) and added a new nameplate to the sides.
Good stuff all around everyone.
Here are a couple from the BRVRR:
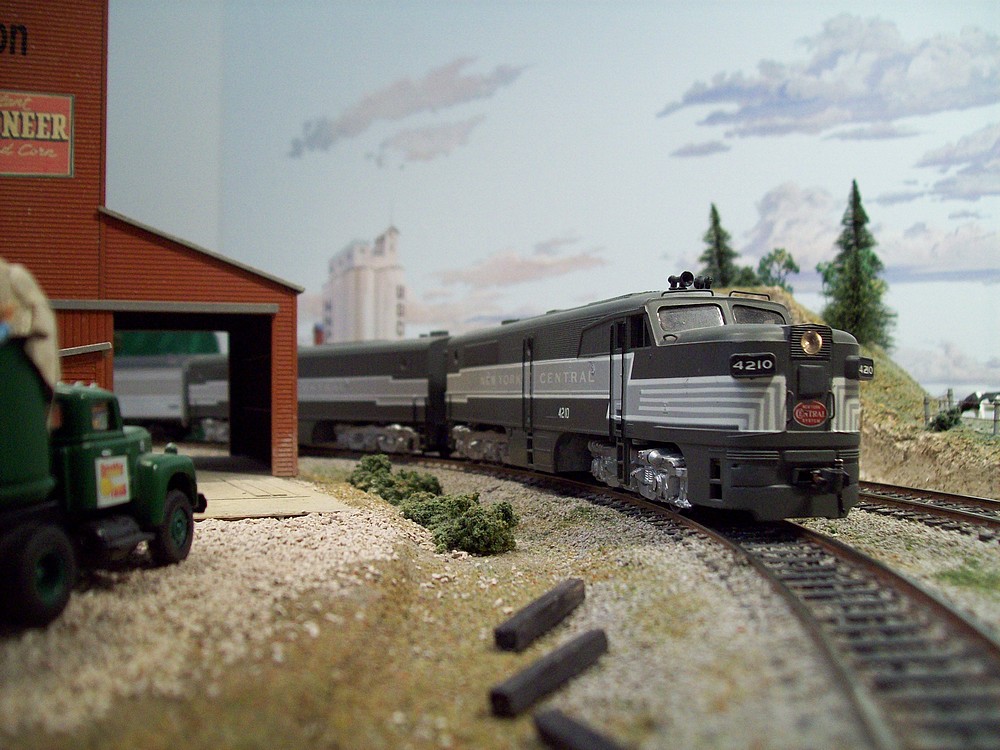
NYC ALCO #4210 rounds the curve at the west end of the BRVRR layout at the head of a short passenger train. These locos don’t get much run time but I thought they deserved to have their photo taken.

NYC GP-20 #6109 east bound at the head of a mixed freight crossing RT-32 as a west bound coal drag passes on the outer mainline.
Keep the photos and ideas coming guys. Thanks to you WPF is always the best thread of the week.
I’ve seen a couple of those before and would love to build one at some point. I have something similiar built by my dad many years ago…I will need to get a better pic later on.

As always, the best thread of the week! Some great modeling in here once again…
I have been SLOWly getting a bit more done in the area. Here are a few shots of the location where Howard’s Dairy will reside.


An overview of the larger area. You can see where this relative the overpass bridge I have been working on.

Enjoy!
73
Wow, these photos are impressive and inspiring.
Mike, that layout is awesome (and huge!)
GP-9, I’m loving the Horseshoe Curve
Peter, that is really nice weathering
howmus, nice to get a look at the are just down from the work we’ve been watching near the overpass
I got my profile boards/fascia up. I got my last piece of road roughed in crossing over the tracks close to the camera. The rectangle cut out of the front board will hold a recessed control panel so it doesn’t stick out (and by stick out I mean get ripped out by a running kid)
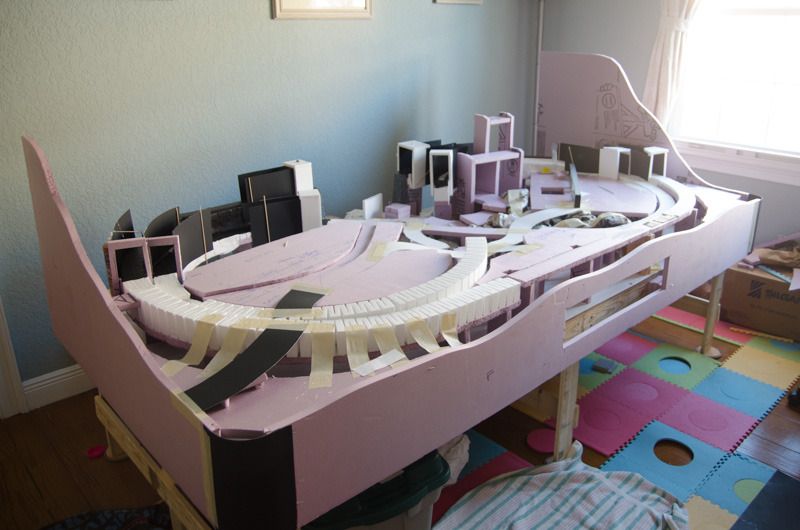
I have a 4x8 layout which means my 22" curves were a little too close to the edge on the 4’ side (aforementioned running children) for my comfort. I used some spacers so the profile boards/fascia are 3" off the edge. I initially hesitated about this since so many things are sold in 8’ length max (foam and wood) but I’ve found workarounds.
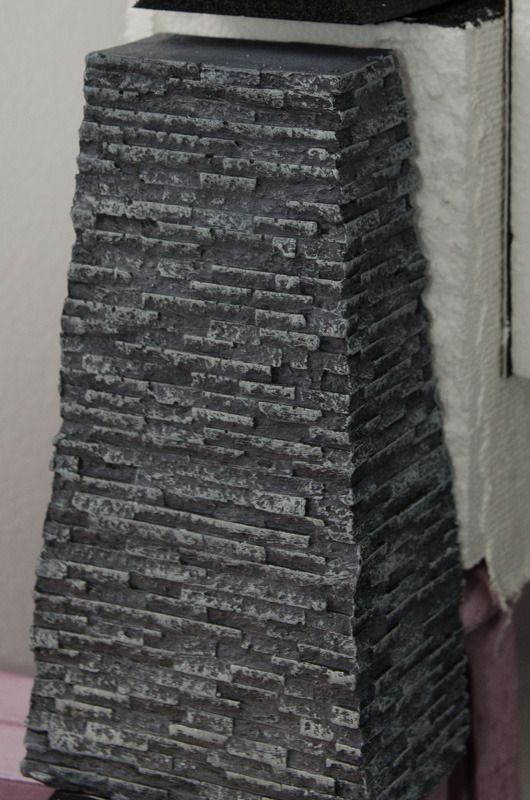
I painted (and kind of weathered) the piers for the back bridge. They were too dark so I brushed the highlights with a lighter grey which looks good enough. I also glued them in place and started installing the track bed there.
Here’s a shot of the bridge placed on the piers for demonstration.
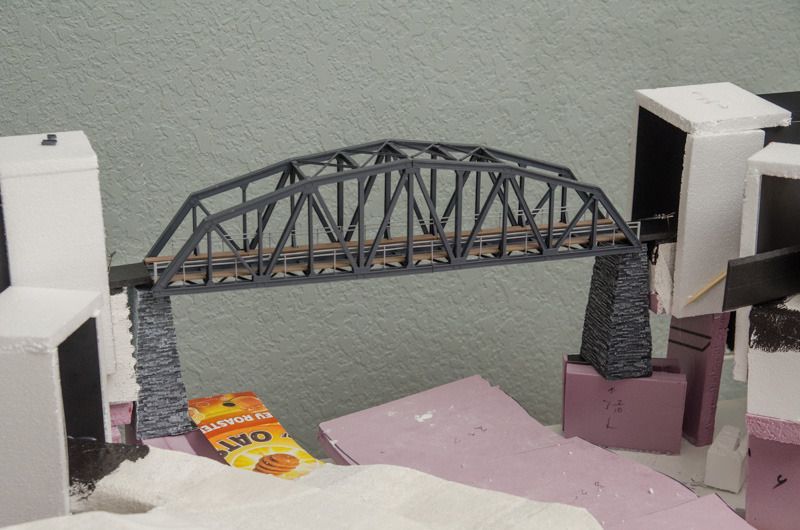
And for the sake of a photo, I leaned a tunnel portal in place. Now I realize that I’ll either have to darken the tunnel portal or lighten the piers as they look to different. I’ll probably lighten t
Here’s a quick self-portrait I shot in front of the layout recently:
