I really like the depth you’ve got going here, it’s like you can see for miles and miles!
Good work!!
Jarrell
I really like the depth you’ve got going here, it’s like you can see for miles and miles!
Good work!!
Jarrell
Nice Pic.
Is the oil in the center of the track correct? I don’t have a lot of experience with steamers except my exposure at Strasburg RR. The oil there is around the rails which I assume kicked off of the side rods.


Hamiltonblue, if you are asking me about the oil slick in my photo of the J (it isn’t clear…), it would not be strictly correct on a transition era layout with almost all steam traffic to see such a slick, but this layout is nearing the end of its life and I am experimenting with techniques that I can apply to the next one.
Let’s assume this is a modern excursion run on a line essentially entirely used by diesels. [:D]
-Crandell
Good Answer [:D]
My loco’s of course have yet to leak leaving me nice clean ballast.
Interestingly enough, the old low grade through Brookville, PA was oil soaked also and this was post steam era. This was a branch of the PC, then Conrail, and then the Redbank Valley and Mountain Laurel RRs from Driftwood, PA to Sligo, PA. Not sure if there were just some really leaky diesels or if all the grease was off the strings of coal cars that passed through. There are some sections here that are not torn up yet…maybe I will go see if the ballast still has all the grease/oil and get a pic.
Wow, a lot of great stuff to inspire this week!
I’m still just getting my feet wet with the hobby, but I always have a bad habit of dreaming too big and getting in over my head. One of these days I’ll learn that smaller and well done beats everything including the kitchen sink and a detail nightmare any day!
Here’s some updates this week from my Eastern California RR project.
Finished painting my waves at the beach:

Installed the LA Union Station I’ve been working on. Still lots of details to add. (detail nightmare, yes) I wasn’t sure this thing would ever be completed, so I decided to put it on the layout and add detail there. It started as just a diorama mock up (I did the same thing for San Diego to create a placeholder for a future scratch built structure when/if my skills reach that level). I did LAUS with the idea of keeping it in place a bit longer, maybe a few years until I have the skills to do it right.


Station tracks ballasted:

Hope everybody has a productive weekend!
Rob
Nice station Rob!! That looks really good. Is that a multi level layout?
I have to agree with this. For the last few months, my layout has been half-finished, with many shots published here, and half raw, benchwork, pink foam, WS roadbed and the like. I’ve take a few progress shots along the way, but my goal has always been the finished scenes, the beautiful work that’s usually exhibited here.
I’ve got a 45-degree roofline over the new section of my layout. Rather than ignore it, I decided to work with it. I built 45-degree scenery to go behind the track, into the narrow space twixt track and wall.
Great Beach Rob. Lovin those waves. [:)]
Spectacularly good waves! I would like to see a more detailed image, maybe twice the density in pixel count? Is that possible, Rob?
-Crandell
Thank you, Michael and Hamit. The layout is somewhere around 3.5 levels with a reverse loop sandwiched in a sub level and also at the top. I know I am going to regret the elevation gain and to compound problems I’m building it one level at a time so I really hope I’ve done the math right! ![]()
To keep my interest I created a level return track for running just the first level so I wouldn’t have to complete the entire layout before running trains.
Rob
Wow 3 levels!! Do you have a trackplan you can show us?
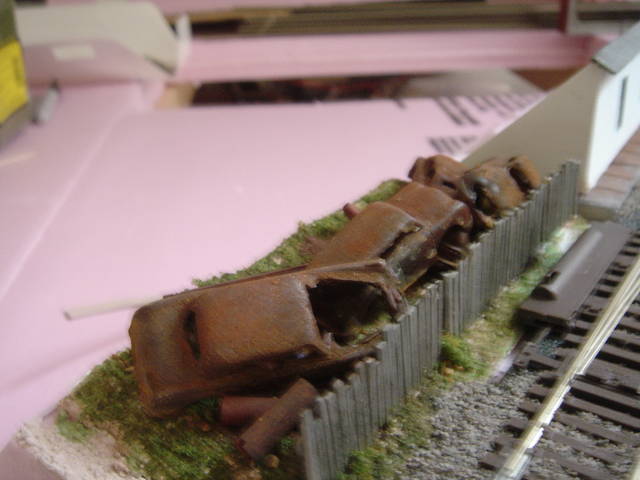
Micheal, I not sure what I am more impressed by, your work it self or the speed you are getting it done in!
You have take a bridge that seemed to have no reason for being and have brought it to life!
What else do you plain to have in that area? You might all so try adding some ground foam to the grass mat as well to add some more color. Looking pretty good if you ask me.
Ken
Sure, will post in another thread.
Thanks Ken! I appreciate the great feedback and help from you. I’ve been putting in alot of hours working on this, and haven’t even ran trains in a week. LOL
Basically, when I get all the scenery done, you won’t even see any of that matt grass anymore. Gonna add some rolling hills and ditches in this area. To the left of the creek is gonna be an ethonal plant (that’s what the road crossing under the bridge is for the ethanol plant trucks), and inside the loop track will be a farm scene with a cornfield, farm house, etc.
This kit here
Hey Rob,
Are those pics of your personal layout or a club? Earlier you said “I’m still just getting my feet wet with the hobby, but I always have a bad habit of dreaming too big and getting in over my head” Followed by some great pics. You sandbagging us or are the pics of a club you belong to? Just curious [:)]
Well, it’s after 1 a.m. here in the east, and I’m just now emerging from the lab. We’re supposed to go on a boat ride with the neighbors tomorrow, so I wanted to get some headway in before taking a nice break. I think my wife is actually looking forward to seeing me!
Anyway, here’s tonight’s… ahem… this morning’s update:
I splurged and bought myself some cork and track so I could work on the staging loop. And work on the loop I did…

It turned out that between the new track I bought and the flex that I stripped from the old yard, I had enough to close three of the loops! I need about 3 more pieces to finish the fourth. The hardest part was tying into the old staging tracks, because the connection is smack dab under the riverbed, and there’s only about 3" clearance at that point. But thanks to some bent needle nose pliers, some yellow construction glue and a cleverly concocted clamp, all went smoothly.

That’s right. A half-filled water bottle. What I did was schmear a bit of yellow glue on the cork, then carefully positioned the new piece of track, sliding the rail joiners into place with the pliers. Once I was confident I had it aligned properly, I’d roll the water bottle into place, wedging it between the track and the 1x2 joist that holds the river bed. Once the glue was set, I’d roll it out and do the next piece of track. This took quite a while to do all 8 tracks by this method… Once all the tracks were poking out into the open, I started making the alignments needed to get around the big bend.
Of course, the resultant triangle where the balloon comes together just begs for a little something…
[img]http://lh3.ggpht.com/_ERLF7TTPvmA/TBxO9vA4wWI/AAAAA
Here’s my first code 40 turnout, built for my H0n3 module Salina. Building a code 40 turnout is very similar to a code 70 or code 55 turnout. There’s only a difference - the rails are really tiny! You have to look twice! It’s a new challenge. [:)]

Wolfgang
I am flattered that it could be mistaken for a club layout! But I am really just learning all of this stuff as I go. It is a 17X17 in my garage. This photo gives a better idea of the use of space.

Bench work is in place for most of it and is a combination of shelf style and open grid, haven’t started subroadbed past level 1. I wanted to model various scenes mostly in California on the fictional modern Carson and Colorado in eastern California. But because I fell in love with many parts of California I model scenes from San Diego all the way to Klamath Falls via Reno. (back to the more-than-I-can-chew routine.) ![]() But the focus of the route is the C&C.
But the focus of the route is the C&C.
I am so impressed with what people are doing on here. I look forward to picking up tips and suggestions!
Rob
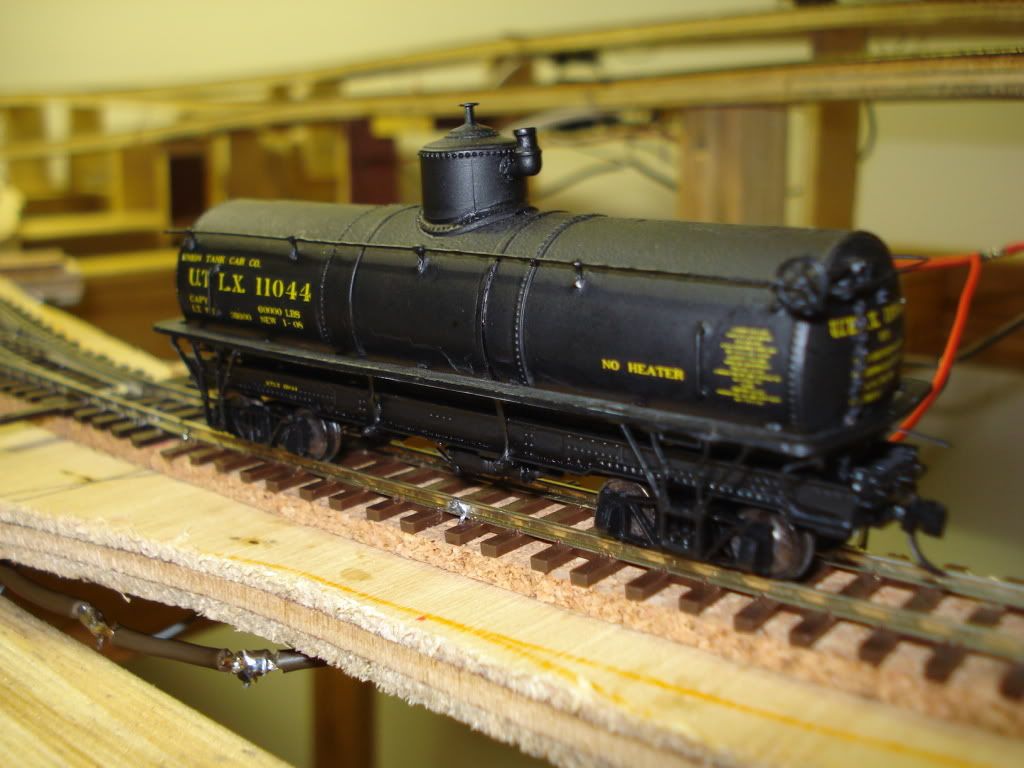
I’ll second the motion about progress shots - it’s always good to see you’re not the only one in the same boat. I’ve mostly been working on rolling stock kits, as I’m waiting for parts to get my HOn3 locos up and running.
This one’s a Precision Scale Co narrow-frame tank car:
This one started as a reefer kit, but the top had a bit of an accident. I decided why waste a perfectly good Micro-Trains Chassis? I decided to try scratchbuilding a gondola top onto it, copying from one of the M-T 9000 series gondolas I already had:
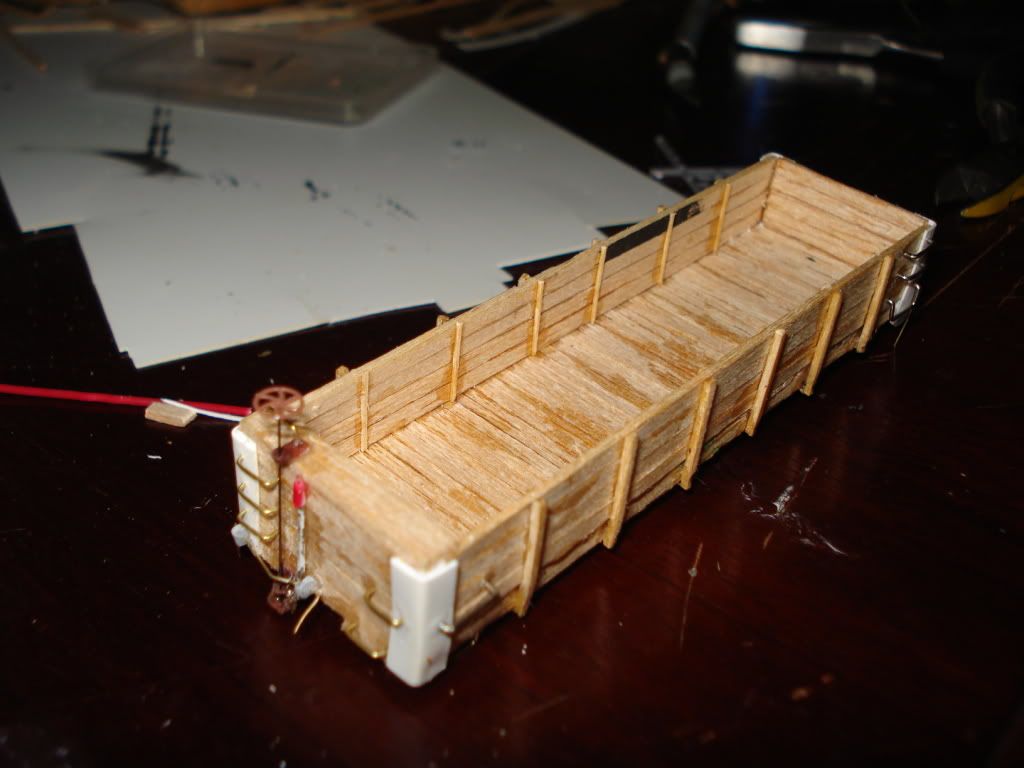
It’s my first attempt at a scratchbuild, and it’s due to be painted & lettered during the week. It’s balsa wood, with stripwood used for the outside framing. The brakewheel and holders came off the reefer kit, the other details are just bits I had lying around. I’ll post a photo when it’s painted & lettered.
