I see illustrations of a variant of these lights that make the ‘inverted cone’ a void molded into the plastic of the molded LED envelope. This suggests that with some careful clamping, a modeler might use something like a typical pointed fine twist drill to form the ‘cone’ and the little ‘window’ of non refraction at its center. If necessary this could then be filled with material of different refractive index if desired, or coated, and the light going to ‘the periphery’ blocked and absorbed with good black (or ‘ultrablack’ nonreflective) material…
Some here might suggest easy ways of cutting the best angle of cone in plastic inexpensively.
Be interesting what this might do with a Yelo-Glo LED…
I had to reduce the size of a bunch of 3mm LEDs so that the tip of the LEDs would fit into the core of an HO scale Utah Pacific caboose marker light. All I did was chuck the LEDs into a variable speed drill and then I used a file to shape the tip of the LED as the drill spun it. I’m sure that a drill bit or a #11 blade could be used to create the hollow center pattern in a 3mm or 5mm LED using the same method.
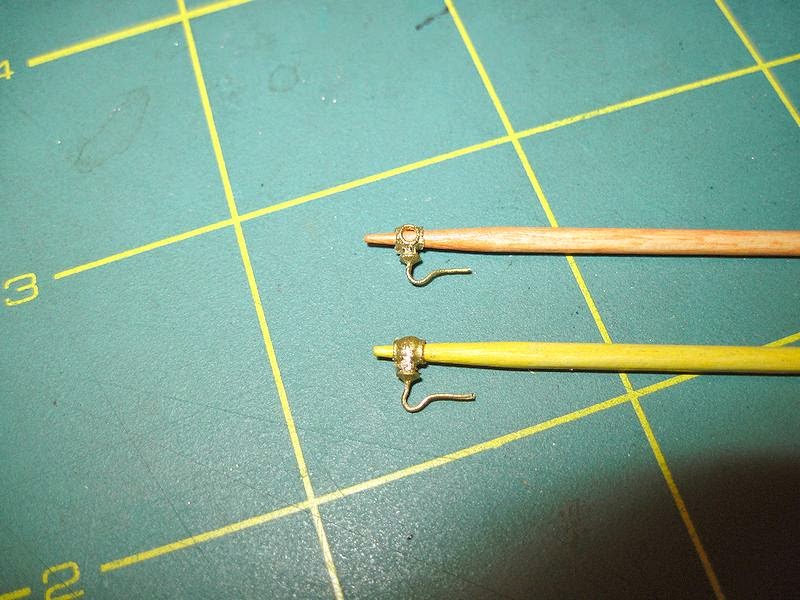
I used to do the size reducing thing in a 4 volt drill for the Utah marker lights but found it much easier to use a short piece of .8mm fiber optics. It slips in the marker and is easily glued to a 3mm LED. I use Crafters Glass Stain for color. The glass stain is available in a lot of colors, I stock red, yellow and green stains.
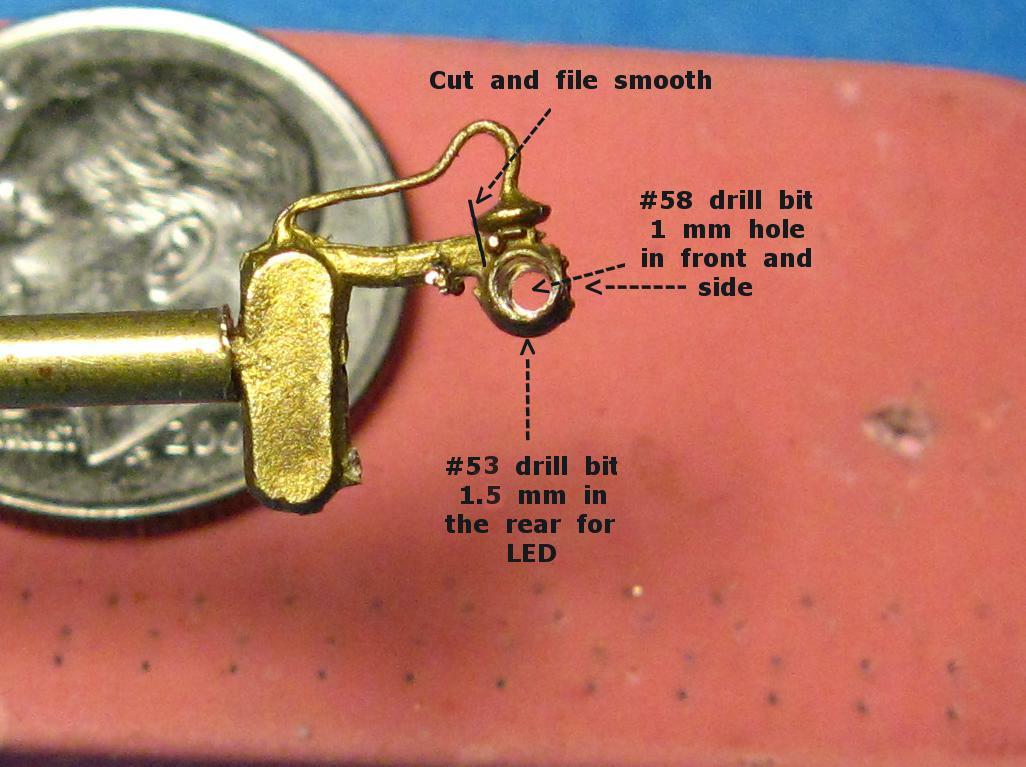
I now use Cal-Scale 190-280 markers for my Cab Forwards and cabooses now. They are solid brass and need to be drilled open for illumination.
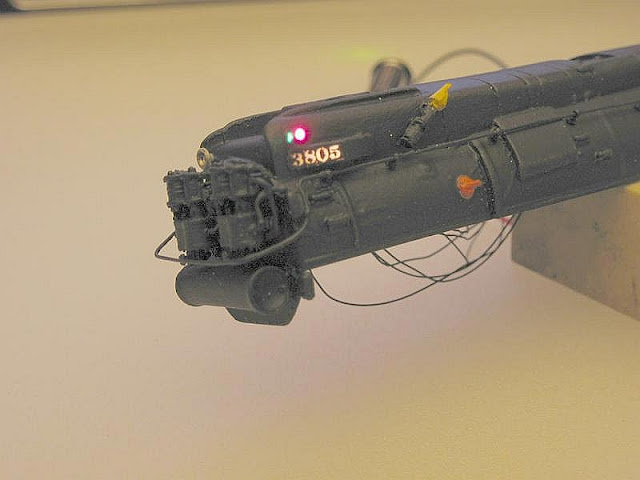
This is one of my AC-9 kitbashes with working markers using fiber optics.