Here are some of the trackside structures found along my mainline:
The first pic shows an inexpensive (Atlas) tower that I upgraded from the original. Floquil paints were used to obtain a more natural look. BTW, painting those “no paint neccesary” kits is a simple and easy way to upgrade any plastic model. Window shades (painted writing paper) was added along with a “tar paper” roof (masking tape painted black). To fini***he the scene, WS turf and coal was added to hide the base.
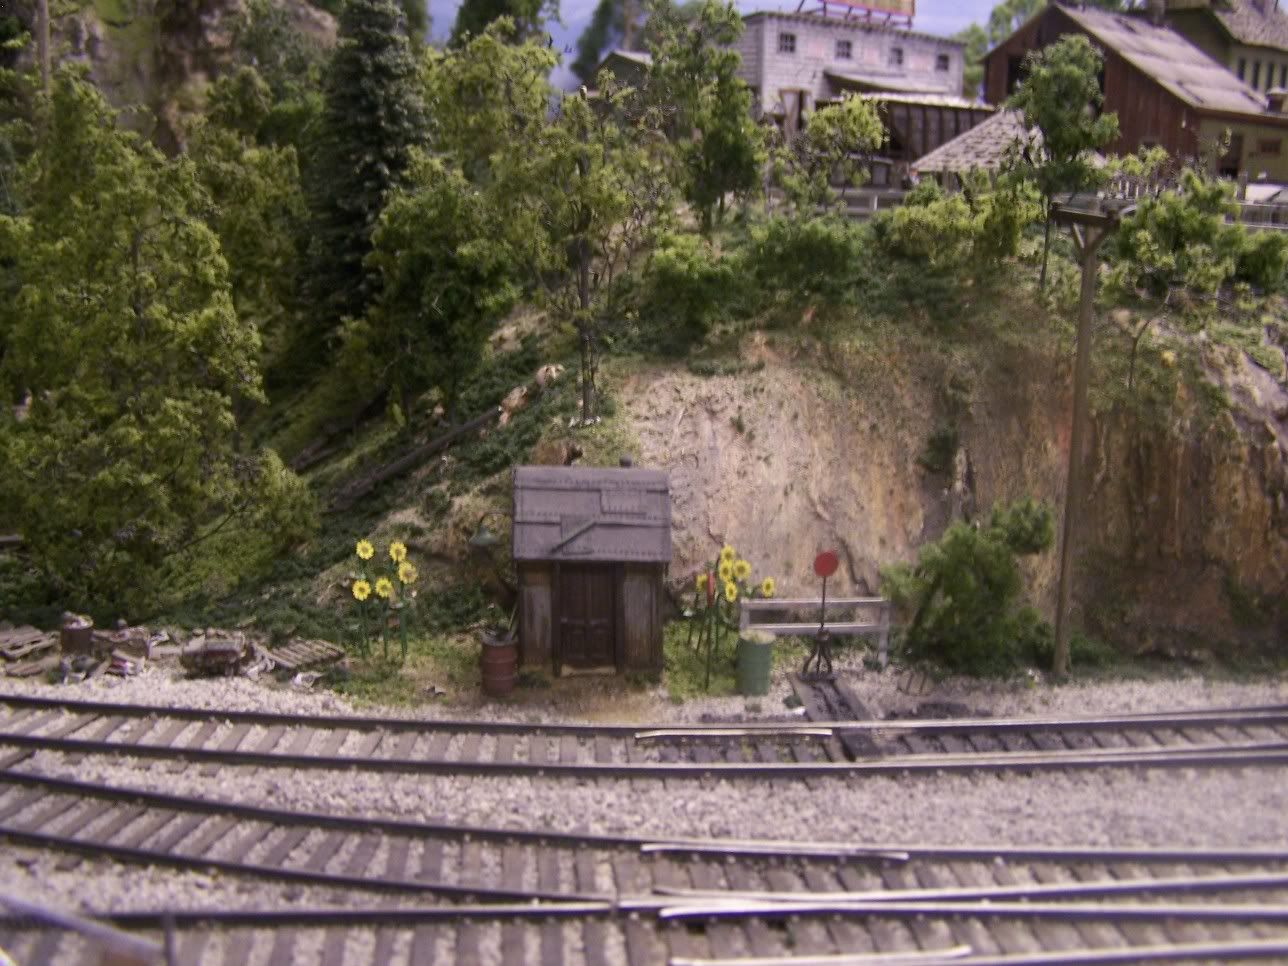
Next is this “scratch-built” trackside shanty. The structure was assembled using left over scraps of corrugated aluminum panels over a card stock shell. For the roof, strips of “lunch bag” paper painted “weathered” black was used to simulate the tar paper. Total construction time was less than 2 hours:
Another scratch built structure along the mainline is this small freight shed. Here, wood was used for construction. The roof was made from Campbell’s corrugated aluminum, then painted with a mix of floquils dark gray, rust, and engine black.
Small structures like these are a good way to give scratch building a try. Once you’ve got the knack of it, you’ll be on your way to creating your own custom models!
Bob, it is nice to see inexpensive kits that anyone can buy being put to good use. Not everything has to be a FSM kit to look good on a layout. Good advice.
Simon. This best part of using an inexpensive model like this one, You can afford to make mistakes until you achieve the results your after. I bought this kit for $2.50 at a train show. Not bad, Huh!
Very inspiring Bob. I’ve not attempted a scratchbuilt structure yet, but I think I could do a decent job of it. Your tips would give it a very nice “finished” touch. Thanks!
Bob, you make it look easy. I agree with Jeffery, if it was on my layout it would look like the devil. On yours it looks great.
Please keep’em comin’!
Jarrell