A few thoughts on brass model trains

Well I suspect at least some purchasers/collectors wanted to keep it unpainted for its jewel-like prettiness. Ironically the importers eventually started to have the engines PAINTED a brass color to look even nicer (and to prevent the tarnish which raw unpainted brass was subject to). Supposedly the brass colored paint made a good primer, but most guys I know stripped it off and started over if they wanted to paint their engines.

You can really appreciate the skilled soldering involved when it is unpainted.

Also since purchasers of brass were often more advanced, they would often unsolder and move the details around to match a particular example of the engine in question since, as is discussed in another thread on the Forums, there was great variety within a class of engines even within the same time frame. And some guys were more fussy about detail parts and made changes to their engines so again, they would prefer it not be painted. As noted earlier back in the prime brass years lots of guys had their own railroad name and numbers for engines so again, a painted version would not be what they’d want. (And often “their” railroad had different standards for where the headlight was placed, the generator, and so on, so again they’d be moving stuff around. Or they’d b
If Tom cares to answer I’ll be interested to see it since it is a real challenge to do this with the usual hobbyist miter box, and good alternative ideas are always worth hearing and trying.

I would merely mention that new and really narrow miter box that MicroMark is selling these days, and the very thin blades to go with it (the slots in their small miter box are too narrow for the usual saw blade, so I advise also getting their blades when you get the miter box). That might be one way to give you the accuracy you seek.
Dave Nelson

I bought my first brass loco, a B&M B-15 Mogul, from the collection of the owner of my LHS. It ran almost not at all, but it was brass and was less than a hundred bucks.

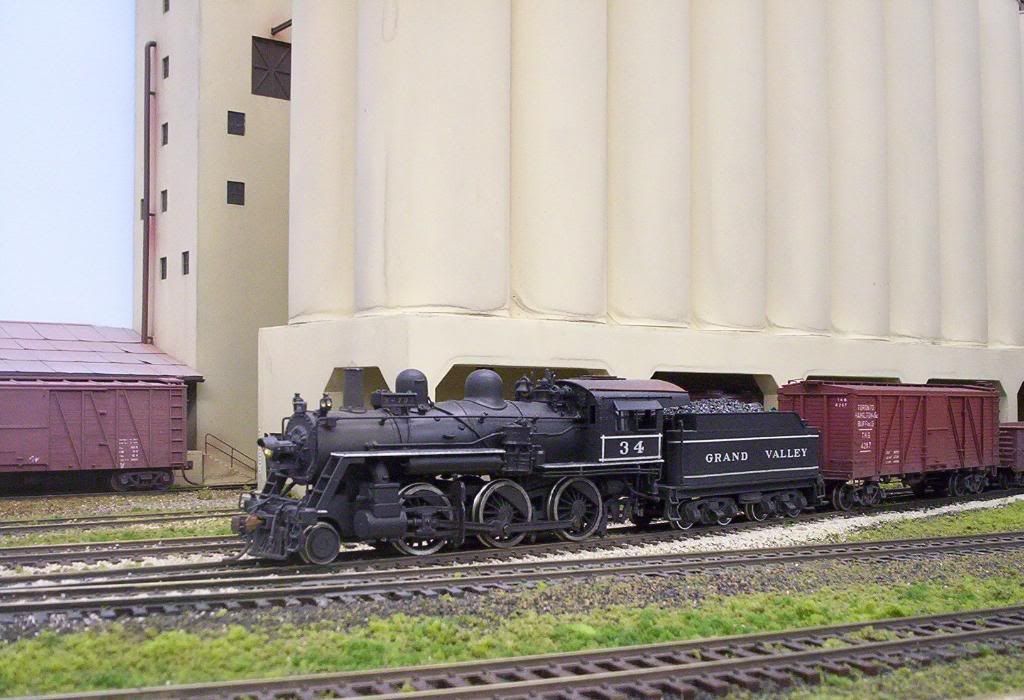
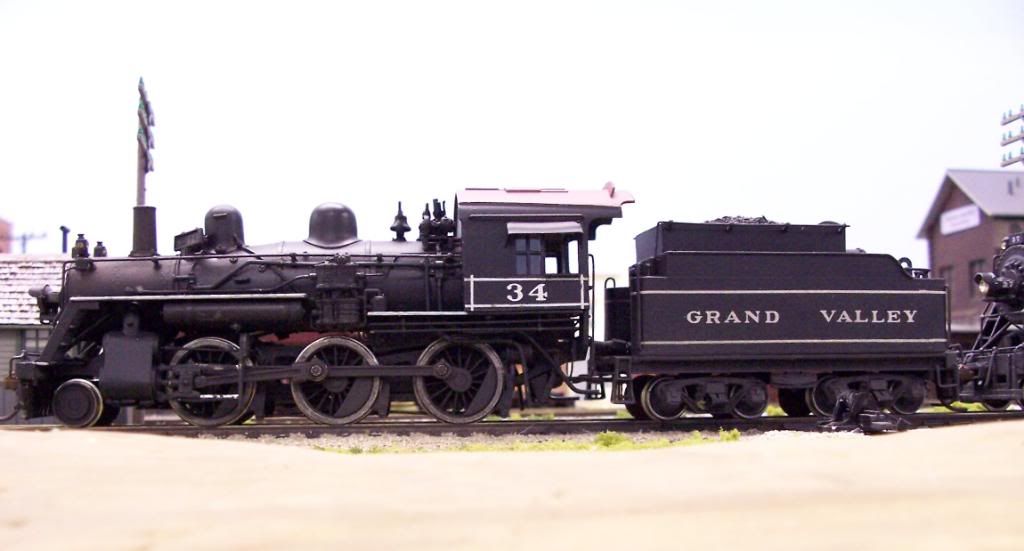
I re-motored it, changed a couple of minor details, then painted it for my freelanced road:

Later on, I gave it a more thorough makeover, using both brass and styrene to make it into a more modern-looking locomotive:

During that time I was painting for the same hobbyshop, and eventually became good friends with a couple of customers there. One was strictly a brass collector, while the other expected his brass to run as well as the state-of-the-art plastic diesels which he also used on his large layout.
For these two, especially, I learned to do mechanical work to ensure that all of their locos ran well and that they all looked good, too. The collector wanted his locos to match specific CNR prototypes, and, in most cases, that meant altering brass (and later, plastic diesels, too). For the one who wanted them to run well, I was kept busy re-motoring, re-gearing, and also altering them for better performance.
While both were able to afford extensive collections, neither was concerned about the market value of their collection, only that it met their particular requirements.

Through this work, I got to see a lot of brass and came to admire certain ones, prompting me to buy another myself. It came with a so-so paint job and needed some mechanical work, but also didn’t have its original box (a must for most collectors). I got it at a good price, repaired it and modified it a bit, then gave it a new paint job. Here it is with my friend’s similar loco:

[IMG]http://i23.photobucket.com/albums/b399/doctorwayne/locom

[quote user=“dknelson”]

jecorbett

One thing I’ve never understood about brass locos and rolling stock is why so much of it was sold unpainted and undecorated. I could never see spending all that money for a loco and then have to do a lot of work painting, decorating, and weathering it before putting it on a layout. Did it have greater collector value unpainted? It’s the reason I never considered buying brass for my layout.

Well I suspect at least some purchasers/collectors wanted to keep it unpainted for its jewel-like prettiness. Ironically the importers eventually started to have the engines PAINTED a brass color to look even nicer (and to prevent the tarnish which raw unpainted brass was subject to). Supposedly the brass colored paint made a good primer, but most guys I know stripped it off and started over if they wanted to paint their engines.

You can really appreciate the skilled soldering involved when it is unpainted.

Also since purchasers of brass were often more advanced, they would often unsolder and move the details around to match a particular example of the engine in question since, as is discussed in another thread on the Forums, there was great variety within a class of engines even within the same time frame. And some guys were more fussy about detail parts and made changes to their engines so again, they would prefer it not be painted. As noted earlier back in the prime brass years lots of guys had their own railroad name and numbers for engines so again, a painted version would not be what

[quote user=“jecorbett”]

dknelson

jecorbett

One thing I’ve never understood about brass locos and rolling stock is why so much of it was sold unpainted and undecorated. I could never see spending all that money for a loco and then have to do a lot of work painting, decorating, and weathering it before putting it on a layout. Did it have greater collector value unpainted? It’s the reason I never considered buying brass for my layout.

Well I suspect at least some purchasers/collectors wanted to keep it unpainted for its jewel-like prettiness. Ironically the importers eventually started to have the engines PAINTED a brass color to look even nicer (and to prevent the tarnish which raw unpainted brass was subject to). Supposedly the brass colored paint made a good primer, but most guys I know stripped it off and started over if they wanted to paint their engines.

You can really appreciate the skilled soldering involved when it is unpainted.

Also since purchasers of brass were often more advanced, they would often unsolder and move the details around to match a particular example of the engine in question since, as is discussed in another thread on the Forums, there was great variety within a class of engines even within the same time frame. And some guys were more fussy about detail parts and made changes to their engines so again, they would prefer it not be painted. As n

I find the O.P.'s attitude toward modifications interesting, and maybe that’s the subject of an entirely new thread. I don’t want to send this one off on a tangent, but it’s interesting that there is so much reluctance to modify models, especially steam locos. I witnessed steam in its final years, and have collected hundreds of photos since. I like the idea of running models of engines that actually operated in my target time and location, and I’d rather have them look like the prototype. That’s where the photo collection comes in. On the same class of engine, you could find a New York air pump, or a Westinghouse cross-compound, or two single pumps. Similarly, I have seen at least three different types of tender on B&O E-24a 2-8-0’s, and I like the idea of modifying my E-24a’s to suit specific prototypes. Brass engines allow this, and many more recent plastic ones can also be modified similarly. To me, I consider myself a modeler — not just a purchaser. I may buy the model off the shelf, but the modeler in me wants it to represent something specific, and I’ll change it in whatever way I need to. Currently I’m modifying a brass Sunset PRR H8/9 2-8-0 to represent a specific H10s engine as it appeared in 1949. I’ve had to modify the valve chests, cab, and running boards, and am now doing some extensive reworking on the tender. To me, that’s what it is to be a modeler. YMMV.

Now back to the subject at hand.

Tom

By that narrow definition of a modeler, freelancers aren’t modelers since we aren’t modeling something that ever existed. One thing about being a freelancer is the freedom it allows me. I don’t have to any need to be a rivet counter. I don’t have to worry that the pilot is wrong for a particular road number. My whole layout is “wrong”.

Just so I don’t start a flame war, I am not knocking ri

[quote user=“dknelson”]

jecorbett

Since you seem to be experienced with kit building and/or scratch building, I’d like to ask you a question. Quite a few years ago I bought a large craftsman kit and am just now getting around to building it. I bought it at the NMRA convention when it was held in Columbus, OH whatever year that was. The framing portion of it is nothing more than a box of sticks that need to be cut to fit. From past experience with several South River kits that required the same thing, I have had difficulty making perfectly square cuts. I used a razor saw and a miter box to do the cutting but the slots it the miter box had enough space to allow the saw to twist slightly as I cut the piece preventing a perfect perpendicular cut. Since everything is butt jointed, it is imperative that the wood be cut perfectly perpindicular to get a tight joint. What method do you use to cut raw lumber so you get a good clean and square cut?

If Tom cares to answer I’ll be interested to see it since it is a real challenge to do this with the usual hobbyist miter box, and good alternative ideas are always worth hearing and trying.

I would merely mention that new and really narrow miter box that MicroMark is selling these days, and the very thin blades to go with it (the slots in their small miter box are too narrow for the usual saw blade, so I advise also getting their blades when you get the miter box). That might be one way to give you the accuracy you seek.
Dave Nelson

Folks, there’s nothing wrong with discussing brass locomotives, but when people start impugning how others choose to enjoy their hobby, my antenna goes up. Let’s all get along and play nice. Because I really don’t care about brass as a topic, and if I have to actually read this whole thread to pick out what’s on topic and what’s a veiled slam against someone else, I may just decide it’s easier to lock it. So… play nice.

Dave & jecorbett,

I’ve used both the X-acto aluminum miter box with their precision razor saw blade and the NWSL Chopper II to make precision cuts:

I model in N scale. I have a few brass engines representing models that are not availabele in plastic RTR versions (e.g. a Samhongsa GE U33C). Today there are very few brass engines that I would like to purchase that are not made in RTR that are of good quality and are good runners. There is a site that reviews all of the N scale locomotives ever made and he is pretty thorugh and honest about them. A lot of the N scalers use his site as a reference guide for both brass and RTR locomotives.

As I mentioned before I obtained most of my brass locomotives at auctions. I found that very few bidders were interested in the poorly painted locomotives, or those that would take some TLC to get running again.

Those were mainly the locomotives that interested in me. The unpainted brass in excellent condition as I remember usually went for a premium, while those poorly painted and scraped usually went for a bargain price. Also, is a detail piece or two was missing, once again very little interest. There is still an excellent supply of detail parts available so while they might be missing a bell or whistle replacements were readily available. Especially misc piping and valves.

As I have a sand blasting cabinet, note that baking soda is now used primarily to remove paint form brass models. It was very easy to remove all of the paint off those brass engines that required repainting.

Not only was the paint removed, sand blasting left a great finish on the brass for paint and/or primer to adhere to. I also became somewhat practiced at using a compressor and paint gun as well.

Most of the brass engines I have on my layout are not available in model form from any manufacturer as they are Canadian railway engines.

Tom and jec:
the Miter Box from Micro Mark I was talking about is their new one, hardly thicker than my little finger:. They called it the world’s smallest miter box and just introduced it. Here is their description: Our Micro Miter Box is sized exclusively for model builders working with micro-size materials. Make the finest 30, 45 and 90 degree miter cuts you’ve ever seen in wood, metal and plastic strips, rods and tubes up to .235 inch wide x any length! Excellent for cutting brass tubing . . . especially very short pieces used for mast bands and other items. Includes adjustable stop for making duplicate cuts quickly and easily. Works best with our Ultra Fine Saw Blades (#85853, sold separately). Approx. 3-9/16 inches long x 5/8 inches wide x 3/16 inch high.

But now I see from their website it is sold out and discontinued! Sorry for the dead end recommendation.

Tom,

I have the same Exacto miter box and razor saw that you have pictured. I must have NWSL Chopper I because mine looks like a clipboard with a chopping arm and blade attached to it. I used that building the timber framing from the South River 5 stall Roundhouse. That was about 10 years ago and my memory is that I didn’t get the nice square cuts I needed. It seemed to give me a little twist as well when I cut the 1/8" sticks. I’m wondering if the Chopper II is a significant improvement as far as making straight cuts.

I was on MicroMark’s web page yesterday and they have a power mini-chopsaw for $73 and changed. That seems a lot for something that I don’t know how much I will use after this one project but it might be the best bet for making square cuts.

Thanks for the reply.

[quote user=“dknelson”]

tstage

Dave & jecorbett,

I’ve used both the X-acto aluminum miter box with their precision razor saw blade and the NWSL Chopper II to make precision cuts:

Tom

Tom and jec:
the Miter Box from Micro Mark I was talking about is their new one, hardly thicker than my little finger:. They called it the world’s smallest miter box and just introduced it. Here is their description: Our Micro Miter Box is sized exclusively for model builders working with micro-size materials. Make the finest 30, 45 and 90 degree miter cuts you’ve ever seen in wood, metal and plastic strips, rods and tubes up to .235 inch wide x any length! Excellent for cutting brass tubing . . . especially very short pieces used for mast bands and other items. Includes adjustable stop for making duplicate cuts quickly and easily. Works best with our Ultra Fine Saw Blades (#85853, sold separately). Approx. 3-9/16 inches long x 5/8 inches wide x 3/16 inch high.

But now I see from their website it is sold out and discontinued! &nb

My first brass locomotive was a Hallmark CF7; I had it custom painted and constant lighting & a beacon installed. That was 35 years ago. It was a short circuit waiting to happen. Beautiful model, terrible runner. Of course, it has the same number as one of the Athearn RTR CF7s, to add insult to injury.

Also, up until relatively recently, pre-decorated models were often not very good. In the 1980’s-90’s several companies would buy undecorated freight and passenger cars (and engines IIRC) and paint and letter them to sell to people who wanted accurate and well-done decoration. Back then, even if say a boxcar came lettered for a scheme you liked, you’d get a better version by painting and decalling it yourself.

I must be one of those rare people that not only has brass, but runs it, too.

I model the New Haven Railroad almost exclusively. I have no set era, just pre-1969, so I have steam, diesels and electrics with my oldest piece dating back to 1907. The newest loco is from 1965. Almost every NH diesel I can get in plastic these days. But steam and electrics? Only a few have been made in plastic: 4-8-2 R-1, 0-8-0 Y-3 (both USRA designs), and the EF-4 electric (also VGN/PC/CR). BLI has made both 4-6-2’s and 4-6-4’s, but in Brass Hybrid.

So what is a NH steam or electric fan to do in HO scale without brass?

Well, I buy it, paint it, install DCC, and get it running right. There are some tricks of the trade in doing so, from making sure the weight is balanced over the drivers to making sure that the tender trucks sit square. But for me, this is a fun part of the hobby: taking something that doesn’t run well and making it right.

Some brass locos are basketcases, but most are not total losses. A little patience, skill, and thought can make most brass locos run very well.

Paul A. Cutler III

Yeah Paul, but look at what RR you model. Probably much of their rolling stock requires brass. If I were modeling steam era D&RGW, I’d be in the same boat. ALL of their main steam is brass only; anything available in plastic are were short lived or leased such as the UP type steam engines or the 2nd hand N&W articulateds. Basically I can’t afford it - and even if I did pick up a few old issue D&RGW std gauge steam in the lower price ranges, I’d have to learn how to make it run well and have it painted etc. Ain’t gonna happen. An old acquaintence of mine models 1953 D&RGW and well, he once bragged that he was in the top 3% wage category in the US, so he could afford all that brass.

[quote user=“jecorbett”]

dknelson

tstage

Dave & jecorbett,

I’ve used both the X-acto aluminum miter box with their precision razor saw blade and the NWSL Chopper II to make precision cuts:

Tom

Tom and jec:
the Miter Box from Micro Mark I was talking about is their new one, hardly thicker than my little finger:. They called it the world’s smallest miter box and just introduced it. Here is their description: Our Micro Miter Box is sized exclusively for model builders working with micro-size materials. Make the finest 30, 45 and 90 degree miter cuts you’ve ever seen in wood, metal and plastic strips, rods and tubes up to .235 inch wide x any length! Excellent for cutting brass tubing . . . especially very short pieces used for mast bands and other items. Includes adjustable stop for making duplicate cuts quickly and easily. Works best with our Ultra Fine Saw Blades (#85853, sold separately). Approx. 3-9/16 inches long x 5/8 inches wide x 3/16 inch high.<