Looks as if I’m going to have to install the dreaded access hatch. I’ve seen many & they all look like hatches…what I mean is that the outline is clearly visible. Is there any way to disguise the small gap that is needed? It will be very close to the front of the layout, so I really would like to hide it. Also seems every time it is moved a small piece of scenery is chipped off, which makes the line even more visible. Thanks for any help. Jerry
I asked the same question a while back and got good replies along with photo’s. I did see one that looked great elsewhere on the net though. It was a lake where the water part swung down on hinges. I don’t know if it was big enough for an arm or a whole body to go through but you could not see any evidence of a hatch as the shoreline was covered by overhanging foliage. It looked great.
On my last HO layout, I had an access hatch that was hinged downward. I built up the hills and tree line around it to hide it as best I could, but you always manage to see a hatch line if you know it’s there, but generally, nobody else noticed…comes with the territory.
Is this a place where you need an opening large enough to physically get the upper half of your body through? Or are you just lifting off the top of a tunnel, so all access is actually from above?
Because I’ve got subways below the main level of my layout, I’ve got 7 different small liftoff regions which allow me to get to the tracks below when necessary. Most of the seams are pretty well hidden. Where possible, I make the edges uneven, because straight lines stand out more than jagged ones. I put plastic wrap (like Saran Wrap) on the fixed part of the edge, and then cover the gap with plaster cloth, leaving a half-inch or so overlapping the fixed part. Once the plaster cloth hardens, I can lift off the whole thing easily, because the plastic wrap allows the plaster cloth to take the form of the edge, but doesn’t let it adhere. Then I can scenic the gap area, including a good helping of turf at the edge of the plaster cloth to hide it. Once dry, I can remove the liftoff easily, but it’s pretty well hidden.
Ideally, make the hatch a swing up, so that it is out of the way of knees and elbows as one slithers up into it. In fact, the one I made was a lift out that I lifted out from below and set aside, propped against a handy wall nearby. It was smack dab in the middle of may “lake”, and I arranged it so that the border was actually right at the shoreline. It was virtually impossible to see…mind you it was about 5’ away.
Otherwise, build it as a diorama on a base that is bordered by a hedgerow, or even some tracks in front of it to hide the break in the scenery. But I would advise you design it to be lifted up from below the layout, tilted and/or rotated, and then either set aside or pulled back down through the apreture and set well away from your flailing extremities.
It can be done…just takes some thinking.
Just started putting in the base for a lift out access hatch on my HO layout, here is what I am working on.

Since this is a work in progress I am still not sure exactly how it will actually look, but this is my plan.
The cardboard strips are attached to the plywood hatch base with hot glue and will eventually be covered with my ground cover mix along those edges. Also, most likely will build up a small berm of scenery base on the outside edge surrounding and up to the edge of the cardboard.
The plywood hatch base section without the cardboard has been left that way to allow access for the Rail Rebuilders model that will sit on top both the permanent base and the lift out section.
Hope this helps!
Cheers,
Ryan
You didn’t mention the surroundings for the hatch, city, country, etc. I have a large yard on the railroad which has an industrial area. For the one problem access area, which I seldom have to use, I decided on an opening, but no hatch, no cover swinging up, down or sideways.
Instead I took one of the large Walthers structures, built two sides of it to sit just outside the opening and camafloged with some additional structures. It also has a pair of sidings running along one side. From the aisle area, it just looks like another large industry. O, the yard height from the floor is 5ft, so the viewing area is at almost eye level. I also put enough of a dummy roof in place to hold some stacks and air conditioners. Looks very natural. The structure is NO fastened down, just in case.
I aquired access, and another switching opportunity from it.
Bob
I have 5 lift-outs on my layout. One is a wooded slope going up to the tracks. Two more are in a surburban area where the sides are hidden by using the roadway edge and a hedge line. The other two are city blocks bounded by streets with a wall that drops down to the tracks below.
Everything else was measured and planned so it could be reached from the layout edge. I also have 2 “grabbers” to pick up derailed cars and even some small buildings.
I think the hatch edges are hidden best by trees or bushes or if that is not possible use an obvious line such as a long building, rail line, river bank, etc. which fools the eye into thinking the division edge belongs there.
Doc
Yes I have to get the upper part of my body thru. Not sure what type of scenery I will use yet. The lake sounds good.
So, why are manholes round? Answer - so they can’t fall down through the hole when you take the cover off.
One option is to make a liftoff that can be taken out through the access hole. A rectangular piece of foam would work. Cut it with beveled edges so it will stay in place when set down from above, but can easily be lifted up and off, or lifted from below and taken down through the opening.
If the base is nothing but foam, it will be very light. It doesn’t have to be perfectly rectangular, but avoid a circular lake if you must take it down through the layout opening.
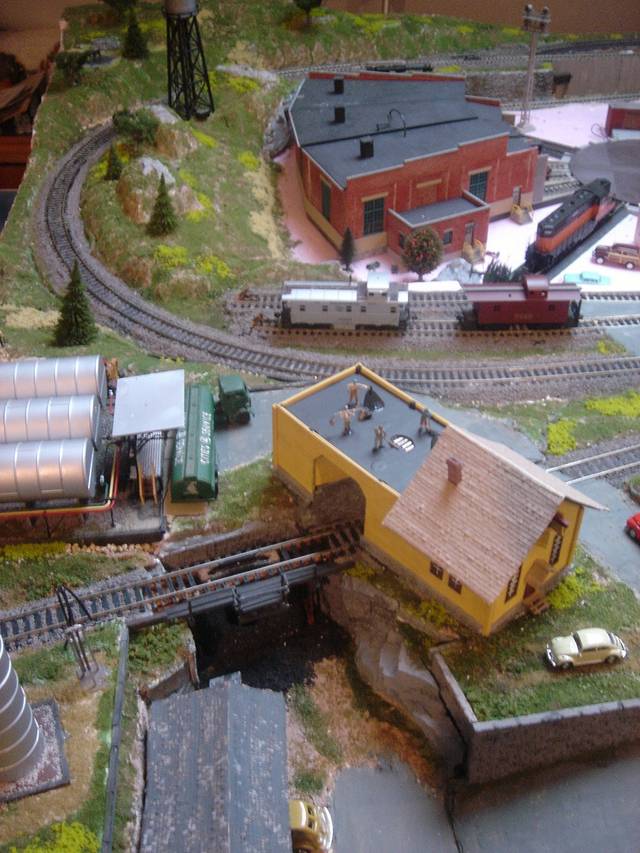
This is a shot of the “west” side of my layout. There are 5 liftoff sections here, designed to provide maintenance and derailment access to the subway tracks below. (Click on the pictures for a larger view.)
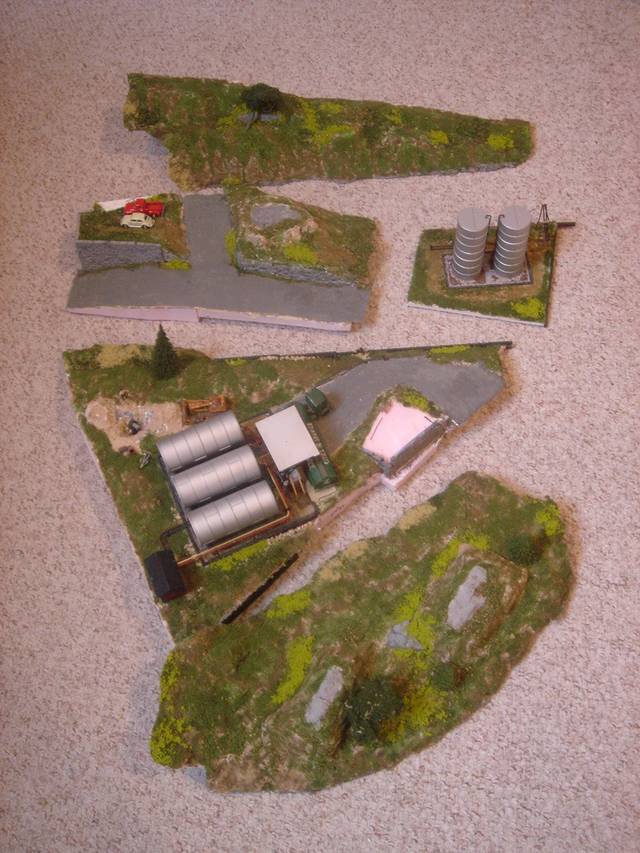
Here are the liftoff sections themselves. My plan was to have no tracks on the liftoffs, so the sections are small, and fit between fixed parts of the layout with the tracks on them. I have a couple of other liftoffs with lighted structures on the other side of the layout, but none of these have wires, either.
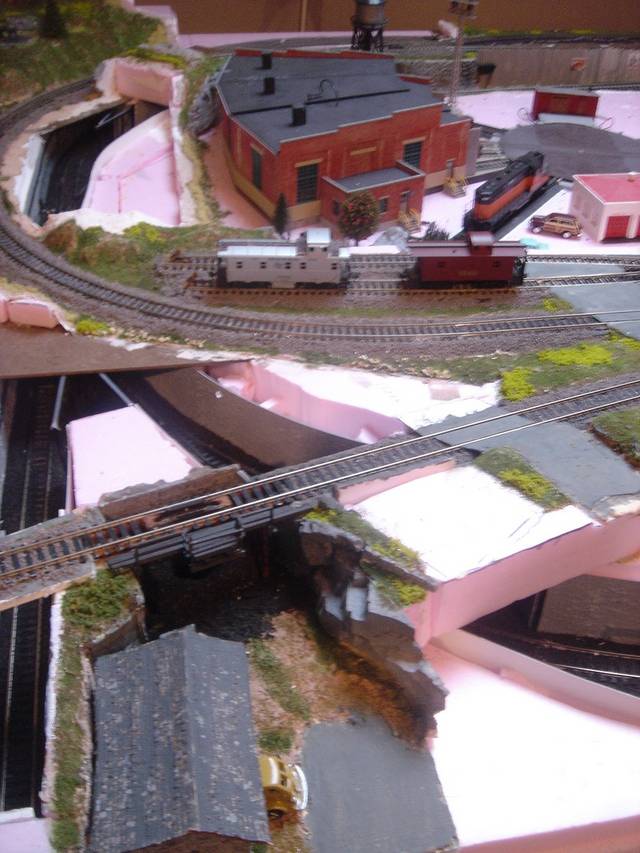
Finally, this is what the layout looks like without the liftoffs. Again, they are far from man-sized, but the principle is the same. All of these are just pieces of foam with scenery on top of them. I find it easier to hide the edges using rough terrain.
There is only one way to hide a hatch. Either you need very precise edges that fit extremely closely that can’t be seen (good luck!) or you need something to block the view. Be creative. Buildings, trees, hedges, slight hills, curbs, anything that makes you see something else or draws your attention to something other than the hatch.
Mr. B., I don’t understand your statement about round manhole covers not falling through. They most certainly will unless there is a retaining stricture below the ground-level aperture in which the manhole sits. In fact, a shape other than round has a much higher probability of not falling through.
-Crandell
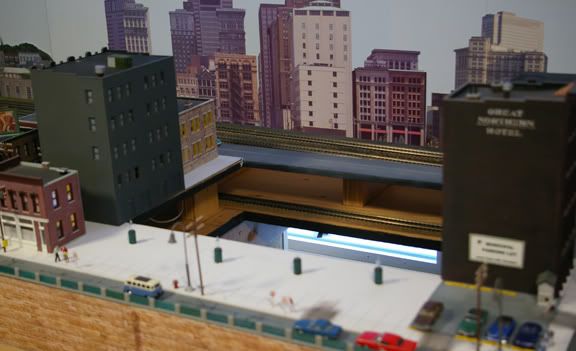
PastorBob makes a good point…the strategy you use for a hatch depends on where it is. I have 3 of them in a line, and they are all hidden by downtown buildings that flank each of them on 3 sides…they exist as permanent holes - no need to close them since they’re not visible anyway.
Selector also makes a good point…a hinged hatch that drops down can be a problem because you risk smacking into its scenery as you squirm into the hole. Hatch size also has to be realistic for your purpose - only big enough to look through and stick an arm through? or big enough to stand up in? Even doing my best ballerina impression in an attempt to make myself as skinny as possible when I stand up inside it, a hole of 13 x 21" is a fairly tight fit for a guy my size (6’2" but not particularly hefty).
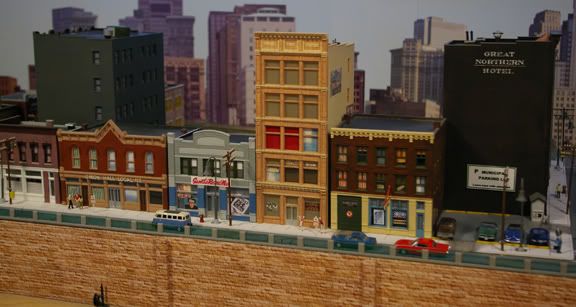
Here’s a pic of an access spot (as opposed to a hatch)…normally the buildings that hide the access hole don’t need to be removed, but I did it here so the hole is visible. Cheers.
Remember, the round manhole cover sits flush with the street level. So, there has to be a lip that it rests on, no? Ergo, the hole itself is slightly (about 2") smaller in diameter than the cover. It is impossible for the cover to fall into the hole. [:-^]
Take a checker, or a poker chip and some styrofoam and construct a manhole where the top of the chip sits flush with the top of the foam, on a small lip below it.
Now I challenge you to push the chip through the hole without damaging either the chip or the hole. You may turn the chip any way you like.
Yes, it must sit on a lip of some sort. The important thing is that the circle has the same diameter, no matter what way you look at it. The circular hole also has the same diameter from every angle, and the hole’s diameter is always smaller than the cover’s. If you have a rectangular plate, you can always rotate it so that the opening will be larger than the width of the plate that has to go through it.
Thanks, Mr. Beasley, and others. I of course understand all this, but I wanted to clarify that just because a disk has its shape doesn’t mean it won’t fall through an aperture of the same size. There must be a nether stricture (ledge, lip, lugs) that support it flush with the surrounding surface. Sort of like an old milk bottle flat cap inset on the top of the neck…can’t go much further.
Thanks, again.
- How is the plastic wrap positioned prior to laying the plaster cloth?
- After the plaster cloth is dry, is there any special technique required to lifting the hatch and separating the dried plaster cloth from the plaster cloth on the terrain surrounding the hatch?
- After the plaster cloth is dry, I am covering it with a sculptamold slurry before adding grass and ground cover foam. Would you recommend adding the sculptamold before or after lifting the hatch for the first time?
Any recommendations (from your or anyone else on this forum) would be greatly appreciated.
7 years and this is your first post? Well, welcome to the forum. My B is still around, 10 years after his post and does some monster scenery.
It’s clear from his description that the plaster hatch only touches the plastic wrap surrounding the hole, it does not extend beyond the plastic to adhere to the plaster base. Lifitng the hatch, might stick to the plastic but not the underlying scenery.
I don’t know how Mr B feels, but 10 years after this thread started and 10 years older but I would not want 5 hatches to deal with.
Wow, over 9 years. I’ve got one more liftoff now, and it qualifies more as a hatch since I can squeeze through it.
I think the straight edges are 2 feet long. This is HO scale.
You can see a small separation line running through the static grass here, with the liftoff back in place.
This picture shows the liftoff section raised up a couple of inches:
As for the plaster cloth, I put plastic wrap around the edges of the “base” part of the liftoff only, leaving the liftoff section itself bare. The plastic wrap can hang down into the opening, and thus separates the liftoff from the base. I put the liftoff in place and use thin strips of plaster cloth over the crack between the liftoff and the base. The plaster cloth will stick to the liftoff but just lie on the plaster cloth without sticking. I let this harden completely. Once dry, I can pull out the liftoff section and I’ll be left with a thin ledge of plaster cloth. I take out the plastic wrap and re-seat the liftoff. At that point I add scenery to the white strip. With turf, ground foam and static grass the separation line can be pretty thoroughly hidden.
This later shot shows the use of ground foam to hide the separation lines.