Hi Everyone,
Where do I add weight to a freight car? I know the NMRA weight equation:
HO Scale freight cars= 1 oz. + 1/2 oz. for every inch.
Thanks
Chris
Hi Everyone,
Where do I add weight to a freight car? I know the NMRA weight equation:
HO Scale freight cars= 1 oz. + 1/2 oz. for every inch.
Thanks
Chris
Pretty much anywhere it will fit, depending, of course, on the type of car involved. Most cars come with a factory-supplied weight, which may or may not be the correct suggested NMRA weight. I don’t worry too much if the car is a little too light or a little too heavy, but generally tend to make mine a little on the heavy side.
For house cars (boxcars, reefers, etc.) the weight usually goes inside the car, and should be secured in-place. I cast my own weights…
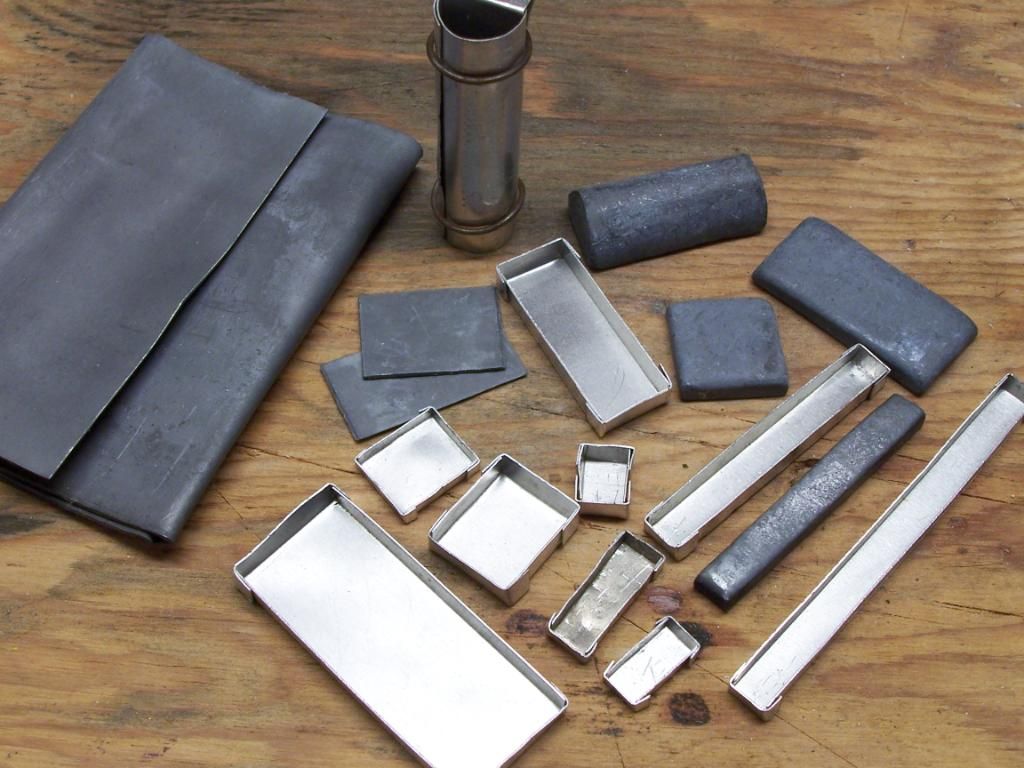
…and there’s a how-to HERE.
In the past, to keep the weights in place, I’ve used various glues, epoxies, caulk, etc. with most giving up, over time, possibly due to the fact that when the cars are not on the layout, they’re laying on their side in a box.
Nowadays, I use styrene strip and/or sheet, along with solvent-type cement, to “trap” the weights in place, like this…

For open cars, such as gondolas and flatcars, there’s less room to hide weight, but it’s still possible.
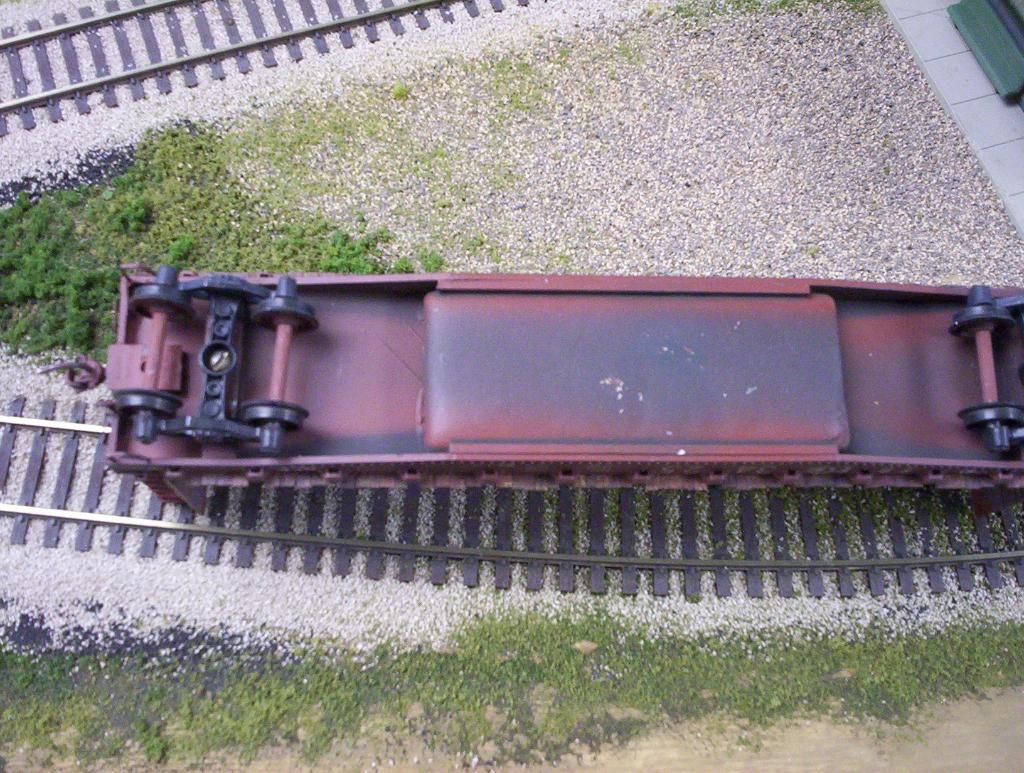
If the car has drop-type sidesills, like this modified Athearn flatcar…

…the underframe can be removed (nobody will notice unless you’re in the habit of having regular derailments with roll-overs) and weight secured in its place…
Gondolas can als
Gidday Chris, on enclosed freight cars I try to put the weight as close as possible over the trucks, in this case, half ounce el cheapo fishing sinkers, squished in a vice, and, as my cars are stored upright, attached with caulk.
Otherwise, I will happily endorse doctorwaynes methods, which I have used with much success.
Cheers, the Bear.[:)]
Hello All,
For handy reference I made a chart in Excel, with both standard and metric units, for both recommended practice weight and length.
I prefer the precision of metric over standard for weights and measures.
As far as weight type and placement, I have a depressed center flat car that rode 1/32 of an inch above the rails and the uncoupling magnet.
The steel weight in this car was located in the depressed center section in a weight pocket. As the car would pass over the uncoupling magnet the magnetic field would momentarily “capture” the car.
I replaced the steel weight with lead and no more stalling.
Currently I am in the process of scratch building an HO scale GSC 60-ton well car. The lead weights are placed in the end sections over the truck bolsters.
Others have posted many locations for adding weight.
A simple way to add weight to a flatcar or gondola is in the load itself.
Underweight cars can be brought up to NMRA standards by simply adding sheets of lead or steel weathered as steel plates.
Square weights can be disguised as ingots or hidden under facades of loads; scrap metal, rock and/or coal.
I purchased a piece of hot rolled steel stock (1"x48"x1/8" @ 25.29oz) at my local hardware store. I calculated the ounce per-inch (0.5269 oz/inch) along with the gram per-cm (5.88g/cm).
When I need to add weight, I cut a piece off, compensating for the kerf of the blade and the weight lost.
This then can be added, in places that have been suggested, to bring the weight of the car up to recommended practices.
Hope this helps.
I add weight wherever I can get it work.
.
All weight must be non-magnetic, lead is my choice.
Weight must be centered. There is not an operational difference in putting 2 ounces dead center from placing 1 ounce over each truck. The same effort will be exerted downward on each truck bolster.
I do not follow the NMRA RP, but instead use this simple rule: 40 foot and below, 4 ounces. 50 foot, 5 ounces. 60 feet and up, 6 ounces. All cars are +/- 1/4 ounce from these goals.
.
For weight, I buy 1/32" and 1/16" sheet lead in 12 by 24 inch sheets on ebay. I use a paper cutter to make 1X1, 1X2, and 1X3 inch pieces. Some cars require low temp melting alloys or lead wool/beads, but sheet lead works easily most of the time.
.
I hope this helps you out.
.
-Kevin
.
I have a ton of A-lines stick on weights ( basically the self adhesive backed car wheel balencing weights ) I put them right over the truck bolsters in box cars covered hoppers tank cars etc. coal cars get them on the underside of their loads but again as close to over the truck bolsters as I can get them. i usually find that an ounce ( 2 stick ons over each truck ) along with the factory weights are sufficient for my layout cars also have metal wheelsets and properly tuned kadee couplers ( trip pins and heights to the kadee tester. I have had no problems ( no large grades or tight cureves either )
There are some cars which just seem to defy any attempt to add meaningful weight. One old trick, culled from the “Kinks” column that appeared years ago in MR, is to wrap solder around the axles of the trucks. It may not be much but you can’t get a lower center of gravity than that!
When using raw lead, I do paint it with acrylic paints or take other steps so that I am not casually touching the lead by mistake. And of course thoroughly wash my hands after touching the lead.
Dave Nelson
For cars such as box or caboose I just put inside, of course. More often than not I add loads to gomdolas and flat cars so they are not a problem. I am not terribly diligent about getting the weight to standard but have had few related problems.
Where possible, I usually use pennies (I recall about 8 per ounce but would have to check. No, a dime is not a better choice.[%-)] The copper is only 80% the density of lead so that would be more space efficient, maybe more cost efficient. I consider items such as washers and nuts as too costly at box store prices!
I bought a container of BB shop at WalMart, and use that for tank cars, covered hoppers and the like. I have a digital scale and start by putting a small container on the scale and zeroing it out. I put the car on the scale then add shot to to the container to get the correct total weight. If the car has a hatch or other opening, I pour the shot inside followed by Elmers white glue. I shake it a bit to get the shot covered in glue and let it sit overnight before closing it up.
With a home made load, it is easy to make the load with a hollow center, and hide weight inside. Some commercial loads also have spaces to hide weight as well.
I buy a 6-pound pack of these black RC car weights that have adhesive backing, I really like them. They are black to they blend in well. My only complaint is they are thin, so they are a little larger than the usual 1/4 oz weights. So, I have to get slightly creative on sticking them to cars. However, the thinness does make for a lower center of gravity.
For a quick reference as to what the weight should be, I took a scrap piece of wood strip very close in size to a regular 12" ruler, marked it off in inches but labled the markings with the appropriate ounce based on the NMRA RP. so all I need to do is hold the “ruler” next to the car & know immediately what the weight should be
I get my sheet lead from the local lumber yard. They sell it for chimney flashing. Cuts easily with tin snips. I pickle the lead weights in a mild acid (supermarket vinegar) to give it some tooth for the acrylic caulking compound to stick to.
I use that as well, I can cut it with scissors. It is good being cut up into small bits to fit in odd places like the underframe of flatcars that have no load or inside the molded tanks and other details on passenger cars before adding seating.
What a weighty topic ,(haha! I use fishing lures for adding weight that are secured with liquid nails. That material is plenty strong.
To minimize the weight’s visibility and ensure they stay on, I squeeze them with pliars.
I was looking at Home Depot, is that basically this stuff (link)?
.
They don’t sell Chimney Flashing in South Florida.
.
-Kevin
.
Self adhesive automotive wheel weights are handy for adding heft to some types of rolling stock.
After experimenting with the overweighting suggested by various hobbyists I’m sold on the operation of cars in the 8 to 10oz range upon my switching layout. The heavy cars track smooth without the jerkiness, they resist running away when coupling up, not to mention the noticeable slack take up at starting, it all somehow imparts a fun feeling of moving real tonnage.
Regards, Peter
My club has a similar setup with the weights marked by car length, but it also has a piece of track on it and coupler height gauges at either end. It is long enough to allow the car to be rolled for about 12 inches so it measures several things at once. Handy tool, and very easy to make.
Dave
Any type of “obstacle coarse” you can set up to verify a car runs well is good for pre-employment on your railroad.
.
I run also run all freight cars through a 16" radius S-curve coupled to an RS-1 on one end and 60 foot boxcar on the other. If nothing derails, they are good for service.
.
-Kevin
.
My method of adding weight to most cars is to use soupy plaster. Self forms to the interior of box cars, covered hoppers and tank cars. Spill some? Wipes off with a little water and doesn’t have the toxic properties of lead and it is cheaper. Hoppers and gons can have a live load over the weight once installed.
