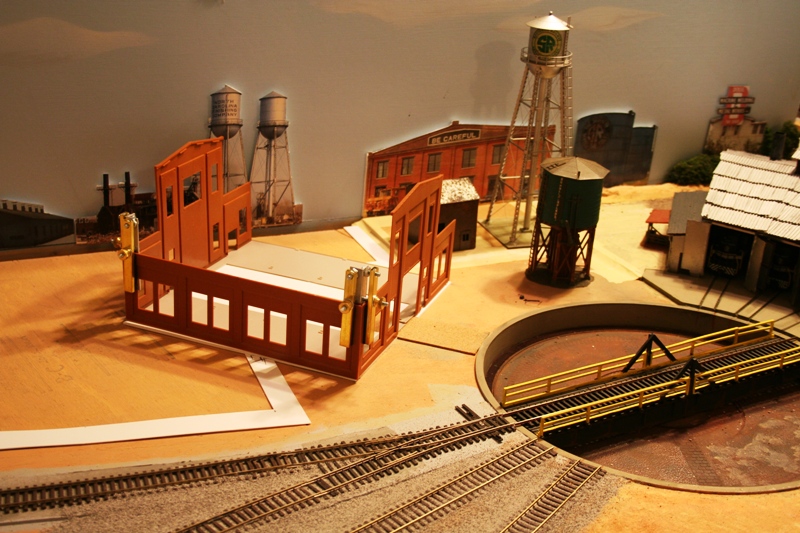
Started work on the Walthers Cornerstone Series kit Allied Rail Rebuilders (Walthers Part # 933-3016 and measures 10 x 10 x 6" 25 x 25 x 15cm) and with just about 2 hours of work into this kit all the walls have been completed and some parts have been spray painted. The base was modified to fit the single track lead from the turntable and then it was coated with gray primer. The roof sections were coated with a flat black spray paint and allowed to dry with some other parts, such as roof vents and doors were spray painted a silver metal coating.
I wanted to see how it looked on the layout having already measured the section many months ago (10"X10"), I wanted to be sure that I was still going to make the grade. Sure enough, the measures were good! I then fabricated a foundation base with two sections of sheet styrene and then hot glued it to the lift out section. I then added thin styrene sheet to the lift out section edges to replace some cardboard that was initially utilized. The thin styrene sheet will provide a better transition for hiding the lift out section. The plan is to apply a layer of scenery base material to the styrene edge and then onto the lift out sections that will not have any building foundations. Then add scenery foam material along the this area. To hide the gap I will most likely add a chain link fence about 1/2" in front of the lift out section edge which will provide a view block to further hide any possibility of seeing the gap. The back and side edge of the lift out section should have enough structures and scenery base material to cover any of those gap areas. The styrene sheet overlaps from the lift out section and onto the permanent benchwork plywood material about 1/2" in all areas.
You know guy, I’m glad to see this…I was considering using this kit for my Diesel Repair & Maintenance module, but Cornerstone kits have this nasty tendancy to be too short and too high. It looks like that isn’t the case here, and It looks a lot like the MOW buildings that Southern used in many of their yards especially in NC and GA.
Thanks silverspike though we have bumped into each other before on the forums.
I model The Southern/Norfolk Western Merger Circa 1987 in the Piedmont of NC. That way I can have my Southern Power (Many Highhood units, those converted RS units used as slugs etc) and the Huge Coal Haulers that the N&W was famous for. I remember those days fondly you could see some very interesting power combos running through Salisbury, and every now and again you would see a freshly painted Norfolk Southern unit. I now reside in Upstate NY, so I can say I have a very unique setup considering I live mainly around NY Central, CP Rail, and D&H modelers.
Thanks for the photos, I can see one modification I would like to make already and that is a back door, see now you got me motivated… I think I need to make a trip by the Walther’s Home page and pick one up.
You know, the N&W has a special place in my heart too. O. Winston Link was commissioned to photograph and record the final days of the steam locomotives for that railroad and some of my favorite railroad images are of N&W steam action by Link. Here are a few of my favorites:
Hot Shot Eastbound at the Laeger Drive In, Laeger, West Virginia, 1956
Hawksvill Creek Swimming Hole, Luray, Virginia, 1956
Just wanted to invite anyone who has built the Allied Rail Rebuilders kit to add their modeling project experience with the kit here too!
If you built this kit did you use it for motive power or rolling stock maintenance, or both? Or did you scratchbuild it for another use or industry on your layout?
Wow those are awesome photos…maybe it has to do with getting older but Steam locos have been calling my name every time I enter my LHS… I don’t know how much longer I can withstand their siren song.
But back to Diesels. what really made your heart pound during those heady days of transition is seeing Engines you would have never seen on the old Southern Piedmont div, and then there was the day I stopped dead in my tracks …sitting on a siding waiting for a hot freight to pass was the newly refurbished 611 J , and me without a camera, I was in my early 20’s and I had never been that close to a full size steamer…it was a magical almost spiritual experience. Everyone has the reasons they model what they do, and when I was a kid I never understood that, it took acquiring my own Authoritative base, or building my own memories as my pap use to say.
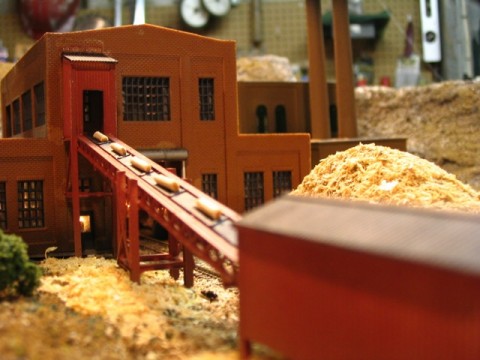
Lee that is an awesome use of that kit, if you’re ever down to Wilson NC, you should really check out the Antique Barn, they have a Modular Railroad that is really something to see, the reason I mention this is one of the modules is a paper mill set up, it was featured in RMC back in the early 90’s. The guy that did it like you used some very interesting combos to set the scene. It was great to watch cars being switched in and out of that one.
This has always been a favorite of mine, though I never cared for the " wing " look. I bashed mine years ago & it has served well through different layouts. Though it would be impractable for my current layout, I’d love to see this building doubled in length with still only one side sticking out, or turn it on it’s side & turn it into a 4 stall building.
Lee and Outdoorsfellar, great examples of utilizing the kit and bashing it to fit your needs.
I really like the paper mill use of the structure Lee, a very creative way of turning the kit into another industry. I wonder what other industries that kit could be incorporated into?
And Outdoorsfellar, that is a great idea turning it on the side and bashing it into a 4 stall building. I like the way you cut the left “wing” and made the building into an “L” shape. Did you just use the same wall parts but eliminate the lower left roof section? I suppose that you had to modify the interior steel supports as well on that side of the model.
Highhood, I still suffer from the same issue of having plenty of photo opportunity “Kodak Moments”, but no camera in hand. [%-)] Memories are great though! [8D]
I built my building probably a good 10 years ago. I know I didn’t use any supports. I probably just didn’t wanna deal with 'em for some reason. My top roof is made using a balsa panel.
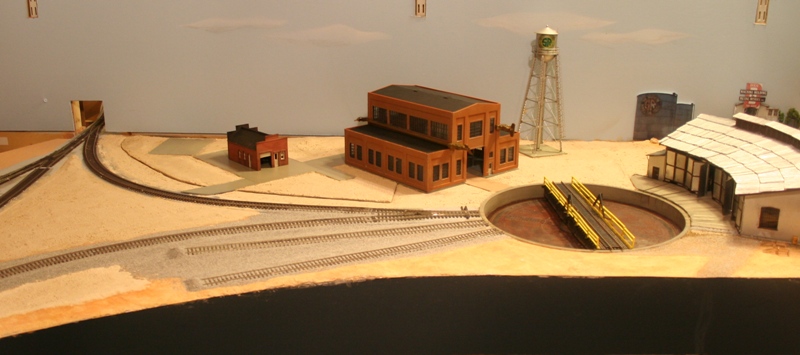
Spent some time on the ARR kit today and now it is about 90% completed. I also worked on the lift out section and styrene foundation that the model will rest on once it is all said and done.
Here are a few updated images from todays efforts:
Wow Ryan that is really coming along nicely as is your entire scene. I will be placing mine on a bit more Modern module, and adding a Back roll up door…it seems to me that module screams for a traveling crane inside, but I don’t think the Walther’s one will fit, but I do know where my wielding flash light and my shops sound module will be going
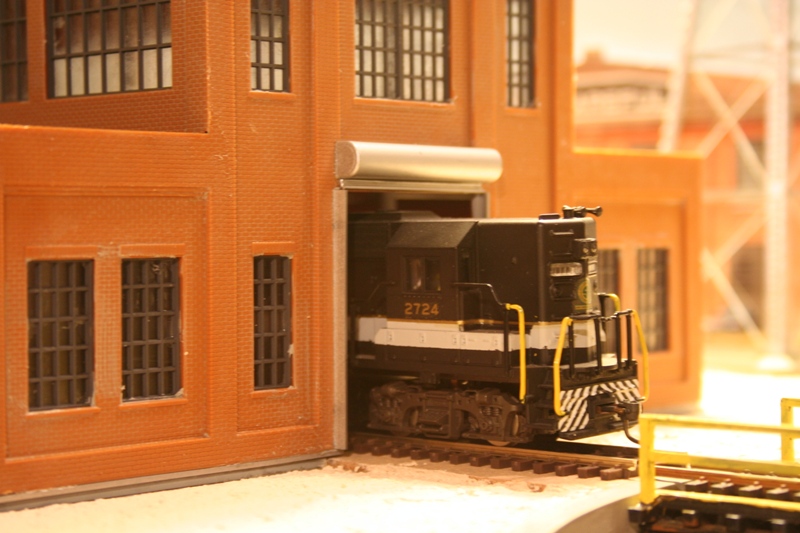
I added the front service entrance door in the open position by cutting the bottom portion of the roll-up door and attaching it to the top section. Then I tested the height and clearance with one of my typical locomotives with the cork and track in place, just clearing it with a few cm to spare.
Click image for a larger view
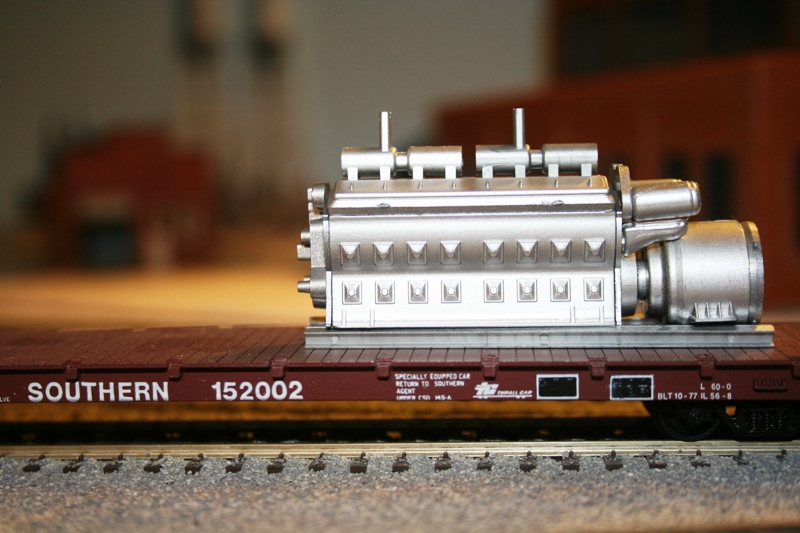
And finished the EMD 567 Prime Mover that is included with the Allied Rail Rebuilders kit.
Click image for a larger view
Next steps are to add the roof vents to the structure and then weather the whole thing. I will also apply some Squadron Putty to some areas of the Prime Mover and then coat with a light silver metal enamel again.
Yeah , I’m glad I saw this, I think I’ll give mine a bit more head room for the front and back doors, The extra Building front and door came from walthers today, so I’ll probably start mine this weekend.