You’re running up against a couple issues. One, it sounds like your mixture is too thick for the job you’re asking of it. For brush coats I mix plaster about 50:50 with water. Use batches small enough you can apply the whole thing before it sets up. Second, never but never expect brush coats to provide a finished surface. They will always have an unrealistic texture with visible brush marks. Apply a finish coat that’s smoothed with your fingers to cover any tool or brush marks. If you can’t control the plaster adequately with your fingers, that’s where you could try something like drywall mud, but only after the setting type plaster forms a solid base.
One last thought and then I’m out of ideas… are you pre-wetting the base before applying the brush coat? The dry plaster underneath will suck the moisture out of the new layer otherwise.
Carl makes a good point, but I’d also suggest that you try Durabond patching plaster instead of regular plaster or drywall mud.
I use Durabond 90 for my plaster-on-screen landforms, and mix it stiff enough that it can be applied using a drywall knife. However, for your needs, I’d suggest mixing it to a slurry-like consistency, then apply it using a suitably-sized brush. It will still harden in the specified time, and will not crack whether spread thinly with a brush or 2" thick with a trowel. If brush marks will be an issue for some areas, you may be able to remove them when the plaster begins to set, either with a softer brush dipped in water frequently or by gentle wiping using a well-dampened paper towel.
While I buy my Durabond in 33lb. bags, it’s also available in smaller boxes, if you want to experiment.
You can also sand it, if needs be, but only in the interval between the time which it begins to set and the time that it fully hardens. Most of my landforms were brushed liberally with water, using a 2" synthetic brush, immediately after the plaster was applied, and the very few brushmarks which resulted are easily cov
Grampys,
Gypsolite is a great idea for an additive to Sculptamold. Still strong at a 1:5 ratio is a little suirprising, but it’s versatile stuff.
I have found putting baking powder into my plaster of paris acts as a retarder giving the mix a longer working life.
By trial & error my ratio is 1 teaspoon baking to 12 teaspoons of plaster of paris .Mix with water until a smooth mix .
I have found using my hands to apply it to the cloth I get a better finish.
Smokey Dawson Australia
I just use ground goop. Mine has saw dust in place of vermiculite. A good surface can be worked in at any thickness. Long working time.
I was attempting to follow Joe Fugate’s guidelines as follows:
“Best approach is to start with a half cup of water and maybe a cup of plaster with the baking powder retarder mixed in. Add the plaster to the water, then add a tiny little bit of water if it’s too thick. And I mean tiny - as in a tablespoon or two.”
I’m willing to go back and try some more and go thinner toward your half/half suggestion. Thin plaster might be a bit hard to apply to vertical surfaces. Joe was suggesting 1 cup plaster to 1/2 cup water and then add a tiny bit as needed. That seems to be a good deal less than half/half - plaster/water. I was doing about 1 cup plaster in June before things got to busy for me to work on the layout; is 1 cup plaster a small enough batch?
Yes, it’s very evident that a finish surface isn’t possible with one coat which is ok. I’m guessing two coats is needed, one to cover the paster cloth and hide the shapes of the layers and pieces laid down, and a second to provide a surface finish, whether using a plaster for the second coat or another medium which might be drywall mud. That second coat only needs to be thick enough to fil
That is a very good point. I’ve noticed in areas that had dry plaster cloth as I was laying new wet plaster cloth overlapping dry area, it would indeed suck the moisture right out of the wet plaster cloth and I would need to spray it down to add moisture back and smooth it over to allow the plaster to fill in the voids. Same would hold true for plaster so Rob’s suggestion that the plaster needs to be mixed at half cup plaster to half cube water which is much wetter than the 1 cup plaster : 1/2 cup water plus a tad more that Joe gave. That would help allow for some of the moisture getting absorbed by the dry plaster cloth it is coating.
Some have mentioned Gypsolite. Gypsolite or something like it, Structolite IIRC, has been mentioned at model train show scenery demonstrations. That may be something worth looking into if the a thinner plaster or other things do not prove satisfactory.
I used fabric softener sheets ( used ) dipped in plaster that was thinned with water and added vinegar to slow down the hardening of the plaster and then layed them over cardboard forms. You can use new or used softener sheets, but used sheets are a little easier to handle.
I’ve already covered all of my cardboard forms using plaster cloth, thanks.
First off you need to smooth the plaster cloth when you apply it. Plaster cloth ussually has two sides, one has more plaster than the other and that is the side you need to face up. You need to get your hands dirty to smooth it. When you need to add plaster over the plaster cloth, you need to wet the cloth very well and use a thick soupy mix of plaster.
I did that already, yep, smoothed it with my hands spaying on a mist of water as needed, which helped to also spread around the plaster that was impregnated in the cloth.
The plaster cloth I used did not appear to have any difference one side vs. the other, however it went on very well and gave me a nice cover over the cardboard strips. The process of applying the plaster cloth went very well and I am very satisfied with the results.
As stated in the original post, I’m looking to cover it all with a thin layer to hide the squares of the cloth and their edges, which overall are fairly even and smooth. It shouldn’t take much.
The consensus is I will need to make the plaster a little soupier than I did on my original 6 or 7 batches appied so far as they did set up a little too fast, even with baking powder added; I’d prefer prefer a little more working time - like 15 minutes or so. Conclusion, spray down the plaster cloth before applying and use thinner plaster.
I do appreciate the other options offered and might give them a go too so I can see what ultimately works best for me. Hopefully in a few years I’ll be able to build a bigger layout - this 10x18’ is hopefully practice for something larger.
Jim,
What is the final coat going to be over the hard shell? If you are going to put rock castings on the surface, you don’t need a completely smooth surface - Ditto for just about any type of ground cover. You do need to get a relatively smooth finish but ground foam, dirt, etc, will smooth out brush marks and other imperfections.
Here is an example of what I mean – sorry about the photo quality here:
The scene with basic hard shell in. Very bumpy and lumpy.
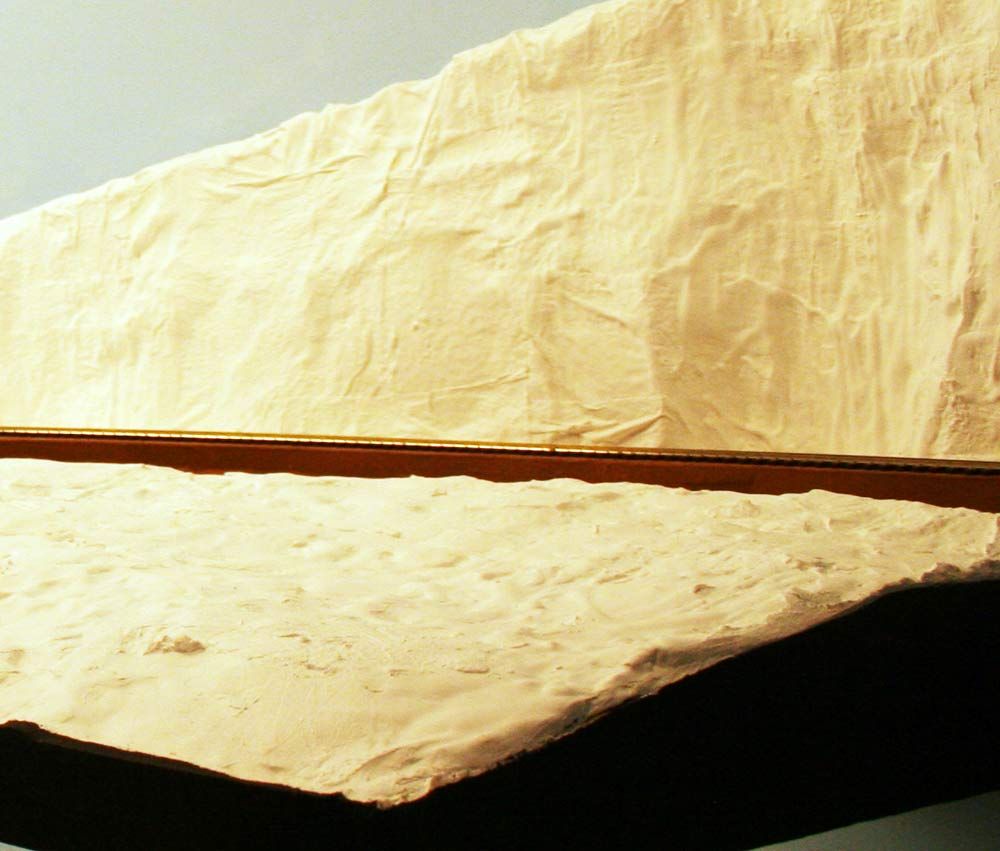
Here is the scene with some rock castings on the face and a few layers of plaster in the foreground to build depth. Notice the dirt around the tracks to build up the level as well.
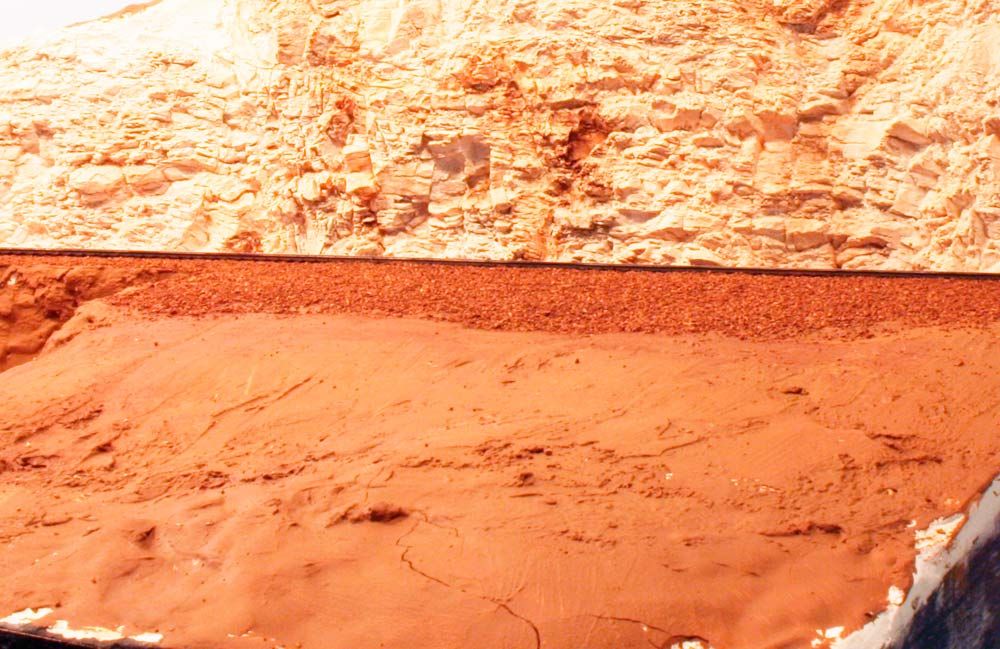
Some basic ground cover in place:
Guy,
In my case, I’m am actually not working on scenery that looks like most of the scenry I see posted - I can’t see your photo’s until I get home since your photohost is blocked here. I’m interested in Ruby Canyon (google it) where there are smooth sand stone outcrops (massive sand stone which is not laminated). Seems that the typical layout goes for limestone or shale layers or outcrops of granite. Much of what is typically done isn’t going to work for me in terms of appearance or finish.
Jim,
In looking at the canyon shots, I can see what you mean. Malcom Furlow and others have done this type of rock effectively. I was under the impression that you were talking about smoothing out the base coat – not the finished texture. Making any kind of rocks, especially the type you are talking about here will take some careful work planning angles, outcroppings and forms. In looking at the amount of rocks in your pictures, you are talking about a fairly large project!!
Even with smooth sand stone, you are still going to have to come up with some rock textures and forms beyond the basic hard shell. The sandstone is fractured and does have edges and distinct lines in it as well as area that have big piles of debris.
It would seem to me that question here would be whether you are going to hand carve/form these rocks or whether you are going to use molds. I don’t think you will get the results you want by merely painting plaster on the hard shell surface. You’ll want more texture and distinct rock features to capture the look. This will require some method of building up depth on the surface of the hard shell. If you go the hand forming method, working in small sections and using the slow set plaster or other slow set materials would be the way to go.
Some good pics down the page of Ruby Canyon at the Western Rail Images website of photos by Jim Ozment, long time Rio Grande employee. There is on a steam shovel loading dump cars that captures the grit well, with some representative scenery in the background.
http://www.westernrailimages.com/keyword/canyon/
Jim,
Is the sloping talus at the base of the taller rock faces essentially weathered sandstone? I haven’t looked at the geology like you have, just remembered the basic of Western landscape, but I’m thinking yes. Then getting that final look can be broken down into getting the slope right, then finishing it gritty. So first part structural, the second part is applying the finish.
I mentioned the texture paint I used earlier in a general sort of way in getting the shortest path from here to there. But there can be a lot of different grits mixed in paint in the premixed. I’m pretty sure you can get textures to add to paint yourself. Go finer ius my advice, but for these slopes you’ll likely want a more mixed look, so getting one grit in your paint and having another one or two in other sizes available to mix in may point towards a finishing mechanism once you get the structiral part squared away.
I use the blue foam for my scenery, after I carve it to my liking I put some drywall compound in a separate bowl I water it down to a thin paste. Then I can either brush it on or throw it on, I also add the base color to it as I thin it down. It has worked for me for years and because it s thinned down it dosen’t crack.
Well, TBH, I’m going for the basics here first and crawling before walking and later running. I tried to get the fundemental land form with the cardboard strips and obviously am not going to achieve a faithful replica of types of canyon walls in Ruby Canyon area, but hopefully a general feel and look of it. I’ll start with something more crude and see how far I get with the level of detail etc. I’m not getting super ambitious but just wanted you to see the type of landforms I’m shooting for, which is very different from your typical model railroad scenery. To me starting off with a smooth surface seems to make sense and then I can add on talus, and perhaps shape some parts by adding on more plaster or sculptamold or whatever works best.
That may work for Joe, but I find that completely unworkable. For any brush coats I have to use much thinner plaster. I don’t use retarder.
My usual batch is about one 16 ounce disposable cup each of plaster and water. Something smaller should be fine.
Multiple coats vary by location. I may use only say 3 brush coats with one finish coat (2 plasters to 1 water) on top of it, or several more depending on what needs to happen with the final shape.