What is the best material for making handrails for locomotives. I have tried brass but it is too soft; other metals resist sharp bent required and break. I am opened for ideas and tried-and-true results.
RicZ
What is the best material for making handrails for locomotives. I have tried brass but it is too soft; other metals resist sharp bent required and break. I am opened for ideas and tried-and-true results.
RicZ
Dr. Wayne uses piano wire, but I’m not sure of the size or gauge that he uses. I’m sure he’ll see this and chime in.
Mike.
I’ve had pretty good luck with Tichy .02” Phosphor Bronze wire. It will take one tight bend without breaking and solders nicely.
I stock .02”, .032” and .040” Tichy wire, it works very good for all kinds of projects. I made steps for my E7s using two pieces of .040” Tichy rod back to back.

Those bends are pretty sharp. I filled the gap between the rods with solder then filled the steps square.
EDIT: The .02" Tichy wire does’t bend with handling, really tough stuff after installing them.
Mel

My Model Railroad
I also like the Tichy Phosphor-Bronze wire that Mel suggested.
.
It seems to be a good compromise with workability and durability.
.
-Kevin
.
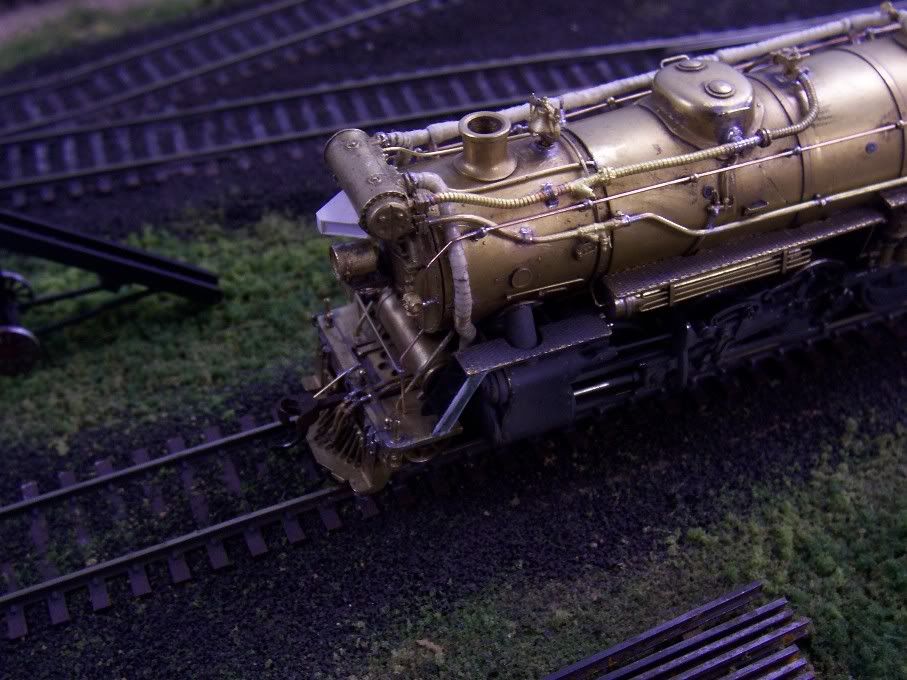
For steam locomotives, I usually use phosphor-bronze wire from Tichy, as many handrails require multiple bends and they often need to match a counterpart, especially on the front end. If you don’t get it right the first time, you’ll have at least a couple of re-tries before it fatigues and breaks…

For diesels, I prefer piano wire, whether with Athearn’s metal stanchions…

…or as replacements for those made from engineering plastic, as on this Atlas RS-1. All of the original plastic handrail portions were removed and discarded, while the plastic stanchions were drilled-out to accept .015" piano wire, bent to match the originals before they were cut apart. This combination give a good to-scale representation and holds up well to handling…
The shape of the end handrails and construction of the plastic stanchions took a bit of thought to get the stanchions threaded onto the wire, so some of the bends had to be made after the wire was in place - a to-scale sketch of the original facilitated making the proper bends…
Wire size will depend on the type of handrail, and a friend who works as a volunteer at Steam Town was kind enough to measure those on an F-unit undergoing a re-build.
All horizontal grabirons, and the vertical handrails on the nose, along with the “eyebrow” handrails over the windshield, the vertical handrails at the rear steps, ladder rests, and interior grabirons are 1.125" in diamet
Thanks, I want to replace the plastic grab irons on a Walthers/Lifelike ALCO PA-1. The responses above are a great help, but I would further like to know what a should use to achieve the right angle bends (This is where I have had past problems as the wire always seem to break while trying to get a good tight bend). What is the best tool to use?
RicZ
I use these small smooth-jawed pliers, putting the pressure for bending very close to the pliers…
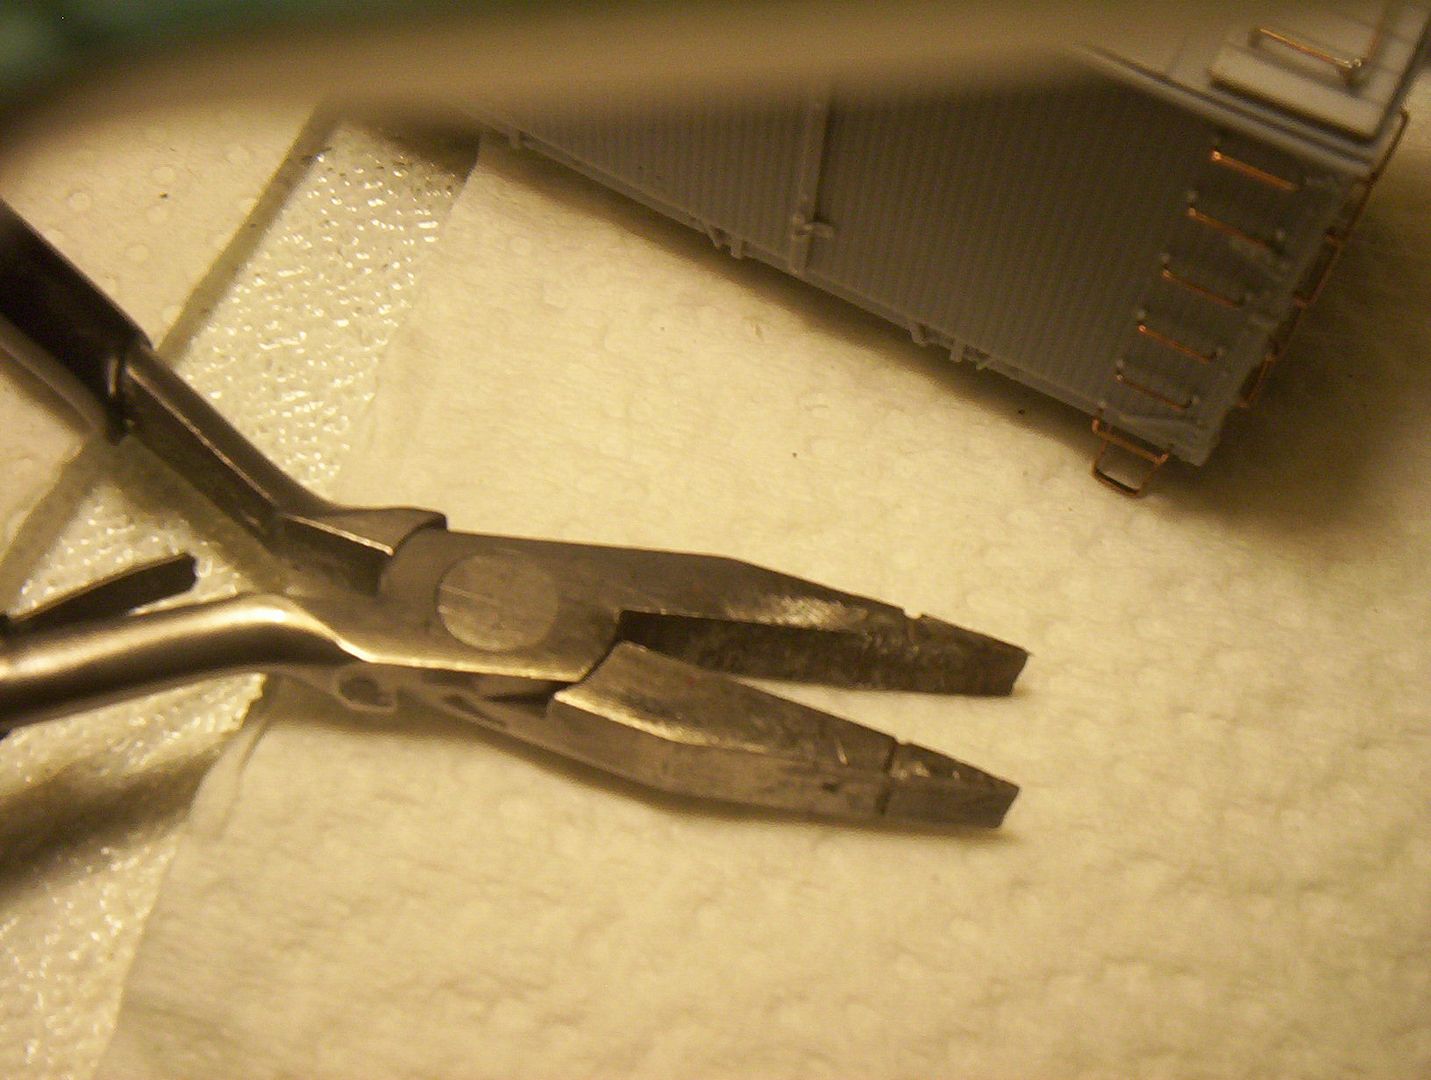
If you’re using piano wire, use a hard object rather than your fingers, to apply the pressure. A machinist’s block, the edge of a table, or a hard work surface will work. The farther away the pressure is applied, the less sharp the bend will be.
I used a cut-off disc to put the grooves in the sides of the pliers’ jaws, as they were useful for forming grabirons for some cars requiring ones narrower than usual.
Wayne
Having used the “appropriately” sized piano, brass, or phosphor bronze wire as it suits me, I use my cheapie needle nose pliers and generally the Mark 1 index finger to get the results I require.
I’m not sure what you’re doing, and wouldn’t dare criticise, but the only time I’ve broken wire by bending it is when I’ve made a mistake, by getting the bend in the wrong place , straightened the wire, tired again , got it WRONG again, and in the process of straightening the wire again, have “work hardened” the wire causing it to break.
Otherwise, are you trying for too tight a bend?
The hand rail in this photo was fabricated from .020” piano wire, the ladders from .020” brass, the grab on the tank, .012” phosphor bronze. (It looks really good from 3 feet.IMG_0498 by Bear, on Flickr
Cheers, the Bear.
These are my wire bending tools.
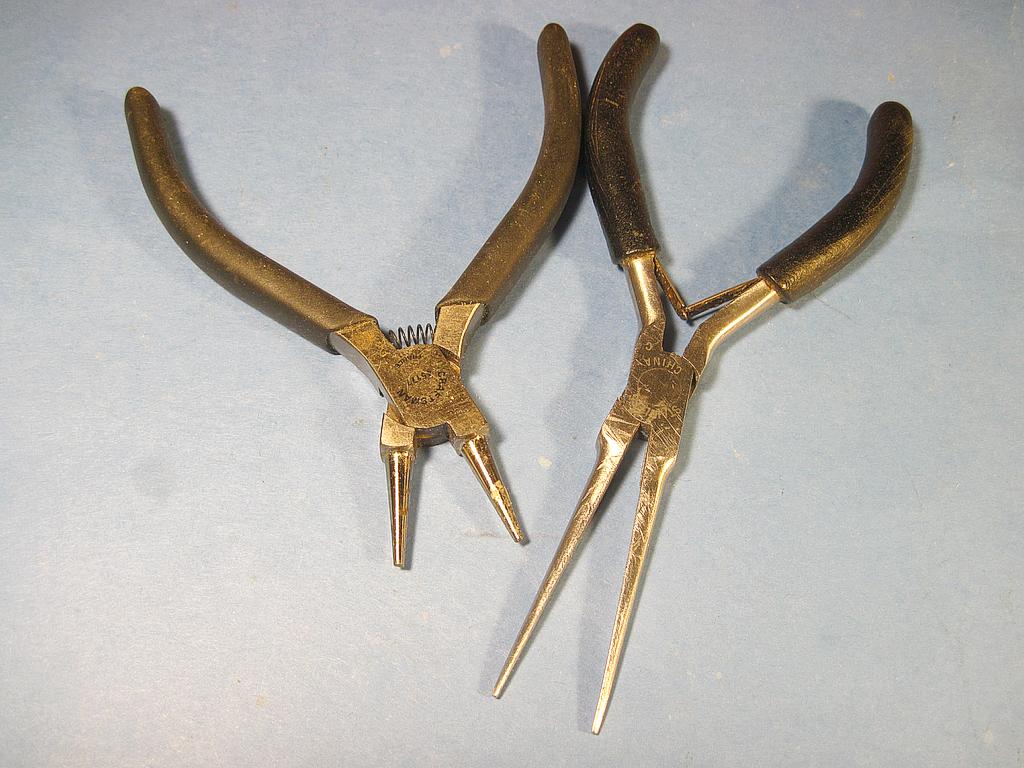
Round Nose on the left and Needle Nose on the right.
They work great for paino wire, brass & Phosphor Bronze rod up to .05". The round nose used near the tip put the correct bend for handrails, the needle nose are for sharp bends.
Mel
So what is the trick to getting the bends in the proper locations?
It looks pretty-darn good in the enlargement I got when I clicked on the photo…at least 3% better due to the reporting marks, too.
Wayne
With wishing to appear smug, Mark I eyeball and experience, works well for me excepting when I get over excited and work harden the material.[banghead][banghead]
However, in the 1:1 world, I still, from time to time, refer to my old much thumbed “Standard Aircraft Handbook”, where these formulas are…
http://www.flight-mechanic.com/layout-and-forming-part-two/
…but which I have no desire to use for Model Railroading, cos Model Railroading is FUN!
3% more thanks, Wayne.[(-D]
Cheers, the Bear.[:)]
There are some quite magnificent structures shown in your link, Frank.
I’ll self-censor any further remarks to avoid an official reprimand.
Wayne
When I worked at the Union Railroad car shop doing air brake piping I developed my own set of measurements for making bends by experimenting. I marked a pipe and made a 90 degree bend starting at the mark. I then measured how much length the bend added beyond the starting mark. Using this measurement I could offset the starting point to get the final length that was needed. Different diameter pipes require different offsets.
This method works for model work although the measurements are smaller.
To produce many identical pieces like grabirons I make a bending jig starting with a thin piece of steel like an Athearn car weight. I drill a hole to accept the wire size a little further in from an edge than the length that I am aiming for. Then make a 90 degree bend in the wire and insert it in the hole. Bend the other end of the wire over the edge of the steel and measure the result. If it is too long file the edge of the steel and try again. Repeat until you get the exact length that you want. When filing the edge angle it in slightly on the bottom so that you can overbend the wire slightly to allow for its tendency to spring back. I have multiple holes in my jig and can produce identical pieces in many different sizes.
Mark Vinski