Best Plastic Glue for Walthers Cornerstone Kits?

Hey guys,

About to assemble and paint my first HO scale building kit by Walthers Cornerstone and wanted to see what your favorite plastic glues are that work well with these kits…heading to Michael’s or my hobby shop tomorrow to hopefully track down a good one, thanks!

–Nick

Raleigh, NC

Tamiya

Thanks RailEagle, I’m assuming you’ve never had issues with it such as being runny or taking forever to dry? Thanks!

I’m new to the hobby, so take this with a grain of salt.

I use Testors.

I found that the problem with plastic glues is that you don’t worry about about how fast it will dry. It will dry fast. Make sure you have things exactly where you want them when you glue them. You will have a very short time to change your mind, and even at that, the glue will melt the plastic enough that you will have difficulty separating pieces.

Good luck, and let us know how it goes.

After you’ve put together something, consider posting a picture on the Weekend Photo Fun thread. The thread usually starts each Friday morning at midnight Eastern time. You will find a lot of encouragement and compliments from beginners to master modelers!

Oh awesome, good to know about the drying time, heading to the store now, will do!

–N

Hello,

I used to use the Tenax (no longer available) which had the consistency of water. You could clamp or hold a seam together and with one touch of a brush loaded with solvent, the capillary action would draw it into the seam and fifteen seconds (or just a tad more) you would have a solid joint.

The Tamiya is a decent replacement (there are others) and there are two “speeds” of the Tamiya. I’m used to the green bottle, whichever one that is.

Be cautioned that the capillary action is VERY aggressive. If you have elastic bands, clamps or fingers anywhere near the joint the cement WILL creep into it and possibly spoil the face of your structure. There IS a learning curve.

For slower acting cement or wider gaps, I like the Faller Expert cement in a needlepoint bottle. Sometimes it is a hassle to keep the needle clean. They supply a fine wire and it is best to leave that in the needle when stored.

Practice on scrap (sprue?) pieces before tackling a critical job.

Good Luck, Ed

Call me old school, but I swear by the Red/White tube of Testor’s.

I use Plastruct Bondene or plain MEK.

Hello All,

I use two (2) brands.

Micro-Mark “Same Stuff” Professional Plastic Welder.

Another product I use is “Styrene Tack-It II”.

The manufacturer claims this formula is, “Re-engineered and reconstructed from the now-defunct Tenax-7R…”

Styrene Tack-It II has an instructional video on YouTube that shows this product not only gluing styrene together but also ungluding by a second application.

For my Walthers kits I use the “Same Stuff”.

As has been posted…

Both of the products I have listed do have a capillary action.

The “Same Stuff” includes a brush in the bottle. The “Tack-It II” does not.

For the “Tack-It II” I use cotton swabs (Q Tips®) for application.

Other types of applicators work well with these

Which glue depends on the kit.

For Walthers I use either Tamiya or Testors gooey glue from the red and white tube.

Some of the Walthers kits don’t really fit together too solidly - seams along some walls actually only have small contact points. They should be in contact along the entire seam, but they’re so badly formed they don’t. If yo use a water-like glue it won’t wick past the areas of contact and you’ll have a very weak structure held together only at the very small contact points.

Using the Testors on these kits will give you a strong structure, because the glue actually fills the gaps and creates one solid unit.

I know this because I had to rebuild my roundhouse after it fell apart for the reason I just described.

Hello All,

This brings up another point in model building…

Surface prep:

  • A thorough wash of plastic parts on the sprues in warm water with Dawn® dish soap to remove any residue from manufacture and packaging.
  • Don’t presume the mating surfaces of the various parts are accurate.
  • Before committing to applying an adhesive, no matter what type, pre-fit the assemblies. Look for any mismatched or odd fitting parts.
  • This can be especially important after painting.
  • If possible, sand the edges of the larger building components. This will allow a small amount of adhesive to do the trick.
  • On longer seams apply small dabs, spaced out evenly. Once you have determined everything is aligned, then you can go back over the entire seam to finish the joint.
  • Styrene strips: Angle Beam, Square, and Round Tubing can be used to fill in the larger voids and add stability to butt joints and longer wall sections.

A few sheets of fine grain sandpaper and some needle files would be a great addition, along with the adhesive of choice.

Hope this helps.

I agree that the contact surface on Walthers kits is very small, and leads to weak glue joints. I start with a piece of 3/8 or 1/4 balsa wood the length of the joint. I glue it into the inside of the corner wit CA (cyanoacrylate or superglue) which sets in a few seconds. The larger surface area of the balsa wood provides a much better surface for glue.

Normally, I like liquid Testors in the clear bottle with a brush for joining plastic to plastic. This joint, however, is plastic to wood so I need a different glue.

I liked it too, but when my bottle of it was emptied, I re-filled it with lacquer thinner, which not only worked equally well, but was much cheaper, on a bottle-to-bottle basis ( I generally bought it in quart or gallon cans.)

When it was decided that lacquer thinner was “too dangerous”, the formula for making it was required to to be revised, and while the “improved” version might have been okay for thinning lacquer-based paints, it was useless as a solvent cement for styrene.

After reading on-line of other modellers who were using MEK as a solvent-type cement for styrene, I decided to buy a gallon of it and found it to be a good replacement, although it evapourated much more quickly than had the old-style lacquer thinner.
At the same time that I bought the MEK, I also purchased a gallon of lacquer thinner, to be used as paint thinner.

Some time later, I discovered that the lacquer thinner which I had purchased also works well as a solvent-type cement for styrene…I’m guessing that I got the unbastardised version of lacquer thinner, as it was purchased from a Sherwin-Williams wholesale site, rather than a paint store or Canadian Tire.

I’ll be picking up another gallon or two of it before somebody decides that it’s “too dangerous”.

Wayne

I agree with lacquer thinner. I do use it with ventilation most of the time. I have found it does an excellent job of bonding and does not Mar the surface.

MEK can be harmful to your personal health, depending on how old you are. It has been banned from household products for this reason.

Acetone (lacquer thinner) used to be treated casually also (nail polish for example) but we now know better.

Avoiding the use of either of these chemicals around your home is a very smart idea. Always wear impermeable gloves when using these types of chemicals. Even other petro- chemicals like engine oil or gasoline are known to affect the nervous system and can be absorbed through your skin.

I would not use MEK myself. I still use acetone but only outdoors or in my garage which can be easily ventilated. Unless I am using it to actually clean stuff off my skin I wear nitrile gloves.

The modifications made to our hobby cements and solvents are valuable to your health and not a negative at all.

When I started building plastic models in the 50s the most available and recommend was Carbon Tetrachloride. Fumes were strong, but it worked great. Cheap and a big bottle was really cheap. I don’t know if it’s even available for consumer use today. I went to Testors in the red tube and never looked back. Testors makes a liquid in a2oz bottle with an applicator brush on the lid. I love it, but it’s harder to find in places like Michaels.

I keep buying CA, but for the life of me I don’t know why. It works OK, but it’s very unforgiving. Even the medium which sets in about a minute or two can get glue on things and places not intended.

Mike

I bought a number of assembled DPM and Walthers kits (all fairly small structures) at a train show for a very reasonable cost.
Some had been assembled using tube glue, and some using ca, but all were done rather sloppily (glue all over portions of the visible sides and parts incorrectly positioned, causing misalignments all over the place.

Almost all of them were easily taken apart, and the excess glue removed using suitable knives and/or sandpaper.

I’ve reassembled most of them, although a number of them still need to be painted.

I also have quite a few Walthers structures on my layout, but don’t recall too many of them with casting defects or too-small gluing surfaces. I don’t think that I have more than a couple Walthers kits that were built strictly to the kits’ directions, as most are modified or made from multiple kits, either alike or totally different.
If a kit has poorly-formed gluing surfaces, I simply remove the defects with a knife or sandpaper and files, then use sheet or strip styrene to create new gluing points.

Where necessary, especially with warped parts, I’ll also use the above-mentioned materials, drilling, tapping, and countersinking, using appropriately-sized flathead screws to make strong permanent joints - this is especially useful when the kit being assembled isn’t all made of styrene, like this Korber roundhouse, made with resin castings…

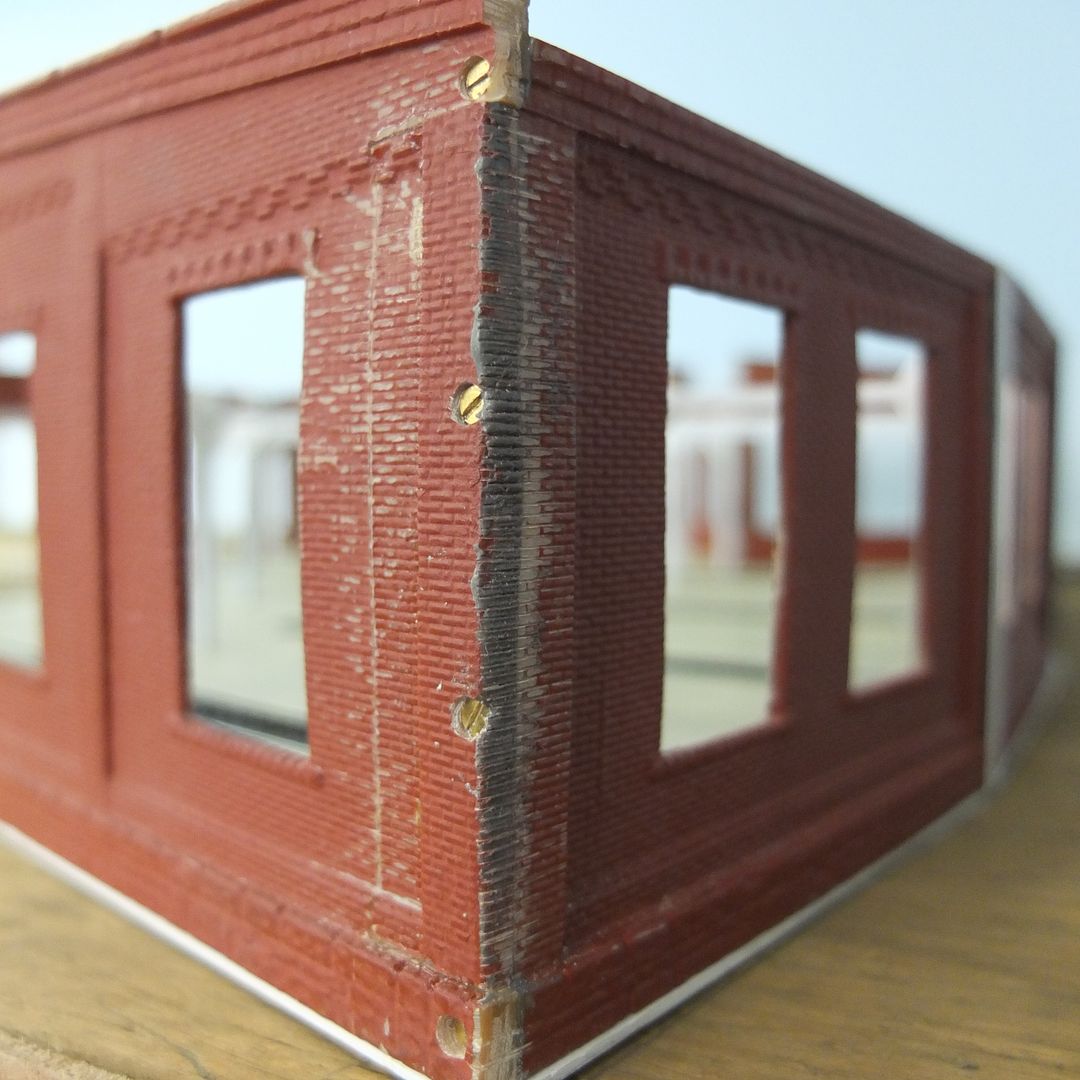
For this kit, solvent-type cement was useless, as was contact cement, ca, and, until I combined it with plastic H-columns, WeldBond epoxy.

The H-columns and Weldbond hold the front wall segments…
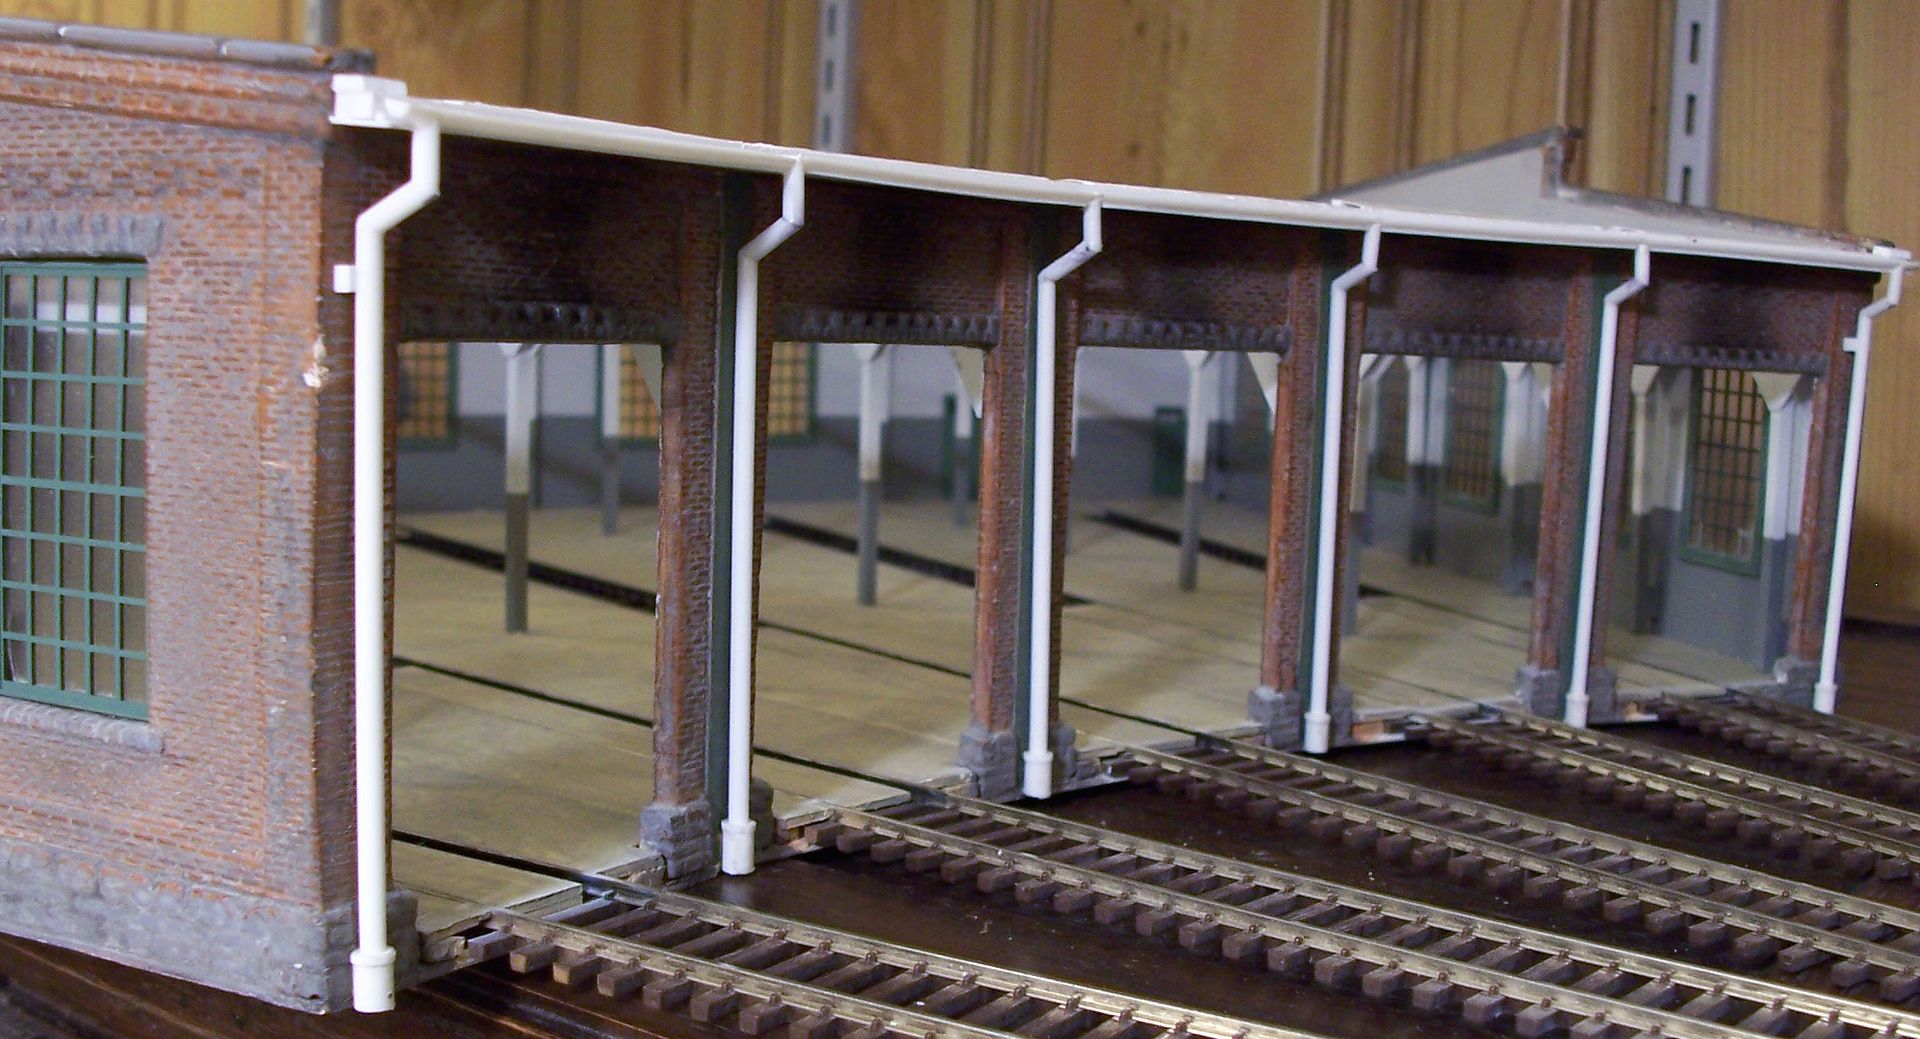
…and those of t