any tips for how i can make my own piers and bridge abutments, id like to make them concrete.
I made mine out of 1/4" MDF sheet. I cut three or four panels for the front face, and angled side panels, and then glued them together.

I painted them with a mixture of beige and grey.
In place under the bridge, and without any weathering, this is what they look like:

Wow, thats cool, great idea!
I scratchbuild “concrete” bridge abutments and piers from styrene sheet. I use prototype photos and scale the models to maintain the right proportions while matching up to the bridges I use.
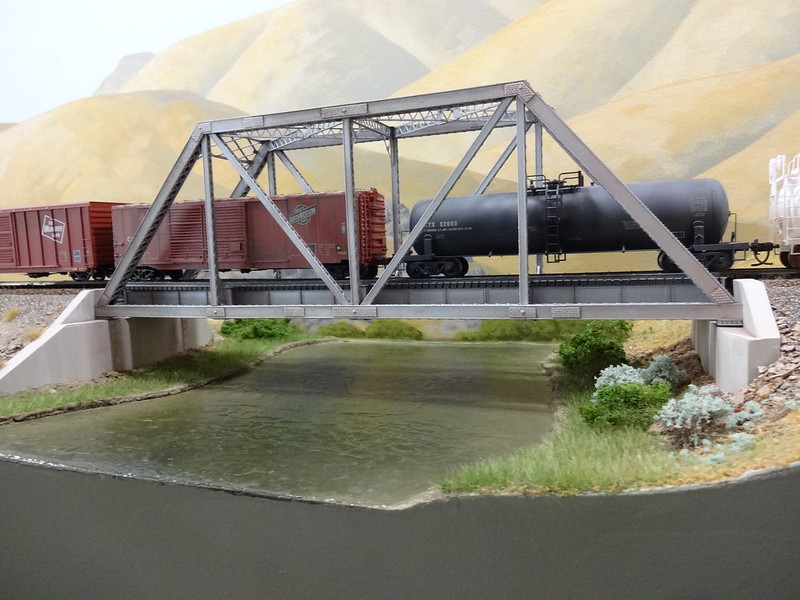
These abutments were adapted to a Central Valley truss bridge. They are hollow.
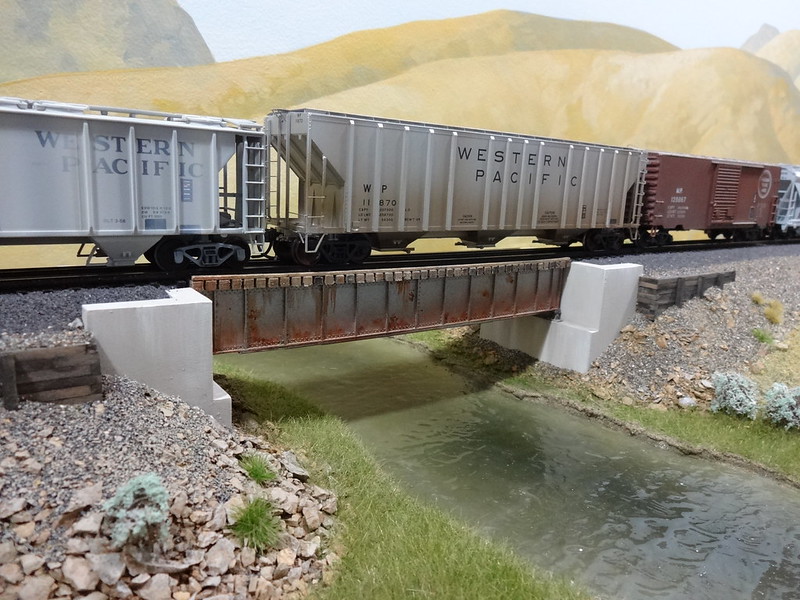
I just used this photo elsewhere on the forum yesterday. This is a Micro Engineering bridge. Since parts of the abutments are visible from multiple angles, I built up such areas with styrene to give the impression of solidity, but these abutments are hollow as well.
I fill any imperfections with Squadron putty, then sand until all traces of the individual styrene sheet components are gone from the joints. I painted these with Testors Camouflage Gray and weathered them with chalk dust and acrylics.
I’ve used lumber, like 1 x 4s and a belt sander, etc. Primed and painted and they look good. Also used wood dowels for supports.
Styrene works too, but sometimes I just like working with wood.
Richard
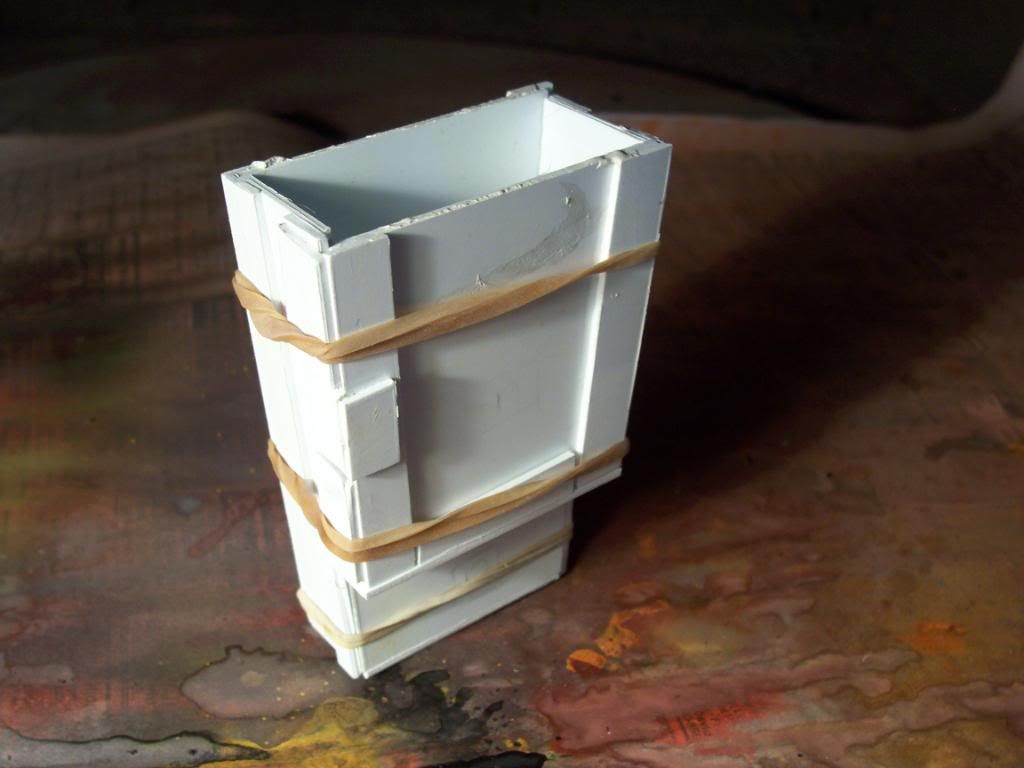
I cast piers and abutments in Durabond-90 patching plaster, using simple interlocking moulds made from .060" sheet styrene:
The moulds are generally in three pieces, as shown below. The interior surfaces were distressed to give the effect of the form boards used when pouring concrete:
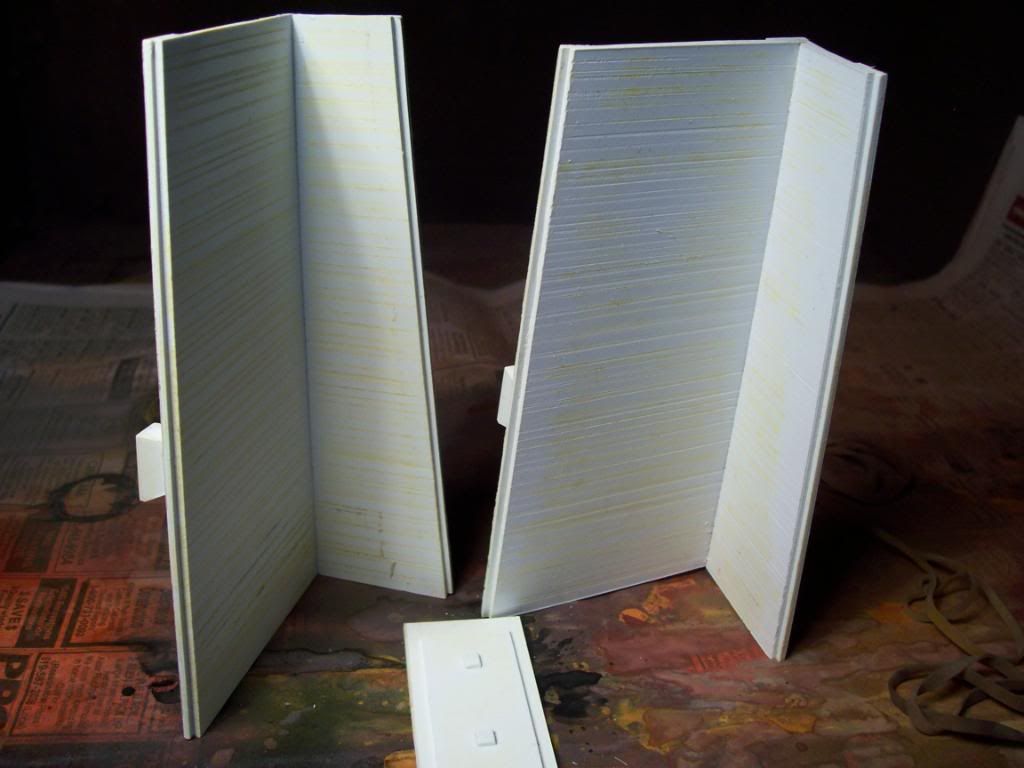
A paper towel was used to wipe vegetable oil on the interior surfaces as a release agent, then mould was assembled and held together with elastic bands:
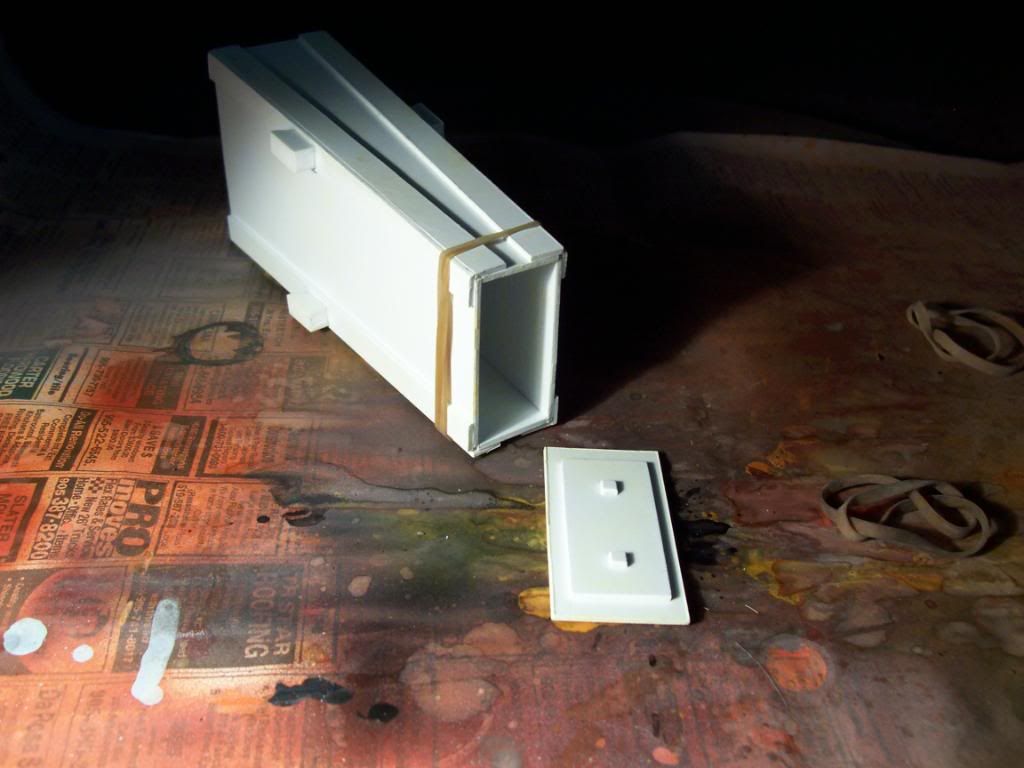
The moulds are designed to be filled when they’re upside-down - depending on the amount of plaster added, you can create piers of varying heights using the same mould:
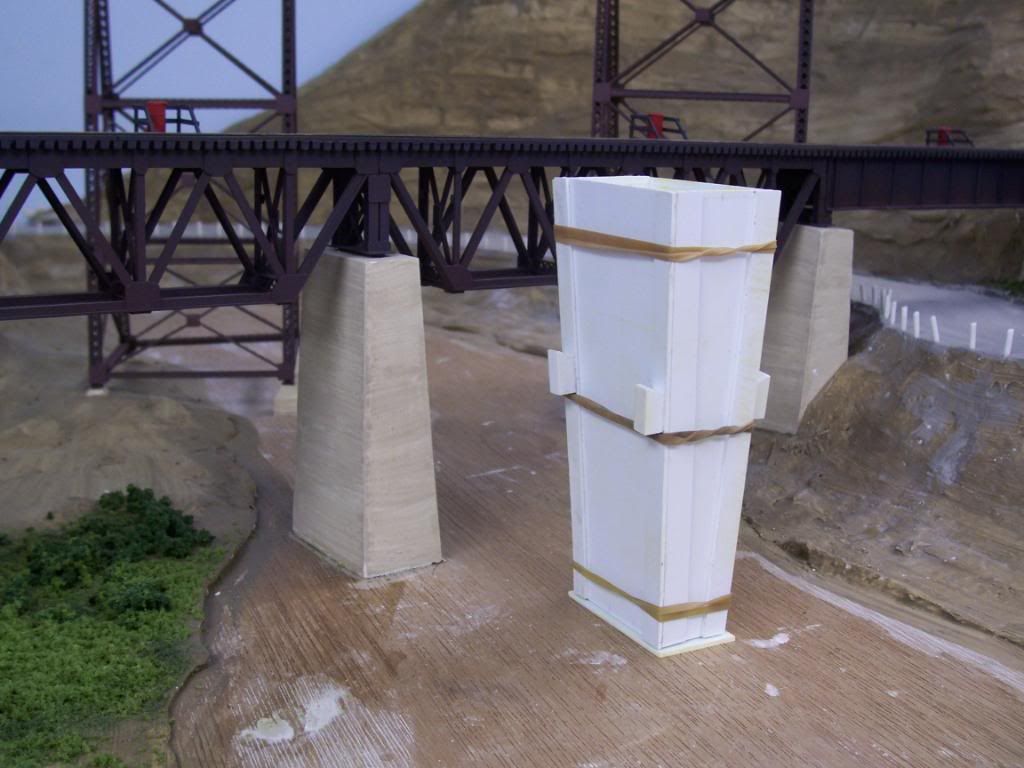
Abutments are done in a similar manner:
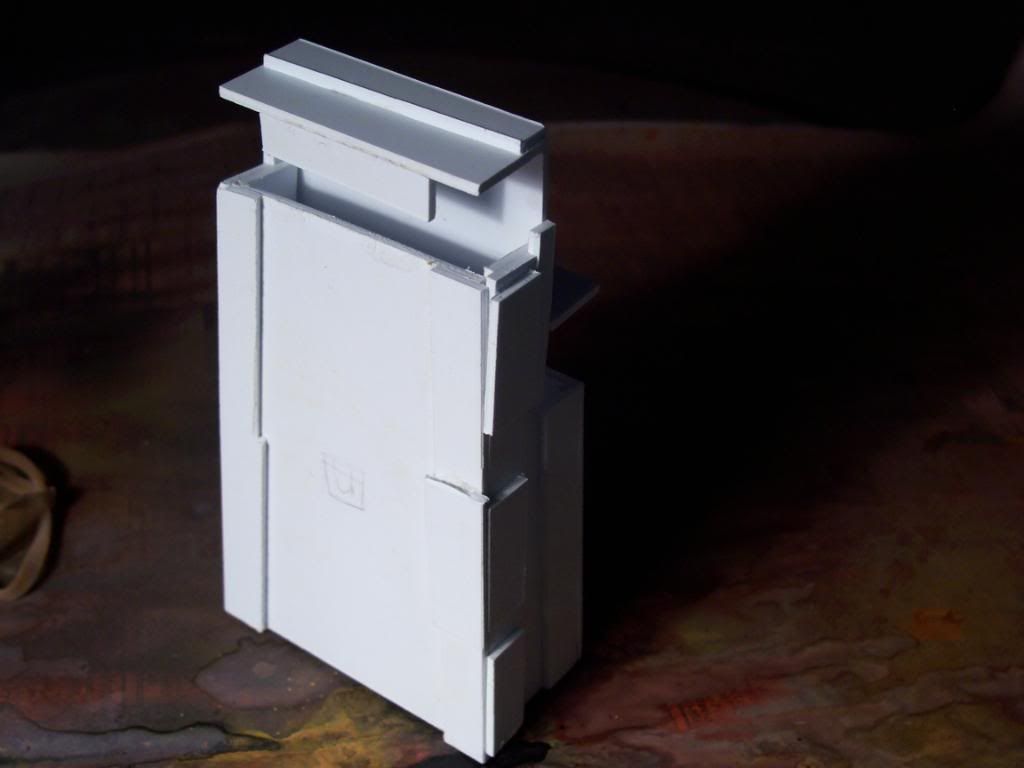
For this one, I installed the abutment, then used pre-cut pieces of styrene, held in place with weights, to cast the wings on-site:
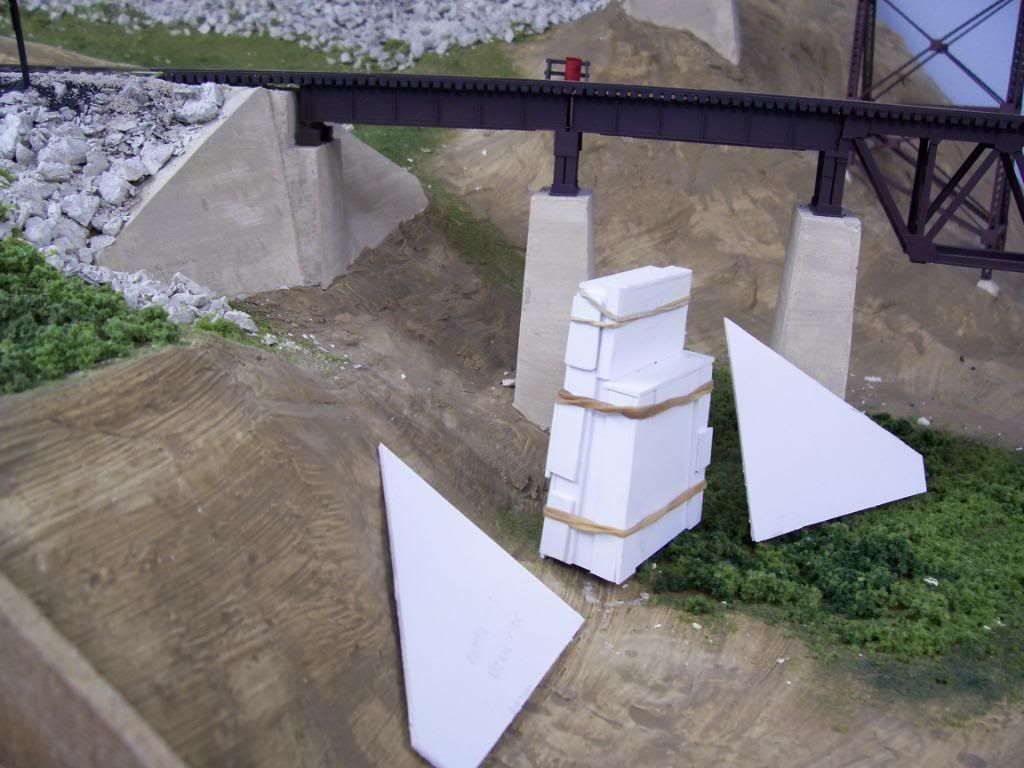
I used well-thinned PollyScale as a wash to colour the parts, and they’ve been weathered with powdered pastels since the photos were taken. [swg]
Wayne
I have seen some made from extruded foam. Cut to size, smooth and paint. If you wanted a stone or block look, scribe the surface with a ball point pen or similar blunt tool, then paint.
Have fun,
Richard
The piers and abutments for my bridge over the Mrs. Hippy River are made out of 1/4" plywood.

Wow! There are a lot of options, thank you for everyone input i really appreciate it.
Hey Guys
When I first started in the hobby this was my interpertation of a scratch built bridge, and piers. Piers ar blocks of wood with lines Dremeled into them. After I built it, I thought the “stones” were kind of large but I have seen photos of piers with stones not far from that size.
Have fun.
Lee

looks great, I like the over and under effect … can you tell me the height from the top of the track to the bottom of the bridge and how did you arrive at the upper level… what grade and what distance did it take…Thanks David
also please disregard the comment about Code 100 in tunnels, seems it keeps repeating the same question and I don’t know how to eliminate it
It looks like you inadvertently have saved that as your signature. Click on “manage profile” which should be on the right hand side of the screen, then click the gear icon for “edit profile” that will show up at roughly top center. You then should be able to access a text editor for the “about dtbarron” setting under the “profile” tab. Enter something new, or just save with the blank screen, and see if that eliminates the extraneous text.
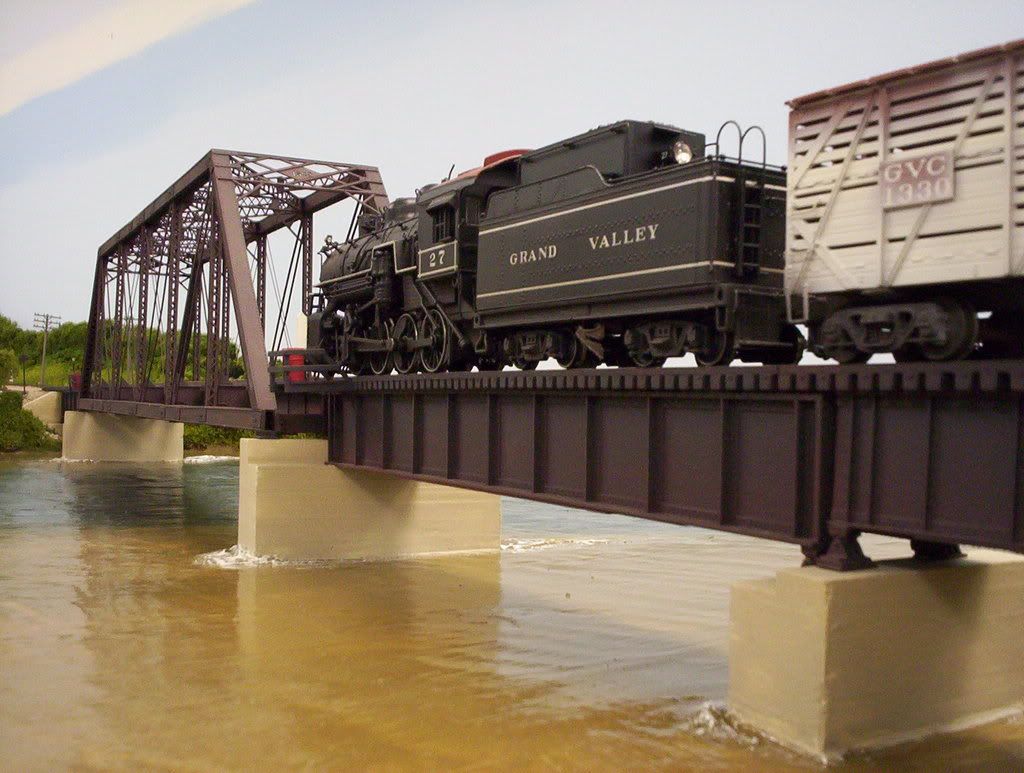
The model work is excellent. However, and I really hate to mention this, the pier in the center is non-prototypical. That bridge would only be supported at the ends. I bring this up just in case you care about such things.
What a timely and useful thread this is. I am in the build stage of my latest layout now, and have been struggling with how to make abutments and piers to fit locations where ready-made products would be too massive. My thanks to the posters who have been sharing their techniques and photos of their very impressive work.
Wilton.
The model work is excellent. However, and I really hate to mention this, the pier in the center is non-prototypical. That bridge would only be supported at the ends. I bring this up just in case you care about such things.
Yes, that has been mentioned before. I have learned a lot from this forum and not being a structural engineer, that was my first try at super structure when I first started 6 years ago… If I ever run out of other things to do I can always go back to remove the pier. The iron work is removable for cleaning or what ever.
Having fun. [swg]
Lee
I did the styrene mold way, I needed a lot of pie rs too!
Someone here sent a PM asking about the rocks, they are hydrocal
Rrebell,
Thanks for the ID on the rock work. The result is very convincing. I get the impression that you did not use rubber molds, as the look is very random and natural. Very nice bridgework too. Thanks for sharing.
Wilton.
In fact I used Woodland scenics basic rock molds and used painting knives to fill in the joints with more hydrocal.