Do all bridges use bridge track or do some use standard 2 rail track ? My reason for asking is that I have a Cental Valley plate girder kit for two tracks. The kit only has built in support for standard two rail track. Walthers has premade bridge track but it is designed for their double truss bridges, which are longer and he track includes ties. What does everyone else do ? Some bridges with bridge track and other without ?
Those extra rails are called gaurd rails. They keep the loco from wandering too far from the rails in the event of a derail (in theory). Bridge track is the more prototypical way to do it, but it’s your RR. There are ways to disguise that your not using bridge track too. Ballasting over the ties (if it’s a bridge that has ballast) is the easiest. You can also get some track thats finer (if your using code 100, get some code 83 for example) and strip it of it’s ties and make guard rails out of that. Just don’t have the ends of the guard rails touching or you could be looking at a short if your wheels touch those gaurd rails at the same time. You could also just replace the track that the bridge comes with and swap in some bridge track.
BTW, bridge track is also used in other situations too. On the Belfast & Moosehead Lake RR they used a double wide right of way and bridge track (without gaurd rails) to span a bog. The bridge track and the extra ballast kept the track from sinking into the muck.
Ok, I think the easiest thing to do is make my own guard rails and use the bridge tie strips that come with the kit. I am using code 83 so I’ll see if I can find anything lighter to use. If not, I’ll see if I can make some by stripping the rails out of some flex track.
I use the bridge track because it is easier.
If you make your own, also notice that here are wood gaurd rails on the outside of the track as well as the rails on the inside of the track. Also notice that there are barrel holders every 100 feet that stand on long ties. These usually have a railing around them.
I just purchased a piece of Micro Engineering HO scale bridge flex track and it sounds like just the ticket for your application as well. It is a 3-ft piece of code 83 flex track with the proper bridge tie spacing and includes two properly gauged 3-ft rails already installed as the stock rails. Also included are two 3-ft lengths of rail that can be mounted in the tie plates already molded into the ties for the guard rails. You can shape the approach ends of the guard rails to match a prototype railroad’s standard practice. The beauty of this is that you can create a precise length of bridge track that exactly matches your bridge.
Which bridge track do you use ?
For the straight I think it was Walther’s(unless it was Atlas I bought from Walthers). For the curved trestle, I have Micro Enginering, but I have not yet laid it.
The ME bridge flex is very good. I find that Pliobond (rubbery contact cement) works perfectly for bonding the flex track. The bond is very strong, yet flexable.
The guard rails supplied are code 70 and the 36" track set also comes with guard timbers and fire barrel/ and platforms if needed.
Ok, so I took a swipe at making my own. I used the bridge tie strips that came with the kit, added guard rails and applied a coat of paint. I am debating on painting the guard timbers black or even yellow. I am not going to spend too much time because this will be way in the back of the layout where hardly anyone can see it except from the side.

jbinkley60, that is nice looking track. I love the nut and washer details.
I wll say that Central Valley doesn’t skimp on the details. They create great kits for those into rivet counting.
I have a neighbor who’s a rivet counter. He has all kinds of stuff like that, most he made himself. I’ll try to get him to look at this thread. The goofball thinks forums are a waste of time and bandwidth and are only play spaces for children who play with toy trains. What kind of thinking is that?
I intend to buy the Central Valley Pratt bridge Walther’s ref # 210-1902. Additional info on Walther’s site:
"Single-track bridge features a removable upper truss, premolded bridge ties and extra-long girder components. Ties accept Code 70 or 83 rail, easily modified for Code 100 rail. "
The photo does not show any guard rails. Who has this bridge who could fill in some details?
- Will the ties take guard rails?
- Is there no track at all with the kit?
- I want to join two to make a two span bridge. Any difficulties?
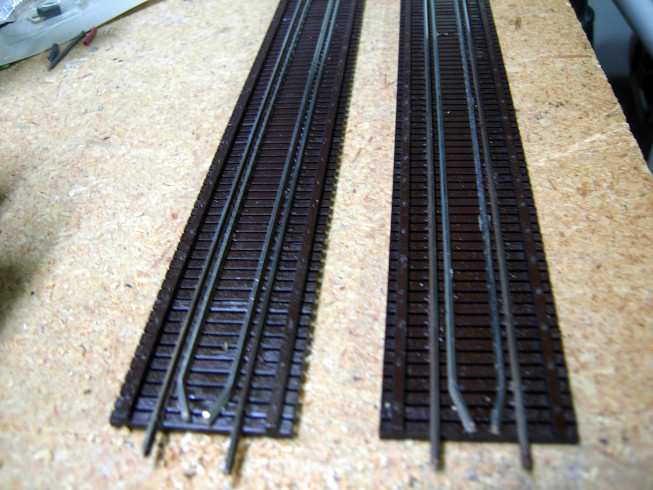
- I use code 83, and as far as I can tell from the photo below, my guard rails will also be code 83. Looks to me to be the same rail.
The photo below is something I took to help when I get around to laying track across bridges. Warning, photo taken in Australia, but the practices are probably not too far different.

I don’t have the specific kit but they all look similar. If so, then the answers are:
- I don’t believe there will be any tie plate on the tie strip to slide the guard railes into. I just glued my guard rails on the inside of the normal tie plates with no problem. I used Gorilla glue. Here’s a good picture of your kit.
http://www.cvmw.com/1900/1902photo.htm
-
I doubt it. You’ll need bare rail. I just stripped out Atlas code 83 flex track.
-
If it is like the plate girder bridge, I don’t think so. Just setup a bridge pier wide enough for both bridges. I’d suggest using a piece of rail that spans both bridges and not try to join it in the middle.
-
I ended up making my guard rails out of code 83 and they look fine. I just didn’t creat a point and solder them together to avoid electrical shorts.
Thanks Jeff,
That’s good. Below is roughly what I will make, but two spans instead of three.

Just keep an eye on the height. I had problems with a Walthers Truss bridge and Husky stacks. I had to modify the bridge for them to fit.
Dear JBlinkley,
The guard rails should extend beyond the bridge (or tunnel portal). Check prototype standards of the railroad you emulate. For example, the 1957 standards for the Southern Pacific had the guard rails extend over two rail lengths (over 78 feet) with the taper toward the track center beginning about one rail length beyond the bridge end. Also, the guard rails tapered to a common point (thus you would need to put in an insulation gap). For modeling purposes, you’ll probably want to compress (shorten) this arrangement, but you get the idea.
Mark Pierce, Martinez, CA
I do. Consider this my beta version 1.0 . Had the tie strips supplied extended longer than the bridge, I would have made the guard rails longer. On my truss bridge I used Walthers bridge track which extends longer than the bridge and comes to a point. As for the point, I see it in many protoypes but not all. I didn’t feel like messing with bringing it to a point and putting in an insulator. Since it is in the back of the layout, hardly anyone can see it, except from 10 ft away. I appreciate the feedback and advice. Thanks.
I used Central Valley HO bridge tie lengths, intended for Code 83 but I used Code 100. Initially I tried spiking the rail but the ties are too hard and do not hold spikes well. I like the appearance of the CV ties although I did weather them to get away from the solid black look. It has the rivet detail on the wooden stringers that run along the tops of the tie edges. I also added a wood walkway along one side, using wood intended for old fashioned boxcar roofwalks.
You can of course simulate bridge track – with the closer ties – with most makes of flex track by just cutting away the little spacers between ties underneath and moving the ties closer together. That way you can have an uninterrupted length of track go right through your bridge. It is easy enough to add the stringers running along the tops of the ties. The guard rails can be easily added as well. Don;t forget that guard rails are entirely weathered, not just as the sides as with regular rail. Not all bridges have guard rails – my four track bridge prototype lacked them
What might be lacking with this “cheating” method is if the bridge track on your prototype has slightly longer ties.
Dave Nelson