I recently got a Walthers Proto 2000 Berkshire and the valve gear broke. (The square slot on the gear broke) Is there any way I can replace or repair it? Spare parts, 3d printing, etc.
Those are old Proto Heritage models, long out of production, so your best bet is eBay where one may be sold for parts. I just looked, nothing now, but such listings do pop up from time to time.
Good luck.
Rich
Thank you
Square slot?
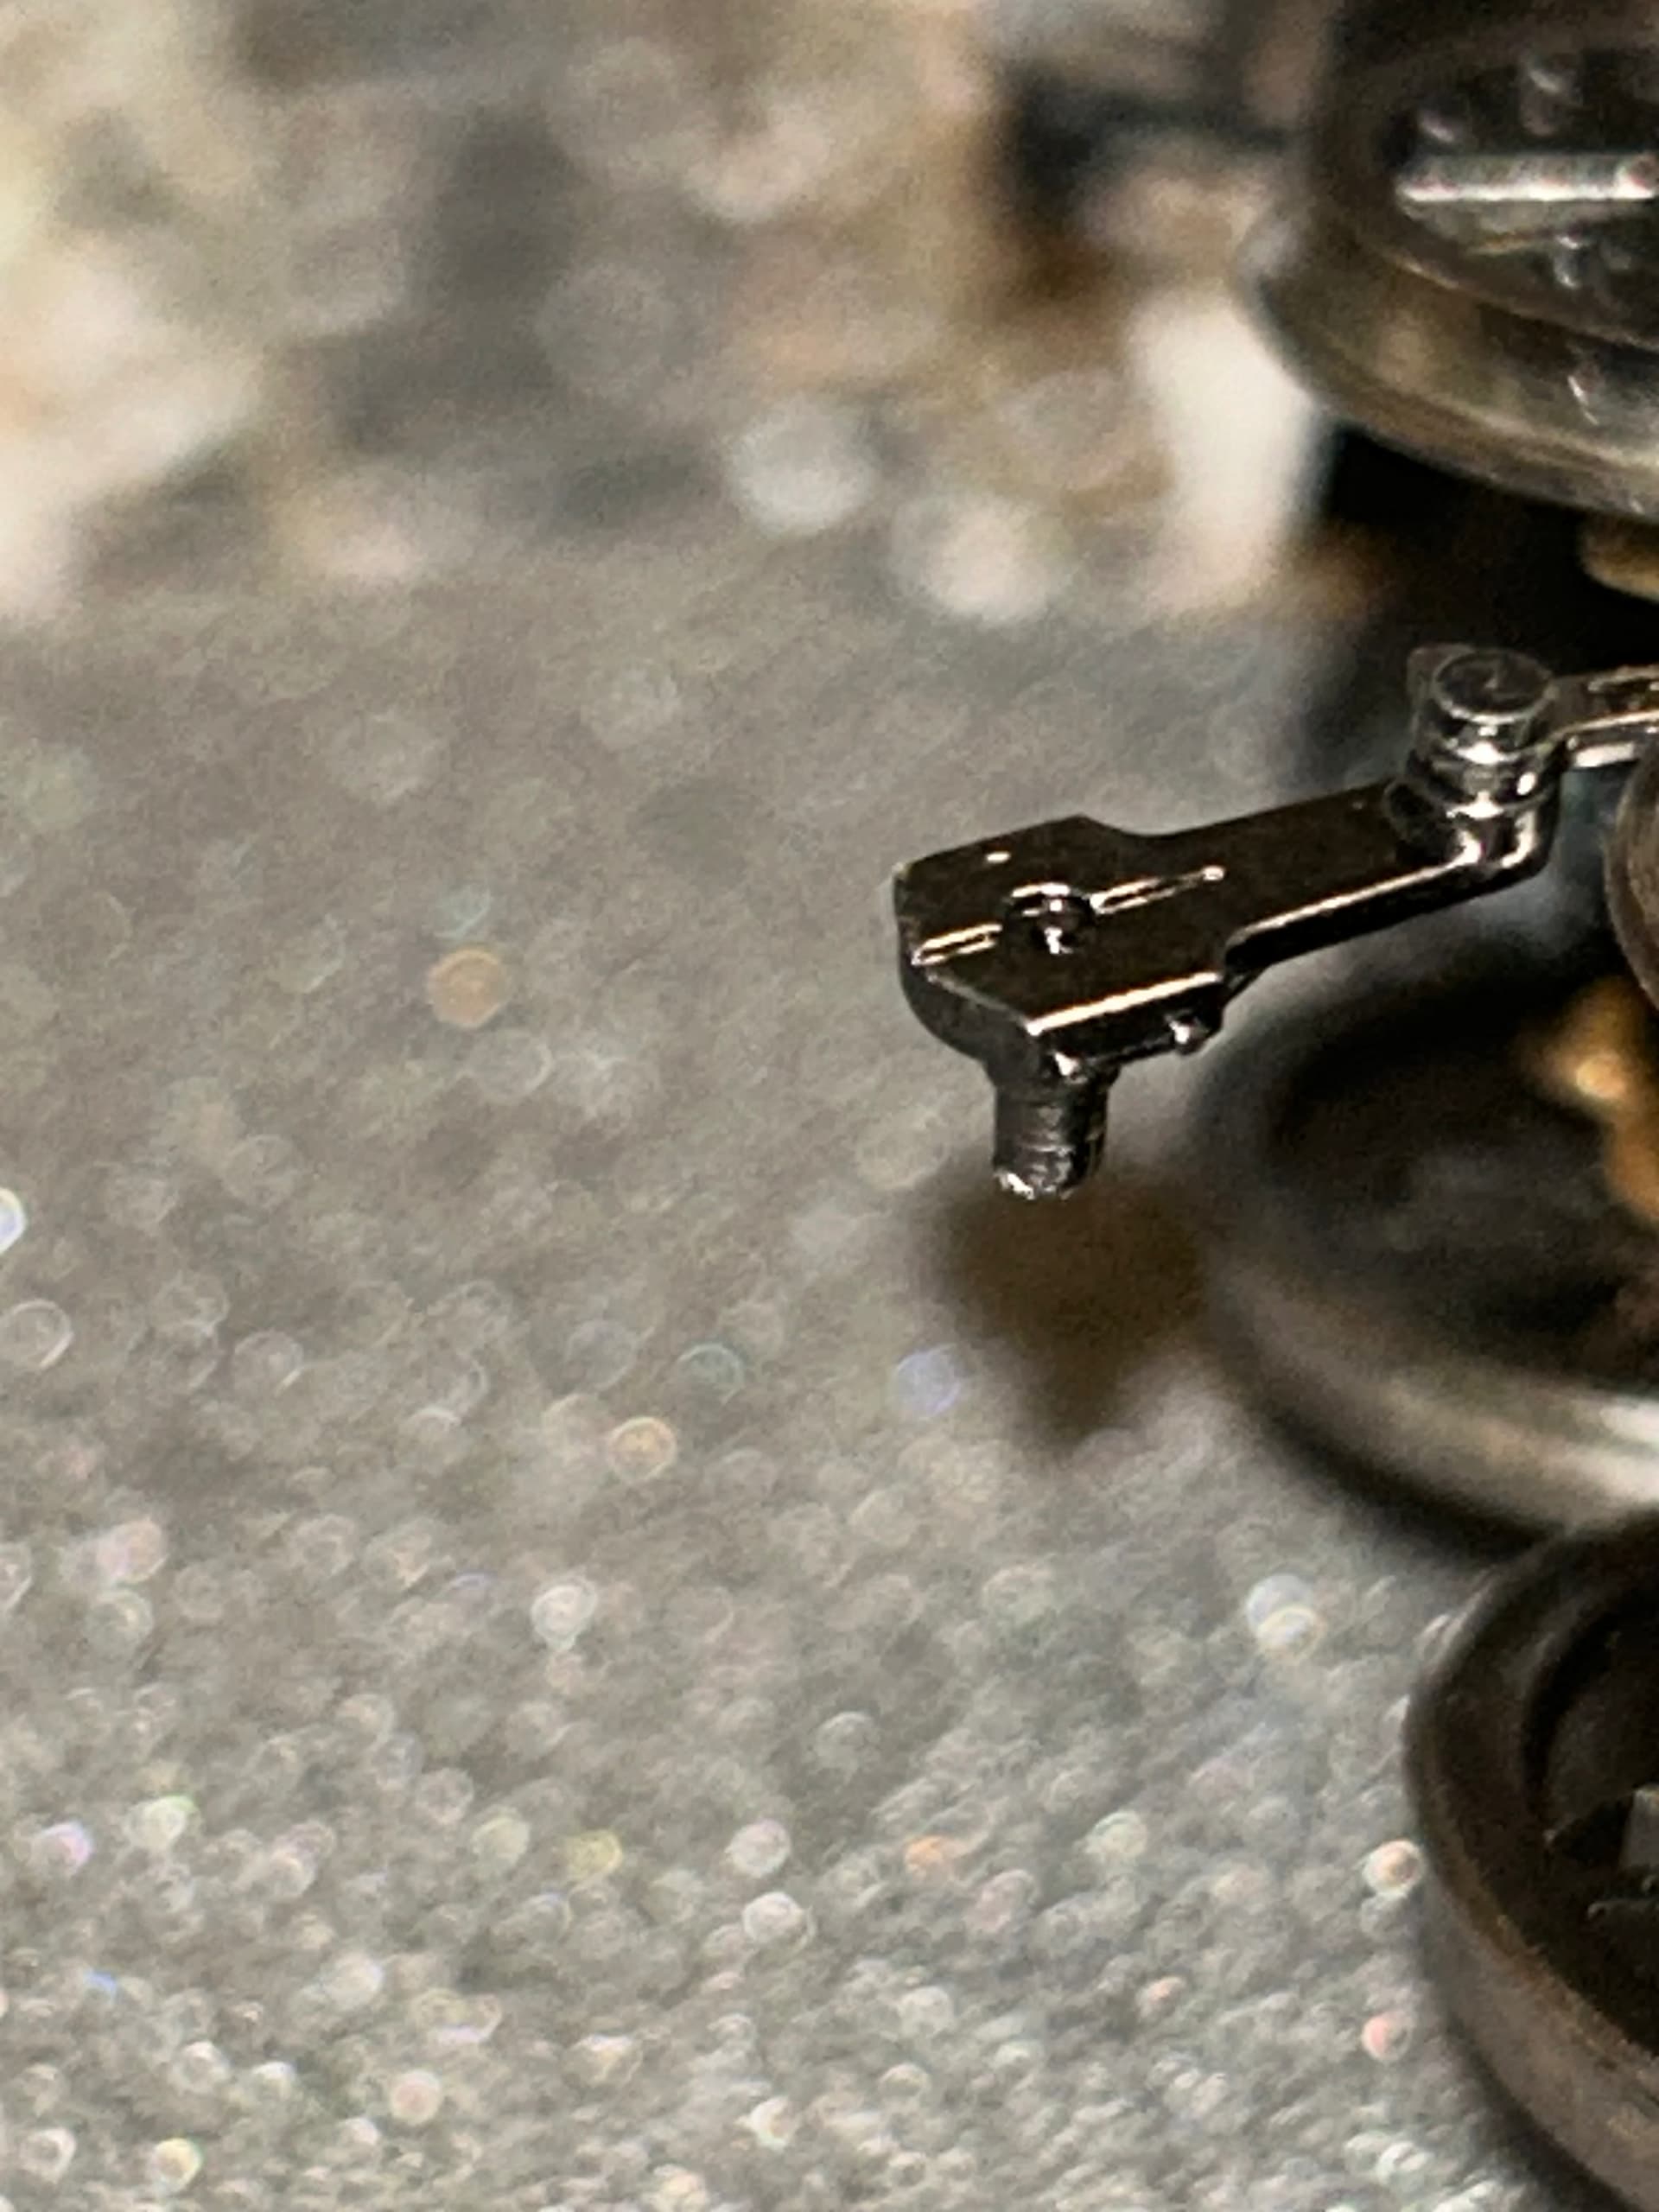
There are no ‘gears’ in most valve gear; the word is used in the same sense as athletic or camping gear. What is in your picture is an eccentric crank, which mounts into a crankpin hole in the main driver. Careful cementing would restore its ‘fit’ even if there is damage to the pin or the driver; obviously, the fake valve gear doesn’t need to be precisely set for high-speed valve events…
The arrangement on the other side of the engine should give you a reasonable idea of how the crank is arranged and what it does.
Yes, I know but I need a replacment
-Jimothy
Show a picture of the whole side of the engine, with all the parts.
Looks like the screw to which the eccentric is connected to is broken, correct?
Simon
For some reason it’s not a screw, it’s a square peg and it broke off of the eccentric rod.

Here’s exactly what’s going on.
This locomotive has a weird style of drive – the motor is geared to the first driver pair (far left in your picture) and the goofy single-piece ‘side rod’ drives the other three pairs, including the “main drivers”
On a real steam locomotive, the main rod (which on your engine is now disconnected) connects the cross head from the piston on that side to the main driver. On the end of the main pin, for convenience (I can go into ‘why’ if you’re interested) is an eccentric crank that provides drive motion to the valve gear – this crank is set so its outer end is at a particular radius from the center of the main-driver axle, and leads (or trails) the pin location by a certain number of degrees, which in a real steam engine is very important for valve motion and timing.
On the toy engine, the main-rod pivot does nothing but push the main rod end around – it is not needed to keep the engine moving, as the one-piece rods keep the four drivers aligned (albeit poorly in a mechanical sense). The eccentric crank has been made in one piece, and as a ‘feature’ has wholly prototypical detail pressed or coined into its surface rather than, as most toy engines have, a slotted-head or hex-head screw holding the rods on. The shaft on this crank was probably pressed laterally into the driver center at the correct angle, but it has now come out, probably damaging the somewhat-oversized hole in the driver center as it did.
Note that the eccentric rod of the valve gear is permanently riveted to the end of the crank. DO NOT MESS WITH THIS JOINT. This is also how I know the crank was not screwed into the driver or secured from the back side when the engine was assembled.
Measure the angle and direction of the intact crank on the other side of the engine – this will give you both the angle and direction of ‘advance’. Put a shim of paper between the frame and the inside of the main driver. You will put a small amount of epoxy adhesive (like JB Weld or PC-7) around the periphery of the hole in the driver, then carefully turn the crank to the correct lead angle, pass the shaft through the hole in the main rod, carefully insert it into the hole to correct depth without pushing in too far, and then working the crank forward and back to coat the pin and bore with epoxy to fill any deformation or space. Line the pin in the driver up to as nearly ‘square’ as you can once you’ve set the crank lead angle. If you’ve done this carefully any excess adhesive will have gone to the back of the driver annd not squeezed forward to where it might bind anything, and you can ease the paper out scraping any excess flush with the back of the driver. Then put another shim of paper back to ensure nothing that drops out if the gap during curing can cause any evil little surprise. I’d put an incandescent light like a Tensor or halogen over the joint to help cure the epoxy, and let it FULLY set – probably 48 hours; be patient.
If you are worried about binding the rods, give them a thin coat of corn or peanut oil with a Q-tip (being careful not to dribble any on the driver center!) If any epoxy does squeeze on them, it will easily break off, as it will have cured to the molecules in the oil film and not the metal.