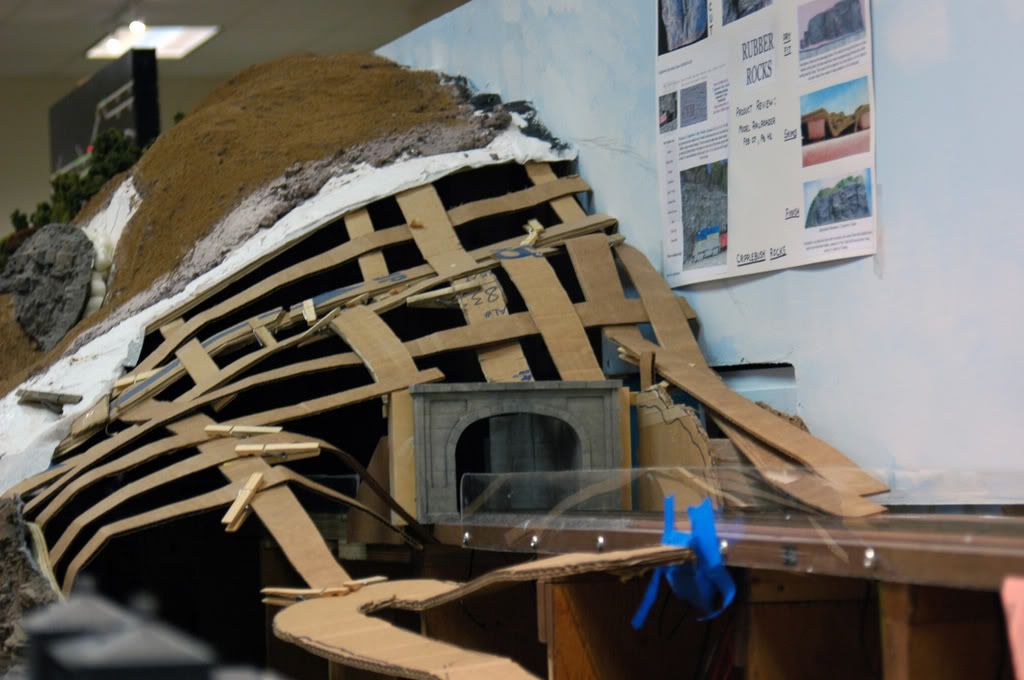
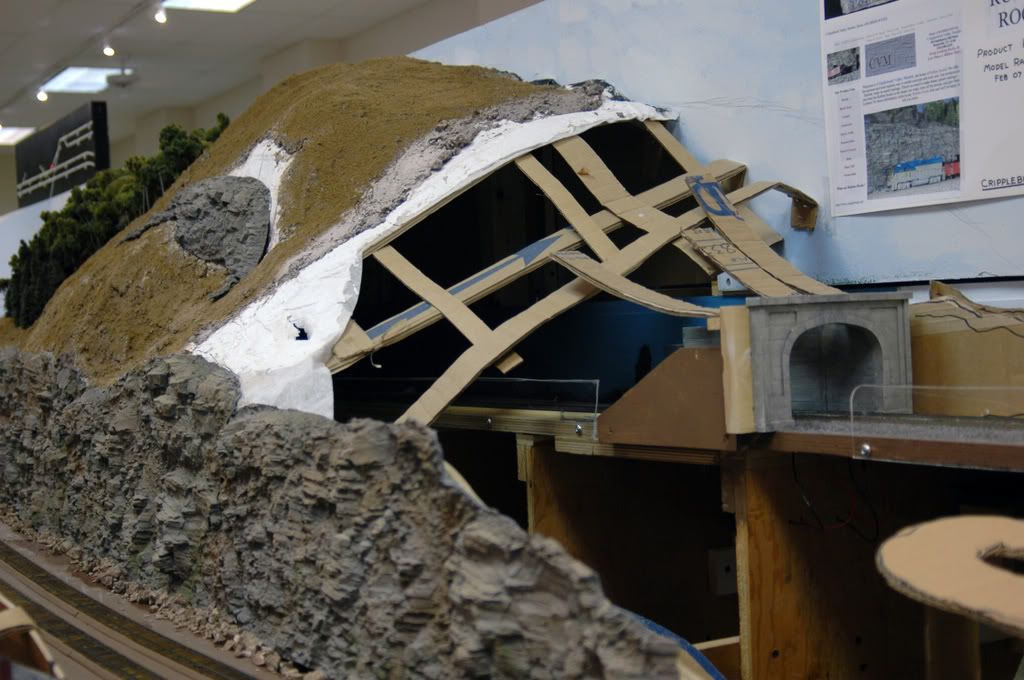
At the moment, i’m trying to build a tunnel using strips of cardboard, but i’m not having much luck with it. What else can be used to build tunnels? It’ll be placed on half of a 22" radius curve.
Hustle Muscle,
Are you talking about the inside of the tunnel or the hillside through which the tunnel will run? If the inside, I once used aluminum foil–the wide heavy duty stuff. I pulled out about two feet of the roll, then had my wife help me form it with plenty of wrinkles over one of my arms. Then I bent it around the curve of the track. Before gluing it down I used a rattle can of flat black paint on the inside so it would resemble the rock inside of a real tunnel.
Good luck!
One of my tunnels is built of reinforced arcs of plywood, covered with old window screening. I then applied plastic cloth and then applied Hydrocal plaster. Finally I painted the mountain over the tunnel, which was formed from window screening covered with plastic cloth and painted flat black. This tunnel has five tracks within it that branch to two exits. Be sure to have removable portals to be able to reach derailed trains within the tunnel. Bob Hahn
I’m doing the inside of the tunnel. What exactly is that type of foil you were saying that you used?
You could form the tunnel out of foam. Once you have the tunnel walls formed around the curve you can paint the interior walls flat black. My last layout I did this and I also bought this texture product from home depot and added it to the flat black paint to give the tunnel walls texture.
John B.
LION has tunnels, lots of tunnels. After all, LION builds SUBWAY LAYOUT.
Using cardboard like that does work, since I assume that at this point you are modeling the outside of a tunnel. Am I to assume that you are building it on the corner of say a 4x8’ table? If so, bring the fascia up in that corner so that it forms the outside corner of the hill.
You can then staple your cardboard strips to the top of this and out to where the hill will end. Next you will weave additional cardboard strips to this to make a hill that looks something like a waffle. This must be covered with something. You can use strips of paper glued to this until the hill has the proper bulk.
LION did do it differently. Here is a picture (of a much younger LION) building such hills on my old (now gone) layout. You can see the plastic net that I had used. Call it plastic lath. I have also used the older metal lath at the expense of many cuts on my fingers and arms. Chicken wire will also work, get the stuff with the smallest holes possible.
For the paper mache, I cut up rolls of newspapers on a table saw until nothing but dust was left (wear a mask and/or a respirator–count your fingers afterwards) Put this in a plastic bag for later. Next go to the hardware store with an empty laundry soap bottle. Look at the color chips and pick one out, give it to the man and tell him you want this color in your empty bottle. Buy just the tint, not the paint. Fill the bottle with water and you have the color medium for making your paper mache. While you are at the hardware store, do not forget to pick up a package of wallpaper paste. (Wheat paste).
Take a five gallon pail, put warm water in it (look at the directions on the wheat paste if you like, I don’t care) You can use cold water if you like, what the heck, they are your hands you are going to put in there, not mine. Add
Woodland Scenics makes/made a half-section mold for to make tunnel lining using plaster. You end up with a section from the top of the arch down one side. You can use a piece of gauze embedded at the top to make them hinge together. Or simply hot glue them.
LION,
Is that stuff already Legal in ND. too?? I have to get some and get in that tunnel…LOL…
Cheers,
Frank
Hustle Muscle,
You can use three ply cardboard for the basic shape,at both ends for the portals and one in the center of the two and then use two ply cardboard strips connecting all three,with either hot glue,or staple them to the sides of the bigger form and then cover it with plaster gauze…Once dry,you can give it a coat of dry-wall mud with a paint brush…As far as tunnel liners,you do not need to go in too far,maybe 8’’ of so,glue three pieces of foam together,paint it black,put it over the tracks,no one said a tunnel,is always round inside…Plus once it is painted and scenery finished,I doubt anyone is going get up close and look in it…
Have Fun!!
Cheers,
Frank
Hustle Muscle,
The stuff I used was Reynolds Wrap, Heavy Duty, 18" wide. The heavy duty means it is less likely to tear while you are forming it. While 12" wide will work, there isn’t much left over for a flange for attaching the arch to the base–thus I prefer the 18" width.
I have fond {Wheat Paste} memories as one of my “best friends” on past layouts.
P.S.: ROAR back at 'ya!
Hi Hustle-Muscle
I generally make a wooden box with 3 sides and top.
Making sure the open side has enough support to hold up the top.
I mark and cut the mouse holes make sure the largest car I have can get through.
If you don’t have one get one of the modern giant box cars they are ideal for this job.
Once satisfied the position is marked the inside painted black and the wooden tunnel is fixed to the layout
The back opening is for train rescue so make sure you can get at it.
I now proceed to build the hill over the box and fit tunnel mouths of choice.
regards John
You don’t have to scenic the entire inside of a tunnel, unless you want it for and onboard video camera. Usually extending the tunnel sides in about 10-12" is all that’s nec. This can be done in many ways by using cardboard, foam, plaster castings etc. You will need some sort of access to the tunnel whether a removable top (hardest to scenic and keep that way), or some access from under or behind.
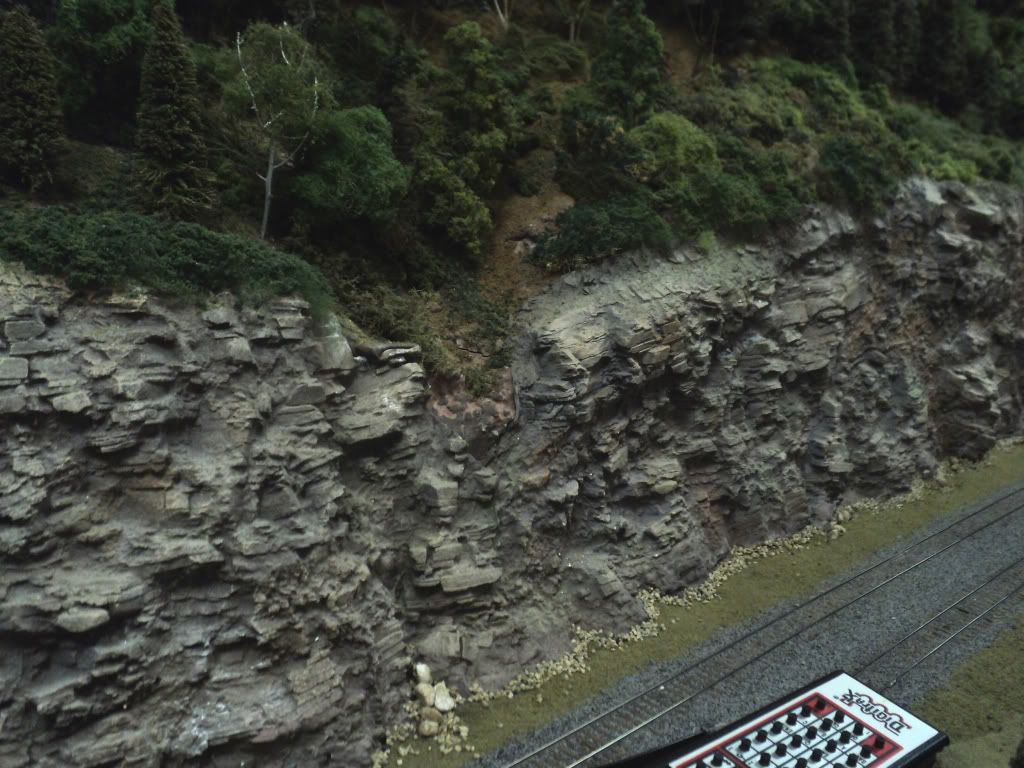
Pics of tunnel sides, used a piece of 3/4" pine stock painted and weathered, once tunnel is dark, you only see the first few inches of it anyway. A bit of light still shows on the “liner” as the webbing is still open. (over 10’ long double track and can only view from one side) access is from under benchwork- clear 1/8" Lexan guard rails the full length for any derailments.
Finished pic of opposite end portal
bogp40,
Very nice scenery, mountains and tunnels.
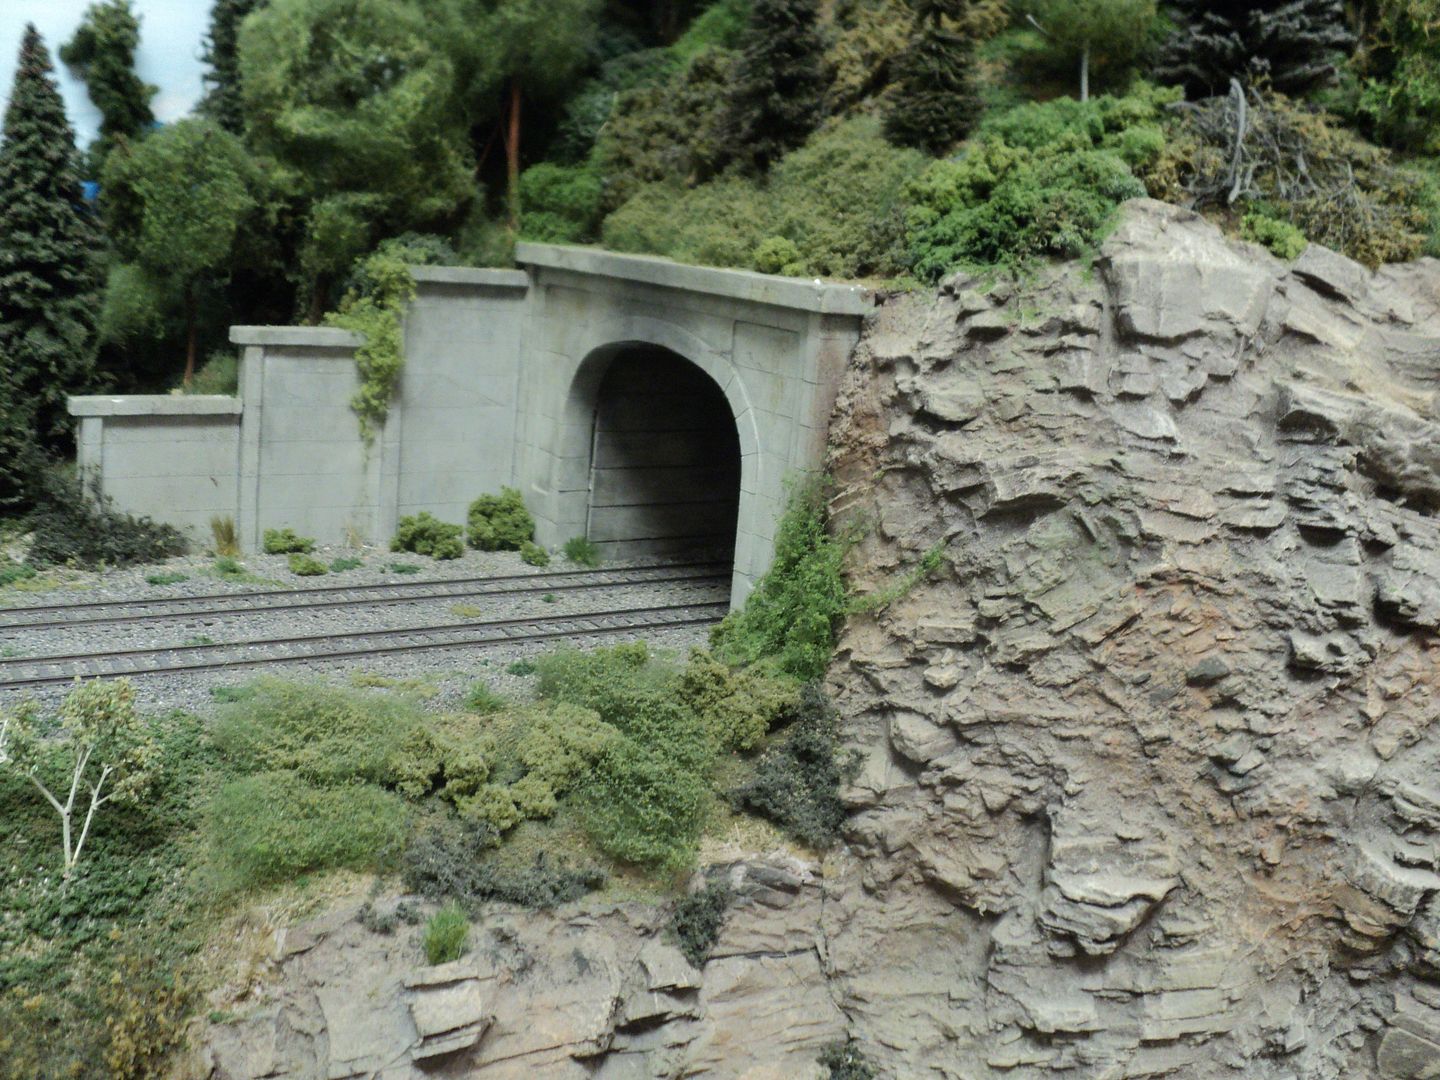
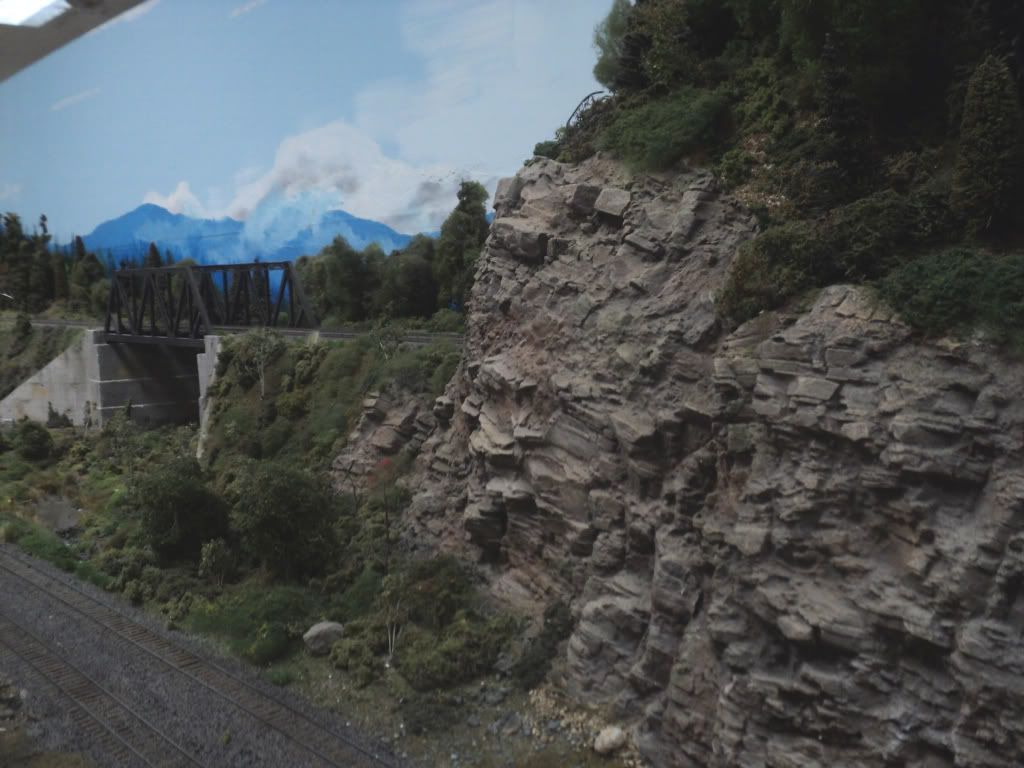
How did you create your rock formations in both the second and third photos? They have a very different and very natural look.
Thank you,
Aflyer
The majority of the “castings” used (note that long cut of about 10’), are Cripplebush Rubber rock. Other hydrocal castings are blended in at and around the portals. Have done many casting from molds, however the extreme length and height of the cut needed a different approach, as placing individual castings on such a large area can produce a weird sort of “patchwork” look to the otherwise continuous cut of all the same rock and strata. Even carving to blend can be quite tedious, so the Cripplebush, (although rather pricey) worked out quite well. The individual “rubber” castings are “designed” to almost interlock/ jigsaw like to each other, cutting and trimming for “crevase’ seams is important. They are hot glued to a piece of 3/8” plywood that is scroll sawed to the contours of the hillside cut. A hintwhen placeing is to add slivered chunks of foam to gain a varying shape and not be so flat. I also placed expandable foam in the backside of the largest of the “hollows” on the bid protrusions.
A couple other views
The platform wall is 1/2" foam board, easy to cut and paint. It supports the roof of the tunnel.
It is of course, a subway tunnel, and so viewers would like to see into the tunnel so the other wal is not present. Since a city street with buildings and more sits on top of this tunnel, the overhead is also made of 1/2" foam. I painted the area above the tracks a grimy black, and the overhead over the platforms sort of a whiteish color.
LION have lots of tunnels, but most of them still need work to become prime time efforts. Three inch tall strips of cardboard are sifficient to make the inner walls of the tunnels.
ROAR
Lion, great detailing on the subway platforms. The edge of the cut foam even looks like the raw poured concrete edge.
It does, but of course that is not correct. The train has a dimensional envelope that it may not exceed. The wayside has a dimensional envelope that it must maintain. The platform edge extends into a “no-man’s land” between these envelopes. It must be made of a “sacrificial material”, in the past this was wood, today it is a lump of yellow plastic.
Here is a wooden edge with a yellow warning track on the platform.
Here is one with a yellow edge.
ROAR
Start with very new cardboard, so that you have the natural stiffness working in your favor. Old, beat up boxes with give you strips that have a great deal of floppyness to them. Having something to from and give general support-be it foam, wood lath, plywood, hardware cloth, etc. will make the task easier. you can use plaster cloth or plaster soaked fabric to cover the tunnel, and to provide a base for the scenery yet to come. In one place, I used plastered over hardware cloth to make a cliff wall- on the viewable side- of a tunnel. Where the plaster failed to totally fill in the hardware cloth, I covered the holes on the rail side with patches of blackout fabric. This step created “caves” from the viewing side, and keeps glow from headlamps from escaping the tunnel.
Don H.
I used aluminum foil as I wanted that blasted rock look. I make the tunnel liner go the full length of the tunnel so that ride along videos see the inside for the full length, not just the first few inches.
I used heavy grade cooking foil several layers thick. A quick spray of Granite grey and sooty ceiling and we’re done. It is easy to shape as required. I think I just used a large cardboard roll of some sort on this one.
After liner installation just use your material of choice to make your mountain over top. Mine just happens to be foam in this particular spot.


Here is the portal before completion.

If you go to my Youtube Videos below and watch Unstoppable II, you can see what it looks like going through the tunnel on the ride along.
