I saw a transition era caboose once with working marker lights. I know they sell the lantern lights to be installed, but does anyone sell a caboose with already installed working lantern marker lights for DCC (except Rapido’s modern side view)?
The short answer is no. The closest one I know of is the Blackstone long caboose, by Soundtraxx. But even it requres you to add their decoder to it.
Tomar makes marker lights with 1.5V bulbs or 3V LEDs and lenses that are green-red-red or yellow-red-red. The kit inludes resisitors and wire . They can take track voltage and the resistors will drop the voltage for the bulb or LED. Add metal wheels to the car and wipers to the axle to power from the track or install batteries and a switch inside.
Actually, not quite that way. The Blackstone Rio Grande long caboose comes equipped with wipers. There is a lighting board/decoder from Blackstone that fits the caboose, which requires soldering the feeders to the trucks. It provides interior lighting only, but there are extra functions on the decoder output that can be used for the markers. [EDIT (see note below): Lighted] Markers are NOT included. More here:
http://www.blackstonemodels.com/access/accessorydecoders/accessorydecoders.php
I’m not aware of any cabooses that come wired with marker lights, in HO anyway.
You can build your own, if you’re OK with getting really small…my friend Scoop shows you how to make working marker lamps with SMD LEDs in these two videos.
http://www.youtube.com/watch?v=CbVmlnWHd3s&list=TLL5mvfRazXY3HrAveiwvo_GeQGwG6mFfL
http://www.youtube.com/watch?v=UZZgu0j7nXM&list=TLL5mvfRazXY3HrAveiwvo_GeQGwG6mFfL
Scoop can also show you how to add a brakeman swinging a lantern on the platform and other animations if you want to really stuff your caboose, just poke around in his youtube channel there to find lots more interesting DIY projects, from simple to advanced.
From the Blackstone website, it does say that marker lamps are included, but you have to install them yourself. http://www.blackstonemodels.com/new/longcab/
Still, unless you are modeling HOn3, it’s irrelevant, and whatever you do will require some work.
pirate,
Yeah, I flubbed that a little…I shouldn’t have said markers weren’t include. What I should’ve said was that lighted markers are not included.
What you get are a pair of plastic markers that have nice painted yellow and red lenses. If you want them lighted, that’s a DIY project. These are really nice markers and work well visually, despite being unlit, as I have them on some of my cabooses and a few passenger cars, too.
There was a company named Utah Pacific in the past that made lighted marker lights. Don’t know if they’re still in business or not.
Utah Pacific is still around (frrom checking the internet) but in looking at all the excellent suggestions, I guess I’ll have to do it manually and the best (and easiest) way to do it seems to be the Blackstone decoder. I’m going to a large train show in my area next week and I will look for a long caboose. Thank everyone for your help in this project.
I’m not aware of any transition era caboose models with lighted markers already installed.
Of course if you are up to a little work, the Tomar markers are pretty impressive.

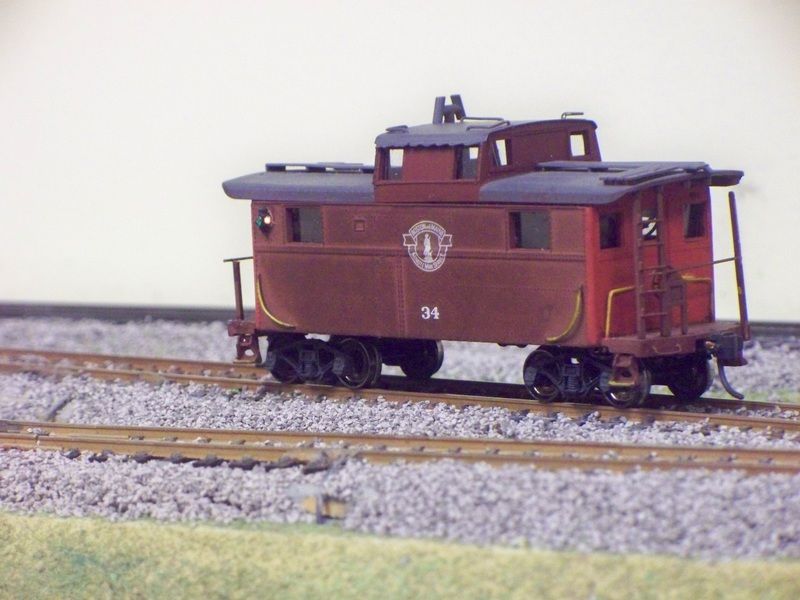
I used a set of the Tomar “Adlake” markers on this caboose I built.


Here is my working marker lamps project. It’s a Bowser NE-5 caboose, repainted for B&M. The lit markers show better when you expand the photo to full size.
And here is the electronics to make them light up. Trusty point-n-shoot is getting flakey and autofocus failed on this shot. Gotta get a new camera before this one croaks alla way dead.
There is a 1 Farad capacitor, a 5 volt regulator, a full wave bridge rectifier, and a homebrew 1.5 volt regulator in there. When new, the capacitor held enough juice to keep the markers lit for 20 seconds after track power was shut off. That eliminated any flicker problems. It won’t do that now, after several years of living in a box and never seeing juice. I’ll leave it powered up for a while and see if the cap will reform. I used wheel wipers on this one. Big mistake, should have gone with axle wipers for lower friction drag. I coupled it to the end of a friend’s coal drag pulled by a massive Bowser I1. Drag was so bad the train failed to make the grade up to Campanella Ridge at the club. Fun project, but I don’t think I will build any more of them.
Good looking caboose, David.
Here’s a pic of how I do my wipers.

The exact install method varies depending on the truck design and materials of the trucks. The wiper is a small piece of PC tie material, but I don’t cut it off at first. First, I solder an appropriate piece of .010" Tichy phosphor bronze wire perpendicular to the length of PC material, along with the lead, of a small flexible wire, to the end of the tie material. The length of the matiral makes a handy handle so you can make the wiper as small as possible. Then you cut the completed wiper off carefully after you solder those parts to it.
How you orient the lead depnds on your install. The wiper can be glued, screwed , or (carefully on the bottom layer of PC foil only) soldered to wherever it needs to be. I then shape and trim the ends of the contact wire where it rests on the axle. These are very low drag and durable.
In this case, it’s for install in a PSC narrow gauge RPO, but you can install these wipers just about anywhere they will fit.
