Hi guys, I realized I have no gray paint for my Santa Fe loco, but only scalecoat II graphite and oil, which is more of a silver than the tarpon gray Im looking for.
Fortunantly, the Tamiya gray primer looks rather good for a Santa Fe tarpon gray, and was wondering if I were to simply spray a finishing clear coat over primer, if that would be okay to do? (instead of primer, gray paint, then clear coat)
Otherwise, any other suggestions for a Santa Fe Tarpon gray color? I would mix my own but Id like all my engines to not have different shades of the gray.
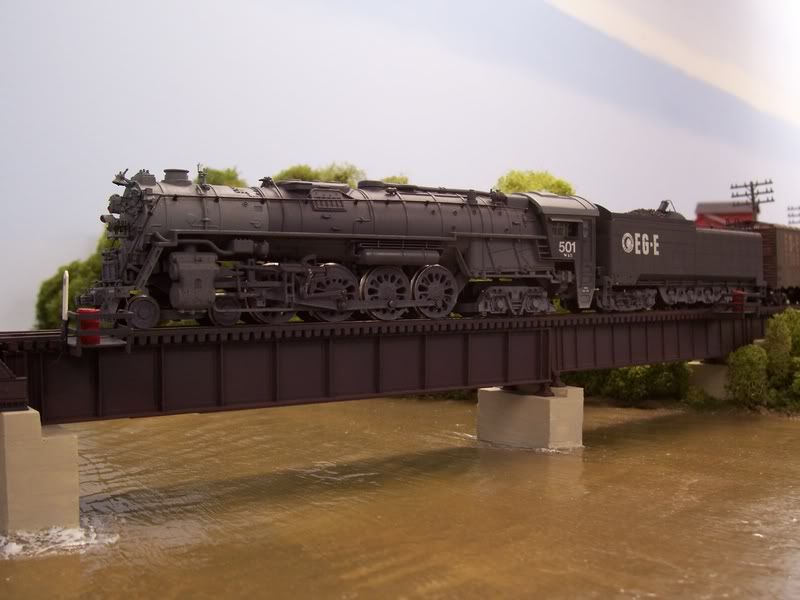
It never occurred to me that Santa Fe locomotives were grey, so I must have unwittingly painted this former Bachmann Santa Fe 4-8-4 using a couple versions of grey paint.
I used those colours based on some real CNR Northerns…
Since the original tender was much larger than anything the Canadian National owned, I cut it down, then kitbashed it with some parts from a damaged Tyco covered hopper, turning it into a centipede-type tender, somewhat similar to what the NYC used behind their Niagaras.
Santa Fe engines arent all gray, its just that the smokebox front and smoke stack are “tarpon gray”. In reality, these parts of the engine werent painted at all. Instead of graphite, Santa Fe used linseed oil, and often times these parts would get dirty (almost black). Modelers nicknamed this dirty bare metal “color” tarpon gray. One of the legendary Santa Fe modelers Gary Shrader used to mix a combo of silver, gray, and black on order to make this color.
Im split between just leaving it gray, attempting to mix scalecoat paint graphite & oil and black to make something, or try to use an alclad color (which would be full metallic). Sort of stuck as to what to do.
Literally every single brass model on brass trains seems to have a different color and/or metallic finish, clearly showing each santa fe modeler chose a different way to make tarpon gray.
Gidday Charles, without wishing to teach my granny how to suck eggs, in the 1:1 world, paint is only a form of protective coating, and the number of layers and thickness of paint, etch, prime, top coat (s), clear coat (s), depends on the environment the painted object is expected to “live In.
I somehow think an HO scale locomotive, unless totally neglected, is not going to be bothered with just a primer coat, especially as it looks right to you. I wouldn’t even bother about the clear coat.
Most of my covered hoppers, in cement service, are painted with a commercial rattle can gey primer.
Hi there. You can also apply a coat of thinned warm black to darken it a bit if you find that the gray is a bit too light. The airbrush is best for that but a paint brush works too. I would certainly apply a coat of flat varnish as primer tends to rub off easily, especially on bare metal. That’s been my observation anyway.
Some primers are formulated to require or expect a topcoat, and are mechanically soft when cured/dried or have poor weathering performance. In particular I observe that even the slightest scratch or dent producing force will ‘show’ in many unprotected primers; I don’t know if a clear coat rather than a color coat would fully eliminate that from showing, but it would prevent at least some.
I think it should. My impression was that Dullcote or whatever it’s called now is actually a clear lacquer or similar coating that has been loaded with talc; other clear ‘matte’ products may use something like silica fume which could be added to some paints to make them ‘flat’ without rendering them too difficult to spray.
I’m tempted to argue that the cheaper the primer (e.g. not high-bond or self-etching or whatever) the more likely it can be left ‘un-topcoated’ on a model. BUT if you’re going to decal: spray the whole area with gloss, not just the ‘patch’ where the transfers go. You will get very visible areas – that have that ‘obvious rookie mistake’ sort of look to them – if you do.
See the arguments for spraying gloss over the decals as well, before uniformly dulling the surface with Dullcote or whatever.
Yes, that’s a lot of seeming rigmarole, and yes, it defeats the point of lazily letting the primer be the dull surface.
Not if you then apply dullcoate over the model to give it a uniform finish. Applying the gloss coat only under the decaled area prevents the rest of the loco from having three coats of paint. Most of it will have only two, thereby leaving the details exposed that much more.
But that requires a thick enough coat to ‘self-level’ over the little hump of gloss coat plus decal film. Which can be a bit of a pain to build up so it doesn’t show.
I would also be concerned with how well a single application of Dullcote would ‘build’ on the primer surface adjacent to the glossy islands. Again thicker or multiple coats might be involved vs. just dulling a properly-prepared ‘substrate’.
(If it’s any consolation, I too went straight to Dullcote after applying decals over gloss – I learned different, and I hope better, here.)
Your eyes must be better than mine if you can detect a hump.
Besides, I don’t mask the gloss coat application. The smoothing brush action doesn’t create a perfect demarkation line of gloss coat over the primer. Its sort of an irregular feathering that doesn’t show up after the dullcoat is sprayed.
And as any good painter will tell you, imperfections tend to get suppressed with flat finishes but exposed with gloss finishes.
Decals tend to obsure the details a bit. The advantage is with the rest of the locomotive that doesn’t need gloss coat before it then gets dulled.
Of course, if you want a glossy like new loco, and sometimes we do, none of this matters.