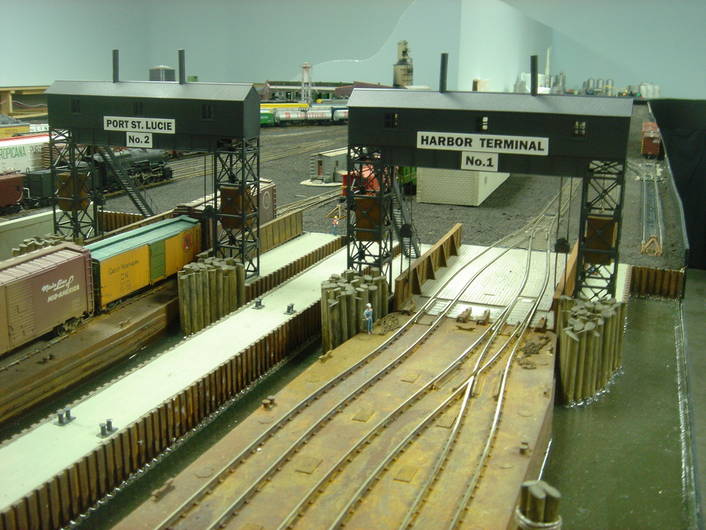
This is a picture I took of the Walther car float and apron at the Treasure Cove Model Railroad Club in Port St. Lucie, Florida. There are two floats and two aprons here.
This is a photo essay by Tim Warris of FastTracks:
(After the first couple of pages, it seems to get lost, but just keep going to “Next Page” and it gets back to the car float after a while.)
Both the picture above and the photo essay use the same Walthers car float, so it’s interesting to compare two different interpretations of the same model kit.
Nice to see another belgian on this forum and one modeling US trains like me.
For more infos about carfloat apron and lot of pictures, look at the following address; even all are not precise shots, they can give you a good look and example how americans big and small railroads made their apron.
www.handlaidtrack.com on the bottom of the home page click and open the blog of the “Bronx terminal” of Tim Warris; on the link pages related on his blog, there is a link to site which help you to discover all the trains terminal of New York and their storie; most of them have carfloat apron.
www.railroadmichigan.com/carferry.html based on the car ferry and steamers which have sail on the great lakes, but on most of the pictures you see apron and carfloat and you can have a good idea of the car ferry sailing on these water between the1900’ and 1970’s years
Welcome to the model train forums, The following photo shows an apron servicing a scratch built 4-track car ferry. I would suggest that you scratch build the carfloat to the dimensions of the apron. It is perhaps best that you first buy a Walthers’ ferry or carfloat apron. The apron is movable vertically and horizontally, which allows one to adjust the tracks on the apron to the tracks on the carfloat. The dimensions of the carfloat can be of any size that will adapt to the space available. The second photo shows my 3-track carfloat, which is tucked into a space at the entrance to a large harbor, I built the carfloat without an apron, but will add one later. The apron is necessary to adjust to the height of the loaded and unloaded carfloat and to tide height on ocean harbors.
The carfloat is extremely easy to scratch build, since there are few details and no curved surfaces. Bob Hahn
Marc, Marc Marc Marc Marc, Marc. How did you build that rail ferry??? I flipping love it!!! Now THAT I would like to have on my ferry layout.
One other easier option is to go with another type of apron. There was…four basic types, although three of them were pretty simlilar. There was the Frenchman style, named after it’s creater, which IIRC was the type like walthers, with a counter-weighted apron, two towers, and a headhouse spanning the towers that held all the lifting winches. Another type used the same method, but used a single A frame tower mounted at the center of the apron, going in the same direction. The third type is like the first type, there was (as I understood the reading) a first section about 80 feet long that had it’s own lifting tower, and was hinged to the dock. A second 30 foot section was hinged to the first section, and had it’s own lifting towers and equipement.
The final float apron type is the one I reffered to as the easier option. It is a pontoon style apron. Again, as I read, it was very much like a deck-girder bridge with one end hinged to the dock, and the other (where the float car/ferry latched on) just floated there. A very large hollow steel pontoon was attached to the apron. It would rise up and down with the tides, and some had pumps so it could pump water in and out of the pontoon for ballast. It would attached to the float/ferry I assume the same as the others did. In my opinion though this would be just as neat looking as the others. Large diameter log pilings were drove into the water bed on each side of the apron, to limit the side-to-side movement of the apron. Pilings were also driven a little further out so the side-to-side movement of the car float would also be limited. I think this may be the type I will model.
I promiss, I will take some other pictures of my Anabel car ferry sitting at port on my Maclau River to post on the forum; because so many people ask how I do it.
It’s based upon the Anabel car ferry of the late John Allen GD lines. Data is only from pictures and some old articles published in MR years ago about it.
It is a full scratchbuild project, I made 25 years ago in Nscale; the only ready pieces are the vents, the anchor, figures and a few other naval modeling pieces.
The hull started, beleive me or not, as a old LEGO ship enterely covered of baswood. The deck features a board by board construction and unfortunately, when building it, I cut away a piece of my finger ; the cabin and other details are styrene, the chimney is aluminium tube flatened in a pinvise
This model had a lot of memories for me, because it was the starting point of many other sctratchbuid projectss and also because my late father give me a lot of encouragements to build it.
When this pictures was shot, years ago, the apron was not finished; the apron feature now a board by board construction with a wye turnout giving acces to the two track, the ferry can move eight 50’ car. The crane of the apron is a scratchbuild one, yet not finished, but based on the one sale by Barmills model but in styrene with Grandtline windows.
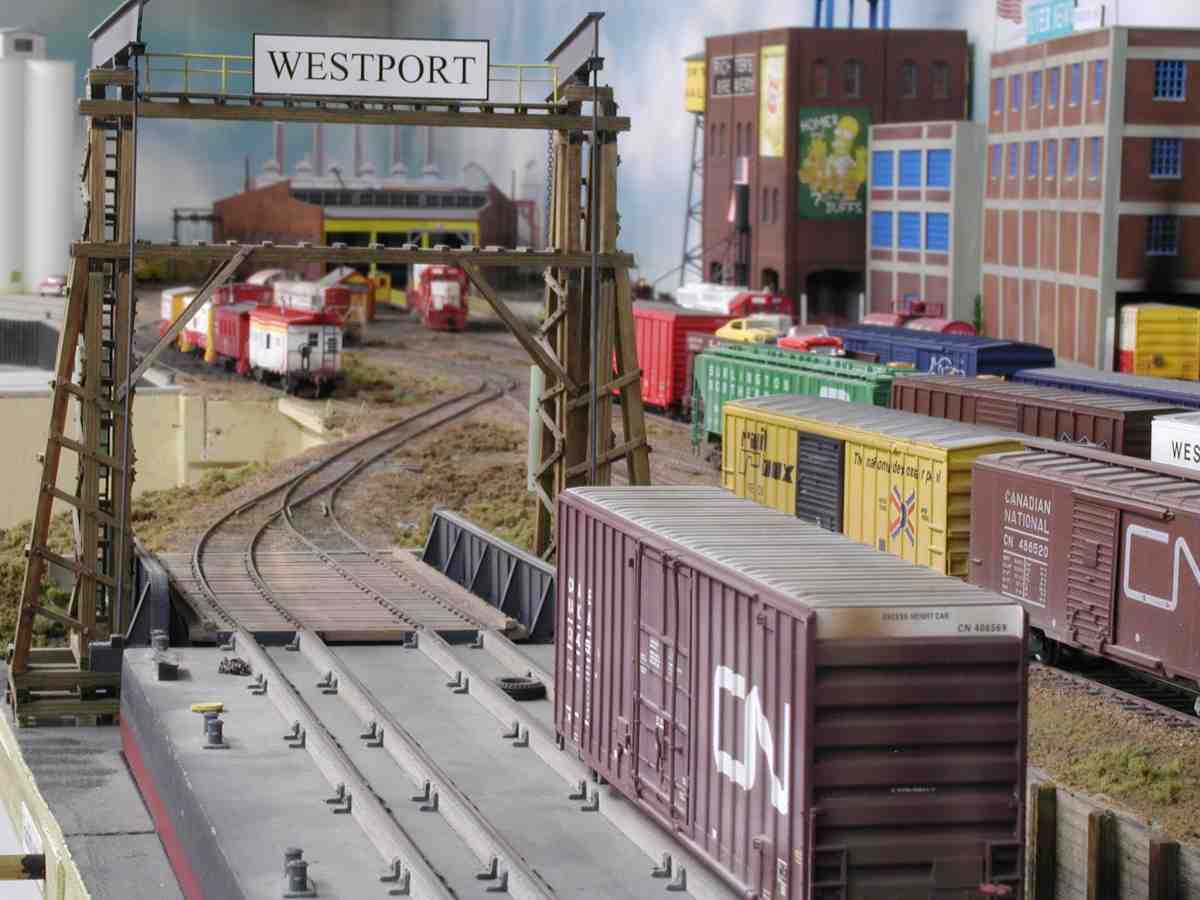
Here is a picture of my transfer bridge under construction. It is a simple design which uses lumber and counter weights. Everything is scratch built except the track pieces. They are just plain old atlas code 100 and will be covered by a lumber “deck” which will hide the out of scale rail height!