I didn’t know much about switch machines when I installed all Atlas snap switches. They work ok, but in some locations, the machine housing is too high and near the side of the rail. When a long loco comes off a curve or a long steamer backs over off a curve the frame detail or sanding pipe etc. can bump into the switch motor or hook up and stall the loco.
I have this happening in two locations. Rather than rip out the switch and put in a better one, because I don’t want to have to rip up connecting switches and track to get at it, is there a lower profile motor or some other motor that can be bashed into working on the snap switches?
Failing that, what is a good profile switch to use in these locations? I can’t use under the table motors at these points.
could You possibly use a small file to remove a little of the point of contact? I would guess You won’t have to file but just a little. Thats the only thing I can think of. Luck!
Y’know that little, nondescript plastic bracket that comes with the Snap-Switches? The one you threw out? That’s Atlas’ solution to this very problem. It’s an extender that spaces the machine out further. When using it, use the outer throw bar hole.
If you already cut the throw bar short, and clearances are too small for any undertable machine, you can use Caboose sprung ground throws, or cobble up some sort of mechanical linkage. Atlas switches are pretty universal. You can bend a piece of old rail into a long, shallow U, drill holes, and use that as an extender from machine to switch (this will help in cases where the machine must be 1 track away from the switch).
Oh man, yer gotta’ be kiddin’. I must have thrown out more than two dozen of these without knowing it. Anyone have a picture of this gizmo? I don’t remember ever seeing them.
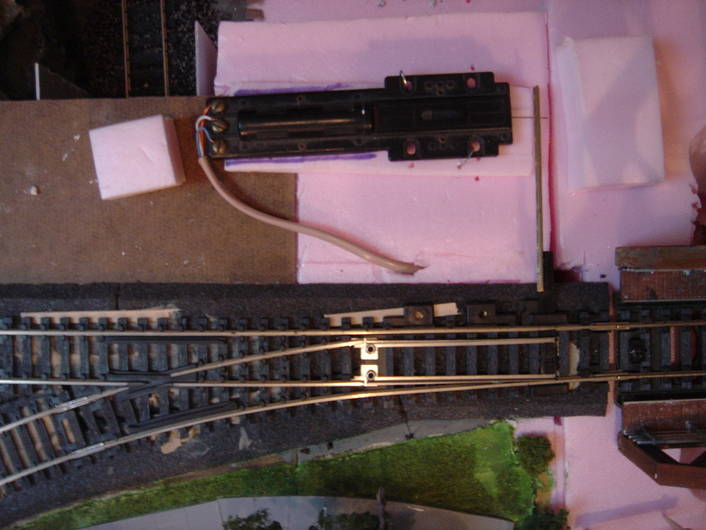
Here’s one in place. Keep in mind that these are old, old switch machines, and they have screw mounts, not snap-mounts.
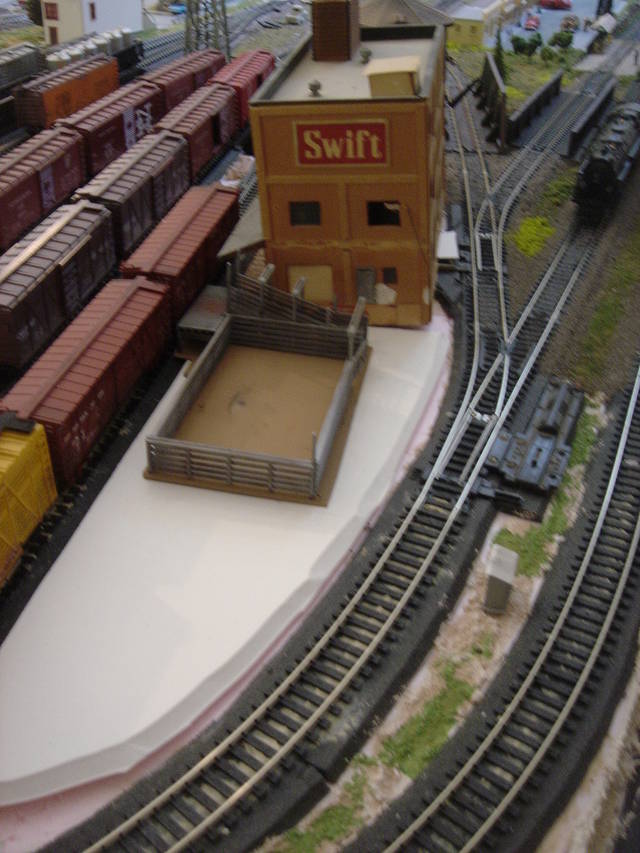
I moved this one way off-line so that I could hide it. I glued a piece of old brass rail to the throwbar, drilled a hole for the switch machine wire, and mounted it several inches away.
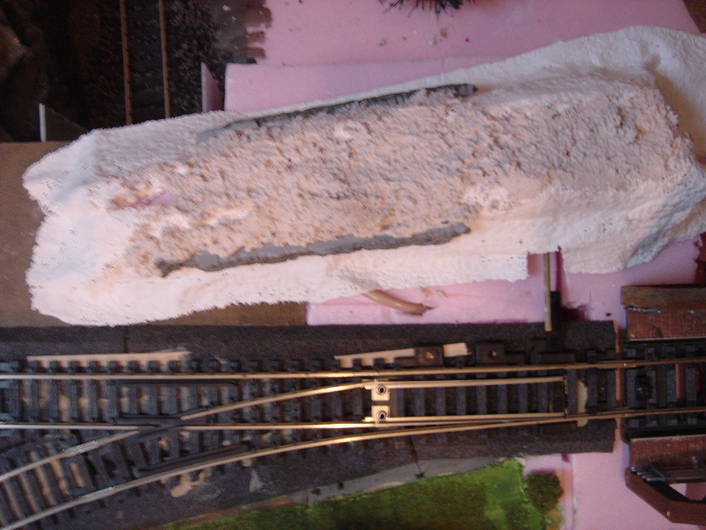
Here’s the “scenic cover,” still under construction. I put some foam scraps around the machine, covered the whole mess with plastic wrap, and then draped plaster cloth over it. In this shot, I’ve covered the plaster cloth with Gypsolite:
If you go back and look carefully at the first picture, there’s another switch machne hidden inside the Swift plant.
Thanks for photos Beaszzz. Yes, those are nothing like mine which I bought last year. Those look larger, and more robust. I have never seen an extension from Atlas in that case. And the little plastic throw bars from the current switch machine I don’t think could support a piece of brass rail as an extension.
But I see now how I can make up my own out of plastic afte seeing what you have done.
Gerome, I do not have any picture’s but something I have done in the past to help in being able to better hide the switch motor might work. It sound’s like you have newer style switch machine’s were the motor snap’s in place, if this is the case you can turn the motor over haveing the bottom side up. For this to work you need to use a right hand motor for a left hand turnout & a left hand motor for a right hand turnout. Just snap them in place as you would on a mornal install. Hope this help’s.
Which Caboose S series ground throw should be used for the Atlas snap switches? I want to change over my manual ones, got one 218S but am a little confused about which attachment to use on the Caboose throw.
If finding a spacer is a problem, I might be able to help, I’m sure I have a few extra laying around. I use under table mounts but keep the spacers around to use as in-fill bracing when skrewing the machine to the underside of the road base. PM me.
Thank you folks for all the good advice and offers of spare parts. I appreciate that.
However, it just dawned on me that I made a basic goof in my post…mine are Code 83 snap switches and motors. If you have never seen them, they look like this: and they also look less robust, don’t they.
They don’t come with any extenders. Perhaps they are alread low in profile, but they still will snag some big locos coming off an 18" curve.
The little throw arm and solenoid arm are tiny plastic affairs. Perhaps I can still glue another bit on and move the motor back some. Or I think I can snap it off the ties a bit and angle it down,and glue the throw arm and solenoid arm together to keep them working with the motor pushed off sideways and down a bit.
I confess that I’ve never used the 218S. I have only used the 101R and 202S. I cut off the nub on the Atlas throw bar so the 202S’s pin would slip in. You’ll have to let me know how the 218S works out. I was quite happy with the 202S…I don’t really recommend the 101R (I was a cheapskate) except in those situations where you have a lot of distance to traverse anyway, and can fit in some sort of spring, like a piece of piano wire with a Z bend.
Odd that the C83 Snap-switches don’t have the extenders…those strike me as one of those neat little bits of engineering that helped make Snap-track a user-friendly system.
Not sure if it’s been mentioned, but you could do similar to MR B. Use music wire for the extension, if moved a great distance run the wire in a brass/ steel tube. Anchor the machine and complete the throw rod. Anchoring can be done all different ways. If you only need a small amout like those extensions, just run strips out from under the ties to the distance needed. Glue (CA or epoxy) at the tie and if placed right may be able to screw the machine in place for any removal if nec.
This method is done regularly at the club to move the Tortoise due to joists and other interference. It has been done above and below the subroadbed/ deck.
Actually, I have found out through some additional research that the 202S is the one to get for the Atlas switch. That funky hook just didn’t seem to be the one to use, though, nothing really seemed to fit easily together. What “nub” are you referring to on the throw bar? I’m going to go and get a couple of 202S’s and now I am in the market for advice on how to extend the the throw bar without having to drill any holes. Everything I have seen suggests piano wire between the ground throw and the throwbar, using the middle hole of the throw bar between the points. On the other had I am wondering about the posibility of a short circuit with the piano wire with this method. I’m also wondering if stripped single strand 22 AW
Actually, I have found out through some additional research that the 202S is the one to get for the Atlas switch. That funky hook just didn’t seem to be the one to use, though, nothing really seemed to fit easily together. What “nub” are you referring to on the throw bar? I’m going to go and get a couple of 202S’s and now I am in the market for advice on how to extend the the throw bar without having to drill any holes. Everything I have seen suggests piano wire between the ground throw and the throwbar, using the middle hole of the throw bar between the points. On the other had I am wondering about the posibility of a short circuit with the piano wire with this method. I’m also wondering if stripp
