Has anyone purchased and built the Custom Model Railroads (CMR) Lift Bridge ?
I am considering the purchase of the two track lift bridge in HO scale.
From anyone who has actually built the single track or double track bridge in either N scale or HO scale, I would be interested in your evaluation of this bridge.
Me too! I’m looking at the single track bridge. I’ll probably pull the trigger and purchase it anyway though it may be a while before it actually gets built.
This may not be of much help, but a friend built one for one of my neighbors. Unfortunately he can’t reply to this thread himself as he is now hospitalized.
What he said is the kit is a craftsman type, some parts must be filled with putty and others must be trimmed to fit. It is not a styrene kit, it is acrylic therefore very fragile.
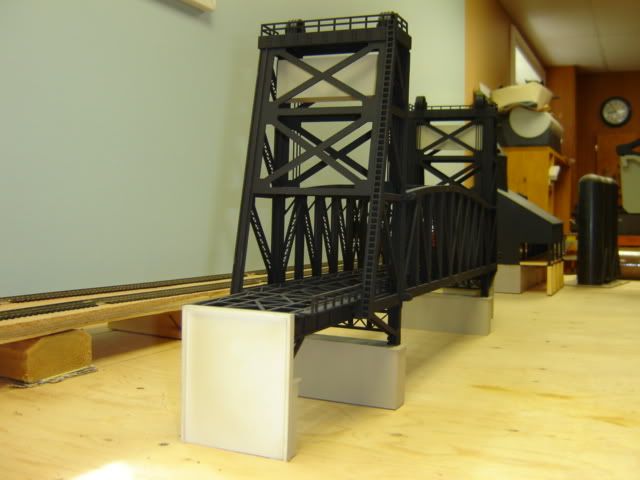
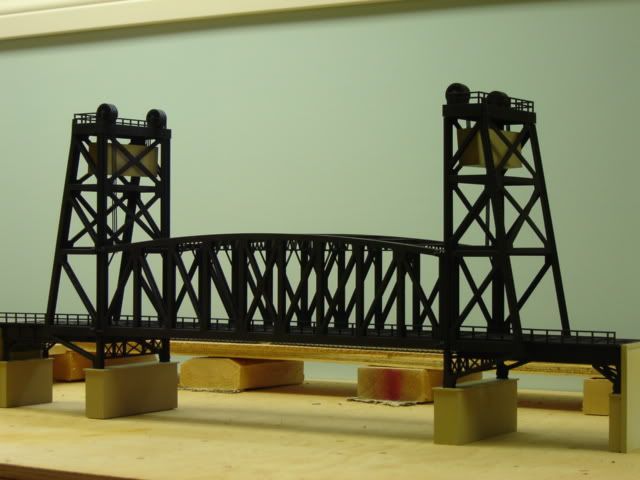
If you wish I can post pictures of the finished bridge. It is the double tracks version.
The CMR web site indicates that the material is acrylic, not styrene, but the claim is made that acrylic was used because it is stronger. One question I have is what kind of adhesive to use to bond acrylic to acrylic. How much more fragile is acrylic than styrene? I don’t mind trimming to fit, but the idea of filling parts with putty bothers me. Was the use of putty extensive?
Acrylic is much more rigid then styrene, however if you drop a part on the floor, it will shatter to pieces.
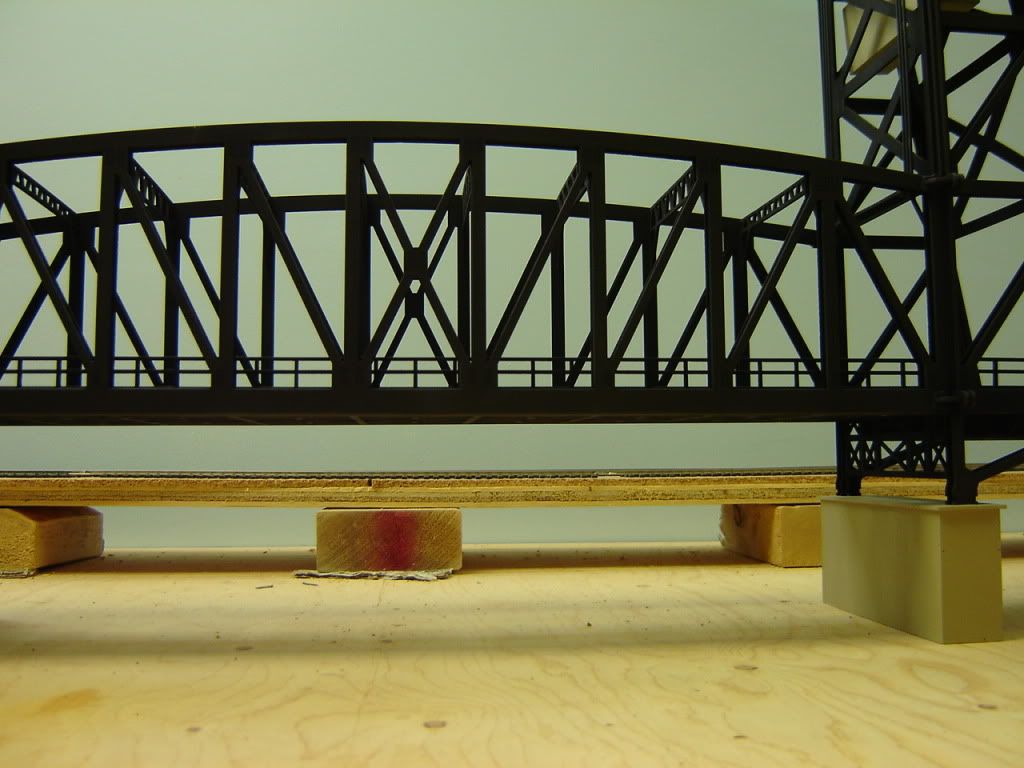
The use of putty is extensive, the whole curvature of the lift span must be filled and on both side. A square section of approximately 1/4 x1/4 inches for the whole length must be filled.
I think Ca glue was used but take that with a grain of salt, I don’t quite remember. I also think there is something to take care with the paint. A call to CMR should clear these questions.
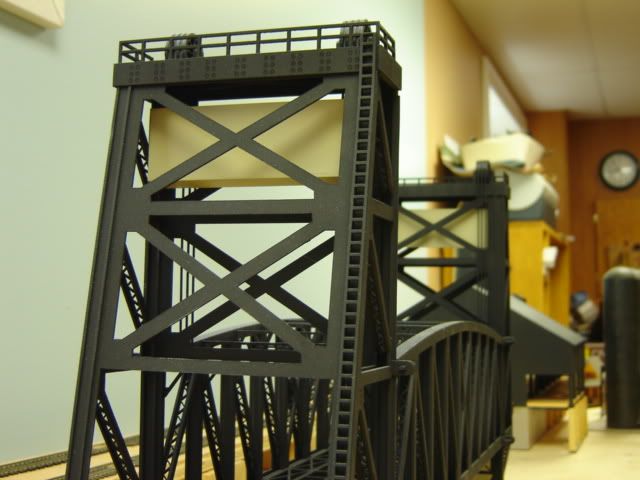
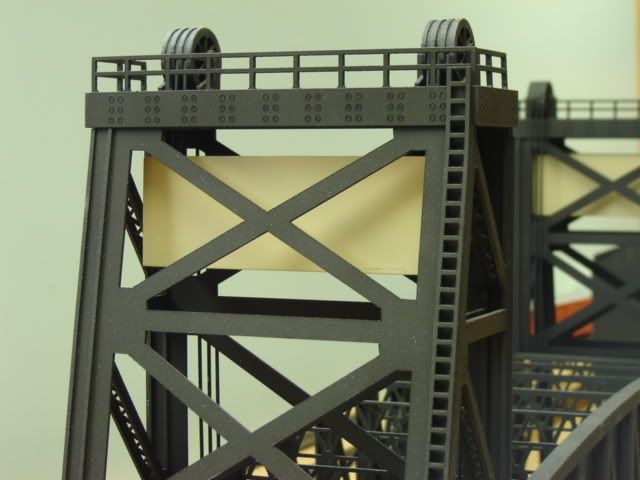
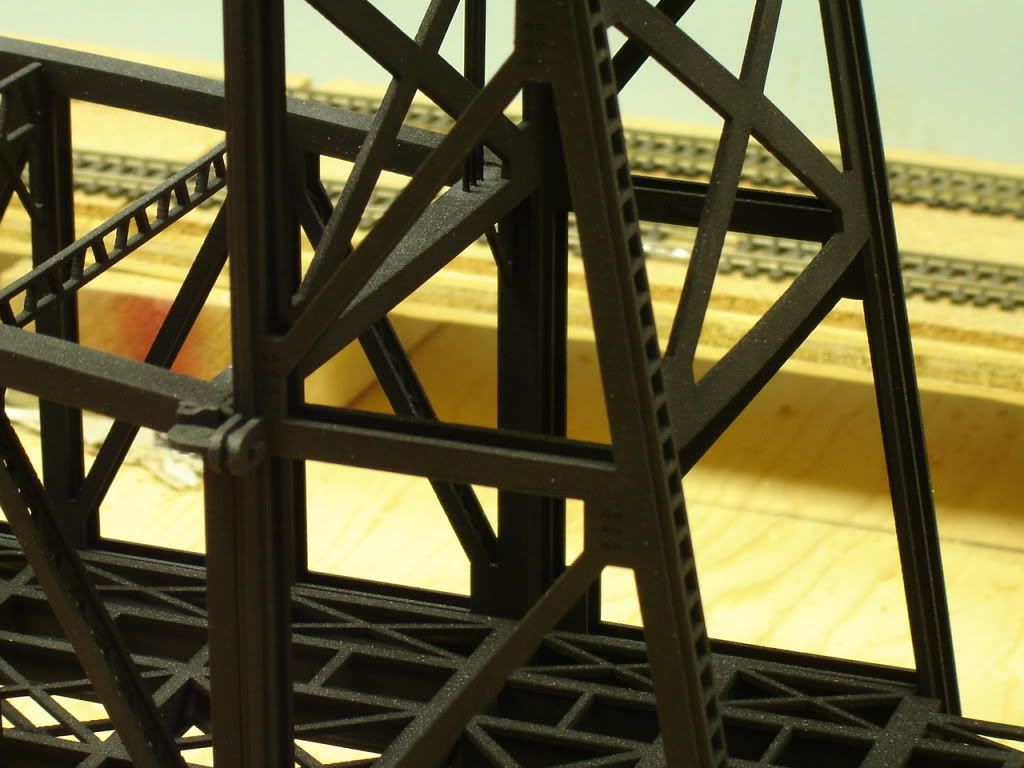
The two lift tower structures are angled as that second photos clearly shows. Since I would like to replicate the PRR lift bridge at 21st Street in downtown Chicago, that lift bridge has vertical lift tower structures that run up and down rather than angled. In your estimation, especially considering that the material is acrylic, how difficult would it be to kitbash the bridge a little to make those lift towers vertical?
You are right about the acrylic material. The CMR claim is that the acrylic is more rigid than styrene, not stronger. The thought of shattering the acrylic parts is a little intimidating.
If each of the four sides of the tower are piece, that could be an issue, particularly if acrylic shatters easily. Maybe I will contact CMR directly and get their thoughts on trying to reshape the sides of the towers to make them more vertical.
On my current layout, I don’t have any space available nor do I have an appropriate spot for the lift bridge.
I have been toying with the idea of starting a new layout that would simulate the area between Dearborn Station and Alton Junction in downtown Chicago. At Alton Junction, the PRR tracks cross the 4 track mainline of the C&WI and the 2 ATSF tracks. Right after the crossing, the PRR crosses the South Branch of the Chicago River on the 2-track lift bridge.
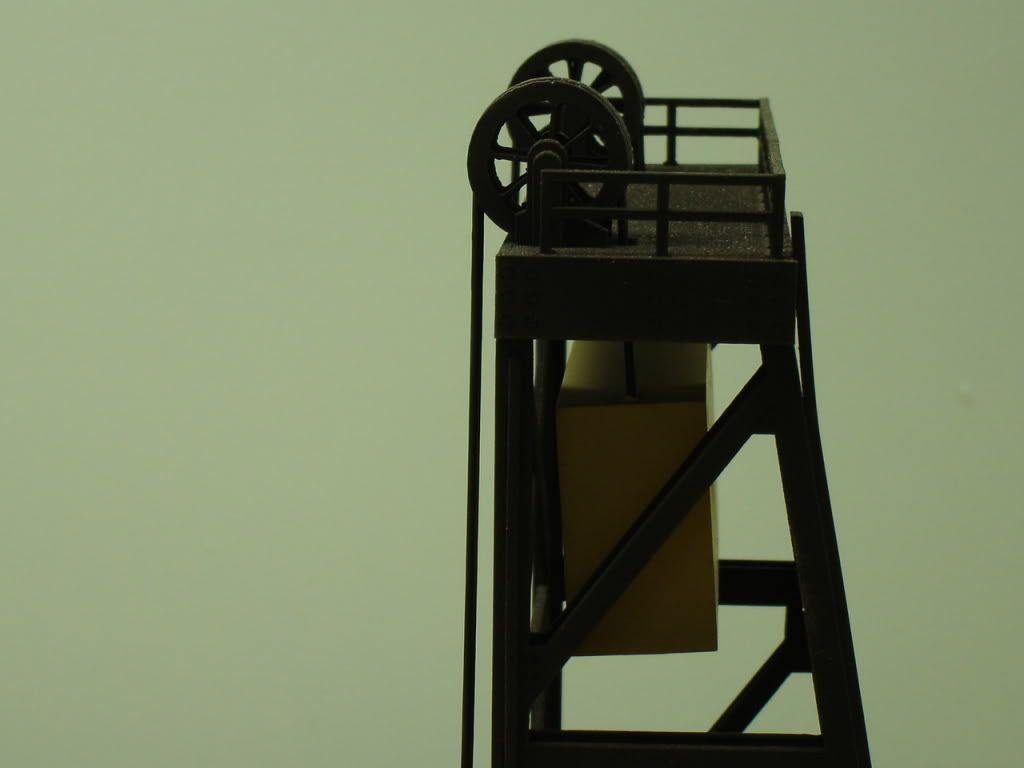
As you say, it is an awesome bridge and CMR really captures the look with its handsome model. Whoever built that model that is pictured in the photos provided by jalajoie did a superb job.
While I haven’t built the lift bridge, I have built quite a few of the buildings from CMR, all of which are made of acrylic. Here are some thoughts on working with the material:
-The acrylic is rigid so you can’t bend it like styrene. It will crack if you try. Nonetheless, to say it will shatter if you drop it on the floor is quite an exaggeration.
-I used Tenax 7R as glue. The stuff smells and dries very fast. Gluing is easy to do if you can dry fit the parts together and then apply glue along the seam. The CMR glue dispenser they sell is quite helpful for this; better than trying to use a brush. Where Tenax 7R falls down is when you are trying to glue a piece on to another piece and the seam isn’t accessible. If you apply the Tenax 7R to one piece, it will dry within seconds, making it tough to get the piece in position in time. For these situations, a 30 second CA is a better bet.
-The kits do sometimes have minor fit problems so you will need putty. In terms of work, this is balanced out quite a bit by the fact that there is very little sanding involved.
-For painting, acrylic doesn’t have much grip so you will definitely have to prime. Would recommend a fast-drying lacquer primer like Mr. Surfacer or Tamiya. Again, more smells.
-While expensive, the CMR kits are unique and I would definitely recommend them.
I think the best way to cut it would be with a razor saw. I’m not sure if I’d trust score and snap they way you can with styrene. The acrylic is also hard enough that an Exacto knife would be slow going. Have never used a glass cutter so not sure there.
I haven’t built the lift bridge but I have built one of CMR’s turntables. The acrylic is fun to build with. I used Tenax with a small syringe type capillary-action applicator and had no problems with getting it together quickly and easily. Fit was excellent with only a minimal amount of sanding and putty needed in a few spots.The clear acrylic does take some getting used to while you’re assembling - seams can be a little hard to see. I’m currently expanding my layout with a second turntable and planning on getting and building another CMR turntable.
If the lift bridge kit is made to the same quality as their turntables, you’ll have no problem and will be rewarded with a nice structure for your efforts.
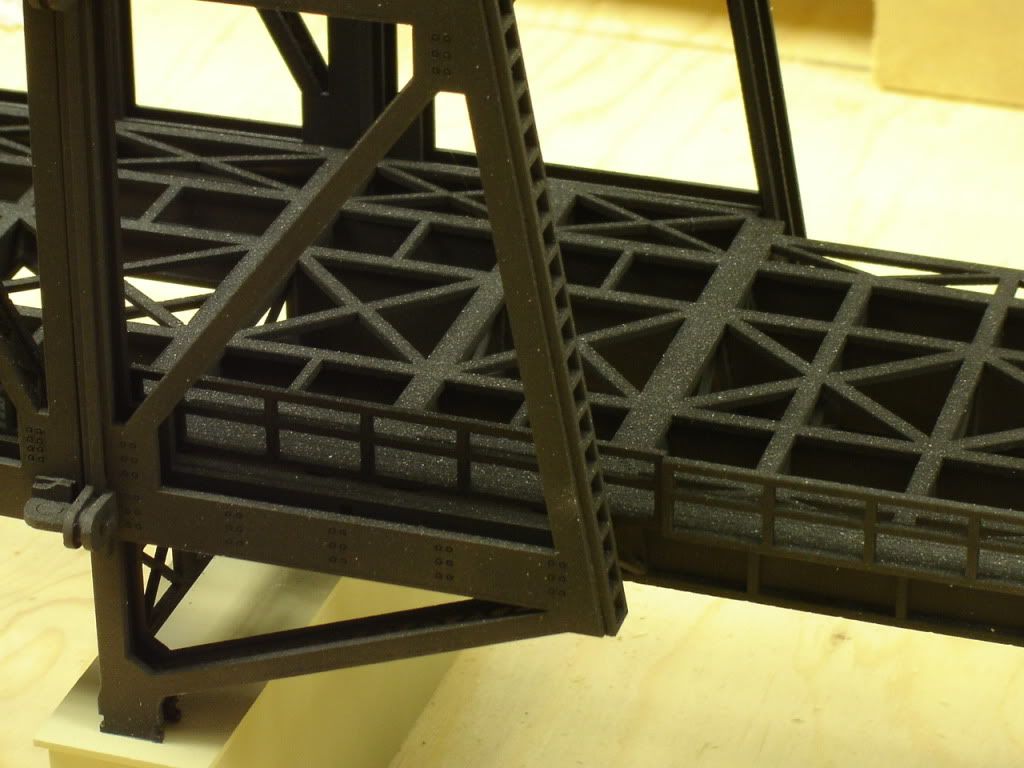
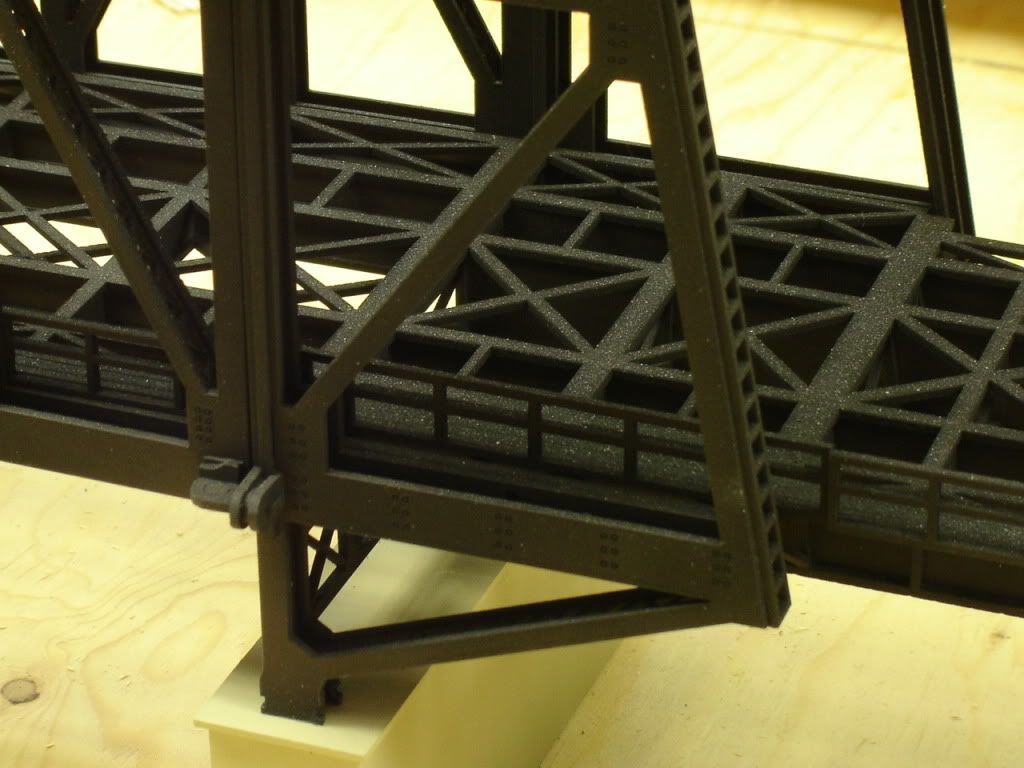
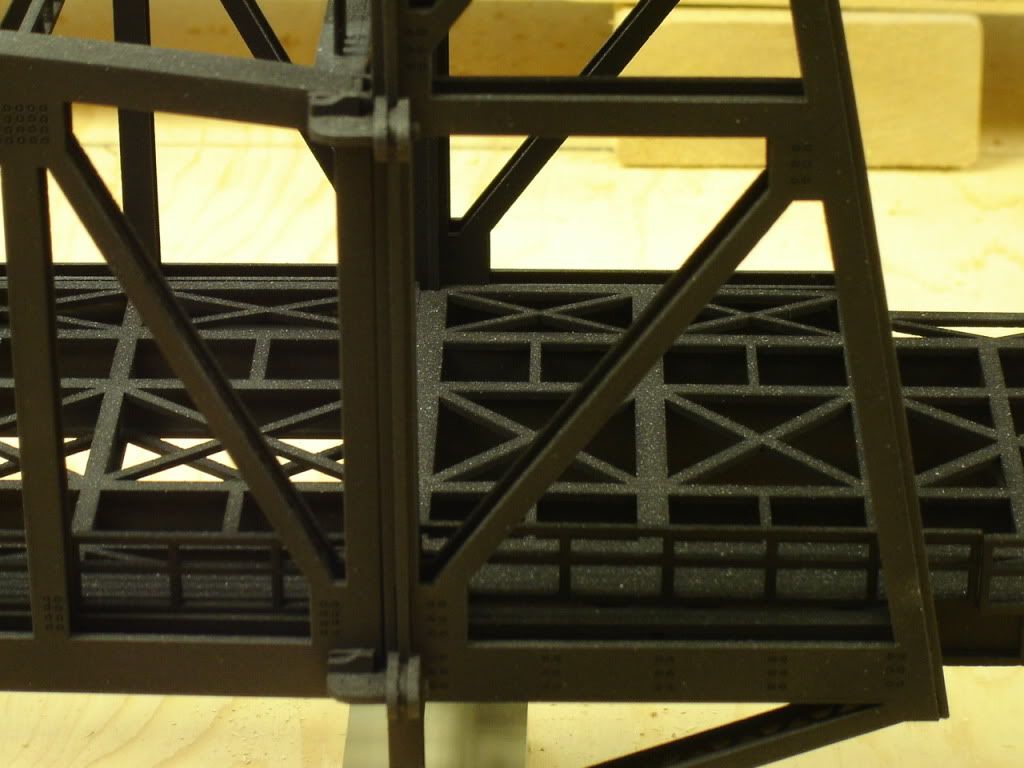
Rich, here are some close up pictures of the tower structure. This is the right one when facing the bridge.
It does look like there are 2 big pieces (laser cut) glue back to back to form one side. How easy it is to modify them I don’t know. Your call to CMR should clarify that. If it is not too much asking could you please inform us of the outcome of that call. Guess I am curious.
Whitman500, the statement about Acrylic shattering if drop to the floor is not from me but from a rep. of CMR at the West Springfield Show. I will gladly accept your opinion that it is exaggerated.
I called CMR yesterday but it was close to their closing time and I got nothing but a busy signal. So I will try again today. I will definitely report back on my conversation with CMR.
I spoke to Jeff at CMR Trains this afternoon and asked him about the feasibility of cutting the acrylic tower pieces to make them vertical instead of angled.
At first, he wasn’t too encouraging but, as we talked, he did indicate that even though the parts are acrylic, they could be cut with care.
One method, he suggested, is to use a Microlux mini table saw. That is why they use in their shop when customizing kits.
Another method is an Exacto saw, and yet another method is a Dremel cutoff wheel.
I suggested a jeweler’s saw and he agreed that would work as well.
Lastly, he did indicate that if I really screwed up, they could provide replacement parts.