I have a bunch of old freight cars that need coupler box replacement. There are various issues making it a pain in the neck to replace these, however. I can’t afford to lose any cars, as I’m short on equipment that fits my era. I can provide photos of equipment a bit later, as I don’t have my camera on me right now, Here are the issues:
Two old HO scale Varney 40ft outside braced boxcars that I picked up at a show. When I tried to replace the horn-hook couplers with standard Kadees, I found that it looked as if the coupler boxes are molded shut. I have Kadee coupler boxes and screws, but I can’t figure out how to remove the old ones.
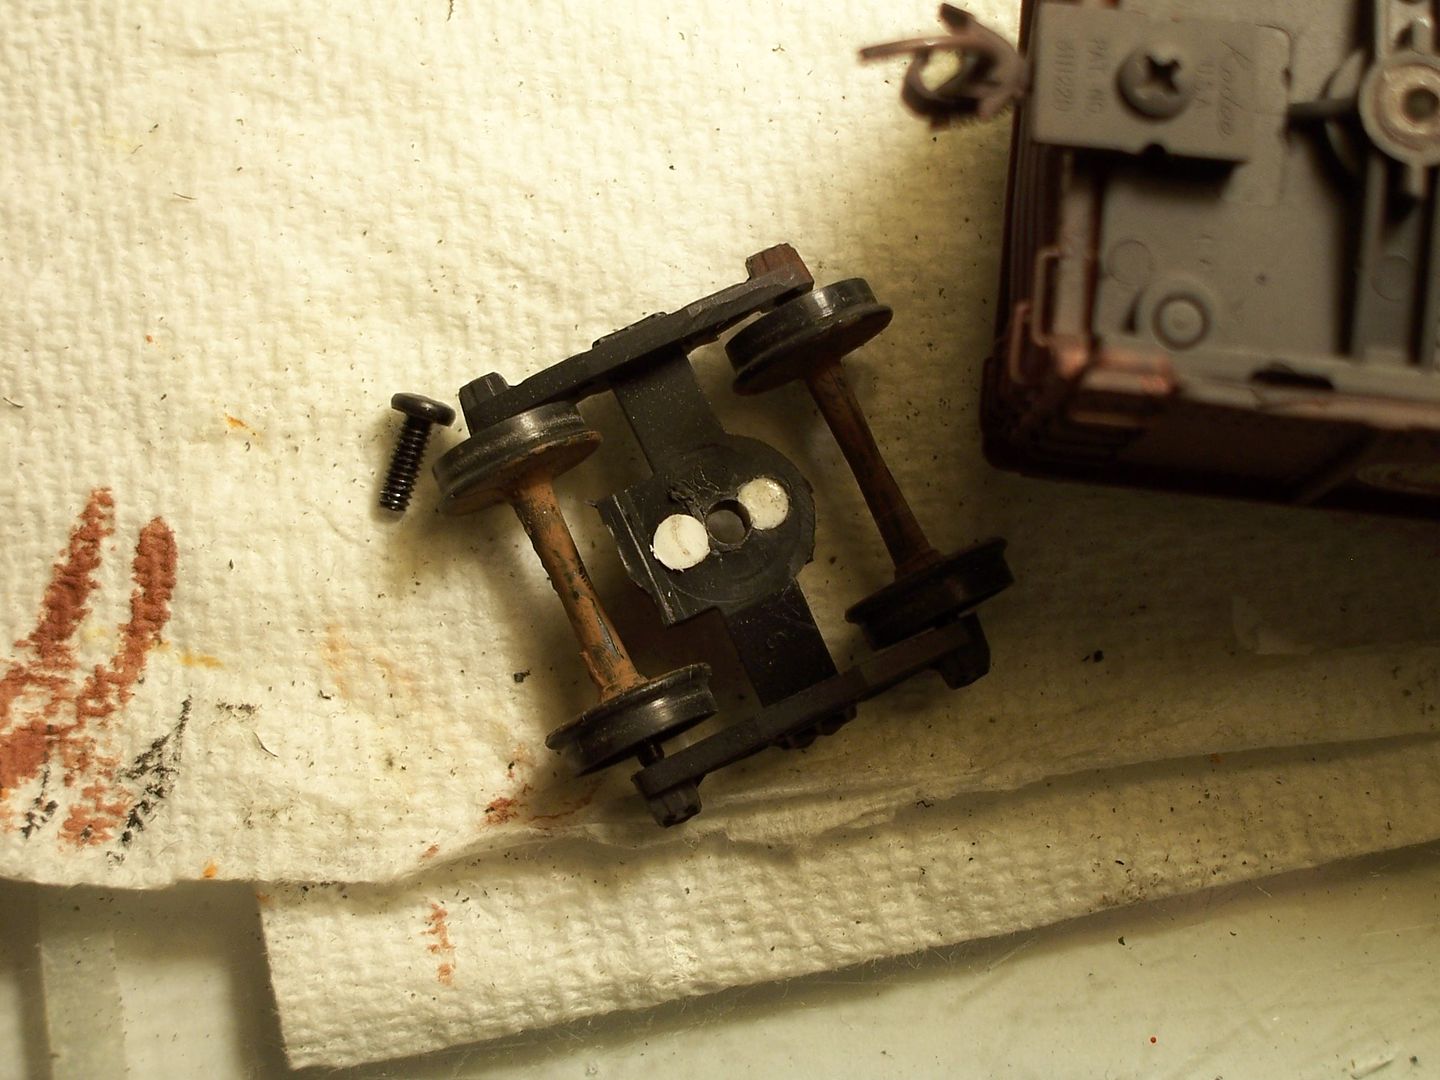
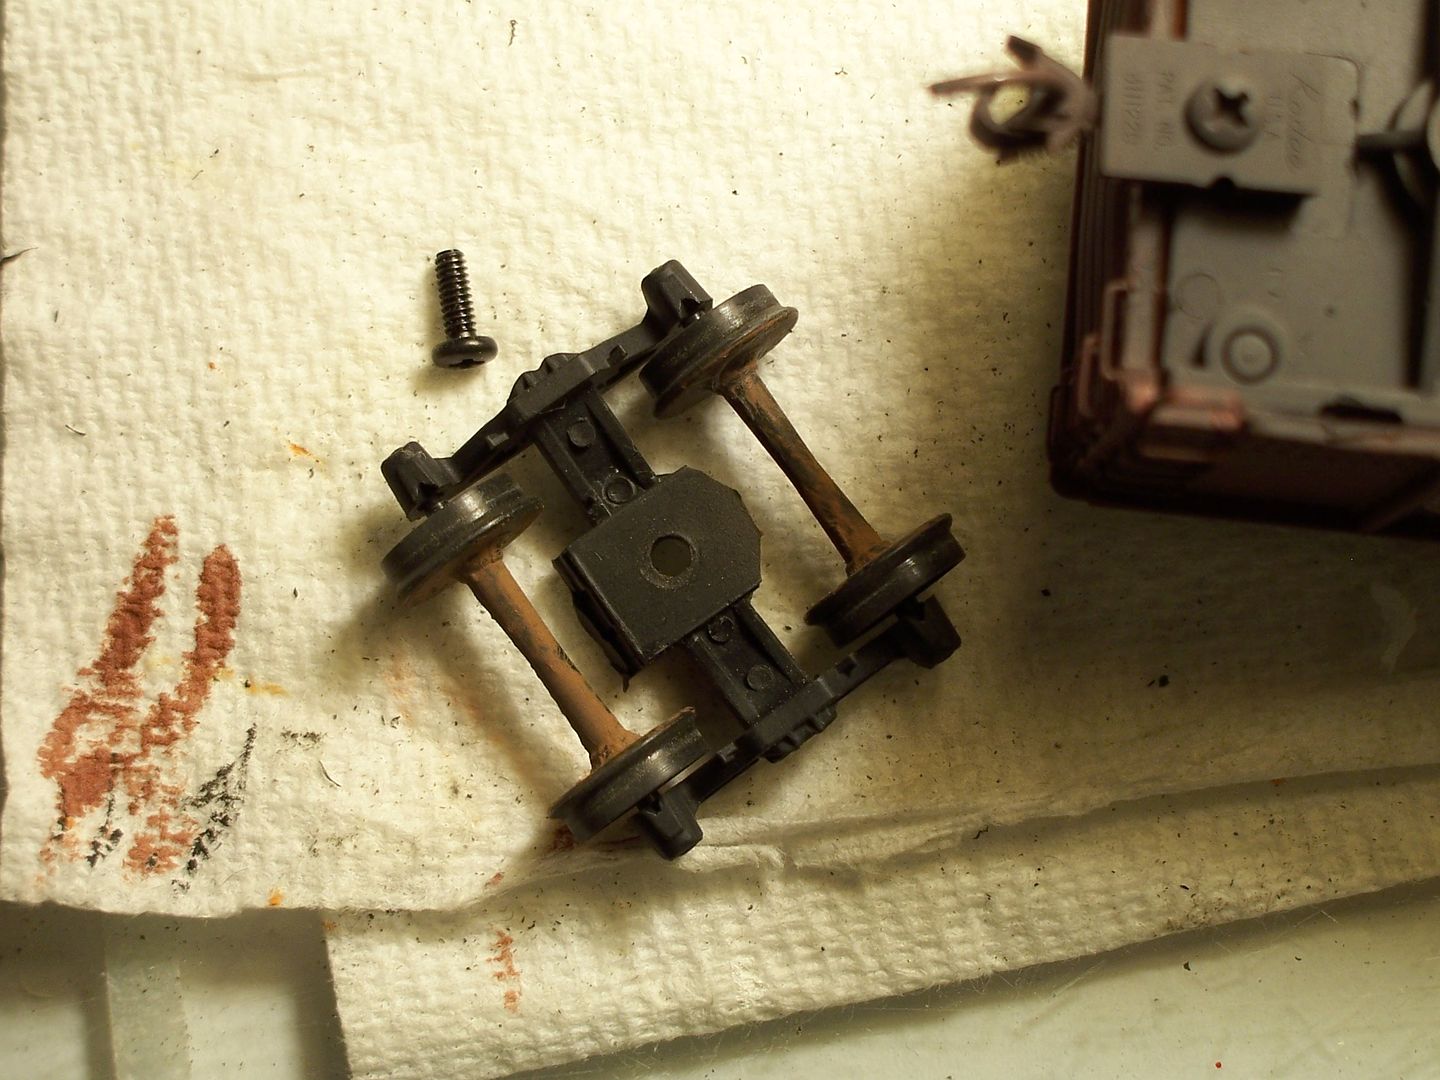
An old Bachmann 40ft steel gondola with truck-mounted couplers, weight on inside of car.
A pair of two-bay steel hoppers (brand unknown), truck mounted couplers.
Four 4-bay offset open hoppers (brand unknown), nowhere to mount on the underside of the car.
Seven 40ft wooden double door boxcars, brand unknown, need to find a new way to secure shell to underframe.
A 40ft plug door boxcar, same issue as last entry.
Any help will be greatly appreciated, as getting these cars in service will mean it’ll be sooner until operations can begin on the layout (when that is built, separate thread).
I’m not familiar with the Varney cars, and would also find photos a help, but here’s links to George Paines excellent tutorials which I have used, or adapted, with much success.
Some pictures could be useful, based on what you’ve described.
Truck-mounted couplers can simply be cut-off - a utility knife may be preferable to an X-Acto for this work, as that engineering plastic can be pretty tough. Remove the trucks from the car, and the wheelsets from the trucks to facilitate the cutting.
A lot of modellers discard those trucks, too, but many of them are fairly nicely-done. For cars like Tyco and others, the trucks simply snap into place, although they’re a little more difficult to remove.
I remove them, then modify them to be screw-mounted, and if the wheel flanges aren’t to deep, keep the original wheels, too.
Some of those trucks have holes moulded into them, which permits modifying them, as there’s not much in the way of glues that will make a good bond with engineering plastic.
I used some styrene rod, just slightly larger (.003/.004") in diameter than the holes, then coated it liberally with MEK, which softened the surface, allowing the rod to be forced into the holes. While it’s not cemented in place (the MEK has no effect on the engineering plastic) it does result in a very tight fit…
Once the plastic rod hardens, the excess material is trimmed off, then some .030" black sheet styrene is cemented to it, and then a hole is drilled at the centre point of the truck’s bolster…
The too-large hole in the underbody of the car (to permit the snap-in feature of the original trucks) can be filled using styrene tubing (the underbody is also styrene, so solvent-type cement works fine). If the tubing is too large for the hole, re-drill the hole to a size just slightly smaller than the tubin
As long as there’s not too much sag, you can use the existing “talgo” truck mounted coupler boxes. A #148 KD coupler will fit in place of the old plastic horn-hook and you can use a 212 talgo coupler adaptor to snap on top. If this ends up being not satsifactory for you, you can always cut off the talgo coupler boxes, reuse the KD coupler and only be out the 20 cents or so for each #212.
The picture below shows a bent plastic EZ-Mate coupler, but it gives you an idea of what I’m talking about.
There are glues that work on engineered plastics made by Reltek, 3M and Loctite. I’ve been using Loctite Plastics Bonding System for gluing Delrin and pp-5 plastics. The thing that makes the glue (CA) stick to the Delrin is the Activator, n-Heptane. The n-Heptane preps the surface then any brand of CA works. The Loctite Activator outlasts the Loctite CA by many times so I just go with what ever CA I have and it works great.
The Loctite Activator cap seals very good, the Activator I use quite often is about a year old and still works like new.
Gidday, your photos work for me. All those cars are able to be upgraded, so to that end I’ll refer you to this previous thread titled “Train Set Junk to Acceptable Model”, for inspiration. Unfortunately, not all the photos are still able to be viewed.
Before I continue, I would strongly recommend that you buy yourself a Kadee coupler gauge, no point in going to the trouble of doing all the mods and not have couplers able to couple!!
The L & N two bay hopper car would be your biggest challenge, IMO. I believe that it is a Lifelike offering, and here are a couple of photos, of less than stellar quality, of how I dealt with mine, using sprue and styrene sheet… (The previous owner had cemented the nail in place, in a forlorn attempt to add weight, I drilled four holes in the bottom and added lead shot held in place with caulk.)
I am likely repeating (hopefully not contradicting) advice given in prior postings to the inquiry. If those Varney cars are from the era I am thinking of, for some reason it was common at one time to cement the cover to the coupler draft gear box in place (I think it was a press fit but a weak one, hence the desire to cement). This is back when Varney used its own dummy knuckle coupler - with the draft gear spring so trains sometimes looked like a Slinky toy going down the track. A fresh chisel blade in an X acto knife handle removes the entire Varney draft gear box right down to the underframe floor of the car which is smoothed flat in that area, wide enough for the draft gear of choice. Since I use Kadees that is the brand of box I use to replace it. I routinely snip off the side “ears” and use the central hole for mounting. Only on some (real) wood floored cars have I used the side “ears” held in place with small brads or track nails.
Bachmann gondola. If I know the trucks otherwise look nice after painting and weathering (and it is surprising sometimes what nice detail is cast onto those back shiny trainset quality trucks
It’s a lot of work to save those old freight cars… if your budget is tight, I would consider hitting your next local train show or swap meet for old Athearn (blue box) and Roundhouse kits. You should be able to find them for $10 or less. They are easy to assemble and the couplers are already body- or frame-mounted.
BTW, we avoid Talgo trucks at our club because on long trains a sudden slack run-in can shove the trucks right off the tracks.
That issue is exactly what I had, and why I’m wanting to body-mount the couplers. I can’t even imagine trying to operate prototypically with those trucks… God bless the HO scale yard crews back in those days.
Sorry for the late reply, Mel, but I was sure that I responded to your suggestion about the Loctite product last night. I’ll definitely check it out, especially since engineering plastic is used for a lot of applications where styrene might be a better choice. Thanks for the information.
To what indeed…the couplers on real cars are attached to the frame of the car, as it’s the strongest part of the car. The flat styrene is fine to represent the top of the car’s frame, and the draught gear box will represent the rest of the frame - a perfectly good solution, in my opinion.
This is true, but is the OP running long trains? If we’re talking 10-15 cars or so on a home layout then talgo mounted KD couplers (if not sagging) should be just fine.
If the OP is already running trains dozens of cars long then I’d agree that retrofitting body mounted couplers or just buying different cars is the way to go.
Otherwise, #148 Couplers and #212 Talgo adaptors will get your cars rolling effectively with the rest of your fleet nearly immediately.
Heh. I think the folks going for prototypical operation were already running body-mounts. I believe talgos were mostly found on the toy stuff – Tyco, Life Like, etc. They’re good for sharp curves, and will couple on a curve, which is useful when you’re selling people just an oval of track.
I have figured that my maximum regular operating length will be about 30 cars, though some trains may run up to 50 cars if I have a motive power shortage. Pushers on all WB trains, if that affects the couplers.
As was mentioned previously, talgo-type trucks could prove troublesome under pushing operations.
While my trains are generally under 20 cars in length, I often run locomotives (all steam) doubleheaded, due to the numerous grades and curves, many occurring at the same locations.
I’ve run trains of over 70 cars, using multiple locomotives in various combinations…all on the head-end, head-end plus pushers, and head-end/within-the-train helpers/and pushers, too.
This is all with DC operation, so there’s no speed matching as is possible with DCC. However, if a train requires multiple locomotives to move it, most will run reasonably well together, despite the fact that when runnng solo, they may run at somewhat different speeds at the same throttle setting. If the speeds differ too greatly, though, you may have to group the ones with similar speeds, then select only ones from the same group for any given train.
When running those longer trains, I noticed that coupler slack is constantly running in or out, in varying degrees, in several parts of the train, all at the same time. This is partially because a train of that length is, at any one time, on multiple grades (up and down) and multiple curves (left and right). Toss in enough locomotives with slightly disparate speeds, and it can be rather unnerving to watch. However, I always operate such trains at low speeds, and seldom experience difficulties.
When running multiple locomotives, widely varying speeds between models can be problem
I have both the IHC mogul. It’s not exactly a B15, but it is fairly close. IHC had no problem selling it painted for the B&M. It runs very well:
And a brass B15 by Pasific Fast Mail.
It came to me used, and in pieces. I had to buy a 150 watt soldering iron off Ebay to solder it back together. The open frame motor ran but it was pitifully weak and got too hot. I replaced the old Alnico magnets, which might have been 50 years old, with rare earth supermagnets and that fixed it right up. Swapping magnets is easier than swapping motors.
I agree, although the rare earth magnets weren’t around when I re-motored my B-15 (also from PFM/Samhongsa). The motor which I used, from NWSL, is mounted in the boiler, rather than on the frame, as it was slightly too large to fit when frame-mounted.
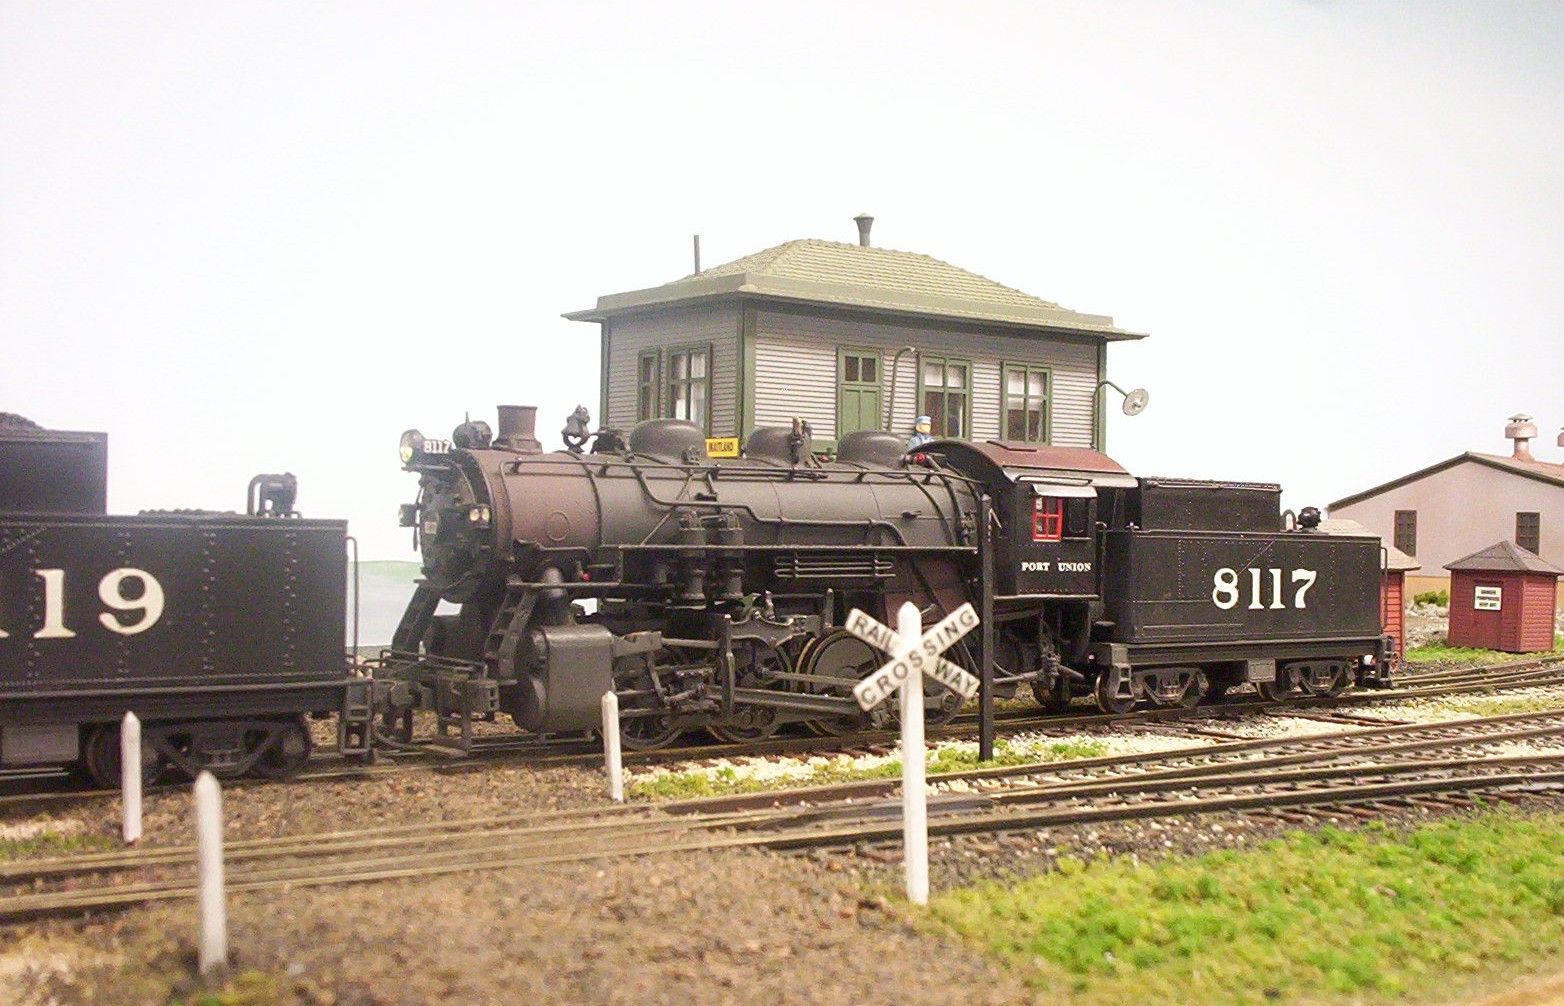
This brass CNR switcher was given to me by a friend, who claimed that it wouldn’t pull enough cars for his needs…
I re-detailed it to match a specific prototype, and re-painted it, then put rare earth magnets in the existing open-frame motor. I also added all-wheel pick-up and as much weight as I could fit into it.
When he visited, I ran it pulling 19 not-too-light cars, a few of which weren’t especially free-rollers, then offered to give it back to him.
He declined, as in the interim, I had modified two United 0-8-0s for him, using the same upgrades…new magnets, all-wheel pick-up, and extra weight…
Both, not surprisingly, are even better pullers than the 0-6-0, and he then picked up another model of a B&O protptype, which got the same upgrades, with similar performance increases…