My wife and I are beginning the long adventure of building a layout that occupies a room that is nearly 25’ X 50’. It is by far the largest and most complex layout I have ever done. My wife is very good at creating scenery with foam, plaster, etc. but we I have always swayed away from creating hills or grades on my layouts. Whats the best way to create a gradual hill to lay my main line on? I wish to have a couple hills with a maximum grade of 1.5% to 2%. I know woodland scenics makes foam inclines but I don’t know if that’s the way to go. Thanks for everyone’s help!!!
Micro Mark makes a small digital level that mesures percent and degrees but IMHO it is too exact and will drive you nuts. I usually figure grade by using a string and dividing the rise by the length of the roadbed. For most model railroading I don’t recommend anything over 2%. And if you have steam locos they will not pull as many cars as diesels.
However, here is little tool I use that gives a very constant grade:
Determine the lowest and highest point. Then take a small line level and mount it on the top of a small rectangular wood block made from a straight peice of 1x2 about 3 inches long. The long side will lay in line with your track center line.
Now mount a wood screw in the back underside. Start at your lowest point and work up grade with the screw out very slightly. Adjust your risers as you go along so that after you adujst your risers under the roadbed the bubble is in the middle of the level. When you get to the top of the grade, if the roadbed is higher than where you want it, draw the screw in some more on the tool and start over. If the roadbed is too low, draw your screw out and start over. When you can go from the low end of the grade to the high end of the grade and have the high end where you want it and the bubble remains in the middle from end to end, you have a smooth constant grade. Be aware that you will have tansition from grade to level but this can best be accomplished safely by using a thick roadbed like 3/4" plywood.
It is also very important to have the roadbed level from side to side (railhead to railhead). Superelevation IMO is best accomplished with the track and not the roadbed. Allow some flat areas where cars will be stored or trains will switch cars.
Good Luck with the new layout .When I did my grades I took a 4 ft level and a piece of 1/2 plywood 6 inches by 1 inch and used double face tape and attached it to the end of the level like a T, as you work your way up just keep the bubble centered and add your risers . To get my 4 1/4 inch rise it took about 28 ft which is a nice gradual grade .I can easily pull 40 to 60 cars with 2 locos depending on the type of cars. Have fun, Jim.
I have used the Woodland foam risers and like them. Good way to start a grade and pries the last time I looked was pretty fair. After you have the grade started, then I would use plywood strips.
Cuda Ken
I have used the WS inclines and risers. I find them excellect and easy to use, and I am guranteed I have the grade I want.
They are vey flexible, and sturdy adn can be used in any shape. {the very low end can be fragile, but the can be glued backon or pinned into place with the rest of it.}
Just don’t use any of their 3 pr 4% inclines!! way to steep a grade. ask me how I know!
I used the 2% WS foam incline to make a loop and I am very happy with it. Gives you a consistent rise, easy to work with and I like that it is wider than the track so you have room to ballast and add plaster for the hillside without crowding the track.
That is a nice large space. I would use an open grid table with risers for plywood sub roadbed and fill in the gaps with foam. That is what I did. I filled the second half with foam, and the first half with plaster cloth. I liked the foam much better. I used the Woodland Scenic risers for the grade around the roundhouse scene. There are pics in my signiture.
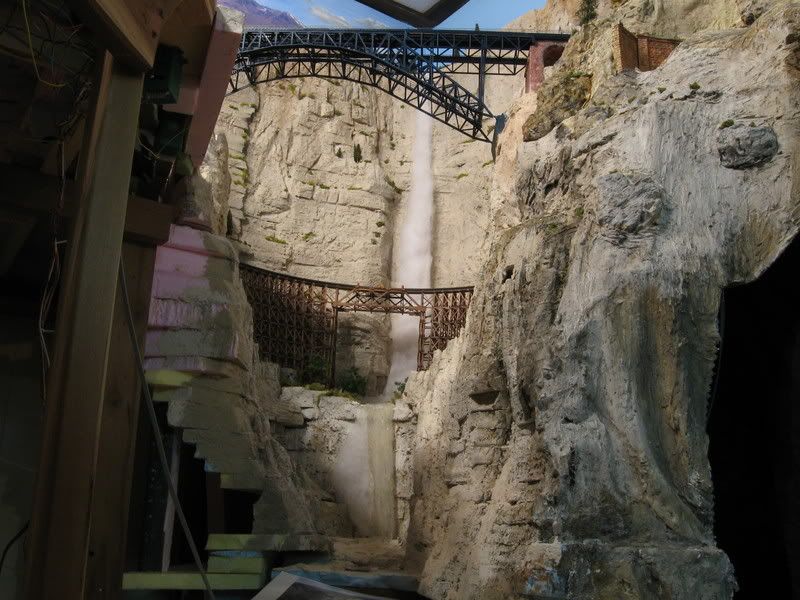
If your wife really like scenery she will like the open grid table because she can make canyons as well as mountains. Here is one picture of my canyon, see if she likes it.
Here’s how to make smooth grades. Gentle is something only you can determine. There’s no reason for a grade to be steep unless you make some serious mistakes in planning.
But…you need to figure a way to get 1/2" plywood, or thicker if you have it, but 1/2" as a minimum, to act as the sub-roadbed for the grade you plan. You will need risers at some point, but certainly at the bottom of the grade you need an anchoring point, something robust and substantial. It can be a plug of 3/4" plywood below the main surface, or maybe some blocking with sturdy hardwood like maple. But the idea is to get the top surface of this strip of roadbed plywood to lie flush with its oncoming and surrounding surfaces. Once you figure that out, you must anchor it firmly for about 6" along its bottom end, and then force the rest of it into a gentle vertical curve until the remainder forms the gentle grade you desire. So, you’ll need some joist below it with some vertical risers acting as pylons every 12" or so.
I hope you understand. The plywood will act as a leaf spring under pressure. At its firmly anchored lower end, it will be both level and flush with the surrounding surfaces. Then, as we go toward the upper portion, we force it to bend and rise. It will form a smooth transition this way. The steeper the eventual grade, the smaller and more curved the transition. That won’t be desirable, I’m sure. So you simply use clamps to slide and clamp the several risers up against the various joists you will need, until the grade accomplishes what you need of it.
Don’t forget, though…you must do the opposite of the process at the top end. You don’t want a kinked exit from the grade, so you must reverse the grade out to level again with sliding risers held with clamps and the top end firmly anchored for about 6"
Crandell
I used WS 2% inclines on my previous layout and they worked nicely, at least as far as getting a smooth grade. Unfortunately, they don’t come in odd grades, like 1.5%. It’s fairly easy to make your own gauge, as some people have already described. I wanted a 1.25% grade and used a radial arm saw with a mitre cut feature to and a piece of 1 x 3 lumber to make a gauge. I then used extruded foam and a hacksaw to cut the sub-roadbed, and a rasp to smooth out rough / out-of-gauge areas.
I used the Woodland Scenics 2% grade risers on the Yuba River Sub, and they worked extremely well. I needed grades of between 1.5 to 2.4%, and there were instructions on the boxes as to how to stack various portions of the risers to achieve the grades you need. With the risers plus the 2 and 4" stacked WS roadbed forms, I was able to achieve up to 20 inches of height between the “0” elevations of the layout to the highest point. And they are VERY solid. I’ve had mine in place for over 10 years without any problems.
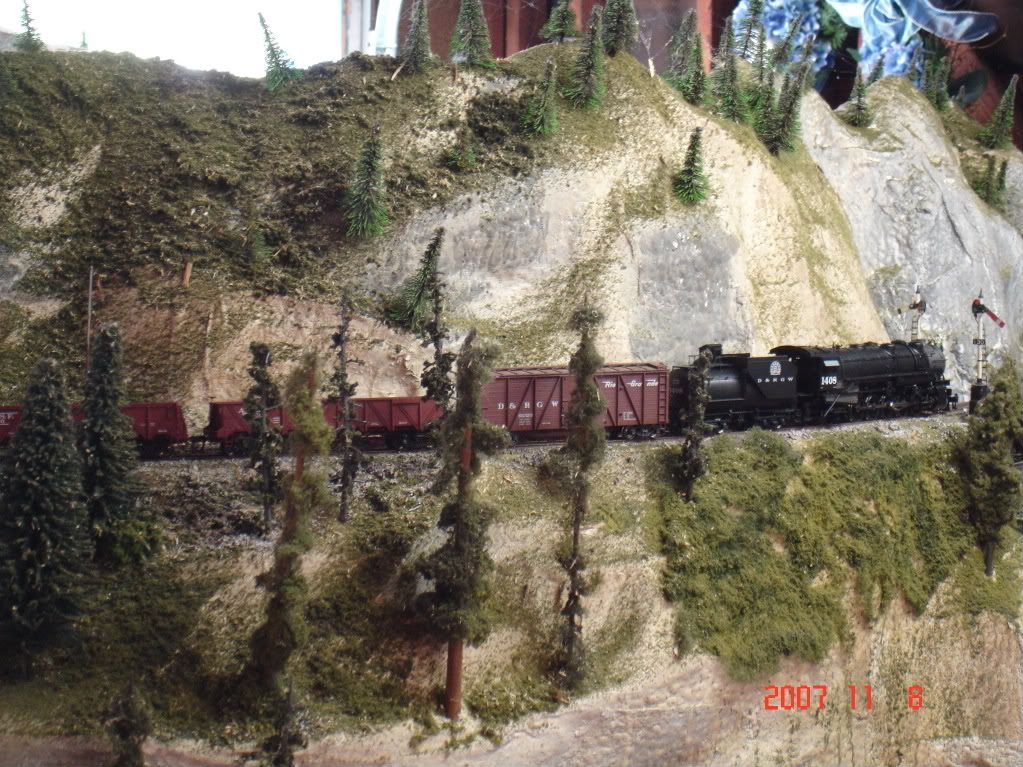
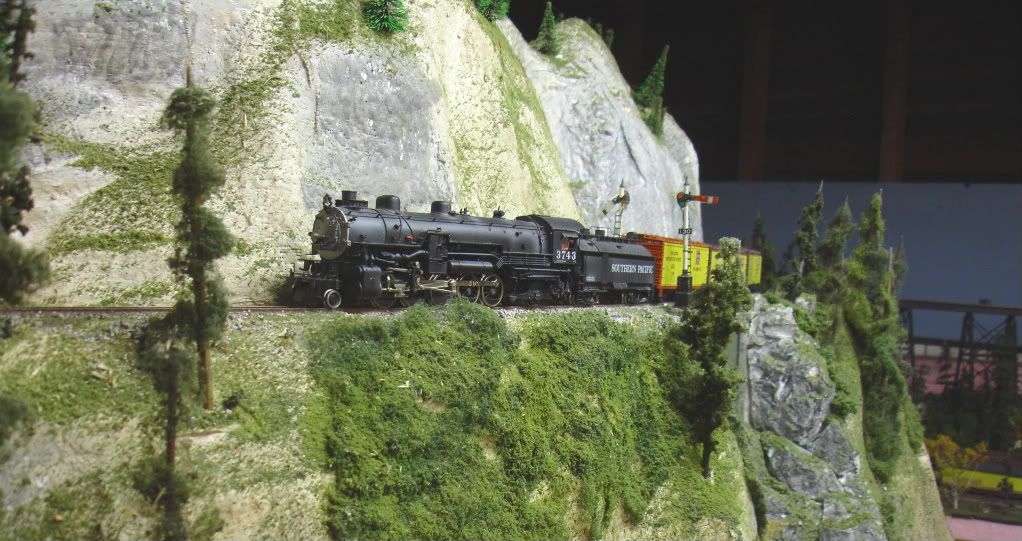
Here’s a couple of scenes on Yuba Pass, which is about 20" above layout level. Everything under the scenery is WS stacked risers.
Tom