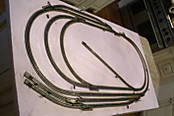
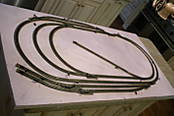
I am a newbie, not an electrician by the way and quite the opposite. I have posted here on several occasions regarding an atlas sectional track predesigned layout that I have been assembling for myself and my two young sons (5 & 8). It’s a relatively small layout, about 6’ x 3.5’. It’s all put together on foam over plywood, cork roadbed and track laid with latex caulk. I stayed with the Atlas snap switches per the advice of several members, that way the kids can enjoy manual or toggle switches, for a small layout. This one was really meant to sort of break us in learn about the hobby, and it’s expandable. Here are may ??
I have used terminal jouners throughout which I will attach to a BUS wire underneath, that to the EasyDCC. I put these only on the outer rails. Do you need connections on both rails?
I have seen posted here before that the Atlas switches are rather cumbersome and don’t work well. Some have suggested using, and forgive me , STDP toggle switches from Radio Shack instead. Can someone help clarify this for me?
I haven’t soldered any joints. Do I need to or will I need to do any soldering? My assumption is that you really don’t need to do it, certainly on a small layout, initially but as the joints loosen and connectivity becomes an issue then I might need to do soldering. Any thoughts?
Thanks, I bought a DCC equipped SP EM7 with sound over the weekend and I can’t wait to fire it up!!!
I’m going to have a go at providing my first ever answers to questions on this forum. Wish me luck…
There should be a connection from each of the bus wires to each rail (if a simple loop, one wire to outer track, one wire to inner track). Make sure you are not connecting both wires to the same track as all you will achieve is a short circuit, which is not good for anything.
STDP I think stands for Single Throw Double Pole, or something to that effect. What it means is that you have a switch lever (which the human uses) that has two positions, i.e. on and off. These positions equate to closing the circuit and opening the circuit respectively. On the other side will be 4 pins, being 2 pairs of 2 pins. Each pair of pins is a link between one electrical path. So an STDP switch with one throw action will open or close the circuits between two sets of pins, or two sets of connected wires (red->red on one set of pins, and black->black on the other set of pins).
If I understand properly, Yes. There are two wires in the output from the DCC system. One needs to go to each rail. For a small layout like yours there is probably no need for a bus. I have run much larger layouts with only one pair of wires to the track.
SPDT is what you would need Single-Pole, Double-Toggle. In addition, VERY IMPORTANT, they need to be momentary contact switches. Momentary contact means they only send power while the operator holds them on. When let go they return to a center-off position. If they did not do this and stayed “on” the turnout motors would melt down. To wire this type of switch the center pole would go to one side of the power while the two outside poles would go to the coils on the turnout motor. The common (usually center) contact on the turnout motor would then go to the other side of the power supply completing the circuit . The problem with these switches is that suddenly one needs a panel to mount them in, while the Atlas switch controllers can just be placed on a flat board. I used the Atlas controllers for 20 years with no problems. My children still use them today.
Wiring issues are most difficult to explain with words. Even people with a common electrical lingo background had have trouble explaining things to each other.
If you built the layout from an Atlas plan, it probably has insulated joiners in places - you don’t need those if you are operating purely with DCC. You’ll want feeder connections in BOTH rails at regular intervals. Instead of going to the Atlas switching components as would be shown on an Atlas plan, you should run some heavier wire under the layout, #16 or if it’s a small layout even #18 is fine, and conenct all those feeders to the heavy wire. Make sure you get them all connected the same way - ouride rail to one wire, inside rail to the other wire. If you cross them you will create a short. Hook this heavy wire to your DCC system. If you power it on and turn on the track power after each set of feeders is connected, and you get a short, you’ll knw it was the last one you connected that’s backwards.
If there is a reverse loop arrangment in the track, or a wye, a lttle more work is required but not much. The reverseing section has to be insulated in both rails, at both ends, just liek a regualr DC layout. There are several simple auto reverse units available that you connect between the heavy bus wire and the feeder(s) powering the reverse section, in place of the old DC method of connecting a DPDT switch. This lets you just run the trains throught he loop, all you have to do is operate the turnout. No toggle flipping, just drive the train.
Thanks for everyone’s advice. I took out the only two insulated rail joiners, separting a dead end from the rest of the track. My assumption was the Atlas plan #9 meant for it to be a programming track. After listening to your advice and consulting the Easy DCC manual I though it better to just use a totally separate KATO straight as a programming track.
I used terminal joiners for electrical hookup at sevaral points throughout, on the dead end there were two opposite each other per the Atlas plan so I hooked these up to DC and bam my trains were running. Only a few minor adjustments and no derails!!!
When I switch to DCC I guess I will just drill holes for the inner rail, place wire and solder. I am guessing I only need one or two, or maybe more???
Can you convert Atlas snap swithces to DCC? I was planning on just using the provided control switches for electrical control as per the advice here on this forum, but I am curious should I get a wild hair.
Maybe. You should cover every two sections of flextrack (6’) with one set of feeders for optimal performance, and even then, you may find that the join to which you solder the feeder will let you down unless it is in really good shape to begin with, snug against both rails, doesn’t get corroded by wet paint and glue, and stays inflexible because of your superb track laying skills with subroadbed and roadbed that doesn’t allow heavy locos to cause the track to dip at that join. Good luck, by the way.
I have run an HOn30 layout at Christmas with nearly 20 feet of track and one set of leads to a track terminal. I suppose I really can detect a slight slowing down of the loco on the side opposite the loop where the terminal is, but…c’mon. So, fellows here will advise soldering a feeder to every single section of track…between joiners, that is…, while others will insist that they can run 100’ of old brass track with a single set of 22 gauge wires to them…okay, I haven’t heard that one, but it comes close sometimes. The happy average seems to be a set of feeders about every 6’ or so. My last layout, all EZ-Track had exactly three sets of feeders distributed around a main of about 24’. Worked very well.
The Atlas snap switches will work with no modification. be careful not to read compliccation into your DCC system. Except for your reveresing section , you can "get away"with two wires to your layout.
DCG, you are going to have a lot of fun with those boys. Mine are now 7 and 9 and we have had a blast over the last 3 or 4 years. The layout looks like it will keep them interested as well, a good looking compact plan. My 7 year old still has as much fun pushing the trains around the track. He just uses a work caboose as a make believe loco and will spend hours playing make believe. I think that manual switches actually is a benefit, it makes the kids think and gives them something to do as well.
If you have not done it yet, have the boys take a stab at making a simple freight car kit and weathering it! Best thing I ever did and it has resulted in some memorable afternoons of fun.
Great ideas for the kids. I may try that weathering task. It would make for great memories just doing it but also when we run the trains in the ensuing years. I like the manual throws for the kids as well. I have been looking at the manual ground throws from Caboose industries with interest posted in this forum previously. They look cool and look fun to throw.
We are also going to attent the local TTrack module clube and, if they are interested, commit to a module. I was intrigued by the modules b/c they don’t take up much space, that makes mom happy, and the kids could have fun gluing down match box cars and learning/practicing landscape techniques.
This actually is a good idea for a new thread, i.e. what ideas have other members in the forum had to get kids interested in the hobby?