Today I received my new walthers cn Canadian national passenger cars Derailment is a big problem the locomotive is fine. When it goes around the curves and derails or fall off the table I didn’t know if I filed all the joints would that help and what if to use rerailers on the curved track it says 18” that what I have just very frustrated never had passenger just freight these are 85” cars I found out I can run four of my six I planned to expand the lay out later this year
Did the cars come with extended draft gear taped to the bottom of the plastic “cradle” in the box? Most of the newer cars shipped have the longer draft gear that you have to replace the short ones with.
These are supposed to extend the couplers enough to help with tight curves. 18" radius is kind of pushing the limits for Walthers cars.
Technically the car will operate on 18" curves if everything is perfect (track, wheels, trucks, couplers, etc.). But perfection is nigh-impossible to get.
You’re going to be much better off if you can get at least a 24" curve or start using 72’ cars or start using passenger cars with truck mounted couplers (or all of the above).
Passenger train modeling is not really suited for 18" radius curves unless you’re modeling the 1800’s-early 1900’s with 60’ or less cars. Really, 18" curves are more like trolley curves. It’s a really right radius.
The above image alone shows that R18" curves are NOT going to work and I would suspect that R22" would only be marginally better. I have full-length MTH passenger cars that barely stay on the rails at R22".
I think you’re going to have to resign yourself to the fact you’re going to need an absolute minimum of R24" curves for your Walthers cars…and it’s still not going to look pretty doing it. Go as large of a radisu as you can go.
Tom
P.S. countsrr, please take the following as a request and not a criticism. If it’s possible at all could you add a little more punctuation to your posts? I find it challenging to differentiate the things you are trying to express because one thought or sentence blurs into another. Again, it’s not a criticism but would help me and perhaps others better know how to help you.
It should be noted that Walthers Mainline Budd 85’ passengers cars are designed to be able to navigate 18" curves. They specify this, and were shown in a video when they first came out handling a figure 8 layout. That said, I do not have any personal experience with them since I’ve been in N scale in recent years, so I can’t vouch for how well they do 18" curves, or how good they look doing it.
I had a Walthers 36’ wood caboose that couldn’t navigate R22" curves without the trucks binding on the inside corner of the side steps - on either end. I had to use a #11 X-acto blade to bevel the backside of the steps but it didn’t completely eliminate the issue. For that reason I only own two pieces of Walthers rolling stock and don’t run either one of them.
Tom, I never owned that caboose, but a friend did and asked if I could fix it.
It’s been some time since I did it, so I may have some of the details wrong, but the solution was to remove the frame and cut it (you’ll need to make the exact measurements, but I could also borrow the car to refresh my memory, if you, and anyone else would like a more complete how-to.
Basically, you make a cut in the centresill just inboard of the coupler pocket, and another similar cut in the centresill inboard of the body bolster on which the truck is mounted. That second cut is made further away from the inboard side of the bolster than is the cut made between the bolster and the coupler pocket. The cut-out bolster segment is then rotated 180º, and cemented back in place, as is the coupler pocket. This places the bolster, and hence the truck, further inboard from the steps. Once you do the other end, too, the problem is solved, with no visible damage to the steps (well, yours already has it, but you know what I mean [:P] ).
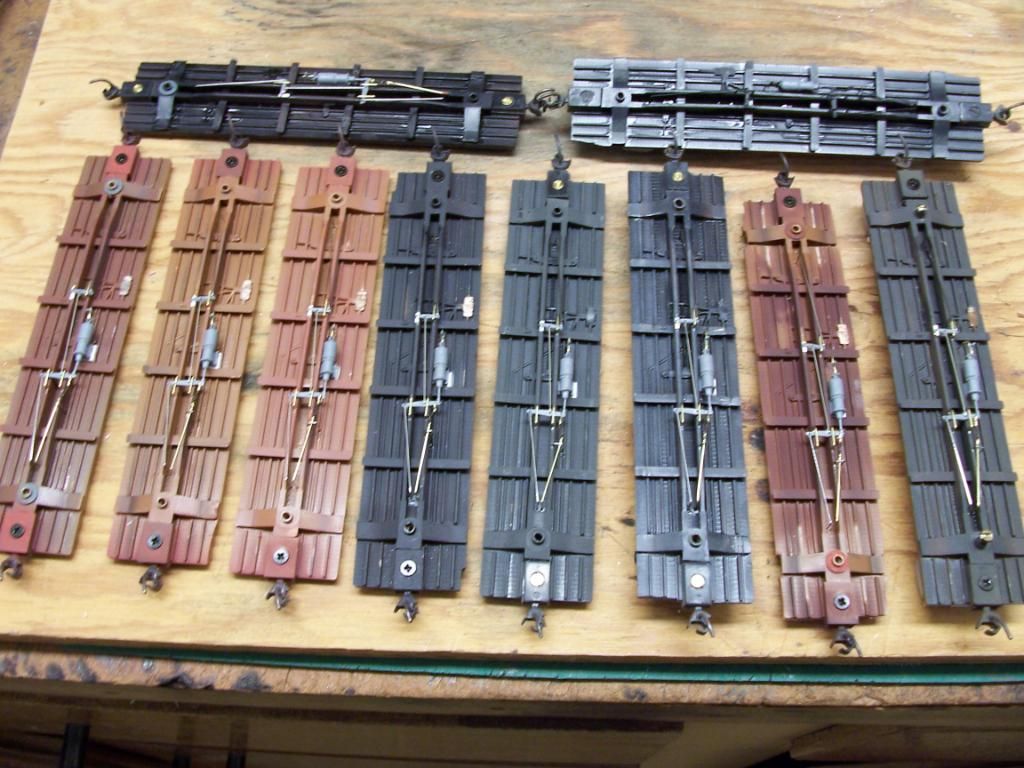
Since I don’t have my friend’s caboose here, I’ll illustrate the concept with this photo of a number of Train Miniature underframes which I modified to add brakegear that would be somewhat more visible, when on the layout, than the standard TM version…
Note the position of the mounting bolsters for the trucks, relative to the coupler pockets (screwed-in-place Kadees).
This is the underframe of a Train Miniature X-29 boxcar - it was exactly the same as th
I use easy track I just ordered 22” radius and Culper extenders mentioned above I have walthers freight cars had no problem with them pictured I added a semi to my flat car
you will have to look at the wideswing coupler mounts if installed for the widest swing possible. Replacing the couplers with a longer shank may help. If you have to get a file and look for ways to get the swing to go wider that would be key without butchering details, etc. I have the Walthers Hiawatha cars and I had to goof around all of the to handle 24 inch reliably. I have the walthers C&NW push pull cars they needed tweaking on 24 inch radius, my KATO Rock Island push pull cars have ZERO problems. This is on 24 inch radius. Rivarossi guaranteed their equipment would run on 18 inch radius, even the big boy. The passenger cars had truck mounted couplers, fine for pulling, pushing mashes them together and derailing common, remember this is in the horn hook coupler days. Remember this hobby is a hands on hobby and solving things like this is a part of it. Consider me modding a Jawn Henry to handle 24 inch radius…I did it, took a lot of patient work. 8-D