The instructions for a newly acquired car kit ask for #79 and #80 drill bits. Is there such a difference between them so I can’t use #79 for both situations?
Guy,
0.001" - #80 (0.0135") & #79 (0.0145"). It depends how tight a fit or how much slop you want or need between the part and the hole.
Tom
Hi Guy:
I use a #79 bit and gel CA where a #80 bit is called for. The CA will fill the gap and it looks fine to me, but I’m not a perfectionist. I don’t have the absolute highest standards with regard to appearance.
Ideally, you want to apply the CA from inside the car where any excess won’t be seen.
Try a #79 bit on one piece and see what you think.
As you have probably discovered, the #79 bits seem to be much less prone to breaking than the #80s.
Dave
Which kits are these, and are the parts to be installed plastic or metal? In my opinion any plastic parts are likely not to have the correct size to fit in a #80 hole. They’ll probably be a shade larger. And then they break when you try to stuff them into the smaller hole.
I’d go with the #79. You will break a lot fewer of them.
The kits to which Guy is referring are ones from Tichy, specifically the USRA single sheathed boxcars and the tank cars, both of which use .012" wire grab irons.
As strange as it may sound, that extra thousandth of an inch on a #79 bit seems to make it much more durable than a #80.
I re-worked a number of Proto-1000 Fowler boxcars, replacing all of the oversize plastic grabirons with metal ones (which all had to be custom-bent from .012"wire, due to their non-standard width).
Counting the corner grabs on the running boards, 78 holes are required for each car.
I have a dozen of these cars, and another four similar ones which I scratchbuilt. On one particular drilling session, using a pin vise, (and not without taking a few breaks) I was able to almost complete five cars, successfully drilling 387 holes before breaking the bit on the 388th. I then broke another two bits before completing the three remaining holes [banghead][:-^] although the one which finally finished the fifth car went on to a long and productive life similar to the first.
I buy my bits in bulk from a local tool supply outlet, but no longer use (or even have) a #80 bit - seemingly, I can break them with a stern glance. [:P]
Wayne
Take the instruction sheet recoomendations with a grain of salt. You need a smidgeon of clearance between the part and the hole to let the adhesive wick up by capillary action. If the part is a tight fit, the adhesive, be it plastic welder or CA, won’t wick up the hole, and thus fail to secure the part.
Plenty of instruction sheets have called for holes so small that there is no clearance, the part is a tight friction fit in the hole. I size my holes by slipping the part into the holes in my drill index, and going for the drill size that is a loose but not too loose fit.
Last year I had a project that called for a number of #80 holes. After starting, then breaking every #80 drill I had, I finished with #79s with no problems.
And if #80s give us problems, we certainly wouldn’t be able to use the bit which did this:
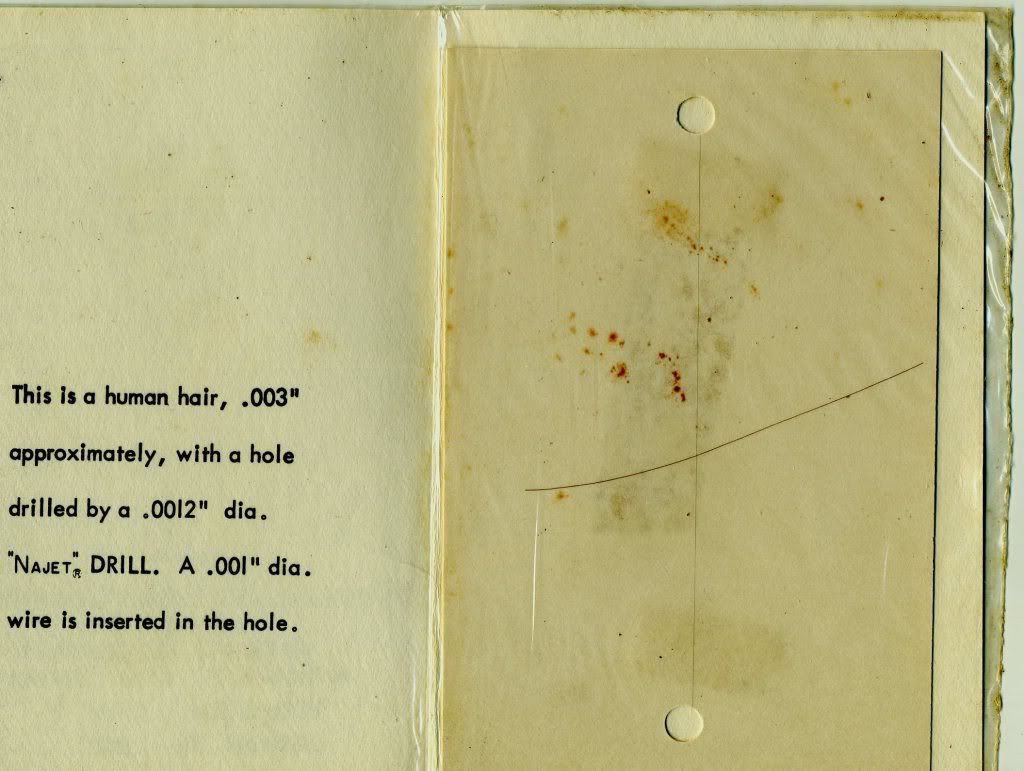
Wayne
Wayne:
Like you, I think I could break that drill just by looking at it!
Just curious - what was the application?
OK, thanks to Mark R, now I understand what I was looking at. I didn’t read it carefully enough.
I don’t think I’ll try to drill a hole in my hair. There isn’t enough left to work with!
Dave
Took me a minute to understand what I was looking at in the picture. The human hair is horizontal with a HOLE DRILLED THROUGH IT and a wire inserted vertically THROUGH the hole drilled in the human hair !!!
Nope … even with an opti-visor, glasses AND a magnifying glass together !
Mark.
Almost all you need to know is at their website: http://www.najet.com/micro-hole-drilling/
Thanks for posting that link, maxman.
My Dad picked-up that sample at a trade show, probably some time in the late ‘50s’, and it’s always fascinated me.
At the bottom of the list of their products and processes, there’s a category entitled “Stories”, one of which had me laughing out loud.
Wayne
Tryed to drill a hole the other day, started with the smallest bit i had, broke as soon as i tryed to turn it. Broke the next 5 bigger sizes on the same hole trying to drill it, before i was able to drill it. The small drill bitts break if you just look at them funney.
Thank you all. I will stick with #79 and buy a dozen. I hope that will be enough for four cars.
[:P]
Now I know why your models look so good! You could probably do a hair transplant on one of the model figures on your layout![:D]
-Bob
Thanks, Bob, but if I could do that, I’d be working on my own head.[:P]
Wayne
When it comes to these tiny drills, it’s the same old story … you get what you pay for. I’ve boughten cheap over the years and the drills either wouldn’t cut into butter or they were brittle and easily broke.
A good drill will drill holes through plastic for years and will even take flexing without breaking. Buy the good stuff - you won’t regret it in the long run.
Mark.
What is the good stuff? What brand? I have a set from MicroMark and they break as easy as the cheaper ones I use to have (and you know what happend to them?) I have a bunch of solid carbide bits that are actually used from PC board manufacturers and they are very sharp when it comes to drilling plastic but even the smaller ones (.015"dia) will hold up if you don’t flex them. They aren’t worth much on metals thought.
-Bob
I used to buy my drill bits at a nearby hobbyshop, and they would ask "Do you want Walthers, or the good ones? The “good ones” turned out to be from Maxon, and for many years, they were good, and lasted well (with care). Over the years, though, I sensed, as did others with whom I talked, that the steel used was becoming harder. While this helped to keep them sharp longer, it also made them more brittle, causing them to break in situations where the original ones wouldn’t have done so.
On one occasion, the size I wanted was out-of-stock, so I took a Walthers bit instead. I don’t think that it ever broke, but that was because the mild steel which was used left the bit extremely flexible - probably could have drilled around a corner if necessary. While non-breakable was good, the softer steel dulled quickly, and I went back to the Maxons as soon as they were available.
That hobbyshop, family owned since the '40s, folded recently, but several years prior to that I began buying my bits at a local tool supply store. The hobbyshop charged about $4.50 for the smaller bits (the ones we usually need to replace most often), while the tool supply place charges $3.50 apiece (when bought in packages of 10). The brand is NACHI (although the stylised “A” looks like a triangle) and is made in Japan. The label identifies them as “General purpose parallel shank twist drills” and notes that they’re made of high speed steel. I generally get good service from them, although I’ve broken enough on first use through my own clumsiness or carelessness.
Wayne
Bob:
I have been buying my drill bits from Hobby Wholesale in Edmonton, Alberta for several years. Their drill bits are made by Excel Tools. They run around $0.99 ea.
In my experience, most of the drills perform quite well but I do get duds. My approach is to chuck the drill bit so that very little of the bit is exposed (just enough to go through the material you are drilling). If the bit doesn’t bite into the material fairly quickly then it is a dud and I toss it. That doesn’t happen very often but it does happen. “Quickly” is a relative term. In styrene the bit should produce curls of debris almost immediately. In brass it takes a bit longer, and longer again in steel. The point is that if the drill bit is spinning away and not cutting into the surface then try another bit. Likewise if the drill bit is only producing tiny bits of scrap.
Dave