When I decal a model, I airbrush a gloss coat, then apply the decals with distilled water, Microsol, Microset and sometimes Solvaset. The decals snuggle down and the film fades away beautifully. Afterward, I seal the decals with dull coat and then notice that trace amounts of decal film show up as shiny flakes! The dull coat actually makes the film visible, when before, they were invisible.
I have read a couple times in the past of guys applying decals, sealing them with gloss coat, then dulling the with dull coat. Does doing this prevent what I’m experiencing? Or is it something else?
The only times that happens to me it’s almost exclusively down to old decals… I’ve now started to use decalfix on decals I don’t trust, and it seems to help.
Hmm. I haven’t had that happen to me. I trim the decals as close as I can, and round off the corners too. I don’t bother with distilled water, tap water works for me. I don’t bother with the glosscoat either. Decals settle down nicely on flat paint. After the decal is properly positioned, and partly dry, dry enough to avoiding floating away, I give it a shot of Solvaset. I’ve never tried Microsol/set so I cannot say anything about them. Solvaset softens the decal film to allow the decal to form itself around bumps and lumps and rivets and planking. Avoid moving the decal after applying Solvaset . Moving will cause the softened decal to tear. Get the decal in the right position BEFORE giving it any Solvaset.
Let the decal dry overnight. Inspect for air bubbles under the decal. You can make them go away by dabbing on a little more Solvaset and then puncturing the bubble with a needle. Again, let the decal dry overnight.
I apply DullCote from the rattle can. Give the model a light coat, just enough to form a wet film, but no more. Avoid sags and runs. Let the Dullcote dry and the job is done.
I’ve had the best luck in hiding edges with some of the above mentioned ideas but allow me to add yet another.
I model 1897 - 1913 so I have light steam locos and all wood cars with a lot of truss rods. It is tough to make the decals lay down in the scribed wood and hide.
Look at your decal sheet and determine the gloss or lack thereof and decide on the degree of gloss. If pretty flat use dull cote and seal the model one last time before decals. If semi gloss find a product in the big box stores called Deft. It comes in three degrees of gloss, flat, semi,and gloss. Blast just the area you are to be applying decals and allow to thoroughly dry. Then put on decals and use the solvent of your choice to lay them down. Close up with dull cote and the edges will be gone.
If gloss, you have a choice of Gloss cote from Testor’s or Deft gloss. Follow the same procedure, bring up the gloss on the areas that will have decals and then apply decals and solvent them down. Flatten back out with dull cote and you’re done.
Don’t feel like the Lone Ranger - I have the same problem after following the same advice. I also shoot a gloss coat, the apply decals with the various setting solutions. Then the dull coat finish makes the film visible again. I’m wondering if the thickness of the decal film has something to do with it. I use custom decals which are thicker than those from the major decal firms. I have some other projects to do - I am thinking I will skip the gloss coat before decaling and see what happens. I don’t have anything to lose.
With decals that aren’t so thin as Microscale I usually gloss coat both before and after decaling. With thin film decals the second gloss layer isn’t usually necessary.
I should have noted that I do cut my decals closely, with a new blade, on a piece of glass. I’ve not had this issue every time, just sometimes. The decals on this last project were custom decals and thicker than commercial products. I had a hard time getting the MILW logo to nestle around the ribs, even after multiple applications of Microset and Solvaset and a little cutting against the ribs. I finally got them down to an acceptable level, though not as well as I could have with commercial decals of thinner film. I dont know how old the decals are from the seller, but I built the kit and applied the decals within 2 weeks or purchase.
I’ll play around with some of these ideas wen using custom decals in the future. Thanks!
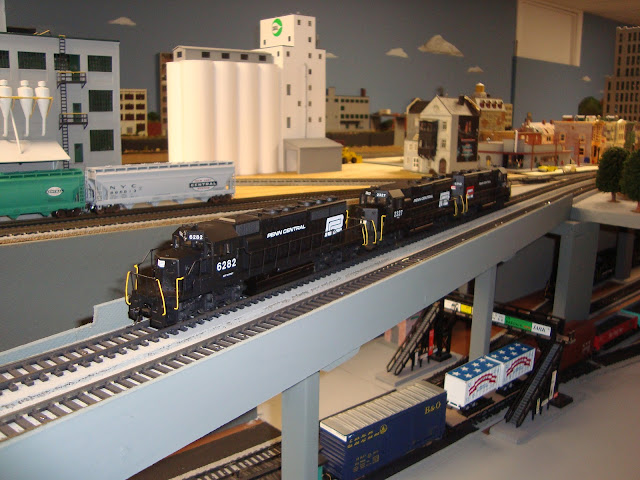
Could those shiny flakes actually be air bubble under the decals? I have had this happen in the past and poke small holes with a clean pin and reapplied the setting solution. I recently painted and decaled these three Athearn BB locomotives. The large PC decals took numerous applications of setting solution and some careful razor work over two days to finally snuggle down over the door latches, hinges etc. On one model the large cab numbers had a lot of silver spots that I poked with a pin and then reapplied the setting solution.
Just what brand of decals are you using? As stated, some old decals may need to be coated first, quite thick ones may need additional “hiding” final coats. Some older Champ even Herald King have given me problems, not quite like yours though. The decal glue especially if thicker or old may need to be soaked a bit longer. This is evident when film will slide and you notice the “slime” off the backing while handling. It sounds like “silvering”, however you are taking the proper percausions by glosscoating. You say it is fine until “Dullcoating” Has this happened every time when using the Same dullcoat or various batches or brands. I “Dullcoat” final coat w/ Floequil flat and sometimes add a few drops of gloss to get the look of a newer painted “semigloss” finish. It is possible that the flat/ dullcoat especially if Testor’s may be bad batch or old and the dulling agent Talc, may be causing the problem. If it only appears @ the edges, it’s possible that with a thicker filn, any uneven cutting of the boarders may show the talc buildup.
Note, with Microscale (larger herald/ lettering, don’t trim too close as the film is tappered thinner @ the edges. Close trimming will void this feathering and show the thicker film. I have never had any issue w/ Microscale as with other brand. Very old decals are what has caused troubles for me. Even using all the steps and precautions, many times you will not get the same results.
Try changing what you glosscoat the model first, try soaking longer, until film is floating off the paper, and change the type of dullcoat. Somewhere in your process one of the steps may be causing this to happen.
Depending on the project, I’ve used many brands of decals. This project was a Stan Rydarowicz resin side kit (pictured here). I dont trim Microscale decals closely, as the film is already cut around the edges, as you stated. I dont know where Stan has his decals made. I use Pollyscale gloss coat. For flat, I’ve tried the Microscale dull coat but have not had good results with it. I mostly used Model Masters dull coat from the can. Seems like my LHS is often out of Pollyscale dull. I’ve not done a side by side comparison with dull coats over the same decal job. I just know it happens sometimes, other times not.
IF they are air bubbles, they would be many very tiny, tiny, tiny ones that a knife poke wouldn’t get to. It looks more like shiny flakes. I couldn’t even get them to show up in photos of the model. You can see a little bit in the middle of the “Do Not Move Car With Door Open” decal. That little shiny sliver in the middle was not “pokable” and wouldn’t settle down anymore than it is. You can make out a little bit of the edges.
None of this will matter after a little weathering. I was just wondering if there was a universal reason as to why this happens sometimes. Thanks!
Great work… I see the silver spot you are speaking of. It appears to be right above the rivets on the door. This is a prime location for an air bubble. As you have closely examined the model and it is not air bubble than I will certainly follow this thread to see if the offending silver spot can be positively identified. Judging by your workmanship it a
Yeah, i can see it too, and it appears to be “silvering” which is a lot of very small air bubbles. It’s pretty-well impossible to slit or prick each one, but you can sometimes remedy the situation by slicing across the area with a very sharp blade, the larger the area, the more slices required. If you make them in two directions, like a cross-hatch pattern, the setting solution will have a better chance at reaching the affected areas. Of course, this needs to be done before overcoating the decals with any clear finish.
That’s a nice-looking car (and paint job, too).
FWIW I often do several applications of Solvaset, over a day or two time, to be sure the decals are as flat as possible. Sometimes running a single edge razor blade along the line of rivets and then applying more Solvaset will help the decals snuggle around the rivets. On woodsided cars, after the initial couple of Solvaset applications, I take the single edge razor blade and put it in each groove between the slats and slice thru the decal. I do that for every opening for the entire decal. Then when more Solvaset is applied, the decal really snuggles into the openings between the boards.
Maybe this works okay, but I don’t believe that I’ve ever read a set of instructions that come with decals that say anything other than to apply the decals over a smooth surface.
Regarding the question about whether or not dullcoat will cover those irregularities described, I have never been able to disguise any irregularity that was due to silvering or trapped air with dullcoat. It has always required repeated applications of decal solvent after piercing the affected areas.
Just so everyone is clear, my original question was not, “will dull coat hide decal imperfections”. I have had times where the decals look perfect, flat, snug, all film totally hidden after my application. It’s only AFTER dull coating that I then see some slight silvering or whatnot. I have good eyes and lighting and this still occurs sometimes. This is what I was asking about.
jt, It is quite possible that the problem is with the dullcoat itself. It could be that the dulling agent (talc) in this batch you used is the culprit. Like w/ the dulcoat/ alcohol weathering technique, the fogging from the alcohol will disapear w/ added coating of finish. You should try a different brand of clear, if problem disapears recoat in a different flat finish. I found far better results using acrylic flats or Floequil flat airbrushed. The Floequil gives me the best finish of all others I’ve tried. Someone mentioned the Deft, it is a very high quality laquer. I still perfer to airbrush over “blasting” w/ a rattle can.