At a recent train show, I purchased two metal kits (kit number 1 furniture factory and kit number 7 wareheouse) in the original yellow Suydam boxes. The instructions state to solder the joints. I am getting ready to assemble the first kit, and was wondering if anyone has suggestions or hints on how to assemble the structures with solder. This will be my first time assembling metal structures with solder. I have succesfully assembled structures from plastic and wood never metal. Any suggestions and hints will be greatfully appreciated.
Built some of those in my early years , I used a 300 watt Gun , not a pencil, metal flux and solid solder. I would tack one end down and then I would place the gun on what ever piece is on top and slowly run down the seam with the gun on full hot and solder the parts together. This probably is not coming out as clear as I wish , I’m lousy at describing techniques. The only part I didn;t like about them was the windows. With the types of parts available today versus 35 years ago they could be made to look better.
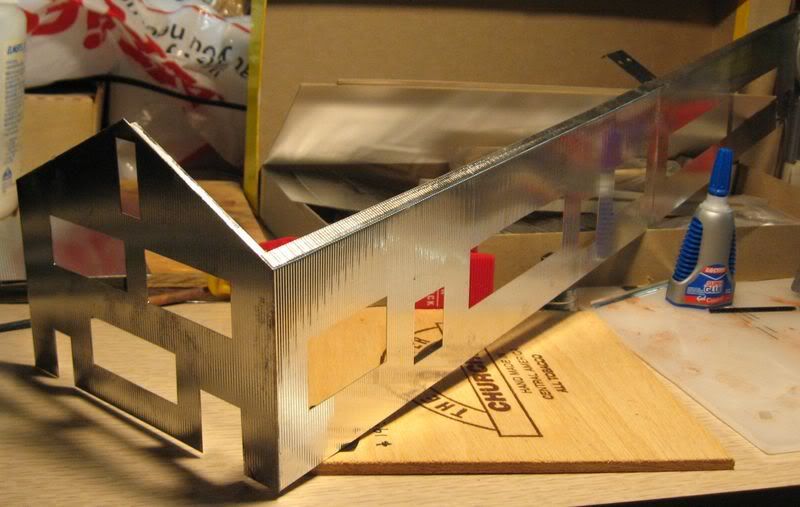
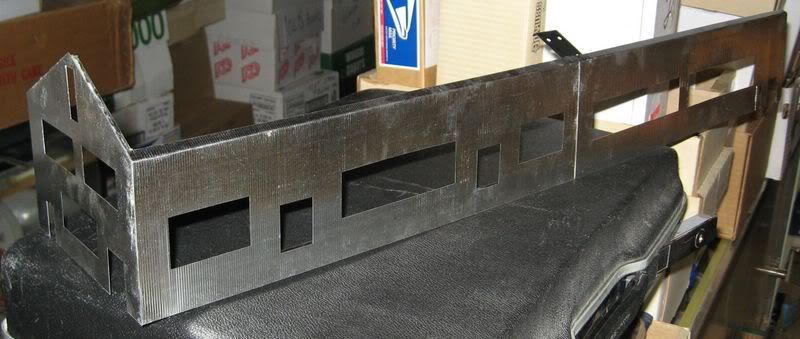
Use C-clamps to hold pieces in alingment while soldering and to keep stuff square. Us soft wood pads where necessary to keep clamps from maring the work. You might find a torch works better than an iron on the big pieces. Use a wet rag or heat sink on already soldered pieces to keep them from unsoldering while you work on other joints.
When these kits were developed we didn’t have epoxies and AC glues. I haven’t tried gluing one of these together, but think either of these glues would work just fine if you don’t want to solder.
Ditto on the comments about the windows. Putting a present day detailed window casting in the openings would really dress these kits up.
Have fun and please post a picture of your project when you finish
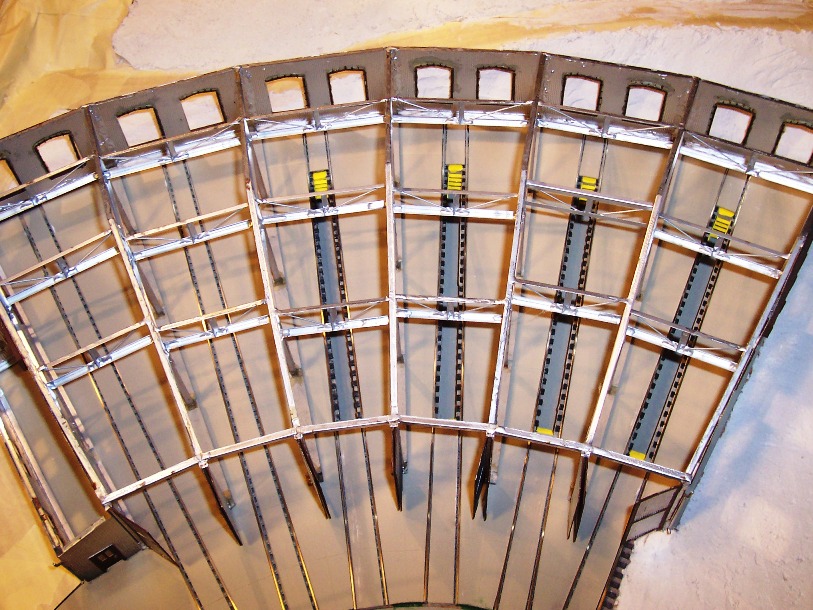
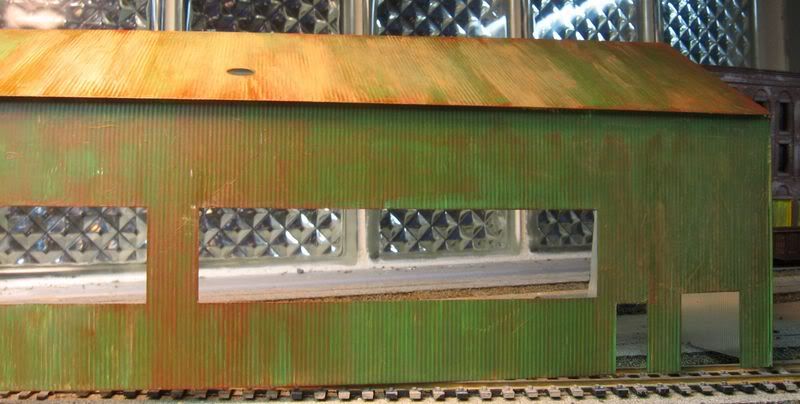
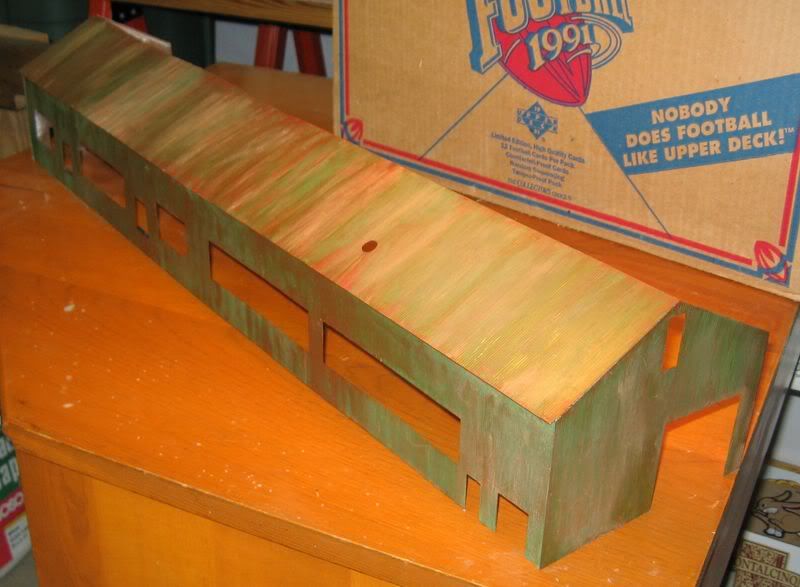
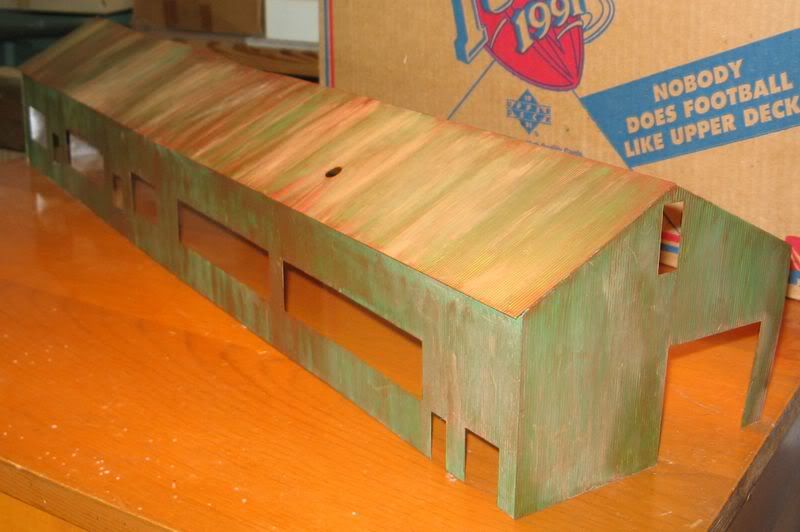
I have the old Suydam Roundhouse kit that I am currently renovating and here is a recent image with the roof removed…
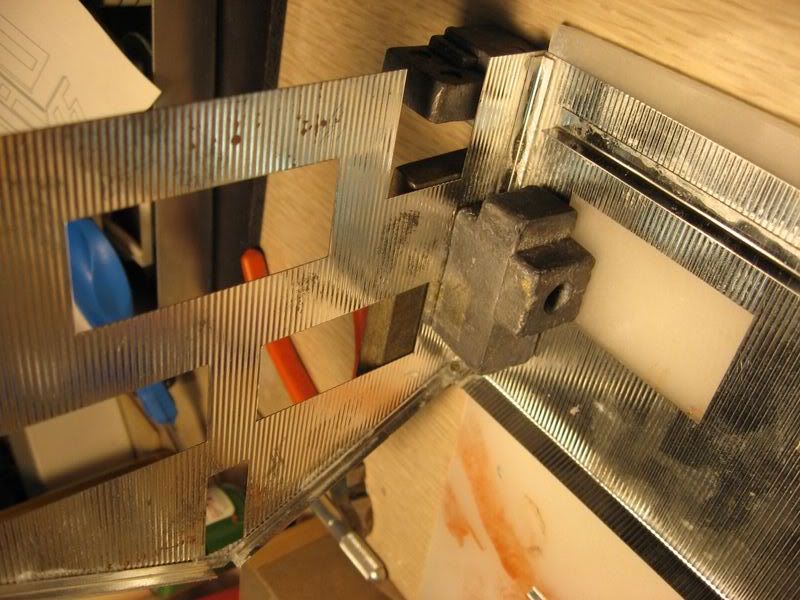
The basic technique that I have used in the past is to create a jig with a large flat piece of 1/4" plywood or some other flat base material that I can use that will accept push pins or T-pins and that allow me to line up the metal pieces in place and then apply the solder. I also have a small metal jig with magnets that can line up smaller pieces too. I also have used clamps to temporarily hold the two metal pieces together while the soldering is being done.
You can use the spot solder joint method or the method described in the other reply. In any case you will want to make sure that the metal items to be joined are both hot enough to melt the solder and thus ensuring a solid solder point/joint.
I built me Suydam roundhouse when I was a kid. I used a solder gun and rosin flus cause it was all I had. I don’t recall having any problems other than discoloration of the metal but the spray paint covered it well.
I wonder if it woudn’t be just as good to rough up the mating surfaces and use thick CA to do the joining. Its been awhile since I’ve done one of those kits,but the last one I tried to solder I sure messed up. Hmm, might have to try another one.
I’ve seen those kits weathered really cool by just leaving them out side in the rain for a few days.
I have at least one of those kits laying around for future use. ACC was not around when Suydam developed their metal kits. I would think now-a-days you could use acc instead of solder. It would seem to be quicker and easier.
I have not tried using CA or other adhesives on the Suydam metal kits, but like anything else I am always willing to experiment on new techniques.
That’s all you can do is try it out with a few pieces first, the worst that can happen is that the two pieces did not stick. Then just go back to square one, solder, or try another adhesive.
I think I would try JB-Quick from JB-Weld. JB-Quick is a 5 minjute epoxy meant for metal to metal and dissimilar materials. It’s fast, rock hard and can be drilled, carved and sanded and it will have the shear strength that ACC doesn’t have. This one of my top 3 adhesives.
Use JB-Weld when you need a longer adjustment time.
Thank-you for the hints. I was experimenting with some scrap pieces and found that if I tinned the walls I was then able to hold the corner braces and tack solder successfully.
Your post really made m smile! I built one of these metal kits as a kid in the '50’s It was purchased at Polk’s in NY. I think by the time I got done there was more solder than metal! But it sure was fun. Also might be fun to try again!
I built a couple of their kits using rosin core solder; the rosin residue was a real mess. Paint would not stick to it. If you do solder, use an acid flux ment for soldering metals. Since I also do stained glass, if I do another one, I would use my 100W soldering iron, 60/40 solid solder and Ruby Red liqiud flux.
Hi, I just purchased a Suydam roundhouse kit #8, but it came without any directions. I only have “part 3”. Would you happen to have directions for this kit? I saw your roundhouse pic and I’m thinking that you may have the directions for it!