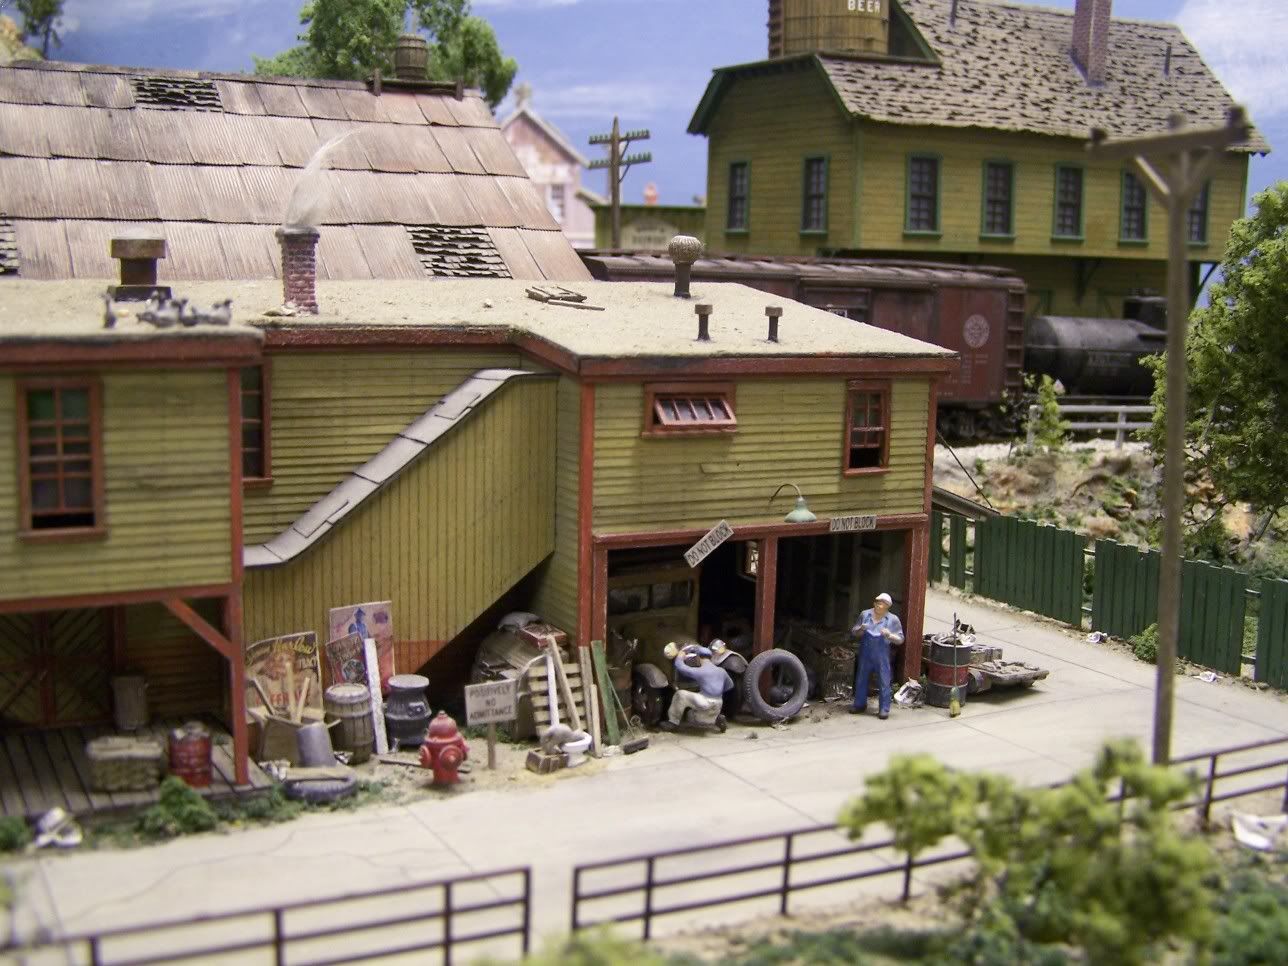
Tony (auto mechanic) is kept busy maintaining the delivery truck owned by Baxter’s Building Supply Company:
Tony (auto mechanic) is kept busy maintaining the delivery truck owned by Baxter’s Building Supply Company:
That is what I love about your modeling, you could miss really great little scenes. The whole pic has about 5 great scenes. It must be fun walking into your train room, even for you, something new everytime. Where did you get the idea of reroofing with steel over the old shingles. You do need to get someone up there to do a little repair/replacement. Maybe we will see a roofing crew in the next few weeks. I do love your pics.
Bob, I didn’t think you had a Fiat mechanic on your layout! And can’t the cat do better then that? Great shot Bob!
Bob, I just love your pics everything is perfect to the last detail. I noticed in the pic there is a broom leaning aginst the barrel, Maybe the workers need to use it LOL. Mike
Bob is that a cat drinking (eating yuck) out of a toilet? If so it must be related to my dog. Two bowls of freshwater always and she prefers toilet water or stagnant pond water???
Great photo. Lots of details and mini scenes.
Terry
Bob, Trash, paintings and missing fence planks, all mini sences with-in a larger one. Great[:D]
Thanks for the pic! There are so many details, but it doesn’t look crowded. Of all the pics you’ve posted, this is my favorite!
Bob,
One word…“Wow”. I’m very impressed and discouraged with my own efforts at the same time.
Is this a craftsman kit or something you scratch built?
Again, great stuff.
i agree with arthill you never can loook at your pictures once because each additional time you look at it you find more surprises
I know what you mean! You see this stuff and you either want to go model building for the next 24 hours straight so you can try to duplicate some of this, or you want to sell everything because it’s hopeless!
Bob, Haven’t heard the “Fix It Again, Tony” since I owned my Fiat in the late 60’s. As usual, your modeling is outstanding and your scenes within a scene make it like we see in our everyday world. I refer to your website quite often for more incentive. I look forward to more!
Doug
The MASTER posts another gem.
Do I see a book in your future or just a GREAT DVD!! Either I want one!!!
Hi Bob,
I wonder why I bother adding superlatives to the compliments others have given. Hope that you don’t get a swelled head.
Do you collect things and pose them for your photos, or is that stuff all over your layout all the time? Things I love:
It is just so beautiful that I could not imagine that you have that all over your layout all the time. But then maybe you do. Thanks for sharing it with us.
And another thing. How can you take such great photos? Mine turn out blurred and blemished in all sorts of ways.[:(!]
Bush 9245:
The details seen throughout my layout are “as is”. I do position freight cars and / or a few figures from time to time. However, all of the mini-scenes you see were shot as seen on the layout at all times. When I built the layout, I knew that I would be limited by space. The layout measures around 81 sq feet. To compensate for the lack of real estate, I set out to detail it as much as possible. The most difficult task when it comes to detailing is avoiding the “over-crowded” look. IMO, too much detail can make a scene look toy-like and unrealistic.
Finding all the right details is another challenge. Many of them (newspapers, trash, broken glass, loose lumber, cardboard boxes, etc…) were built from scratch. Others, such as oil drums and wood pallets, are from Grandt-line, JL Inovations, or Woodland Scenics. The remainder of the details seen on my layout pics come from many of the craftsmen kits I’ve collected over the years.
Bob…
Thanks for the explanation Bob.
It looks great, and there are many who appreciate your efforts. The trash as you call it is what makes the scenes look “lived in”.
Bob, you’ve mentioned the “water putty” that you use for your concrete roads. Is that a hobby-shop product, a craft-shop product or a hardware store product? I’ve never actually seen it, but then again, I haven’t looked too hard. (And of course, as a guy, I can’t ask for directions.)
And then, how do you color it? Is the putty basically that worn concrete tone we see in your pictures, or do you have a secret formula for coloring and weathering?
Mister Beasley:
To model my streets (Durham’s) water putty is used. This putty can be found at most hardware / Home Depot stores. I buy the one that comes in a can (a little goes a long way) After mixing the putty per directions, the putty is spread in place (1/32 to 1/16 inch thick) using a soft foam brush. Once dry, the roads are sanded smooth. After vacuuming the sanding dust, the road is painted with a combination of (Floquil’s) concrete and weathered concrete. After the paint dries (2-4 hours) I scribe in the expansion joints and cracks using a #11 blade.
To weather the roads, charcoal powder is used. Sprinkle the powder over the roads and move it around using a soft brush. Once satisfied with its appearance, seal in the powder with Dull Coat. For Sun-bleached roads, I brush the finished roads with an alcohol and ink mix.
Bob.