If you decide ME track, one trick (other than ribbon rail gauges… Those work so well it’s almost too easy…) is to take a paint stir stick, (cheap!), and run it along the edge of the ties, pushing the edge away from you as you run the stick along it, to assist in creating a more gentle, kink free curve.
Me, I have both Atlas 83, and ME 83. Yard is hand laid ME 70, except the approach track turnout, which is a curved Shinohara 83 (Walthers). I like the ME 83 on curves, as it holds it’s shape better.
I used Atlas code 100 when I was in a modular model RR club. Would have used Atlas code 83 on my home layout but it was not available when I started laying track three years ago so I used Peco code 83. If Atlas is available when I need to purchase more I would probably use it over Peco because it is less expensive.
Regarding “holding shape”. I have historically found the “springy” track (Atlas) easy to shape and work with, much easier than the stiff track that holds its shape. As for holding shape, my track holds shape by fastening it down with Atlas track nails or spikes - they work quite well for that.
That’s why I decided to go Peco, after ordering a few pieces to test. It flexes fairly springy like Atlas, so it’s easy to form smooth curves and transitions with, but the spike detail is finer than on the Atlas. And the little things - instead of those wierd D shaped end ties that Atlas uses to there is no plastic under the rails where the joiners go, Peco just shaves out the plastic, so it looks like there is a normal tie at the end of the turnout, or the end of the flex track piece, but in reality there is space shaved out for the joiner to fit in without bumping up the rails. Less cutting the end ties off and fitting them back in later and no unprototypical D shaped ties.
I agree that the Atlas tie ends have to be cut off.
The Shinohara tie strip is molded in an alternate pattern so you can “bunch-up” the ties without cutting any off (of course on curves you are going to have to cut the outside rail.) I like to solder the joiner without any ties under it then when everything is filed and cleaned up I take some scrap ties left over from short sections, use an Exacto #11 and scrape away the spike heads then slip 2 or 3 ties under the joint and apply just enough heat to soften the tie and the joiner nestles in nice and smooth.
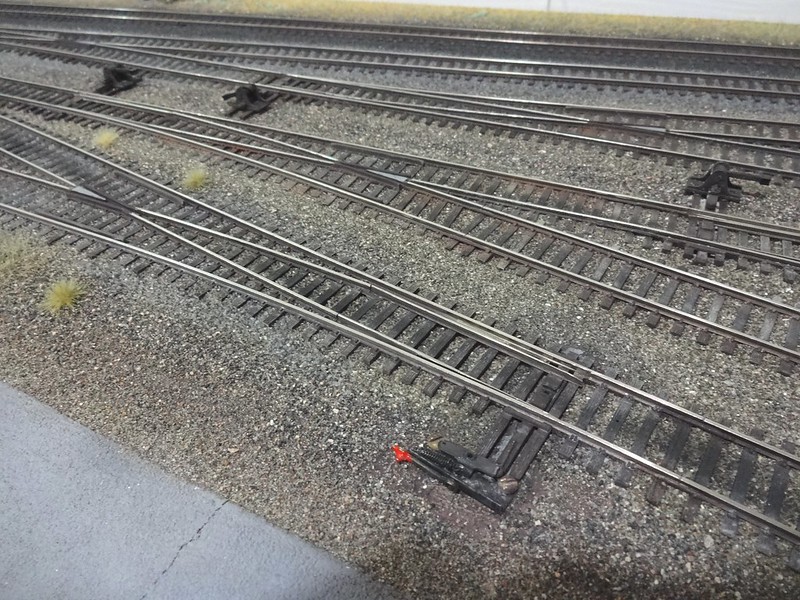
I got used to removing ties for joiner clearance automatically. The goofy D-shaped ties Atlas mods in to some of its products get cut off no matter what.
I use wood ties under the joiners, which don’t melt from soldering iron heat, and are made of slightly thinner material to allow for joiner clearance. Once everything is painted and ballasted they mostly disappear. The track above is Atlas 83.
Another note, what kind of rail joiners to use. With code 83 I used Atlas N80 joiners. They are significantly smaller, less clunky, than the larger ones. They fit nice and tight (a bit too tight) so you can take a piece of flextrack and file the ends very slightly tapered and wiggle each joiner on it a bit to loosen it slightly before adding to your real track. Glad I did it, though I used the big clunky insulating ones at electrical gap joints.
Back in the earlier days of Atlas code 83 track, Atlas used to sell code 83 rail joiners before going to their “universal” code 100/83 joiners (which are big and clunky looking). I bought up every package of Atlas code 83 joiners I could find because they were much finer and looked better - good to know there are alternatives out there since the old supply dried up - I do a good supply of the Atlas code 83 joiners to last me a while right now.
I too use the plastic insulated joiners too - I imagine painting them will help hide them.
I drilled a hole in the end of a dowel and glued a piece of rail about 2" long into it and sharpened the point. This is what I use to spread those n-scale joiners.
My track is code 83 Walthers/Shinohara turnouts and Atlas flex.
No plastic joiners for me. I cut the rail with the Dremel and glue a piece of styrene into the gap. Hit it with a nylon “wire” wheel and it takes on the contour of the rail. It vanishes when painted.
Another tip on handling ME track. If you’re in the basement working on the layout – as many are – then the top of a dryer or washing machine can help you out. Laying the ME flex on any hard, slick surface, then pushing sideways only, carefully, it’s much easier to make it behave.
RioGrande mentioned reasons why some prefer Atlas and the difficulty of handling ME often comes up on those lists. But I actually prefer this feature. I usually build track away from its intended location, especially so now that the layout’s track is effectively finished and I only do mods and upgrades. Having it stay in place while carried out and back in is helpful. It also seems to me to help with accuracy of attaching wiring drops and cutting to the exact length required.
This is as much a matter of personal style in laying track than anything. Try both and you’ll figure out if you prefer one over the other… It won’t make much difference on a small layout, but I’d hate to be committed to 100 pc of something that would drive me nuts before I got it all laid.
Some of us do get stuck in our ways. I learned how to lay track the old way back in the 70’s and 80’s by laying it on a center-line. Because I lay track to conform to the center-line which I drew based on a curve drew with a trammel or from scale drawings, it’s easier to use the springy flex track - it conforms quite nicely. I have to battle with the stiff flextrack to get it to conform to curves - what stiff track I have now will mostly be used in straight sections in a yard.
There is definately a learning curve the first time you use track that stays where you put it. I had a few GRRRRR! moments myself until I figured it out. The secret for me was working the curve from the end of the piece backwards instead of bending as you go. I should have probably looked for a video on how to do it first. [:-^] I was ready to go right back to springy track when I first took a crack at the stiff stuff, but I stuck it out and now prefer the stiff stuff. It’s splitting hairs for me though.
It is considerably more expensive now, but still on the lower end of flex track prices. I think it looks almost as good as the others, and it flexes really easily. Thanks!
I used ModelPower c100 track at a buck a stick back in the day, I thick it’s $1.80 a stick now from Trainworld, they’ve also got c83 now. I liked it because it had better detail and smaller track spike heads. Upper photo is Atlas lower, photo is ModelPower.