I’ve been working on my first scratchbuilt tank cars for a couple weeks. I am using copper pipe sections with brass detailing, and cast adhesive for the thank ends. It will also feature custom decals and weathering once complete. For those wondering, I am using different soldering techniques from torch, heating pen to electrode soldering unit. Key is to define the building steps in a way that you don’t unsolder the tiny parts.
Those tank cars look great! Obviously you have some modelling experience.
I know all about melting the wrong joint(s). The critter in my avatar is scratch built from brass. Lots of moist paper towels and other heat sinks were used in the process and I still managed to undo a few things that were already in place.[banghead]
An excellent scratchbuilder in brass and other metals, the late Carl Traub, told me he used several solders of various melting points – increasingly lower melting points as the work progressed – to try to avoid having previously soldered parts come loose. (Carl did the tool and die work for the early Globe plastic models - what later became Athearn’s initial plastic line, including the famous F7.) I think I have read that the Japanese and Korean brass loco makers did the same thing.
Thanks Mike. The ends have required quite a bit of R&D for that, and if you browse into my Flick’r account, you may fing the mold and the idea.
I had to make myself my own mold from Urethane (I tried epoxy, but it is stiffer and tends to chip). I then used the same two components urethane adhesive (industrial sample; not for retail sale) for doing the ends. It resists heat better, is more flexible and paints very well.
And yes, I know sir Bobby since he was kind enough to share blueprints of DUPX whale tankers to me 2 years ago. I have this project in mind for quite a while, but I wanted to master soldering tank cars better before getting into such an ambitious project. Bobby does wonderful things and he his probably my best inspiration as a scratchbuider (in HO scale anyways; I used to do 1:50 construction projects before getting into HO in 2013).
Bobby is active on the Rustbucket now. He is posting comments on a regular basis.
I used to be more active on the Diesel Detailer. But that site has slowed down since Photobucket went the greedy way and blocked everybody’s picture albums, hence making most posts on the DD obsolete. Fortunately, most of my completed projects are posted on Flick’r. So far, no issues with that site. But I always keep backups…
Hey, thanks Dave. You might want to click on my pictures and jump in to my Flick’r album. Pictures are public, so you will have an idea of some of my previous works.
Ha, good to read you here too Bobby. I thought you’d be around. [swg]
Yes, projects has been slowed down recently due to some temporary sickness. But things will resume soon.
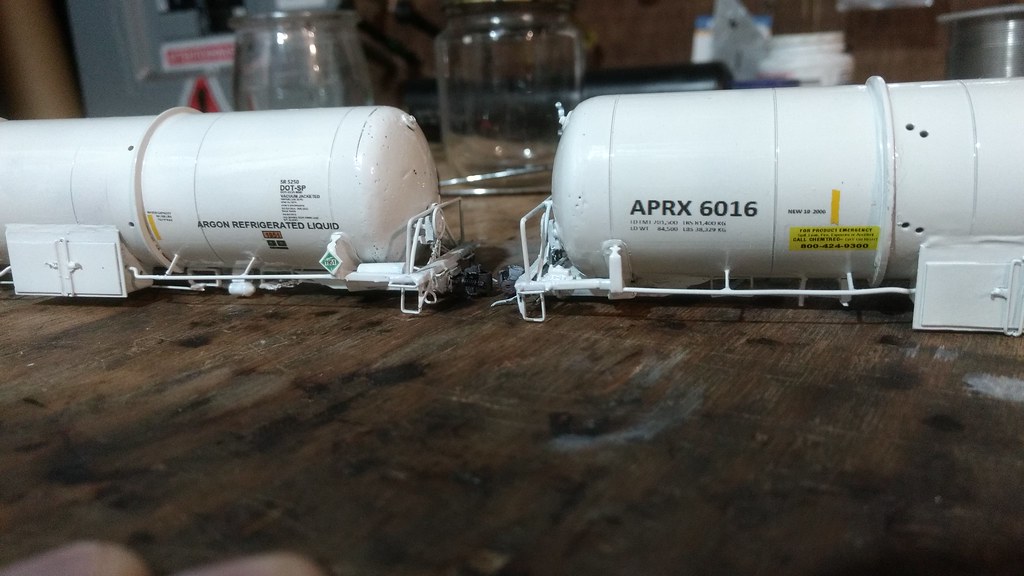
I also have two refrigerated liquid argon cars almost completed. I still need to add a few details (grab irons, uncoupling tools, connecting hoses…) before I reinstall my airbrush. I also need to work on the custom decals. I have to redo all data from scratch using MS Word, then downsize.
So we’re talking about four copper/brass heavier cars here. I test ran them on my home layout, and I’m pleased with the stability, and “prototype feel” of switching heavier cars. I doubt my locos can stand more than ten of these (if I keep up with my collection) in a same drag, but that’s not the idea. I will most likely use them in DPUs with lighter cars at their end, or as “yard beauties” [;)].
I’m too using two different types of solder myself. But it has a lot to do with planning the built from larger/thicker parts to smaller and tinier. Just as in everything: the more you do, the more you learn.
Thanks! It very easily comes off just in case of something going wrong in the hidden track. The city scene is one piece of 2" foam, it lifts right off, exposing the track. And the buildings are not fastened down, all removable, before I remove the rest.
The road and the mill and food plant, to the left of the city scene, all comes off, in 3 sections, to expose more track.
The road deck of the overpass also comes off. The only part that doesn’t, is the tunnel and park scene, with the campers, the tunnel I can reach easily from both sides. The area in front of the big lake scene, is open and exposed. I use a step stool to get to it, when needed.
I still like to see some of the projects showing on DHS at times, but I am not so much into buying 1:50 models or just repainting anymore. I’m more into custom work.
If I was starting back with a new crane/heavy hauling collection, I’d certainly go with the VPC650 thought. No doubt!
More progress in the paint and decals.Still, the urethane ends will likely need additionnal sanding and putty before another layer of white on the ends.
I have already got started with decals on the sides, as by experience, the decals kinda melt through the fresh (say one day dry) oil based paint. After a couple days, I will add a layer of clear, and wait another day before retouching the ends.
I hope to be able to post completed pictures in a week or two.