I have seen posts referring to making foundations for buildings so that they don’t look like they are sitting right on the ground. The only material I can remember being mentioned is foam core board, but not how it was done. Do you cut a full piece the footprint of the building and dress the edges, somehow, to look like poured cement or blocks or do you cut a strip the height you want your foundation, using the surface of the board for the outside part of the wall?
Any suggestions of techiniques or materials appreciated.
No wait! what era is the building that is going to sit on the foundation. Rebar and poured concrete is more recent, our church sits on field stones. Modern buildings sit directly on Styrofoam. Well, ok they are Styrofoam forms that are are set up and then the concrete is poured into them. They are left in place providing insulation on both sides of the wall. For most buildings I might use some dimensional wood to fit under the building and then paint it as concrete. Seldom on modern buildings does the concrete esxtend beyond the wall, but this is common for other construction such as stone.
If I were building a structure that required a stone foundation, I would set it in place and then build up a bit of stonework around it.
LION has also printed stone and brick work on his color laser printer and pasted them to a board upon which the structure sets.
Look at pictures of the structures and then think to yourself what you might do to make something that looks like that.
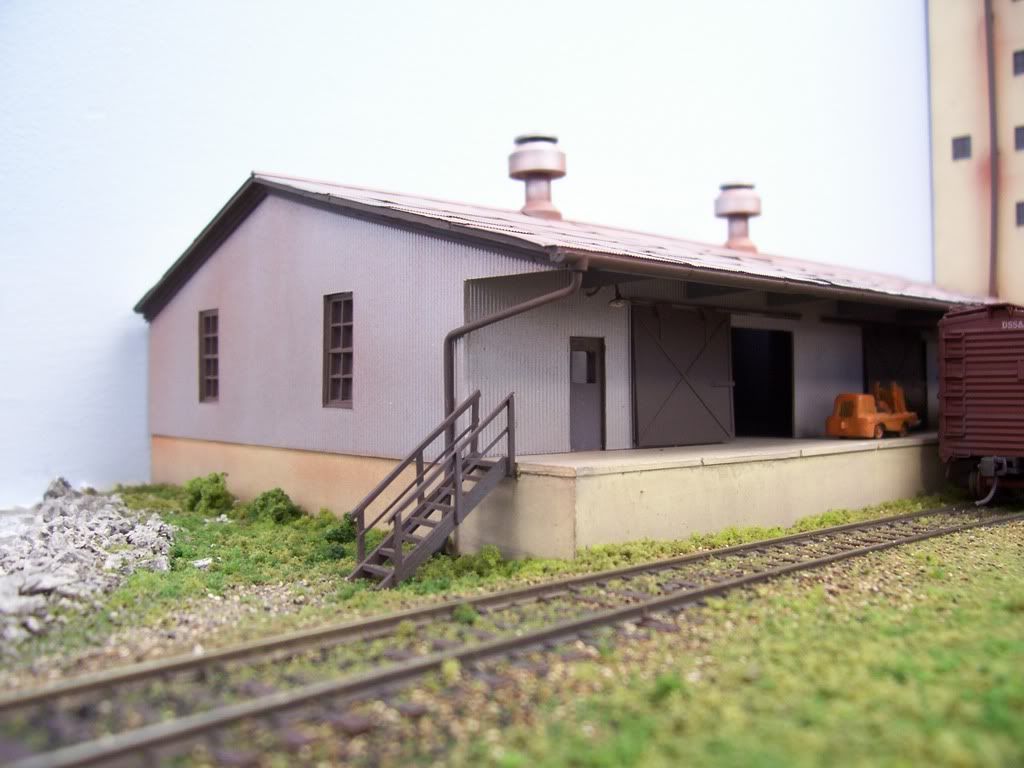
I much prefer .060" sheet styrene for foundations, and buy it in 4’x8’ sheets, as it’s useful for many other things, too. Simply make an open box in the size and shape of the structure’s footprint. Brick buildings would sit directly atop it, while most wood and metal buildings would overlap the foundation slightly. If you use solvent cement to assemble the foundation, allow it to harden fully, then file or sand the corners to make the joints invisible. You can also add a styrene floor to strengthen the entire structure or where a floor is needed for interior details, as in the first photo below.
I used strips of extruded foam or even styrofoam from packaging. In the image below, it is the latter kind painted with acrylic paints. The steps were of extruded foam.
I do something similar to Lion. I make a foundation using fairly thick pieces of Evergreen styrene. Then I paint it, glue it in place and build the scenery up to it. That way I don’t have to worry about smearing plaster, dirt or ground foam on the building itself. Then after the scenery work is done, I have a flat solid place to sit the building. I also add small blocks in the corners to hold the buildings in place.
While we’re talking about foundations, I would like to give a suggestion for keeping the structure located exactly on the base. Once you have fabricated the foundation of your choice, use small dowels, round toothpicks etc at the inside corners. This will keep the building just where it’s intended yet can be easily removed for nearby work or some housekeeping. You can use blocks, however I find that the dowels, tilted slightly inward allows easy replanting w/o fumbling and wiggling the structure to drop it back in place.
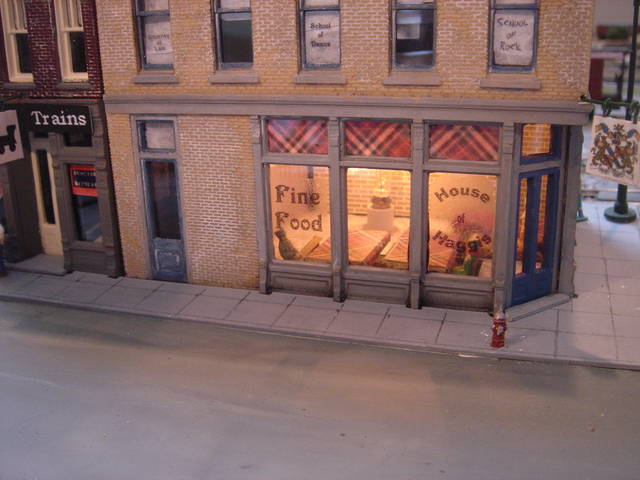
For my urban buildings, I cut styrene sheet to fit around the base so that the structure itself actually sits inside and just slightly below the sidewalk. That hides the base and prevents light leakage beneath the building.
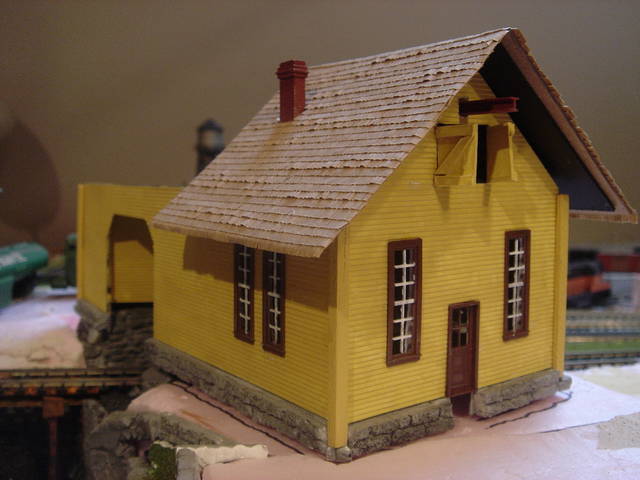
For this scratch-built structure, I cut two courses of stone foundation from a hydrocal stone wall casting and attached the structure to it. I’ve since found that a razor saw is a good tool for cutting hydrocal castings like this. It’s probably not great for the saw blade, though.
For certain structures and situations you may want to explore an idea I wrote up for my Frugal Modeler column in the NMRA Midwest Region’s “WayBill.” Here is the version as on the NMRA website
Basically I create a base for the structure and then take very thin foam rubber, dyed a green or earth shade (or I supose the color of concrete foundation), and cut it to shape for the edges of the structure. The foam rubber fills the gaps of the slightly irregular ground. In other words, it is a sort of flexible gasket. I affixed that gasket to the base, not to the structure ( you could but I anticipate having to replace the gasket from time to time).
The article does not mention this, but this idea works best with my scratchbuilt structures which are, frankly, a bit over-engineered and rather heavy. For a very light wood or plastic structure i would probably have to add weight to the structure to make the foam rubber gasket snuggle down and fill the gap.
Thank you all for the ideas. Looks like the ususal several ways to do something in model railroading, so some experimenting to find MY best fit. As mentioned there are different foundation materials, which will present more possibilities,
Dennis, the plastic to which I was referring is white styrene. Look in the yellow pages under Plastics Suppliers. It comes in various thicknesses: the first sheet I bought was .040" thick, but all subsequent ones have been .060", as I find the thicker material requires less bracing when building large structures. For bracing, I usually cut strips from the sheet, then cement it on-edge to the structures’ interiors. I haven’t had to buy any for a while, so I’m unsure of the current price, but I’d guess somewhere between $20.00-$30.00 for a sheet. You won’t require a truck to take it home, either: they simply roll it up and tape it - you could take it on the bus if you had to. [(-D]
I use a utility knife to score along a metal straightedge and/or framing square, then snap along the score lines. Since I use so much of the stuff, I use lacquer thinner as the bonding agent - it’s cheap, easy to use, and gives a good bond, plus it can be used to thin lacquer-based paints, clean brushes and airbrushes, and strip paint from brass models. [swg]
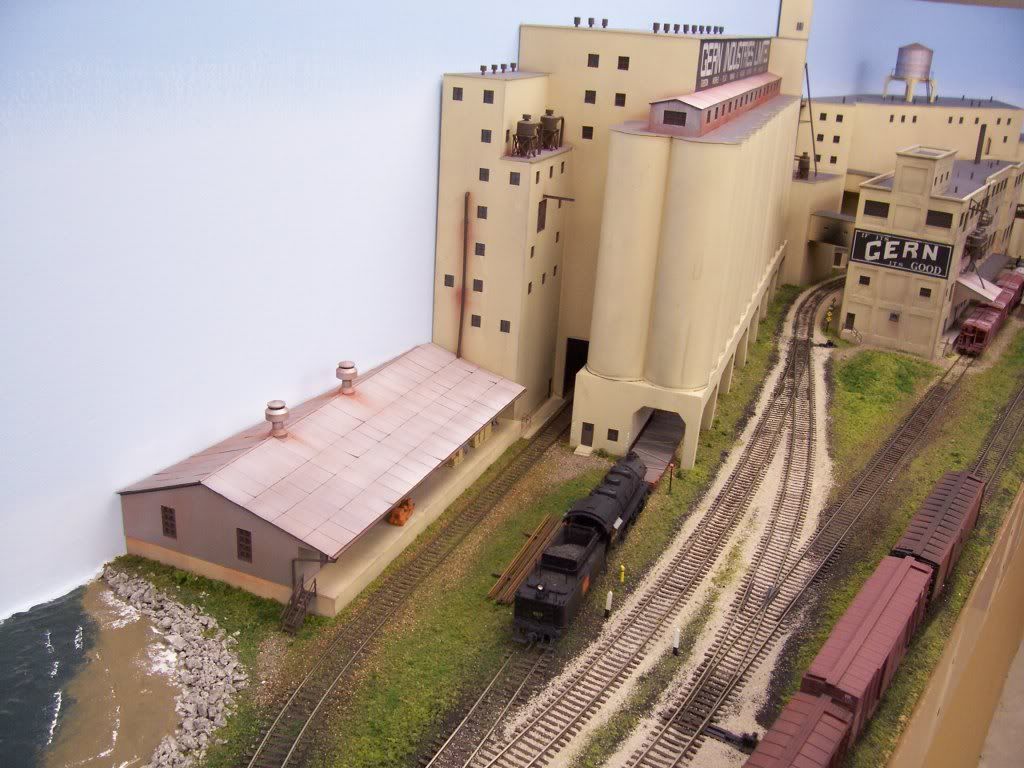
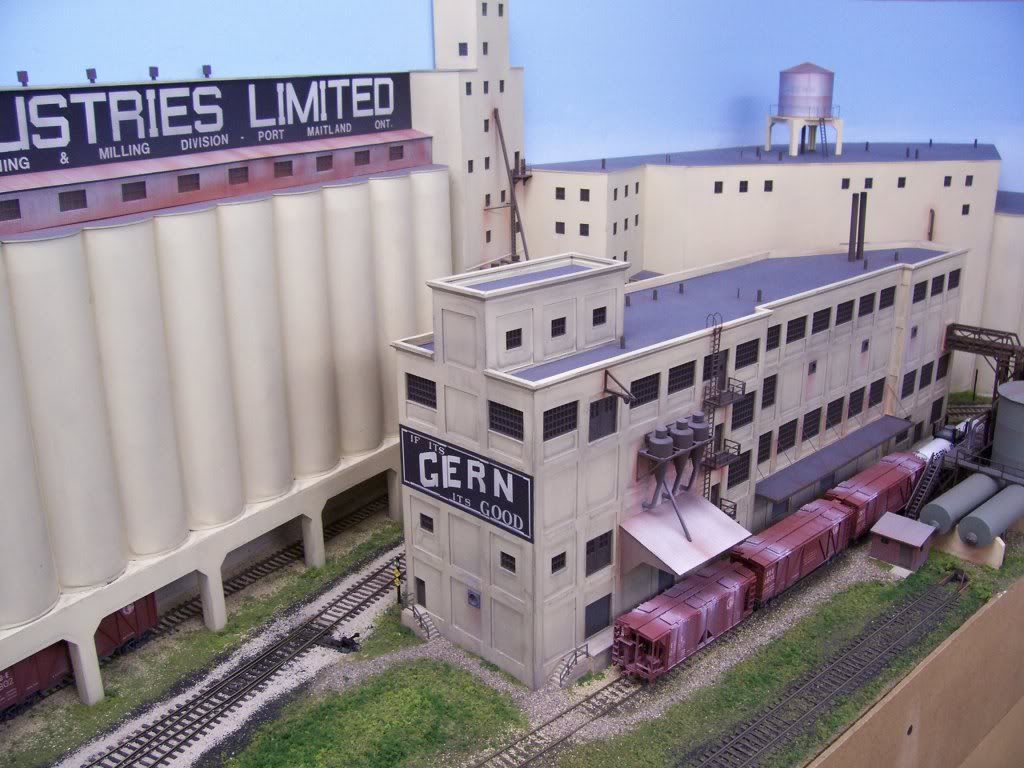
Here are a few structures built utilising the .060" material.
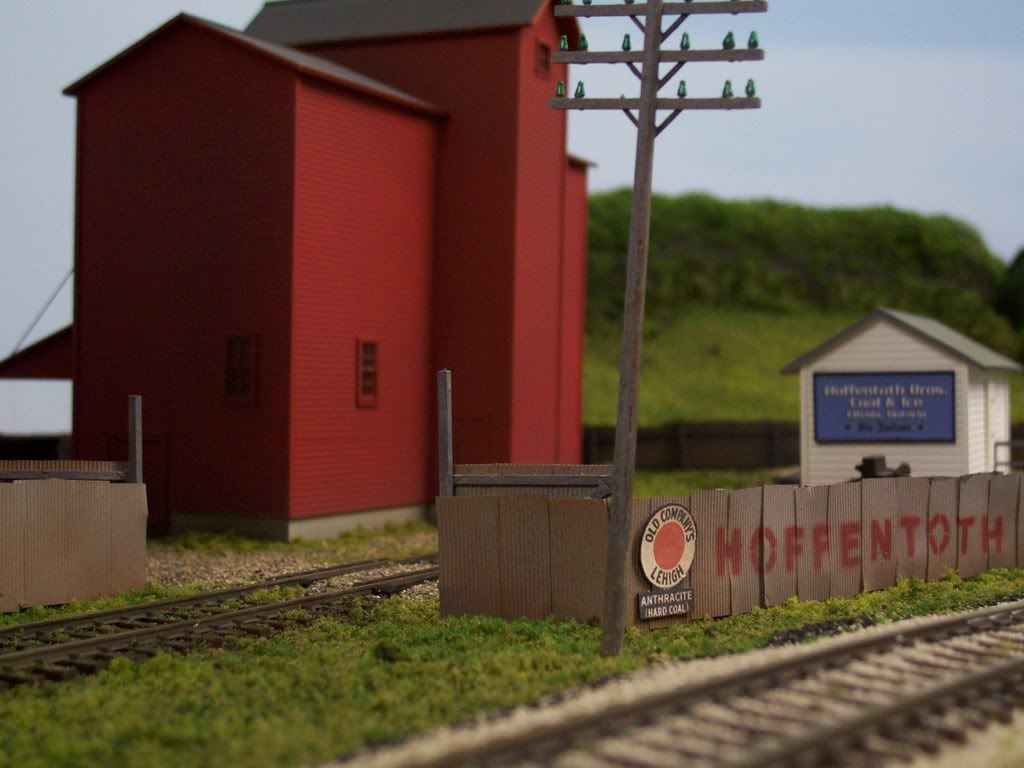
GERN Industries is a kitbash of a Walthers ADM Elevator, with the add-on silos and their Redwing Milling company, plus lots of sheet styrene for the warehouse, most of the tall building against the backdrop, and the back of the former Milling building. Since my layout is an around-the-room design, most of the structures use .060" sheet for the unseen walls, allowing longer or deeper structures by using the extra walls where they can be seen.
National Grocers was built from DPM modular walls, but all the roofs, unseen walls and interior bracing is .060&
to get hillside look on foam base, I make razor cut into scenery. I use foam base and no plaster so its very clean. Add wet fiber to base, ground covers and let dry.
photo below shows building before sealing with some clear caulk
Another source of sheet styrene is your local sign shop. Mine will order anything I want or cut a piece of his stock if he has what I need. No shipping charges, a local business and I can see what I am getting.
Thanks for the info Wayne. I’ll check the yellar pages. I have to say that you are some accomplished modeler Wayne. Your work is absolutely beautiful. I only wish my shaky hands would allow me to be so accomplished. Oh well, at least I try
Once again thanks for the info and great look at your work.
You really didn’t say if you were modeling in N scale or HO scale. I model in N scale and building foundations are different in some ways… mainly because of the size N scalers have to deal with.
I must admit I’ve seen some nice tips in this thread. Wayne and Mister Beasley come to mind right off hand and more than likely I will integrate some of those ideas into my layout.
Richard, I added your quote at the top of my reply because when I read it, well it seemed as if you were talking about ‘Party Foam’. Go to any Craft Store and ask for the Party Foam, there will be quite a selection to choose from. It comes in many colors, different sizes and you can even buy it in a bulk pack real cheap. It also comes in a few size thicknesses but I use the 1/8th inch thick version. Did I mention easy to cut, as well as paint?
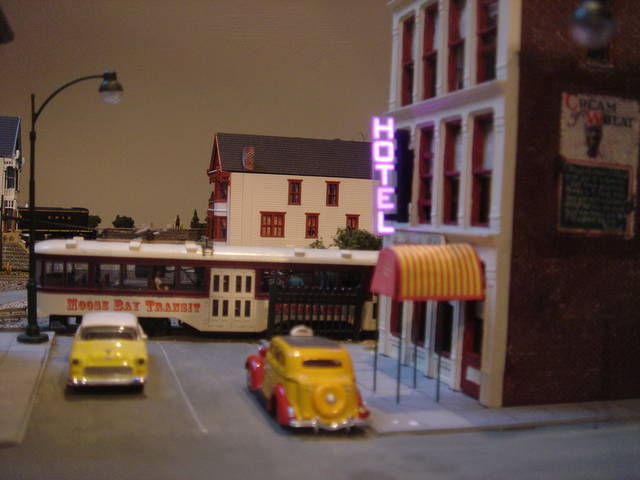
Here is what I do. My diorama’s come off the layout. The houses also come off the layout. I like to add some sort of foundation as well as the ability to ‘fine tune’ the house in terms of it being level. The foundations can be seen or not seen. IN this particular pic, you can see two faint imag
You can also tightly wrap the underside of your structure in kitchen plastic wrap, then press the entire structure down into a thin layer of wet plaster and/or ground cover and leave the structure in position until the plaster/ground cover dries. Once dry, remove the structure, remove the plastic wrap, then replace the structure into the shallow depression in the scenery. The structure foundation will look as though it is “in the ground” because it is! The overlap of the scenery depression around the structure base will also stop light from leaking under the structure.
And they will often give away misprinted or “typo” signs. A friend picked up an inch thick stack of plastic signs where the three color process had somehow gone bad during the run. I am still working off the supply he shared with me.
Dave Nelson


