Go with the super trees. The material is available longer, got some in a super box but don’t know of someone who sell just the bigger stuff, forget the name of the actual material is.
Walt, the trees on the left and the flowering shrubs alongside the company houses look the best, but the others aren’t bad either. The bushy one in the centre would likely look better if you were to snip of the taller portion on the left - it could be a smaller tree or shrub on its own - and then touch-up the spot where it was removed with a little more polyfibre and an application of ground foam.
You’ve captured the airy look quite nicely with the other two in the right background, but they’d look even better if you had similar but shorter ones in front of them or shorter bushier ones in front - that would hide the spindly trunks.
I usually try to hide my poorer efforts behind or among the good ones. After all, scenery, unless it’s really poorly done, is more noticeable by its absence than by its degree of perfection.
I have some fairly large areas to forest, but wouldn’t even attempt to make every tree a masterpiece. If the ones closest to the viewer are pretty good, the less good ones in the background probably aren’t even noticed by the majority of viewers, and even less so by the people running the trains.
I also notice, on my own layout, that the trees look okay when I’m running trains, but not so good when I view them in a photograph - it’s easy to spot the too-thin branches and trunks, or the limbs which have somehow poked through the fibre and the foam, etc. When I see such things, I sometimes make an effort to correct it, but a layout is a mistress greedy of our available time. I have places where I’m still laying track on bare plywood.[:-^][(-D]
Wayne
I was figuring on cutting off that bushy looking tall limb, and nipped it right after reading your comments. It looks a lot better without it.
Agree on having nicer trees out front to fill it out, but in this case there is very little room for trees behind the cabins- in fact I intentionally selected “armatures” that were very flat to get them to fit back there. I am sure I can do better but going to concentrate on construction of my phase 2 for now.
I like the Supertree and Supersage armatures for foreground trees but with a little practice I think your method will work nicely for areas of thick growth. So that’s my plan.
I know this thread is getting old, in fact it was one of the first threads that I started when I decided to build a layout three years ago. But I am pumped, and since this is where my tree-making journey started…
I spent the last few days making trees, and this afternoon started planting them in the newly constructed area of my layout. Take a look at the results.
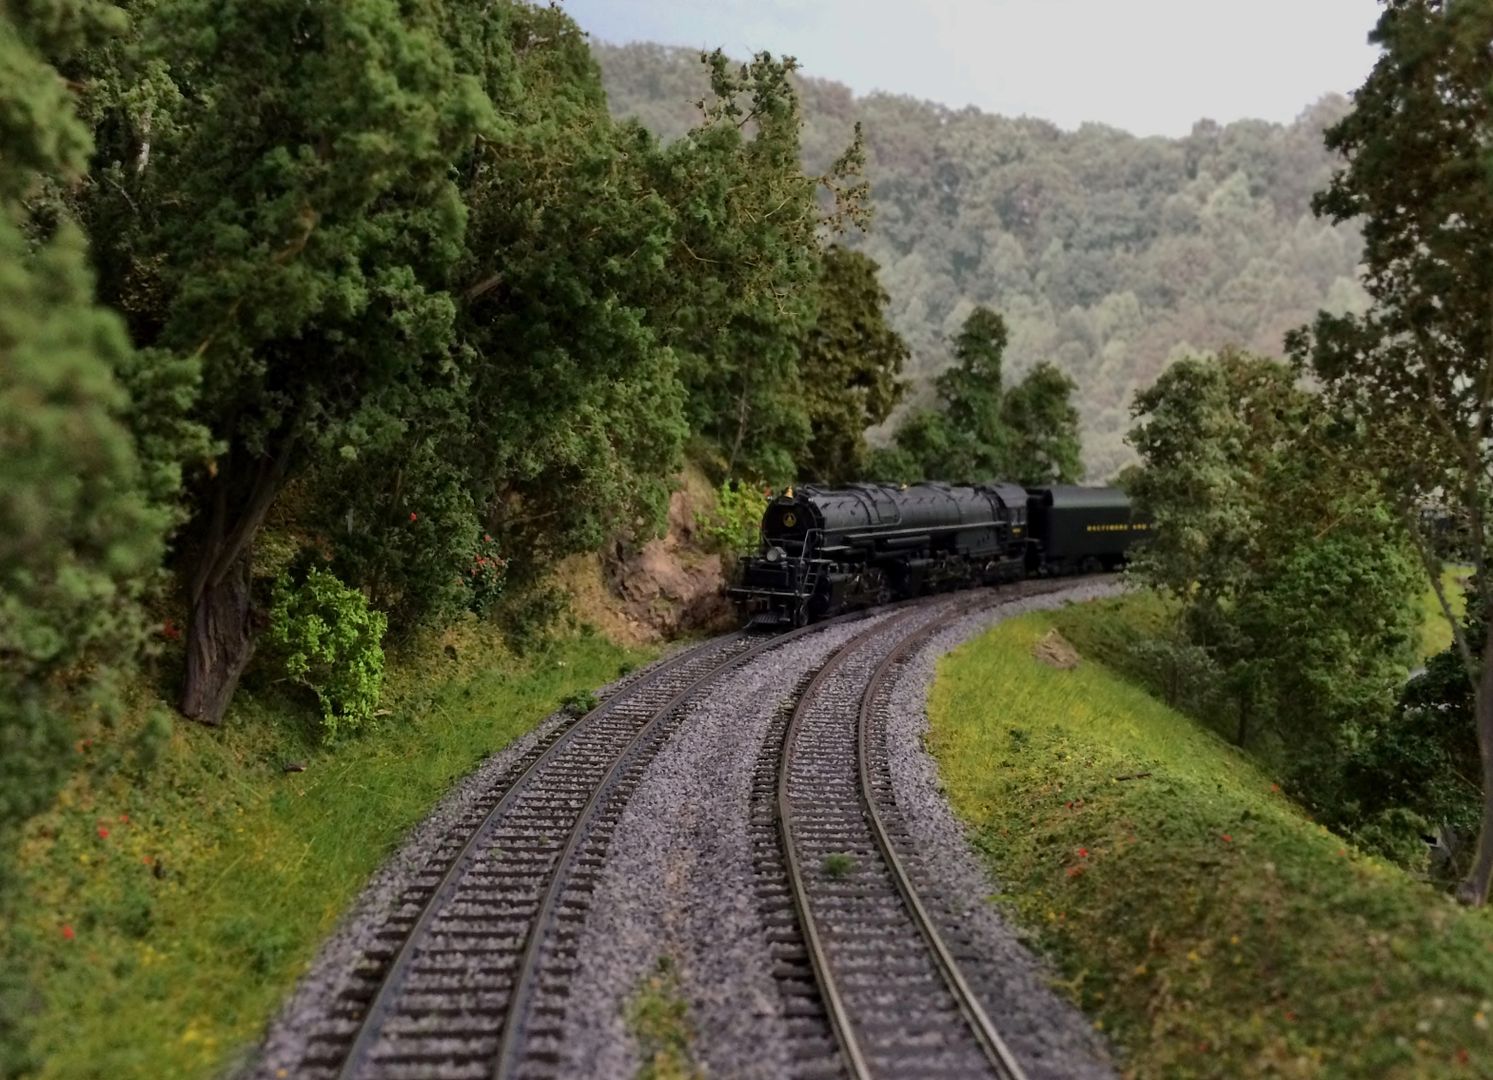
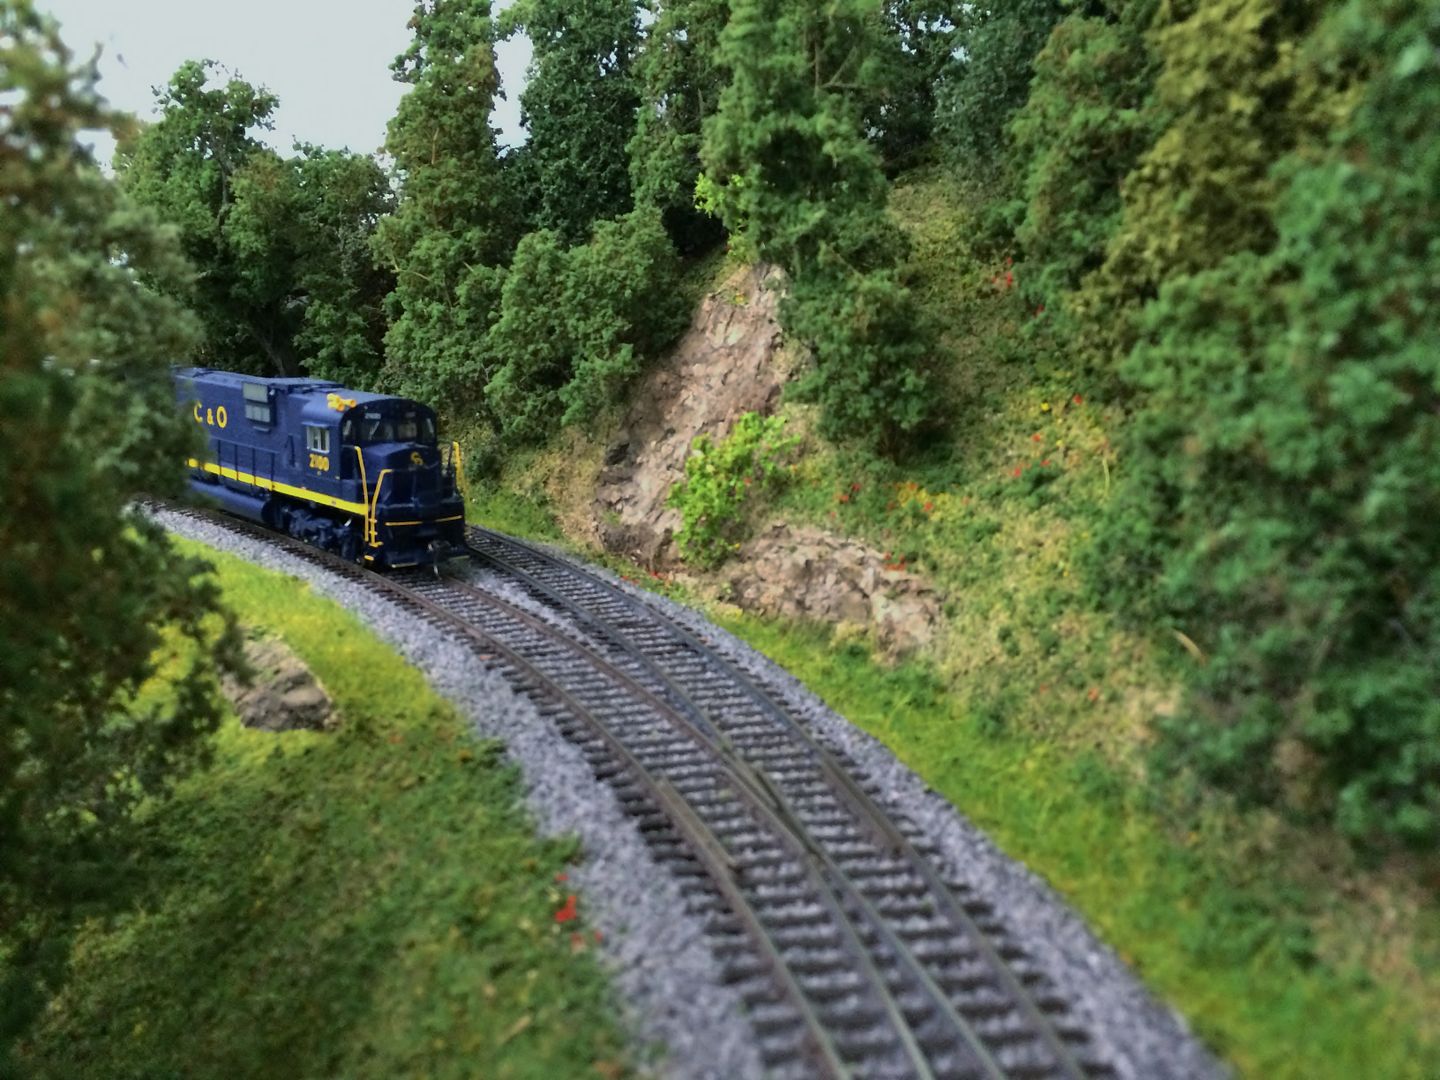
All of the trees in the pics were made with a 1/4 bushel of Supertrees (less than $30) and I only planted about half of them so far. I just had to take a break and get some pictures, and then of course I had to share.
It took a while and a good bit of experimenting, but I think I have a system for trees figured out [:D]
Looks like you’ve been pretty successful. Nice work.
When I started this thread I was a raw rookie. I had a couple of years to think about it since then, and also got to see how my original trees held up. So I was better prepared this time.
Actually all of the originals have held up just fine. The only trees that really want to shed a bunch if handled are the ones made with Noch leaf flock glued on with hairspray. I used a variety of gluing methods back then and this time went with the one that I think is most simple and easiest to control. My original Supertree starter kit came with two little plastic containers that look like they were intended for grocery store sub sandwiches. I thinned matte medium concentrate and filled one of them up, and one at a time, rolled a tree in the matte medium to soak the branches in the glue but avoided getting it on the trunk. Then I flocked the tree and went on to the next. After the trees dried completely I sealed the the flock with hairspray like I did before.
Of all the flocking materials I tried three years ago the regular old (grass) green foam was the easiest to work with and most versatile. So I bought a bunch of that for the base color of my “forest”, and then some Noch tree flake in green, dark green and olive to add variety. And also some of the new Superleaf flock to try out. This time I paid a lot of attention to each tree shape and the branching density when selecting the flock to use. I only used the Noch flake on trees that were very full and would not show much branching or trunk. Rounded trees all got the olive color. I used Superleaf on trees that were full but would show some branching or trunk. Over half of the trees still got the foam, but I varied how much I put on to make some very dense and some very delicate depending on how the armature looked.
Overall these trees look better and make much more sense than my first effort- there is still variety, but a pattern to it all.
I
Very nice looking results, Walt. [tup][tup]
Wayne
Walt:
The trees look really ‘natural’ which is often not the case with HO scale trees IMHO.
Well done!
Dave
Walt, have you tried using any azelea cuttings for armatures? Am getting ready to trim a couple and wondered if saving cuttings would be worth the time for model trees. I am at the stage you must have been a couple of years ago. I am also looking at using goldenrod as there is a lot growing about a block from my house and is dried out now. Have seen articles on making goldenrod trees before and think it is cheap, available and worth a try.
Jim
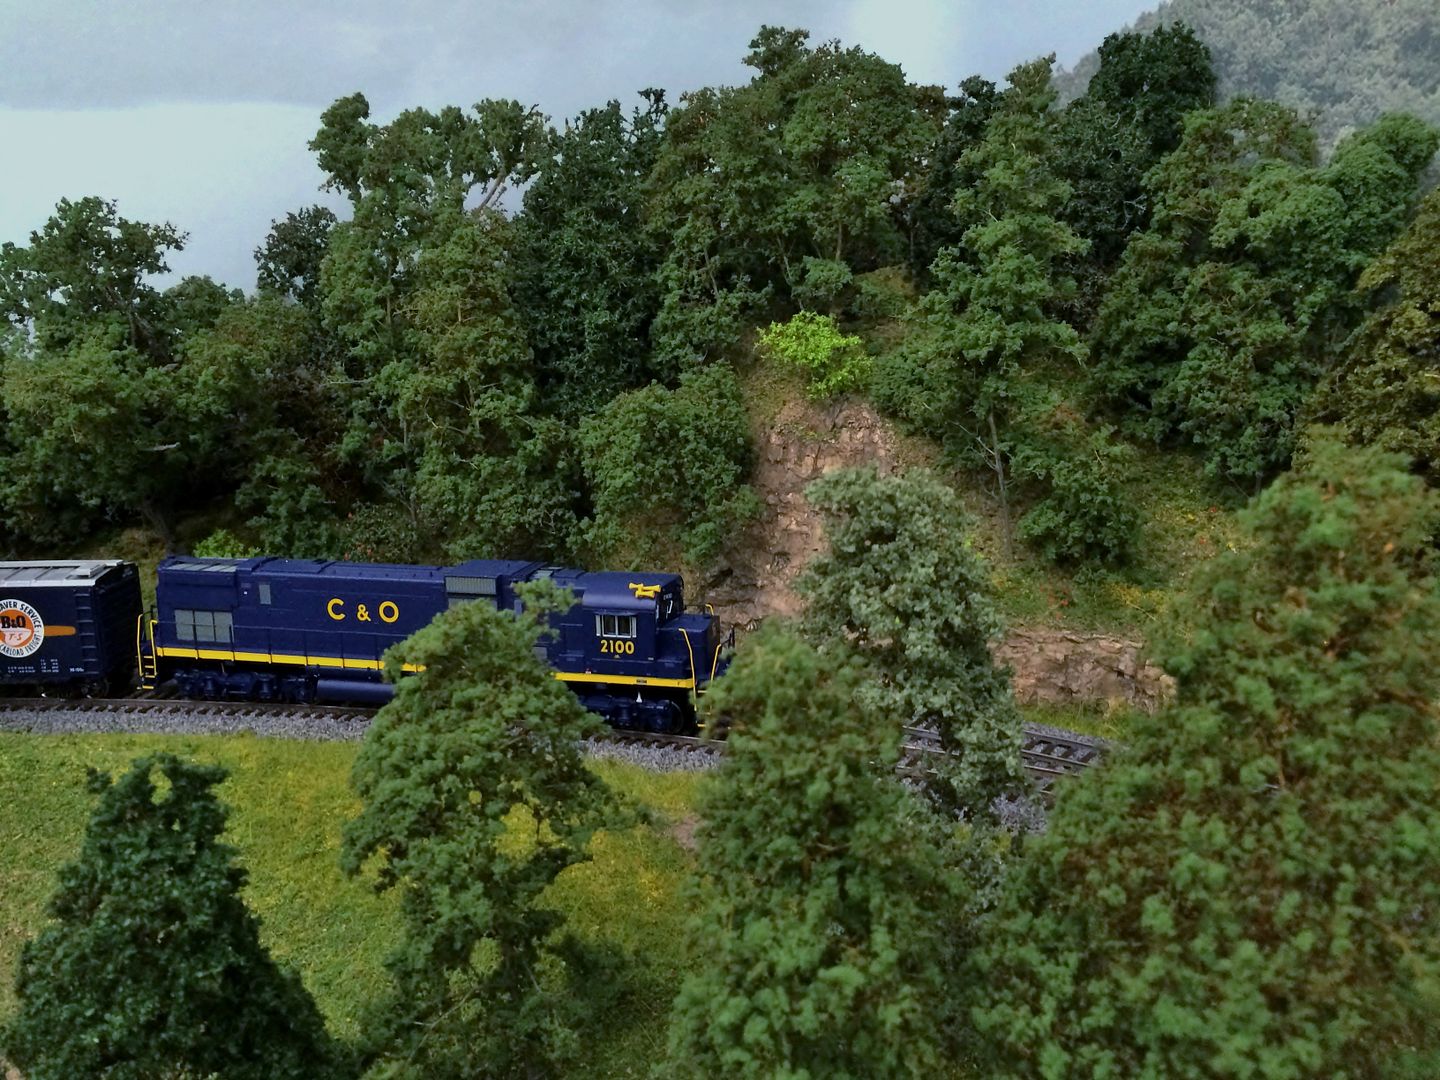
Jim, I really didn’t get to play around much more with the azalea cuttings. I think it is possible but it would be hard to get a bunch of trees that look as good as the supertrees, and modeling Appalachia I need a lot of trees. So I pretty much shelved the idea.
The branching is a bit odd since azaleas tend to branch out in several directions all in one spot. And you need to use fiber like Wayne does, or 3M spray glue, or something else to build them up. That said, I had two that were good enough to sneak into the background, and one is quite visible in the diesel side-view pic if you know where to look.
Playing around I did find other uses for Wayne’s fiber method- using it to make pretty good looking ivy and other odd plant growths.
Just to add some possibilities to your list. Sedum also makes good tree armatures. Once the flower dies in the fall they can be cut off and dried. Some folks leave them until the flowers fall off, others leave the flowers on. They can give you quite a tall tree. I planted a few several years ago and haven’t come close to using all the armatures they have produced.
If you have a neighbor with these they may not have cut them off yet, so ask around. They do need to be cut off annually.
Good luck,
Richard
Since moving to TN from GA, I moved my Nandina bushes with me. They make superb tree armatures, after the red berries fall off. You just have to remove the tiny ends that look like bulbs, then you’re good to go. I’ve used them naturally and have painted a few of the trunks a light grey to mimic ash trees. I really love all your (every post) posts in this section and it has given me more insight into making trees than any other post I’ve encountered on the inter-web. Continue your good work and keep us posted.
Nandina grows kind of wild around here though it is usually pretty scraggly. I never thought of trying it for tree armatures. I am going to have to do some looking around to see what I have and experiment with it.