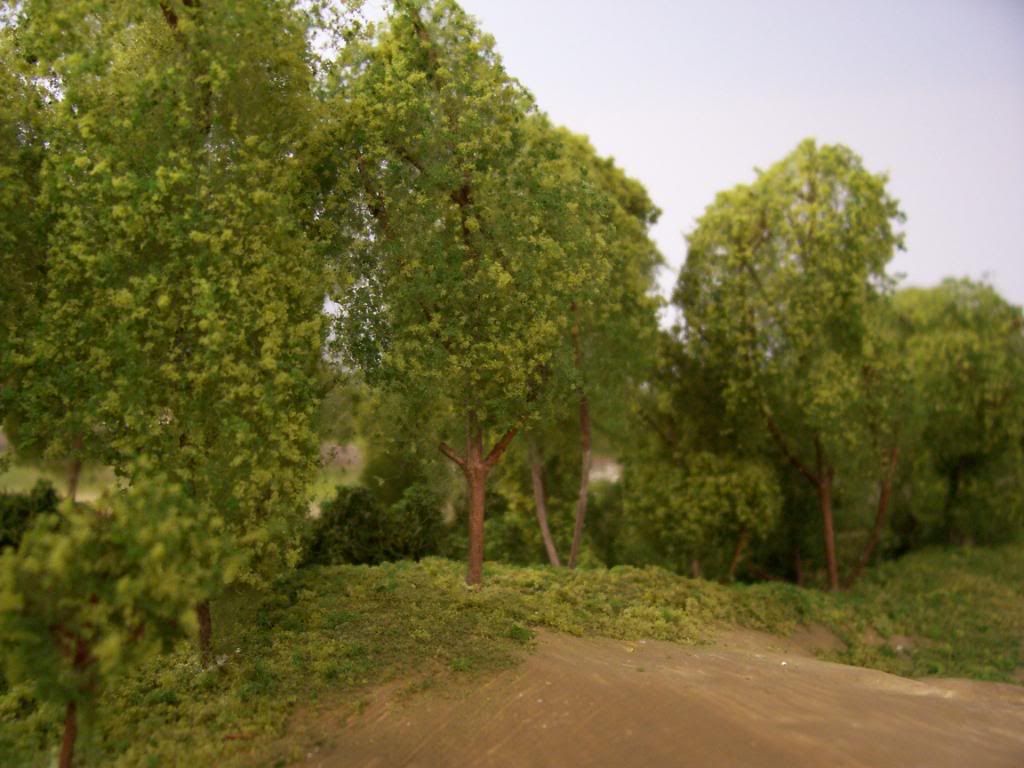
I am still playing around with scenery techniques on my test board while working on the layout grading and I bought a Scenic Express super tree kit to try out. It comes with about 15 “natural armatures” and quite a variety of different flocking materials- enough to do a whole bunch more than the 15 trees that come with the kit.
I selected four of the most ragged-looking to try out using different glues and flocks suggested by web links and videos. The one to the far left was done similar to the instructions using the supplied matte medium glue. The one in the center was done with 3M spray adhesive. And the ones to the right and the rear were done with hairspray. I also made a few bushes from scraps using both scenic cement and hairspray (my wife really likes the berry bushes.)
All adhesives seem to work fine, with the hairspray producing the most “delicate” trees. And the 3M adhesive produces a fuller tree and is much quicker to do. So, here’s the question- are there any advantages or disadvantages to the different adhesives long-term, or is it just a matter of taste? I would hate to have “leaves” falling off or turning an un-natural color a few months or years down the road.
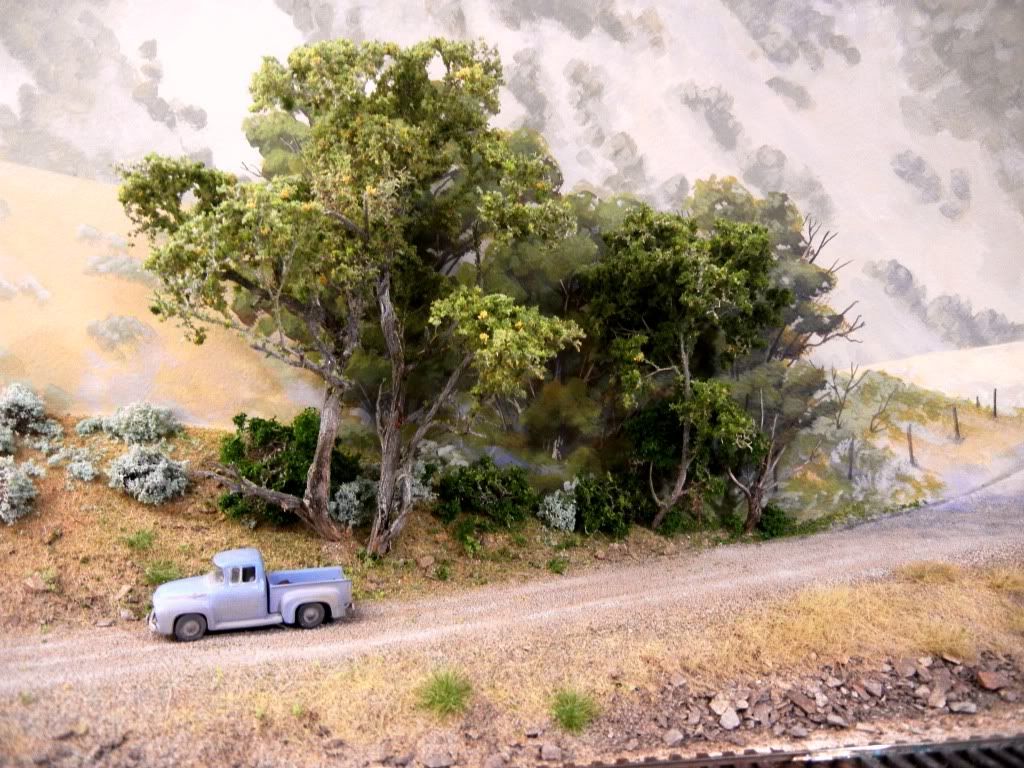
I think the biggest downside to the super-trees is that they are all about the same shape and size, and the 7" max height only scales to about 50’ in HO which is too low for virgin forest. Need to think about how to get the same effect cheaply and easily (because I am going to need a whole lot of trees!) but end up with some that are taller and with more variation. The pre-made WS trees like toward the far right are too costly, and though the shape is kind of nice they really don’t have a lot of detail.
When I first learned how to make the furnace filter trees about seven years ago, the instructions printed here were to spray first with the 3M product, sprinkle the ground foam, and then spray the ground foam with the hair spray. I have quite a few trees done that way, and they have all kept their foliage.
Yes I hit the 3M tree with hairspray after it set, also did the same for the trees that the foliage was applied with the hairspray. I sprayed the matte medium tree with more of the glue per the instructions, but didn’t put any hairspray on it.
Will the hairspray seal better, or the matte medium, or really no difference to be concerned about? The Scenic Express instructions specifically say not to use hairspray. But then I am sure they want to sell more glue, so I tend to take this sort of message with a grain of salt unless I hear otherwise from those that have experience.
I did soak all of structures in diluted glue per the instructions and let them dry before painting the trunks and applying foliage. That did make sense to me.
Hairspray CAN fail over time, but not always. Of the adhesives commonly used for making model trees, I’ve seen and experienced hairspray failing most often. I haven’t seen it causing discoloration, but it can become brittle and lose its grip. After all, it wasn’t formulated to be permanent. Something like 3M Super 77 has serious durability. Matte medium is somewhere in between.
These trees were built from Supertree armatures glued to sagebrush trunks, and the leaves are attached with Super 77.
You mentioned the lack of height variety using the tree making kit. I walk the road I live on out here in cow country, and find many suitable armature-type materials. Sage is good, and grows several feet tall. There are several others that I don’t know the name of as well. I have also used cuttings from my privet shrubs in the yard. I have seen modelers use the heads from yarrow, a tall shrub-like flower. The point I guess is the height variety that you can achieve from looking for materials out in nature.
The row of trees along the backdrop are all made with natural cuttings from my surroundings, except for the conifers, with are Woodland Scenics and Grand Central Gems. I use diluted white glue or hairspray to attach the ground foam to the armatures, and sometimes use poly fiber to bulk-up the shape first.
Those are about the most realistic trees I’ve ever seen. As for the gray shrubs to the left of the trees, did you make those as well, as if so, what materials did you use?
The model sagebrush are made from 3M synthetic steel wool (a coarse gray scrub pad material). It’s pulled into small pieces, coated with Super 77 adhesive, and covered with ground foam. I like AMSI “Eucalyptus” and Accurail’s “Sagebrush” colors.
Synthetic steel wool can be used for all kinds of shrubbery. I used it for many of the shrubs in this scene.
I just finished making some 350 Scenic Express Super Trees from a $100 crate of Super Trees. I used sage for the trunks of close-up trees. I used various brands of cans of spray adhesive. After three years, the trees that I had made previously are still intact. There are oodles of Threads on Super tree construction on the Internet. I also made many trees using furnace filters, with stained wooden skewers for trunks. I change the foliage color for Summer and for Fall, and Winter on various parts of my 24’x24’ (around the room) HO layout. When unpacking the Super Trees from the clear plastic crate, I pour out the entire crate. The Super trees are radially placed in the crate, so with the bottom on top, one can remove the trees intact, with no damage to the brittle trees. I,personally, prefer Super Trees to Puff ball trees, for realistic appearance. Bob Hahn
After using a variety of adhesives for making trees. I finally tried Woodland Scenics Hob-E-Tac, and really like it. You just brush it on the branches, let it sit for about 10 minutes, then dunk it into the flock, or if you prefer, use it to hold their Poly Fiber in place.
Wow, lots of really great looking trees using a variety of methods!
Yes there are a lot of links on the internet, some very amateur and some way too time consuming for a heavily wooded area. Suggestions here are much more in line with what I am looking for. Interesting that nobody is really recommending using the matte medium for the foliage even though Scenic Express really pushes it.
I was thinking of trying azalea branches as armatures. No lack of those here on my property (Augusta GA.) and some of the smaller varieties have a lot of branching near the tips. Based on what you guys are saying its worth a shot.
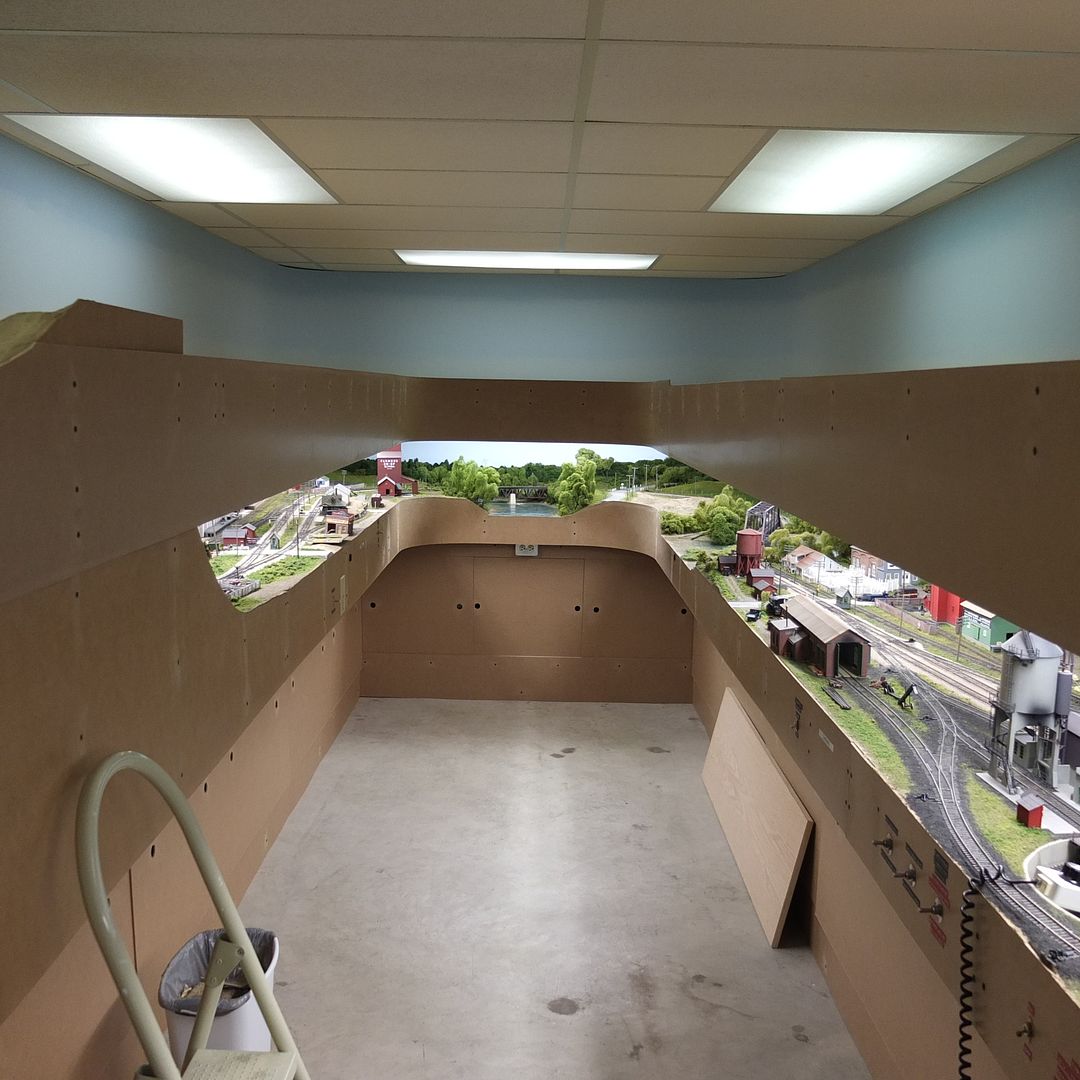
Funny you just posted on this old thread. I took a break from model railroading over a year ago and just got back to working on the layout the last few weeks. Not much new progress to report (though it has come a long, long way since this thread was started- this thread is OLD!)
You are right, I’ve lived in the Augusta area for 25+ years now and my layout is the only one I’ve ever seen around here. No clubs or local support, but that’s OK. I’ve always done what I want to do how I want to do it anyway.
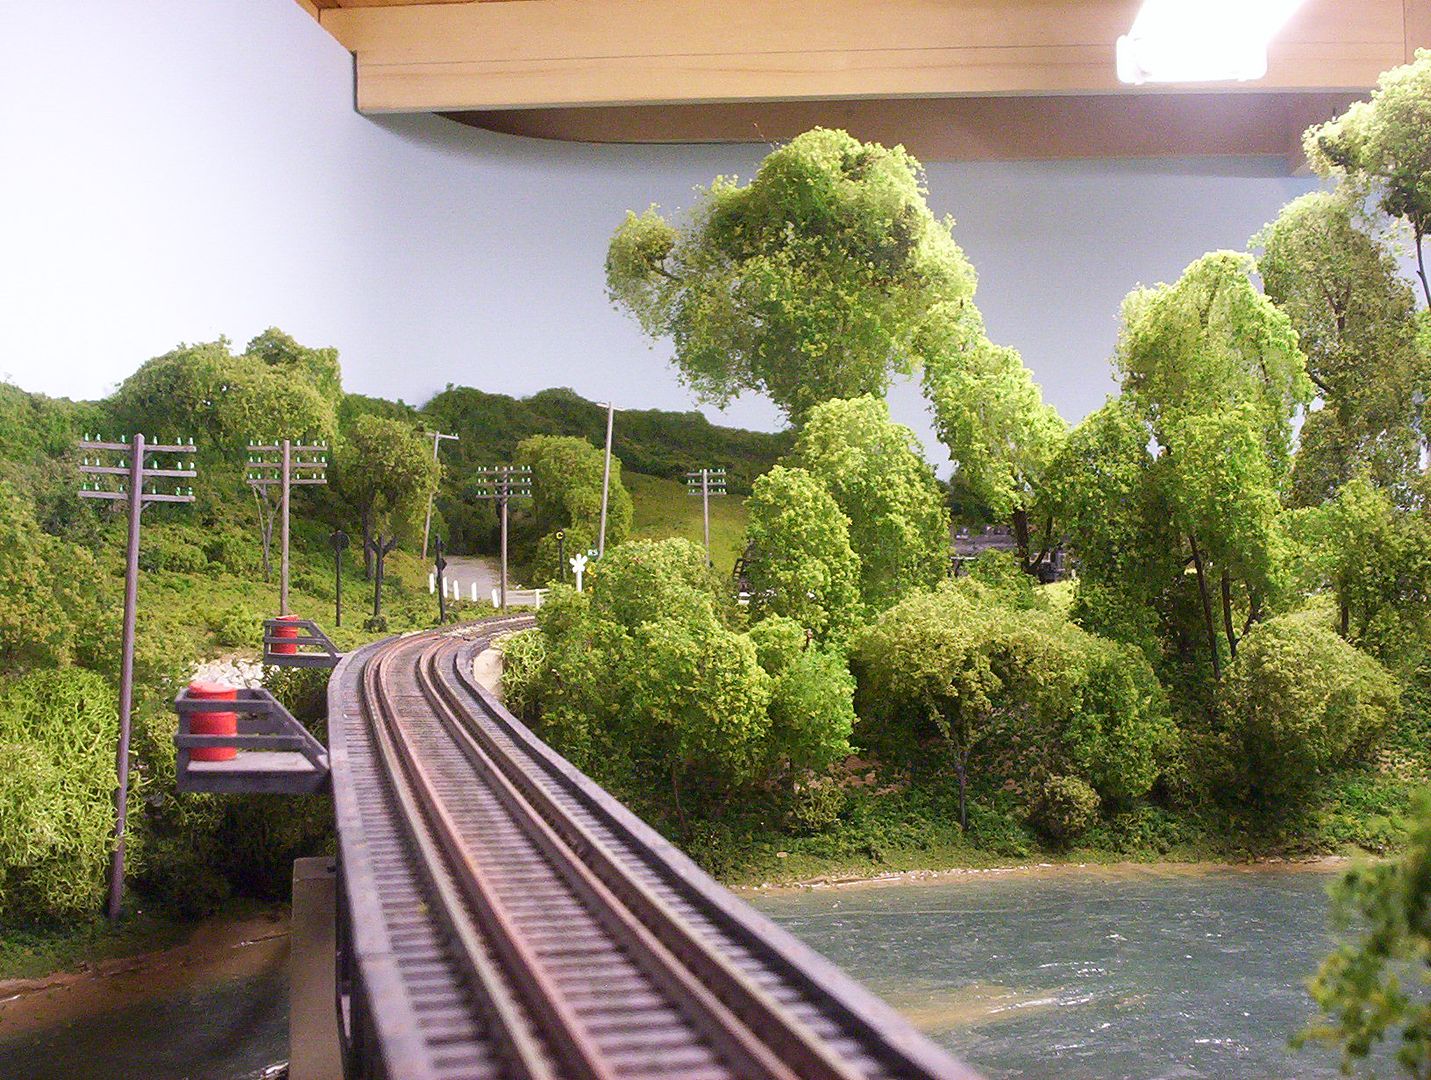
I don’t yet have very many trees on my layout, but most are natural armatures with polyfibre stretched over them. I then spray them with hairspray from a pump-type sprayer and sprinkle on some ground foam, repeating the spray and sprinkle operation until I get the shape and colours I want. I also use lichen as underbrush, sometimes with ground foam added or, where it’s just filler between the other stuff, unaltered. Here are a few:
These background evergreens are bottlebrush Christmas trees. I trimmed them somewhat to break-up their too-regular shape, then stretched a little polyfibre over them, gave them a few spritzes of hairspay and sprinkled on some ground foam:
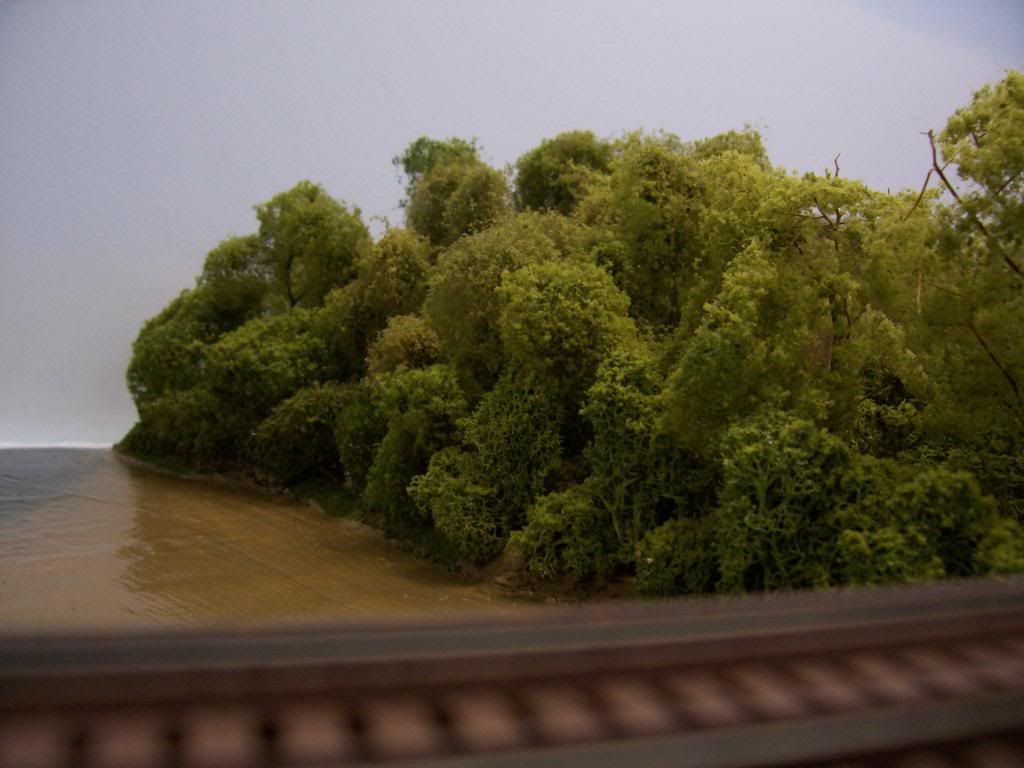
These scrub trees and bushes grow alongside a small creek, almost obscuring it from passing trains (and their operators):
Wayne, just like the rest of your work your trees are outstanding. I also really like the way you are able to get a great looking “dense woods” effect.
What do you mean by “natural armatures”?
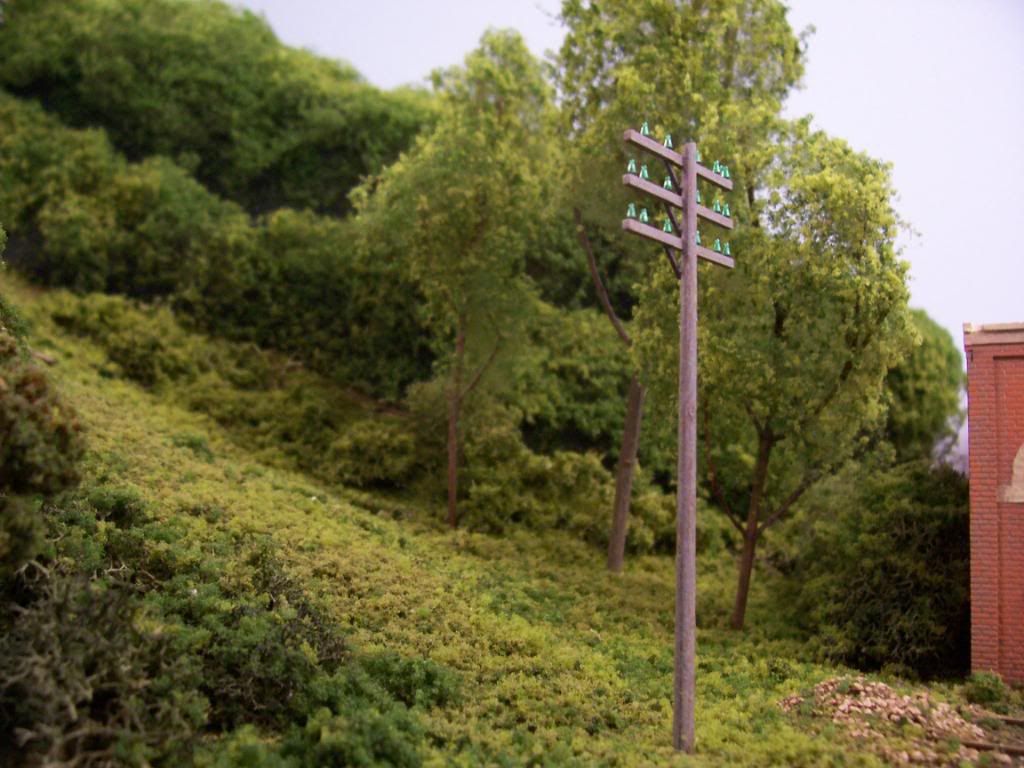
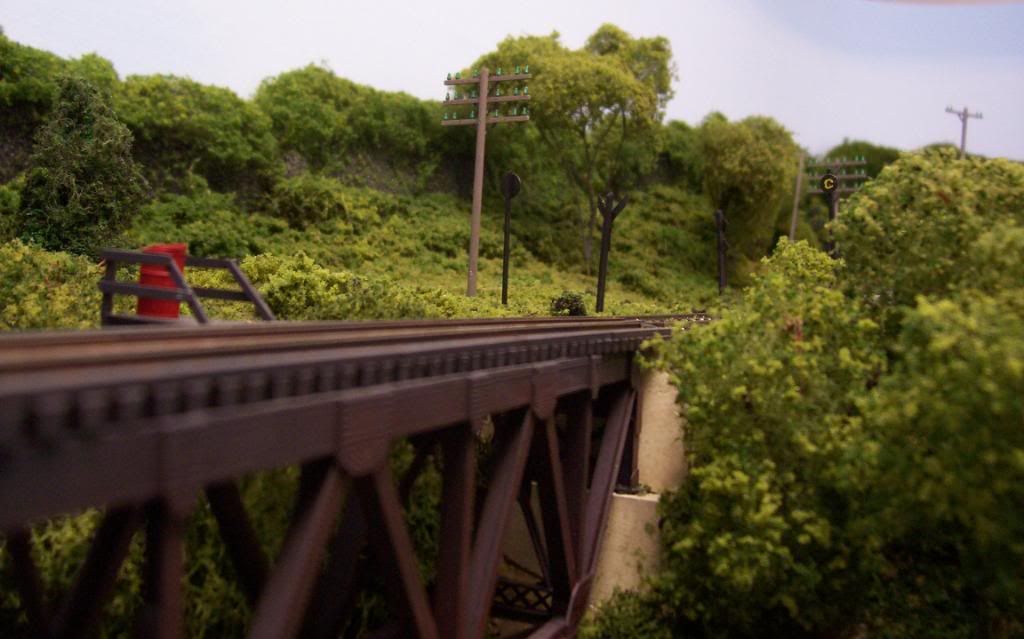
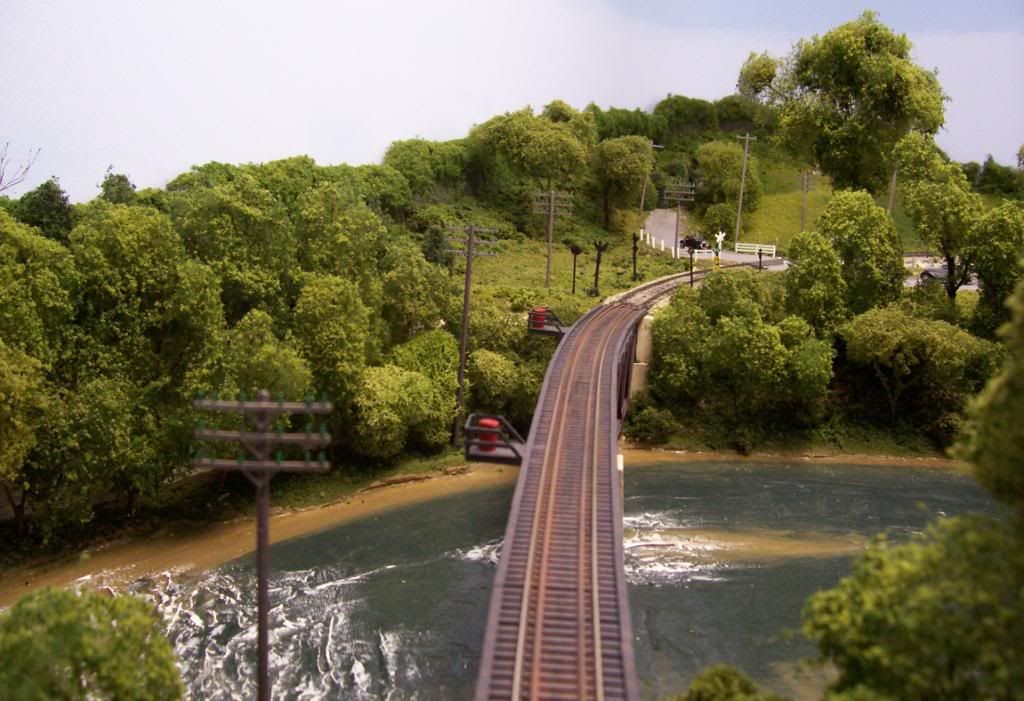
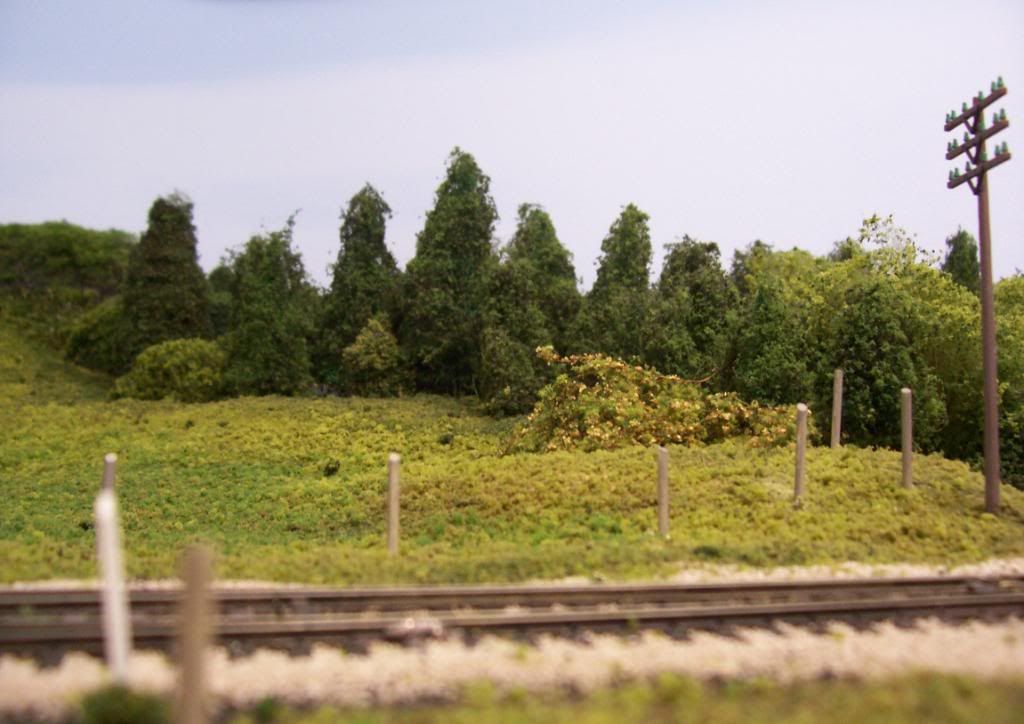
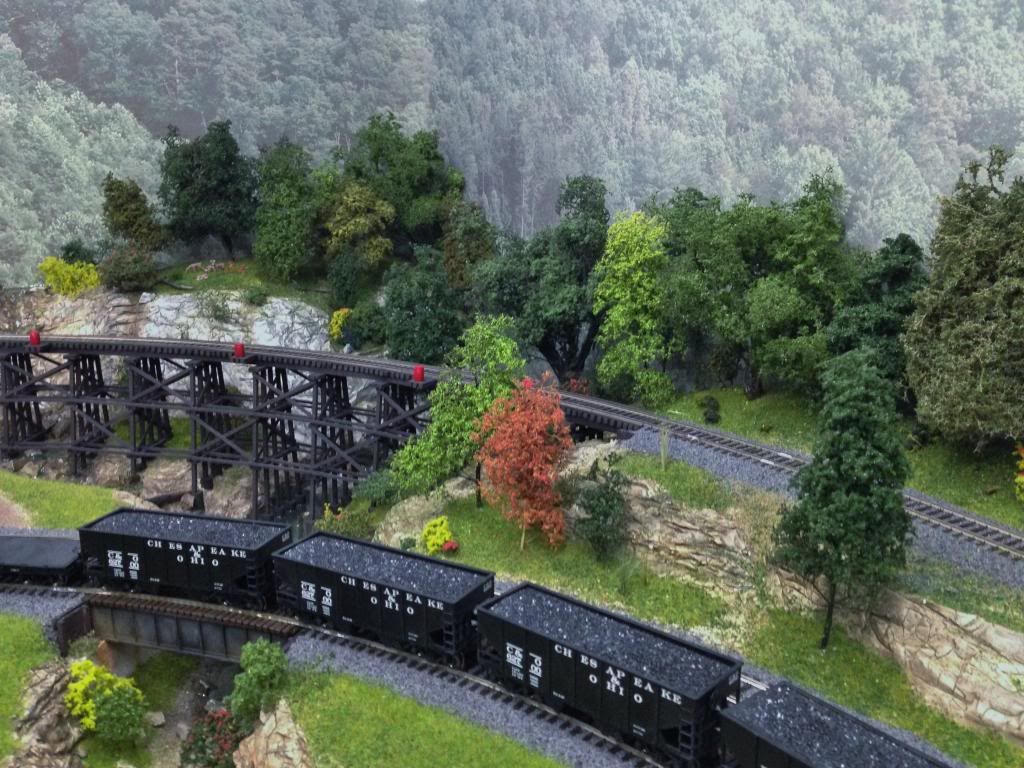
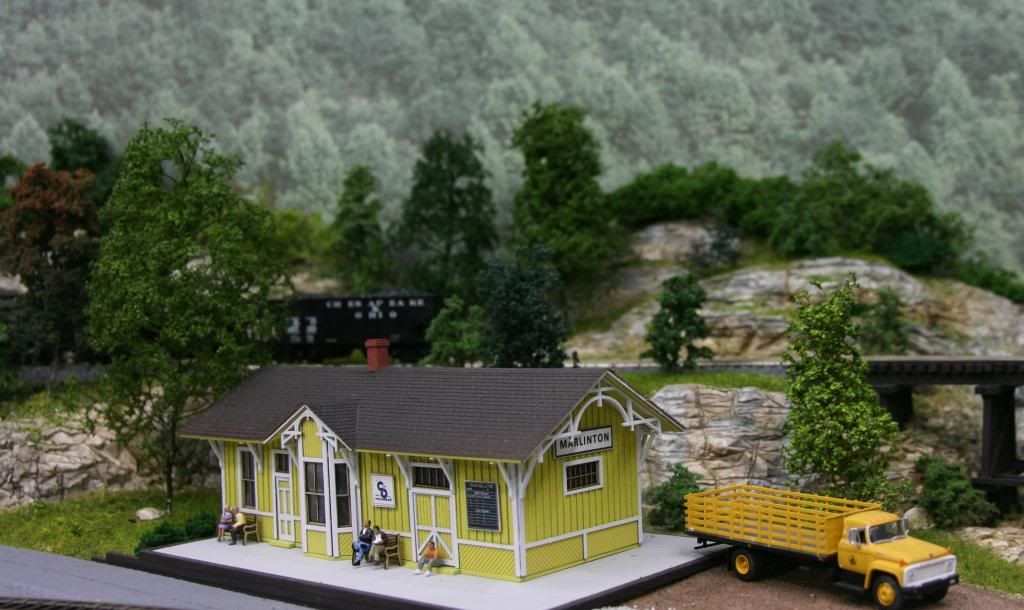
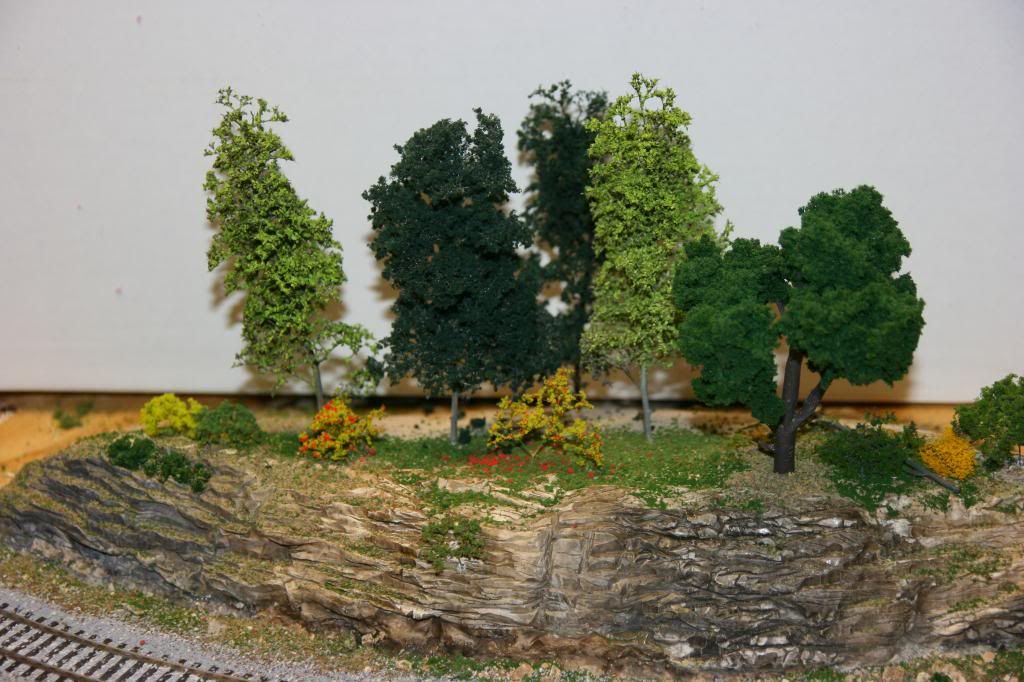
For those relatively new to the site here are some pics that I posted long after first starting this thread. All were made with Supertrees experimenting with a variety of gluing techniques. This is the only area of my layout that I consider fully “detailed”- and not much has changed since then except the rails have been painted. I am happy with the way it turned out but want to get a more “dense woods” look for other areas.
It will be a while before I get back to making trees. Right now I am concentrating on terraforming and installing a ME viaduct that I just finished building for phase 2 of my layout. Foam is flying and plaster is drying [:D]
Other than the bottle-brush Christmas trees, all of the trees were made using natural weeds and twigs as the armatures, but I’m afraid that I’m unable to name any of them. I use twigs, mostly from bushes growing wild, and weed stems. If you look at real trees, you’ll notice that many have shapes peculiar to their species, and often colours specific to either the species or the time of year. It’s not really necessary to know the type of tree, only that you find something in a scaled-down size which ressembles that shape or can be trimmed to that shape. Trimming includes shaping its silhouette and/or removing excess branches from its interior.
Goldenrod, with the leaves and other non-scale stuff cleaned off, makes a good support system for the interior of a forested area, but the stems are a little scrawny for the edge of it.
To make fatter trunks using just about any type of weed stems, I use multiple stems and combine them using florists’ tape, available in most craft stores. It comes in several colours, but I use dark brown, then paint the wrapped trunk dark grey. The tape is somewhat stretchy and sticky, but I usually add a drop of white glue to secure the free end. The last photo, with the cows in the shade, shows a tree built-up in this manner.
I think that polyfibre has been one of the biggest boons for tree-making, as it saves having to do a lot of work on the armature (unless you’re building foreground trees which will be under more scrutiny). On many examples I’ve seen, however, the fibre isn’t stretched thin enough, with the result that the shape of the trees appears too well-defined. You can get away with that in a large expanse of forest, or on distant trees, but if the trees near the viewer are done with a little extra care, it will give an impression that the whole scene is of similar quality.
After trimming a bunc
The problem with hairspray is you have to use the right amout to seal it. When you seal it, it will looked sealed but will flake off after a year or two unless you really soak it. You see a light seal will hold for awhile, just like hair but you need a more permanent seal.
There are more permanent methods of attaching foliage, but the hairspray seems quite durable and is certainly easy to do.
Many older layouts begin to look tired because dust accumulates on it over the years. Trains and structures can be cleaned, but trees not very easily. In some cases, though, they can be refreshed with a few careful spritzes of hairspray and a light dusting of ground foam.
My layout has been around for a while (I don’t recall when it was started, but it would have been some time in the early '90s), but it is in its own mostly-finished room, so dust isn’t a major problem. I do vacuum it, track, structures, trains, etc., every year or two, but details like vehicles and small scenic items are removed for that (none are glued in place, as I like to alter things periodically to keep it “fresh”). Trees, of course, are not removeable and they’re too fragile for vacuuming, but they’ve been in place for at least 7 years, and look the same as seen in the photos.
I’m currently working on a partial second level over the area where most of the trees are located, and while it does create some dust, I often vacuum while working and always when the day’s work is done. Here’s a photo taken recently on what is now the lower level:
…and an overview of part of the room:
The lower level is operated from a rolling office chair, and the deep upper fascia controls the viewing angle so that only the layout is visible, none of the support structure for the upper deck.
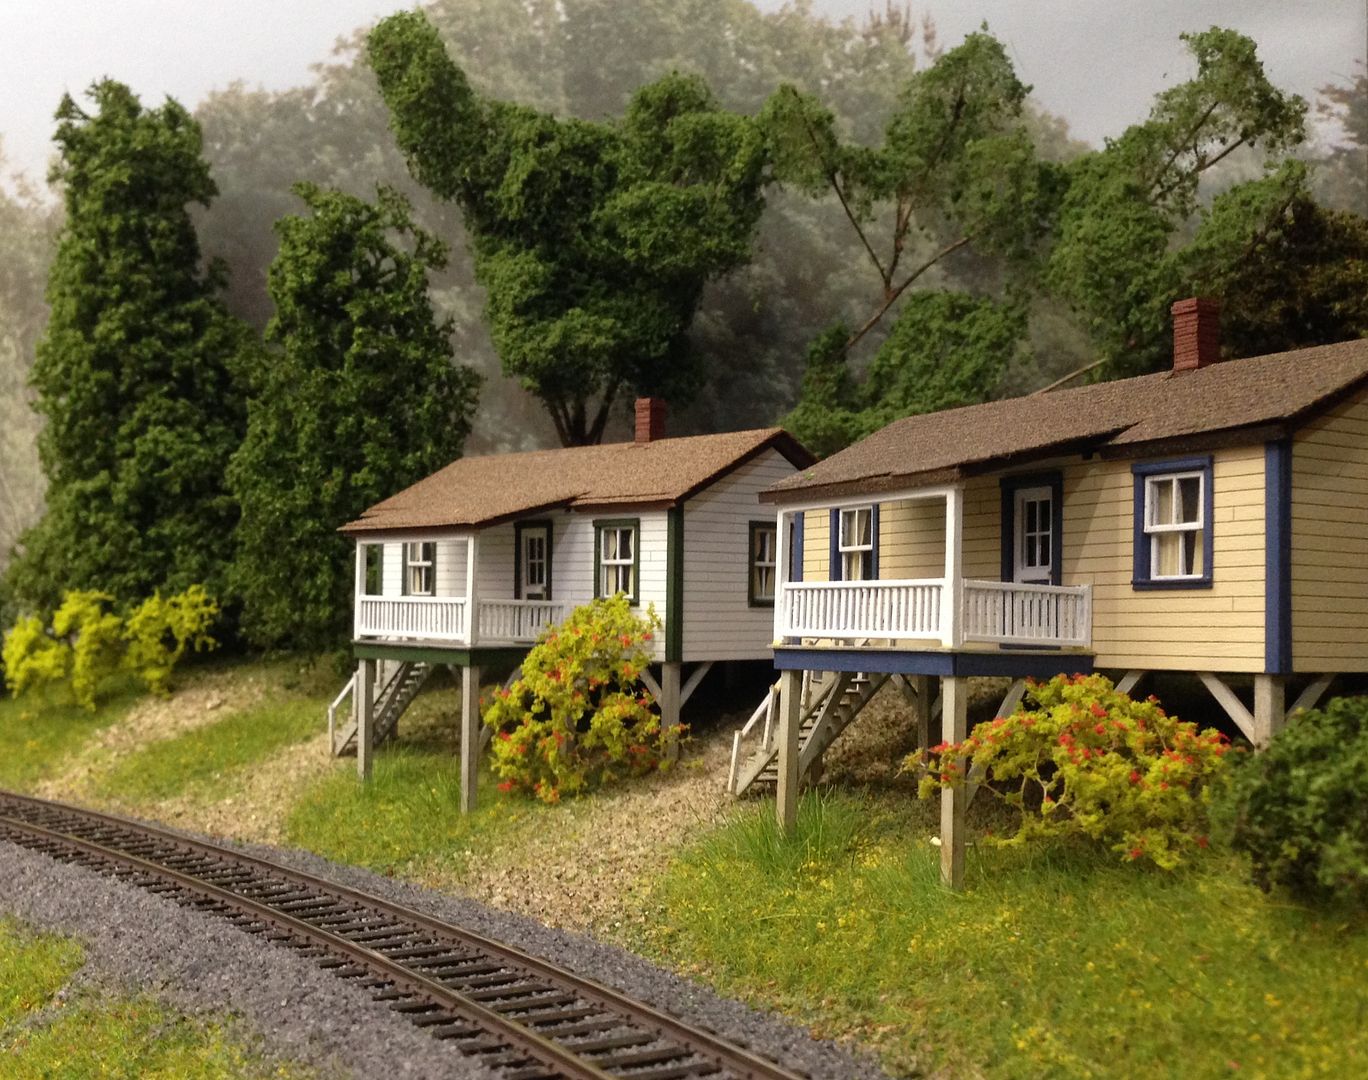
OK Wayne, I gave your method a quick try this evening- polyfiber over dead azalea twigs then flocked using hairspray. I didn’t get fancy or spend much time on it, just grabbed what was handy in the shop and made two trees. Then populated all the bushes and trees around the two cabins that I finished just before taking “time off”. I had already made a bunch, just never planted them after finishing the groundwork and painting the track rails.
The polyfiber definitely helps promote thick “growth” using readily available materials, but like anything else it seems like it will take some practice. I tried one azalea armature with tight “branches” and then one with more delicate, spreading branches. It was easy to get a bunch of green (tree behind the left cabin) but controlling the polyfiber to get a good effect on the delicate tree (to the right of it) so that the branching shows was a bit more tricky. The two trees to the far left and all the bushes were made using Supertree material. As far as I am concerned this scene is complete for now.
But take a look- any suggestions for improving technique on the trees? I am definitely going to work on it and make a bunch more this way.


