My small HO scale layout. From time to time I’ll drop photos in here to share showing the progress. Just for fun. Hope you enjoy. Eric.
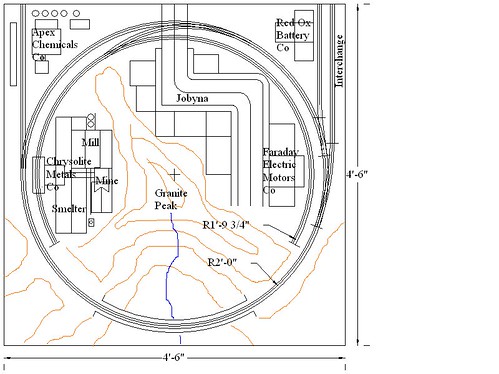
First, here is the track plan drawn with Turbocad v7.1.
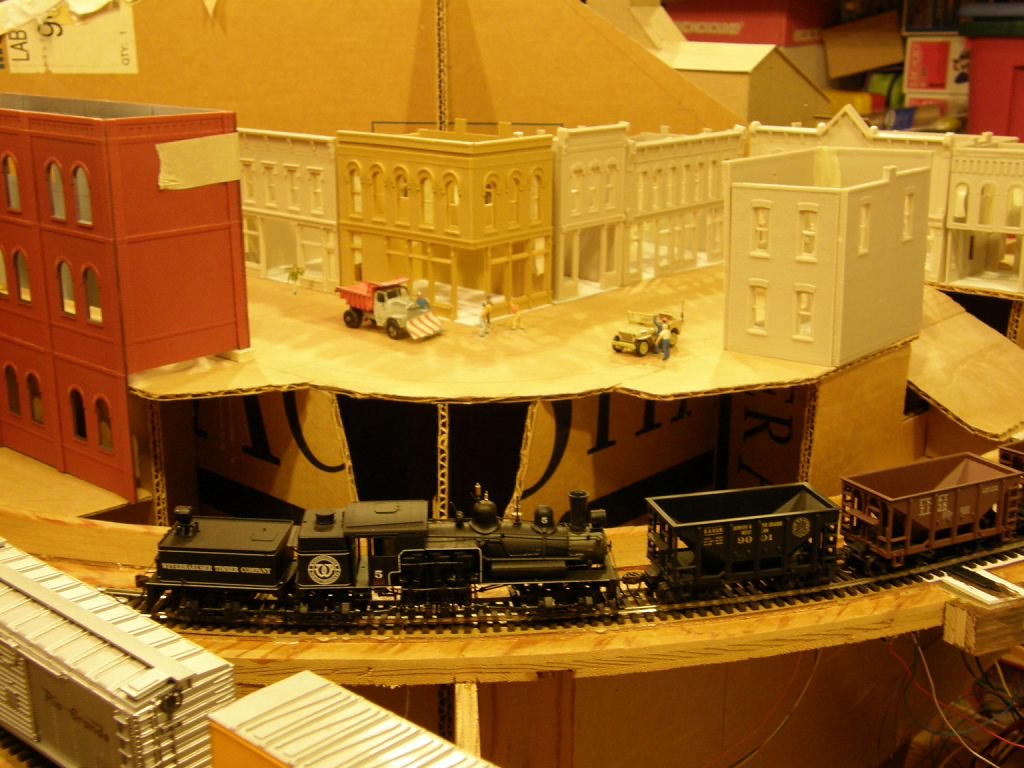
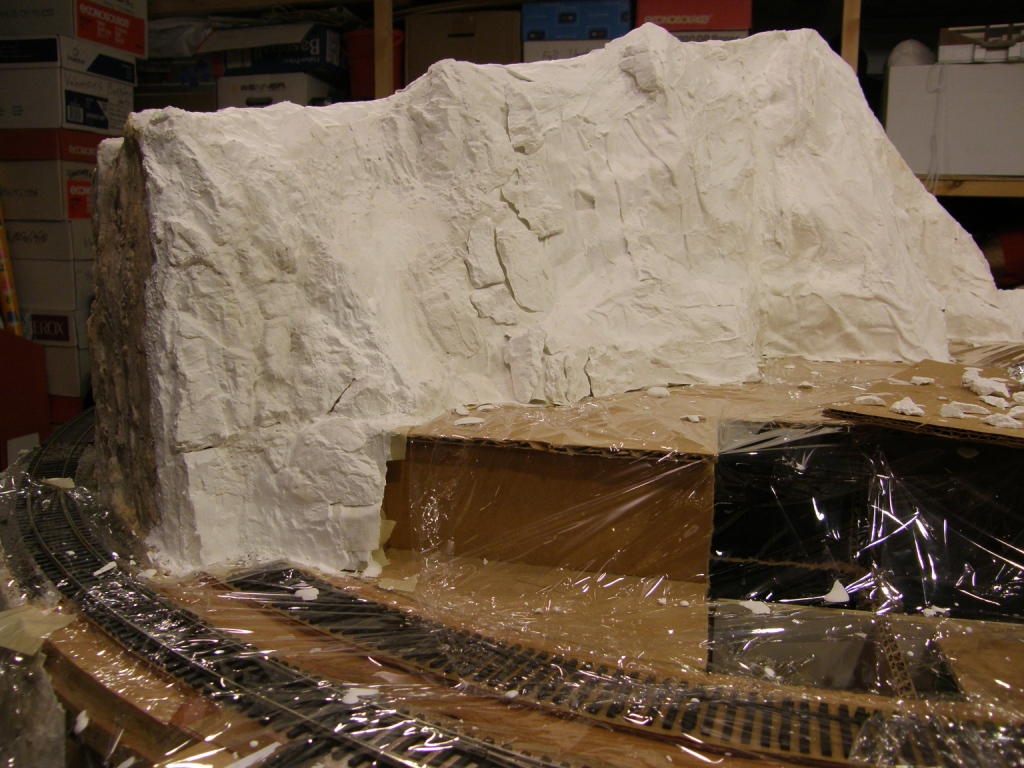
The plan features three scenes on a single 24" radius circle, a bridge scene, a city scene, and a mining/industrial scene. The mountain in the middle separates the scenes so you don’t notice too much that the track is just a circle. The era is steam, 1920s to 40s.
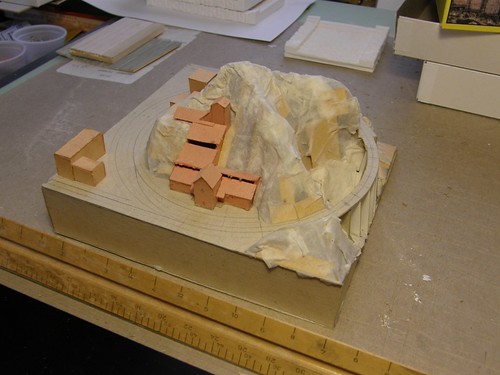
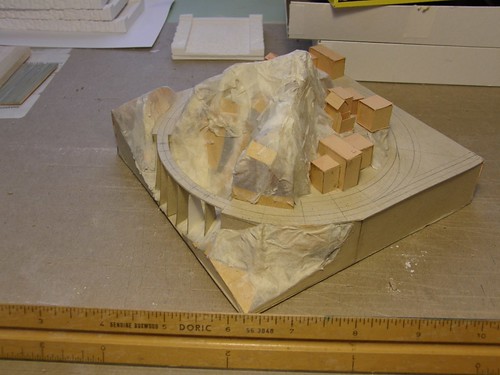
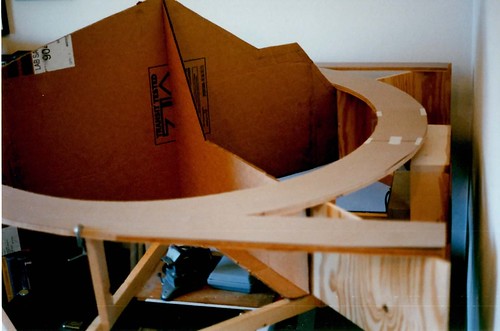
The first thing I built was a model of the model, years ago. The scale of the model is 1-1/2" = 1’. This version is 4’ x 4’ with the main radius at 21".
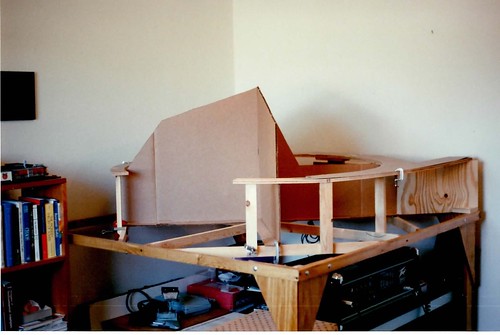
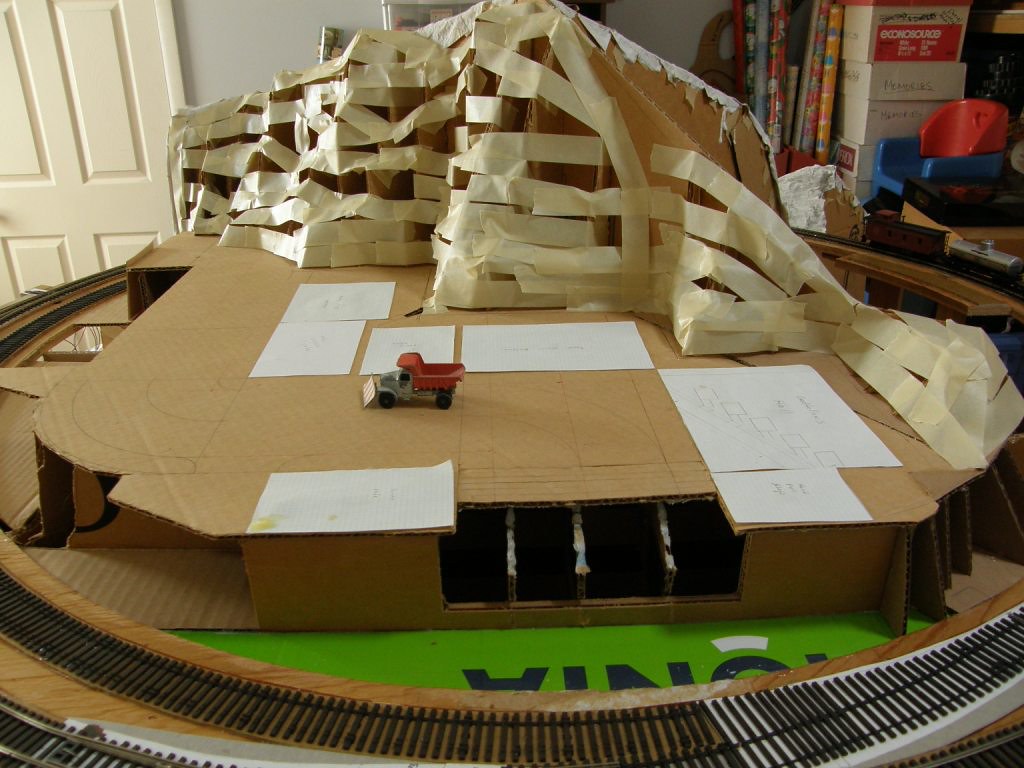
Here are a couple of the early photos showing the benchwork. I wanted this to be light weight and portable. Much of the layout is supported by lots of cardboard. Like a very heavy duty box. Took these a long time ago in the late 1990s (BDC before digital cameras). I have been working on this very slowly for some time. Too many other things going on, cars, kids, trips, work on the house…
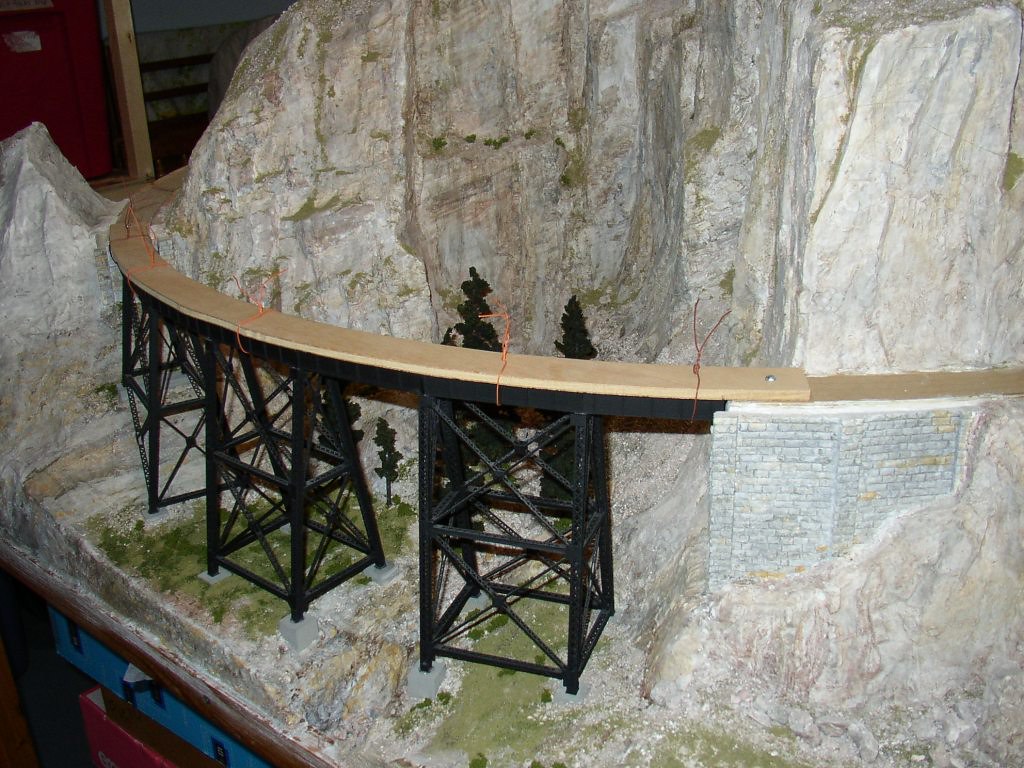
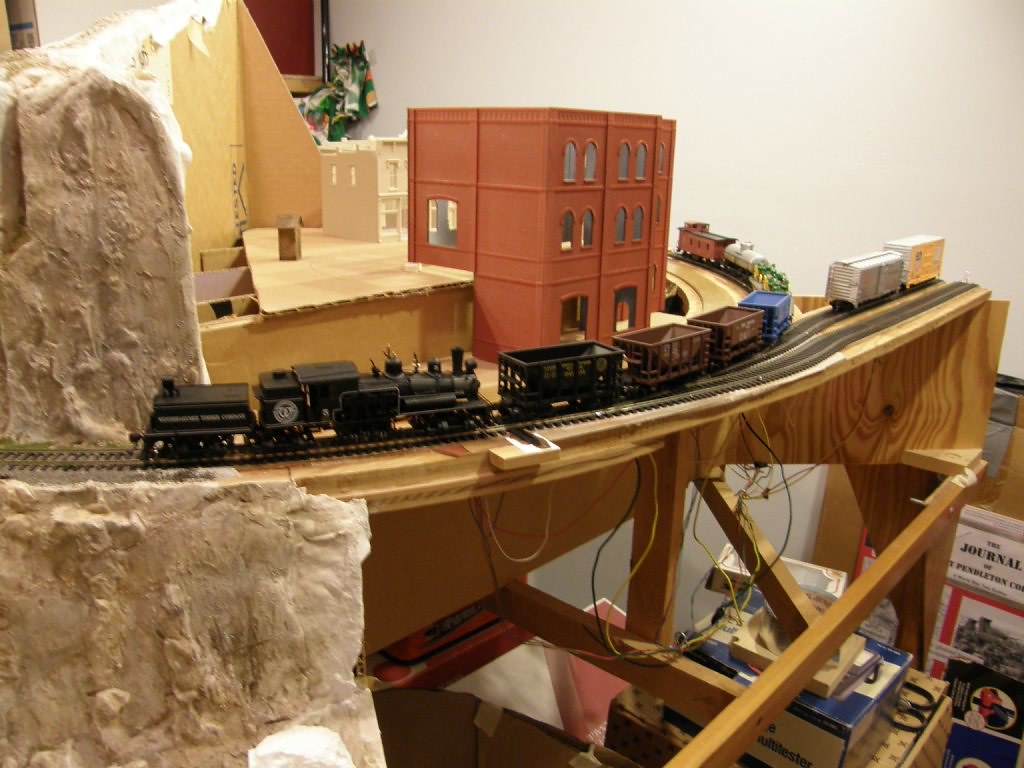
The micro-engineering steel viaduct took me awhile to build. A little tricky with the curve. The non tower spans are also shortened. Here it is being installed.
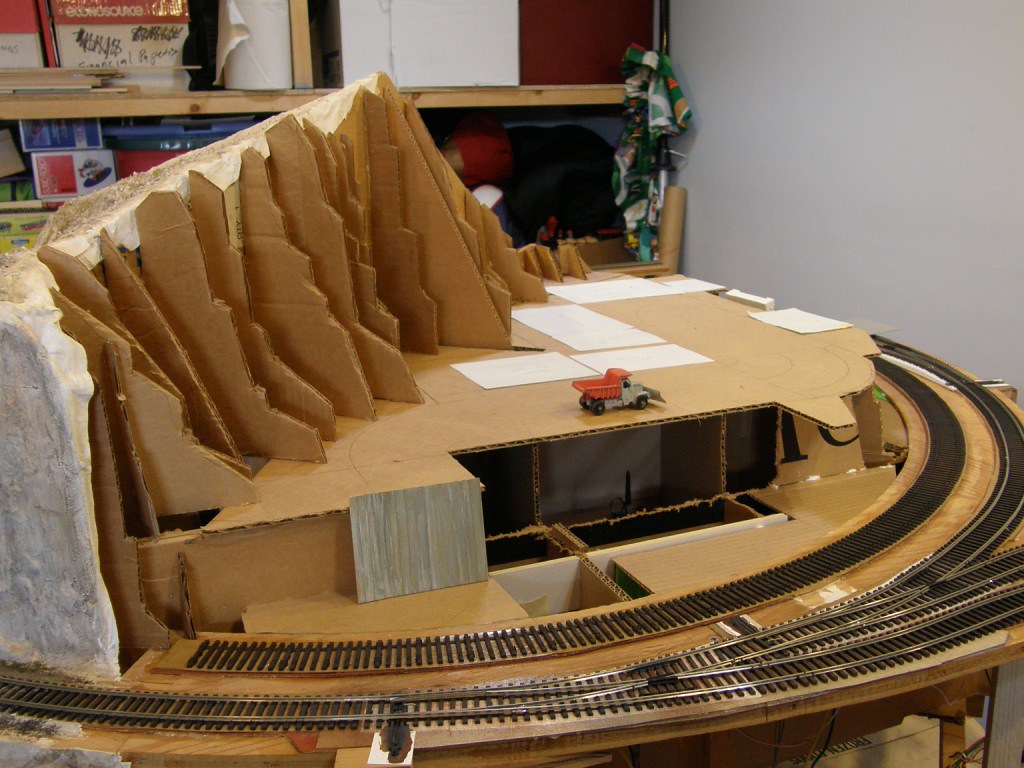
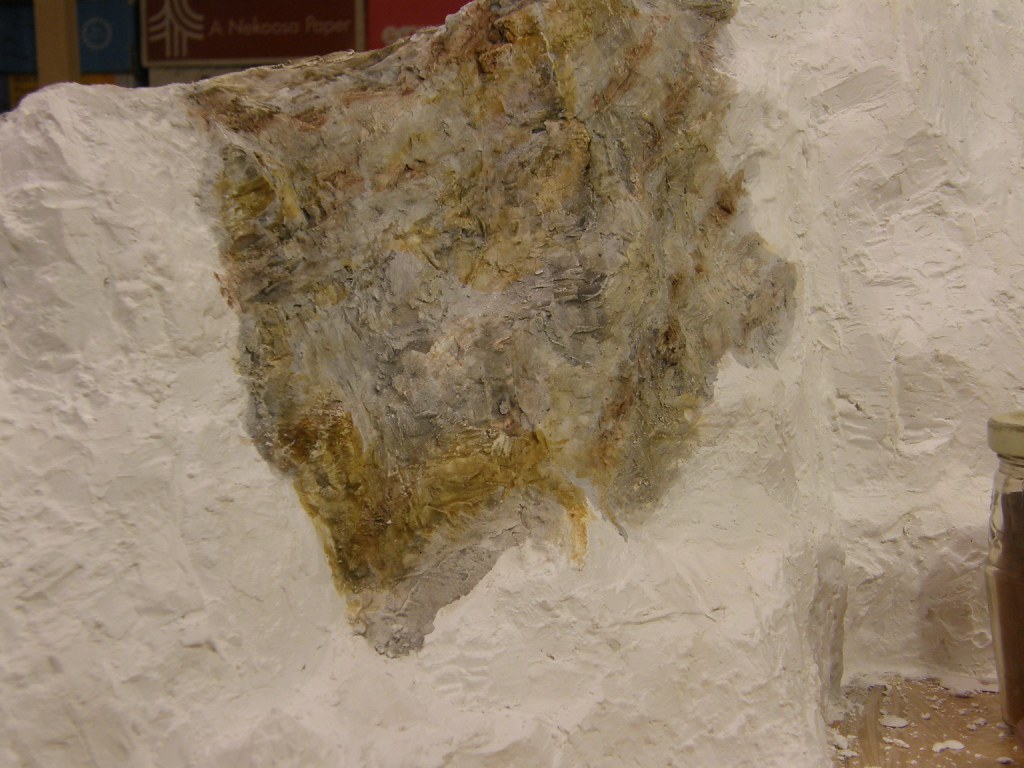
I tried making pyramidal footings out of plaster and then embedding them into the hard-shell scenery. But I could not get that to work. So I ended up cutting out the scenery underneath. Then glued pine footings I cut on the table saw, to a segment of plywood also glued to the benchwork. Then, the scenery was redone.
Here is the bridge being epoxied to the footings showing how I kept the curve alignment and kept the top of the bridge even with the road bed.
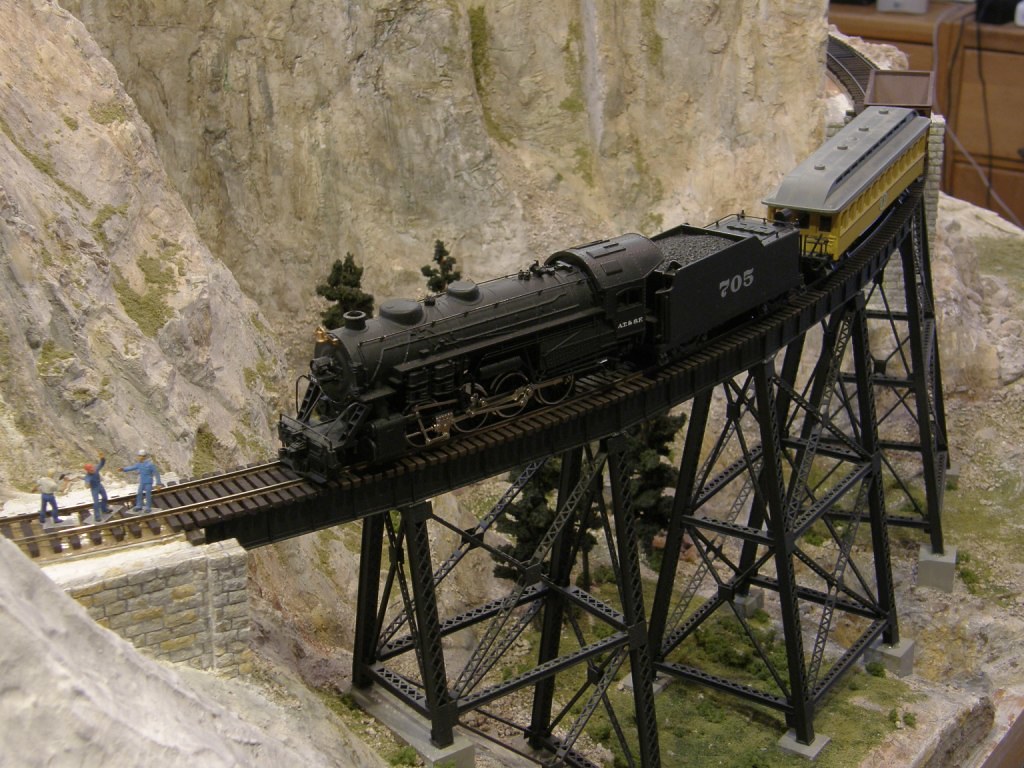
The GPM&C celebrates its first inaugural run. The celebration was witnessed by some of the construction gang as a coach bringing in the dignitaries arrived at the future site Chrysolite Metals at Jobyna. Said one of the crew “we’ll be old and drawing our pensions by the time this thing is done”.
Micro-engineering bridge track. Central valley ties and curvable switch kits. Code 83 rails. Mat-board and card-stock road bed coated with varnish before ties installed.
that is an awesome little layout you are building. It is sure another demonstration of the fact, that the fun of model railroading has nothing to do with the size of a layout!
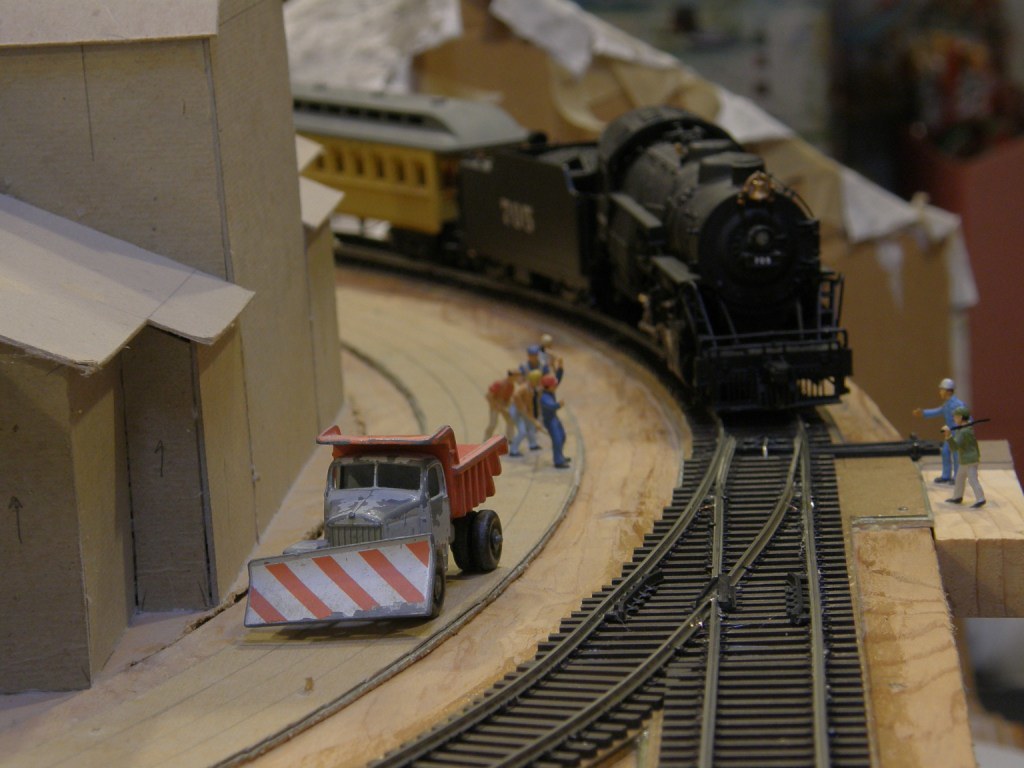
Someday the room this is in now will be a full layout, part of an addition I built on my older house. But for now, there’s too much junk in there! Meanwhile I want to see this one through, and see how it comes out. There is actually plenty of modeling for me to do!
Here is the mock up of the town of Jobyna (named after the silent movie actress Jobyna Ralston). The factory is Faraday Electric Motor Company. Maybe a bit too tall but I’m stuck with it.
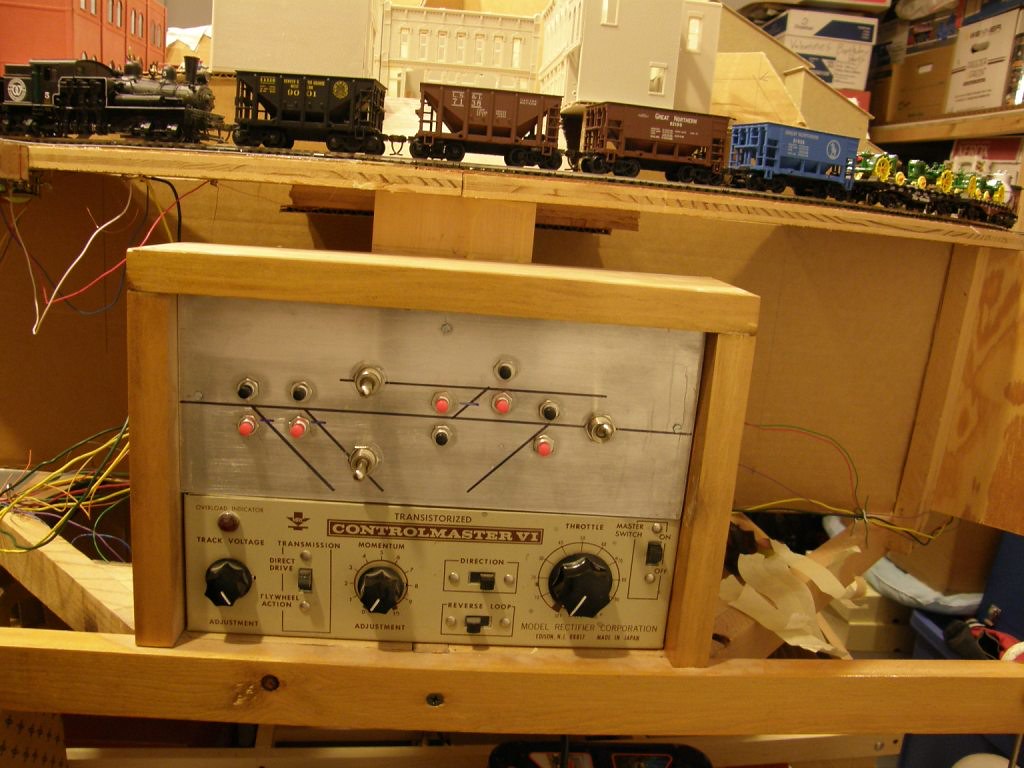
Here is the control panel and a typical switch machine install. This transformer is the same one my dad bought in the 1970s. It was saved from the 11x17 layout he built, and I helped as a kid. We dismantled that layout in the 80s. The switch machines are also leftover from that and I have kept all these years, along with the DPDT toggle switches. Still work great. Old school! (actually these ore cars are from the 80s too, which I recently refurbished and put KayDees on)
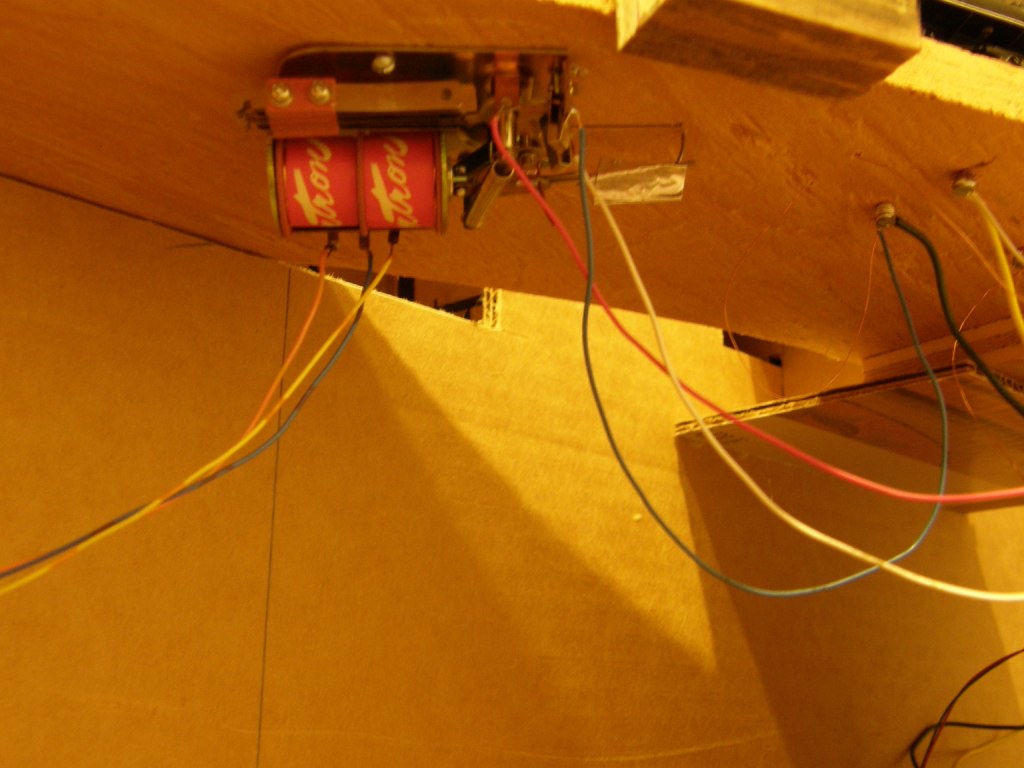
The switch throw mechanism I make from the spring wire the machine comes with. After bending the “L” for the points, I pass the wire down through the hole, then bend it towards the switch machine. I then tape, using metal duct tape, a looped copper wire so the rotating mechanism will not bind. Seems to work ok. Anyway, that is what that odd looking metal duct tape is for.
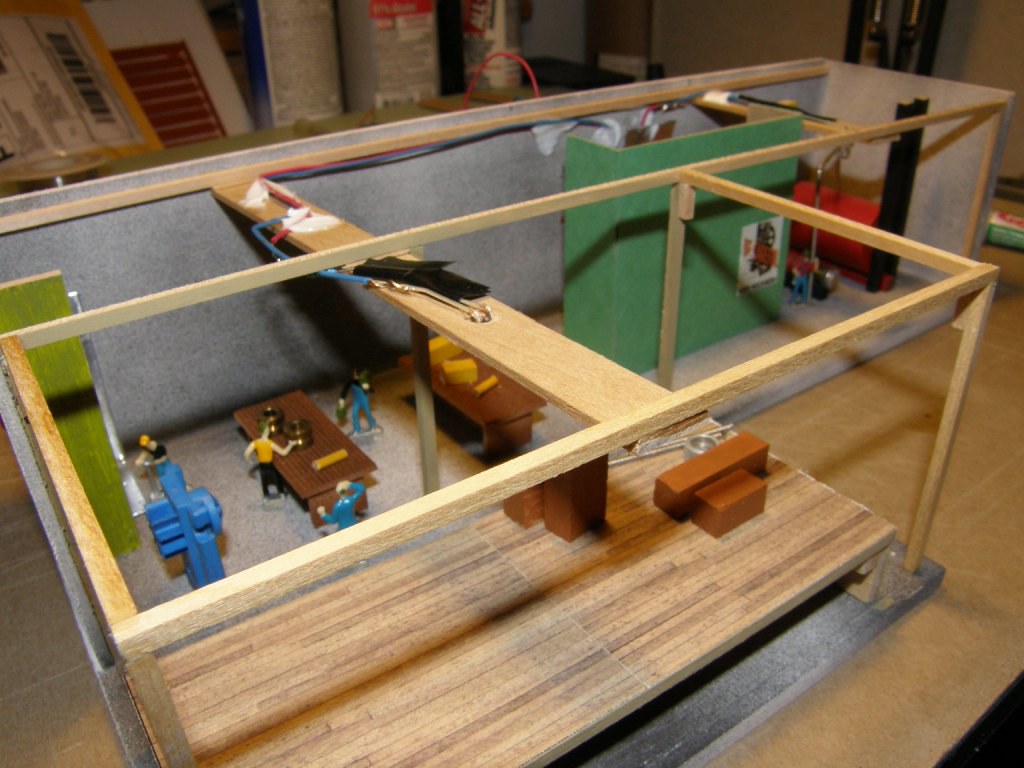
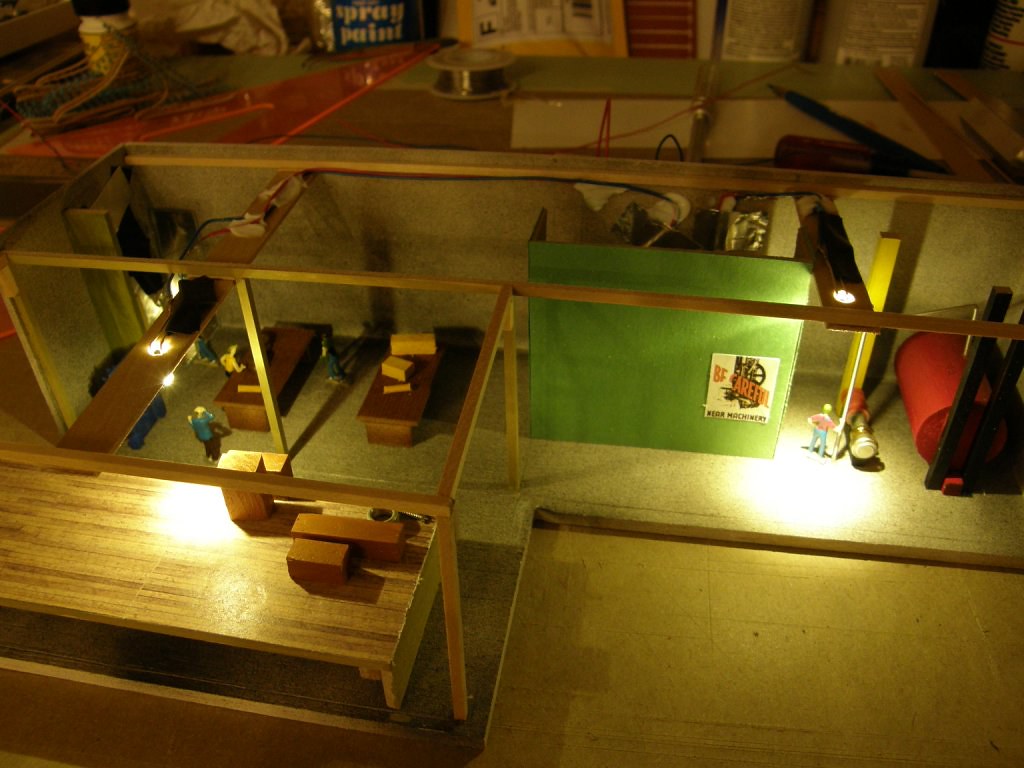
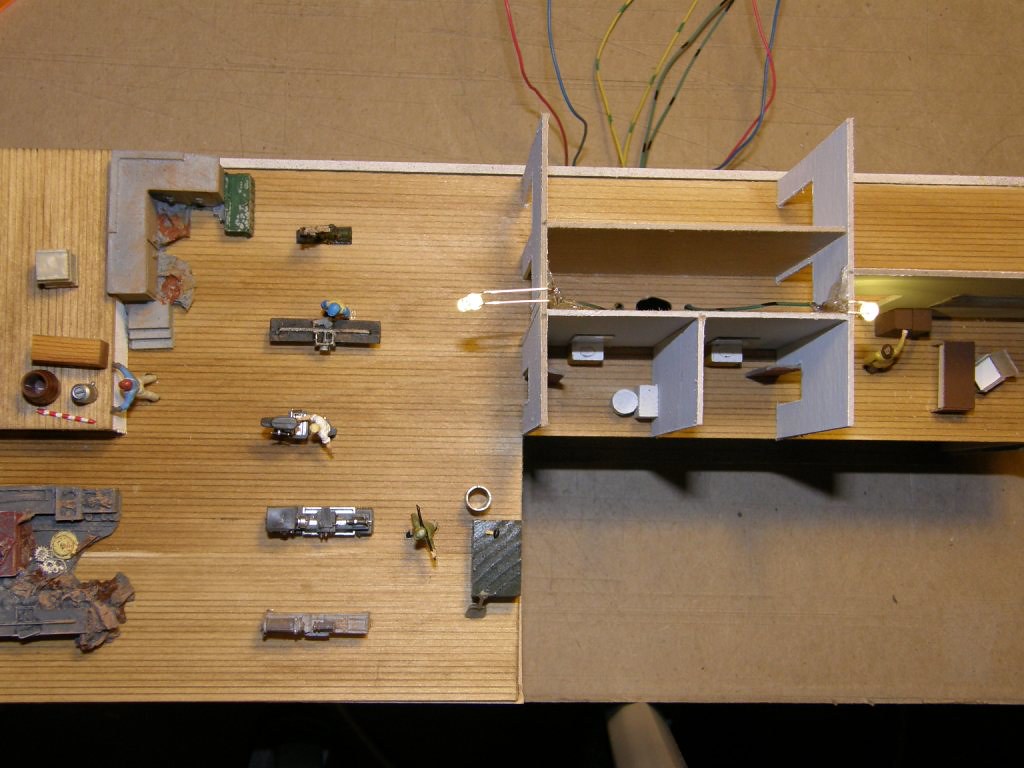
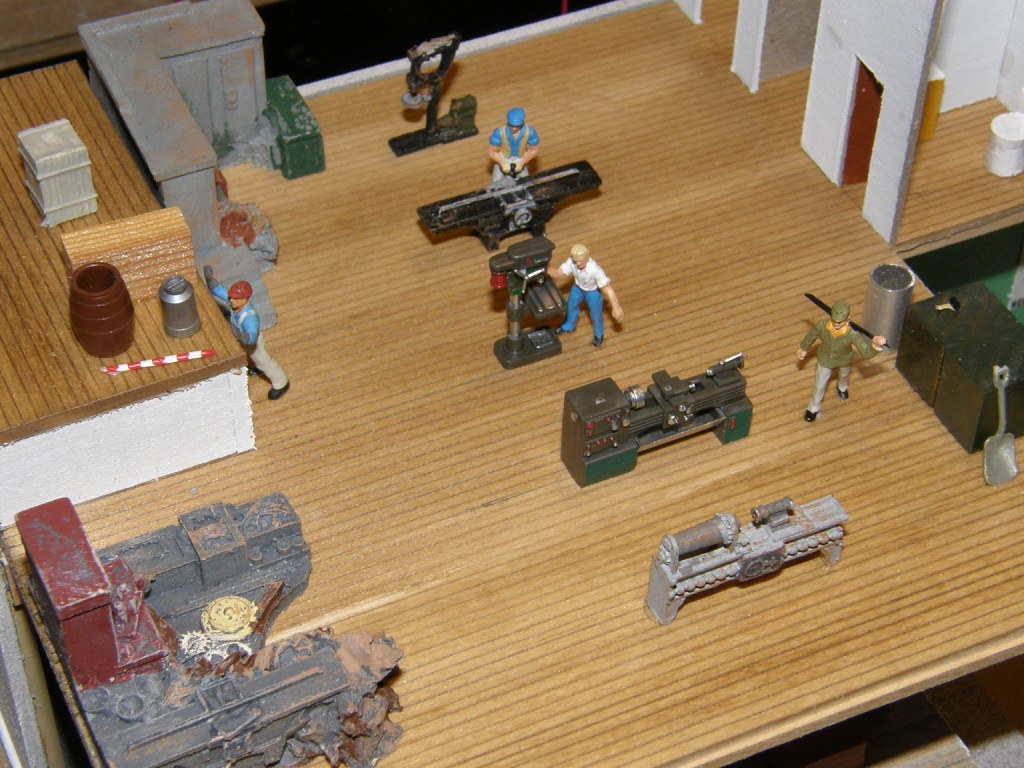
The Basement of Faraday Electric Motor Co. I got some Bachmann workers as a gift and since, well, lets just say, they probably wont be too visible in the basement. There is an arc welder cluster of LEDs on the left corner (from modeltrainsoftware.com). There are some bass string parts, a boiler from a dowel, and a dynamo from a button battery, and a barrel and other junk. Warm white LEDs and resistors from ebay. Anyone care to identify the mysterious blue machine?
Yeah those bass strings have those potentially useful brass thingys on the ends Of course, old guitar strings are as useful like piano wire.
And the strange blue thing is an old operational amplifier shipping package. Kind of have cool fin looking things. Anyway, junk for the basement not very visible.
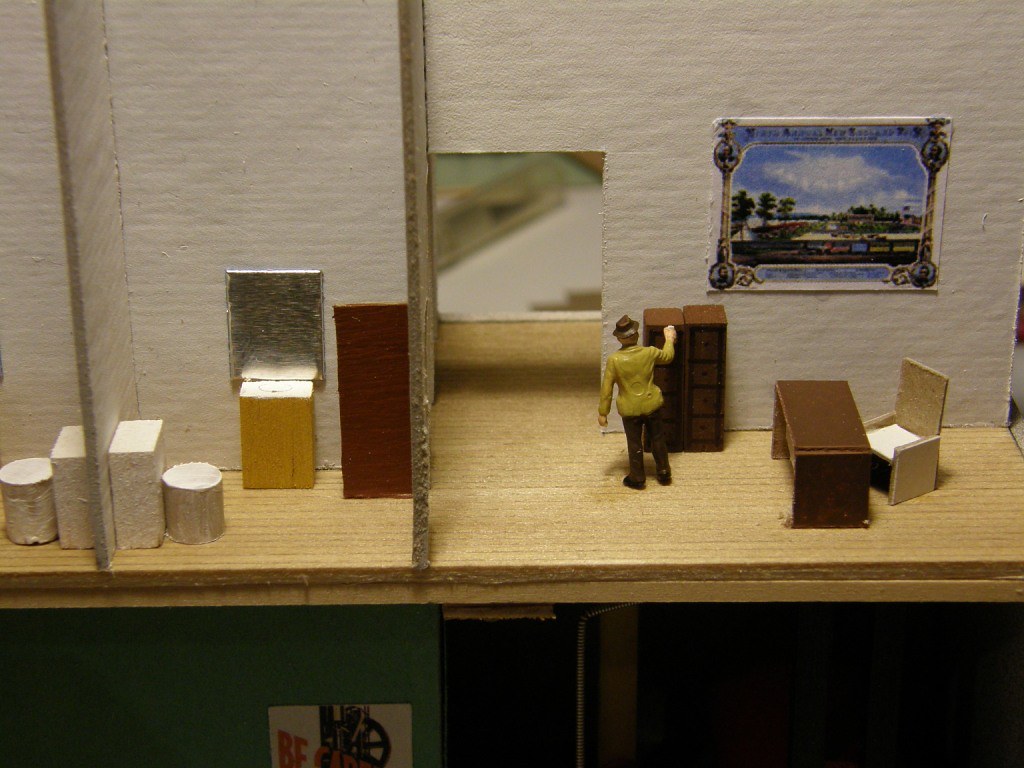
So here is the main floor of Faraday EM. We have a bit of a mix of eras of tools, some belt driven, some more modern but, oh well. The green lathe and drill press in the center of the production floor is from Roco and has nice detail I think. The floor is basswood scribed with a drafting pencil and stained. The walls are cardstock spray painted flat white. The file cabinets I made out of balsa wood and scribed with the pencil. Painted with brown acrylic. The chair and desk are cardstock. Artwork stolen from the internet and printed on the printer.
The main floor consists of an entry for workers (center), a reception area (right), the forman’s office (behind reception with the desk), the stair well ( in the center), the bathrooms, and of course the main shop floor. Just trying to give an illusion that there is stuff inside the building.
Micheal Faraday is one of my favorite scientists. Not from a well off family (you typically had to be well off to get educated and do science in those days), he educated himself and in a roundabout way, ended up working for a chemist in his laboratory. He went on to develop the theory of the electromagnetic field, diamagnetism, induction, and the laws of electrolysis. He invented the electric motor. So for this I named the company, Faraday Electric Motors.
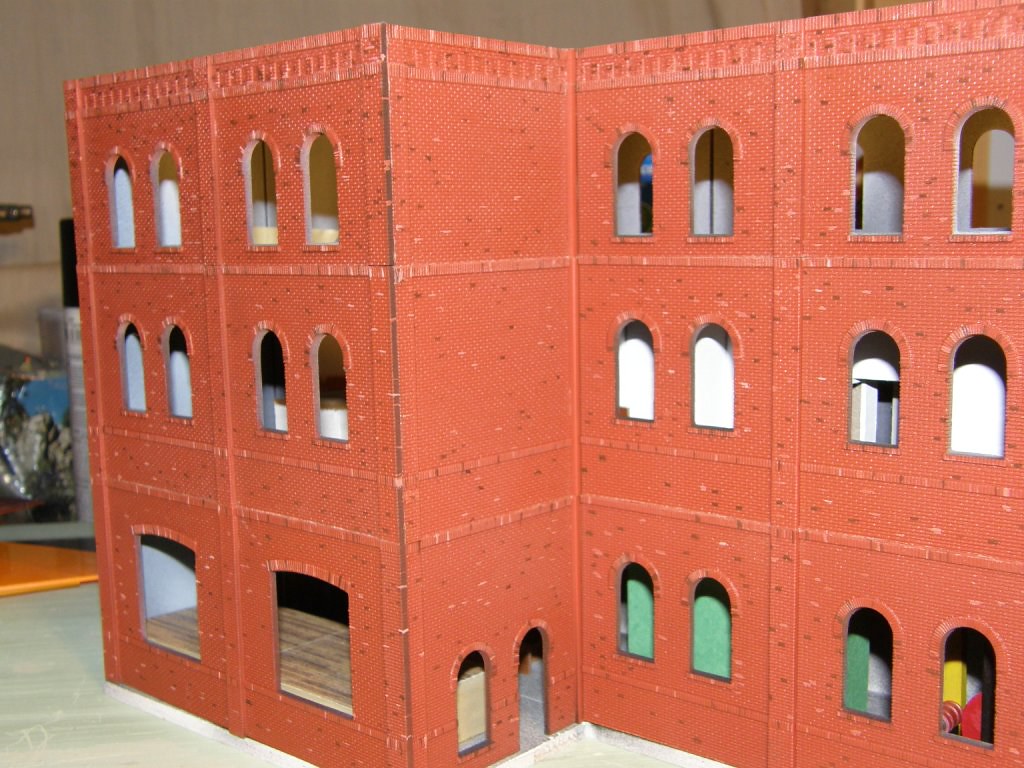
Here we see progress on the masonry. Borrowing a little from the techniques of Bob Brendle ( “Brick Walls With Character” , Railroad Model Craftsman, Vol 69, no 2, July 2000) I did not do near as good a job as he did! After spraying the interior walls black (to absorb interior lights) then some white, the outside was airbrushed with oxide red acrylic. Then, random bricks are painted with either lightened red, and darkened red. I think doing this alone does quite a bit for the building.
Bob uses a different technique for the mortar than I did. I diluted some acrylic white with isopropyl alcohol (2-propanol) and dabbed it on. Mostly, the white settles into the mortar lines. Here you can see the difference between a treated and untreated wall.
After the mortar treatment everything gets a mist of cheap flat black spray paint.
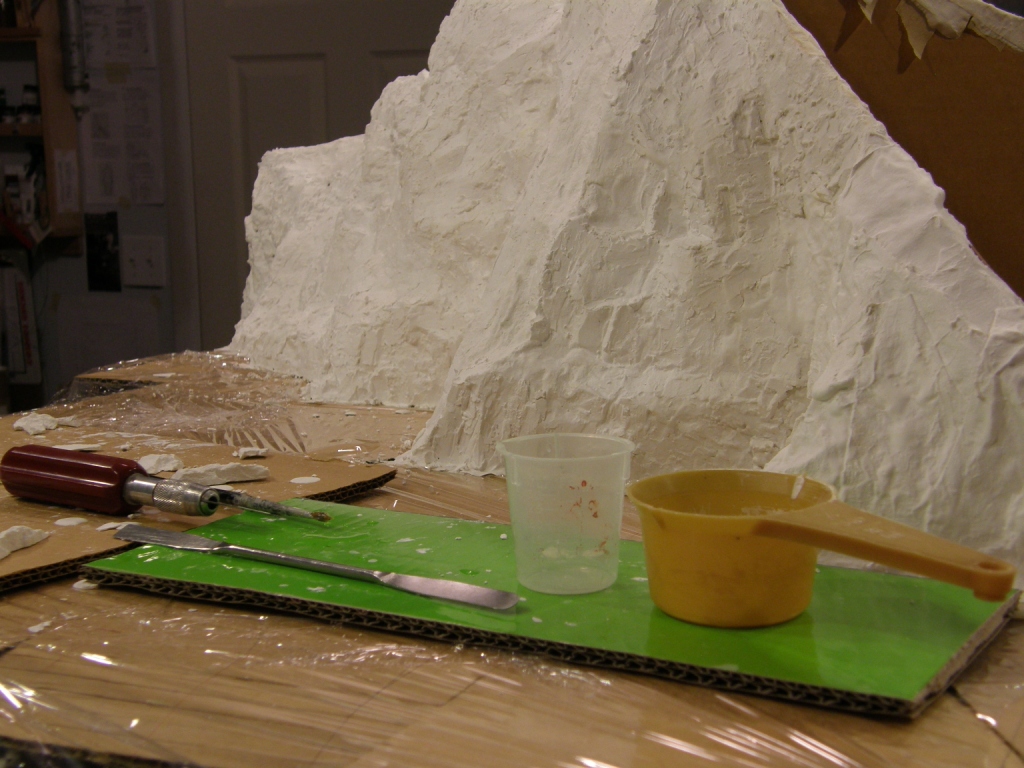
I like this little stainless steel spatula tool (below) you can get from science supply companies (Fisher or Cynmar). The square end is great for making the sharper edges of rocks. Small enough to make lots of little random details. Then I use an old paint brush for stippling and blending while the plaster is still wet. After the plaster sets I use the x acto knife to trim and further carve in rock like shapes.