Several months ago I posted a question on a building an N scale curved trestle. Thank you to all who replied. The ties (or bridge timbers if you prefer) are laid, the rail is down, and I’ve been running trains over it for a month. Now my question is, what is a good way to install the guard rails to get the proper spacing between them and the running rails? At present, my longest steamer is a 2-8-2 and I don’t want to cause any binding problems with the drivers. The trestle is on a 15" radius and I will be using ME code 40 rail for the guard rails. I used Peco Code 55 for the running rails, with the lower web of rail buried in the ties/timbers (yeah, that was a fun project[(-D]). Thanks for your help.
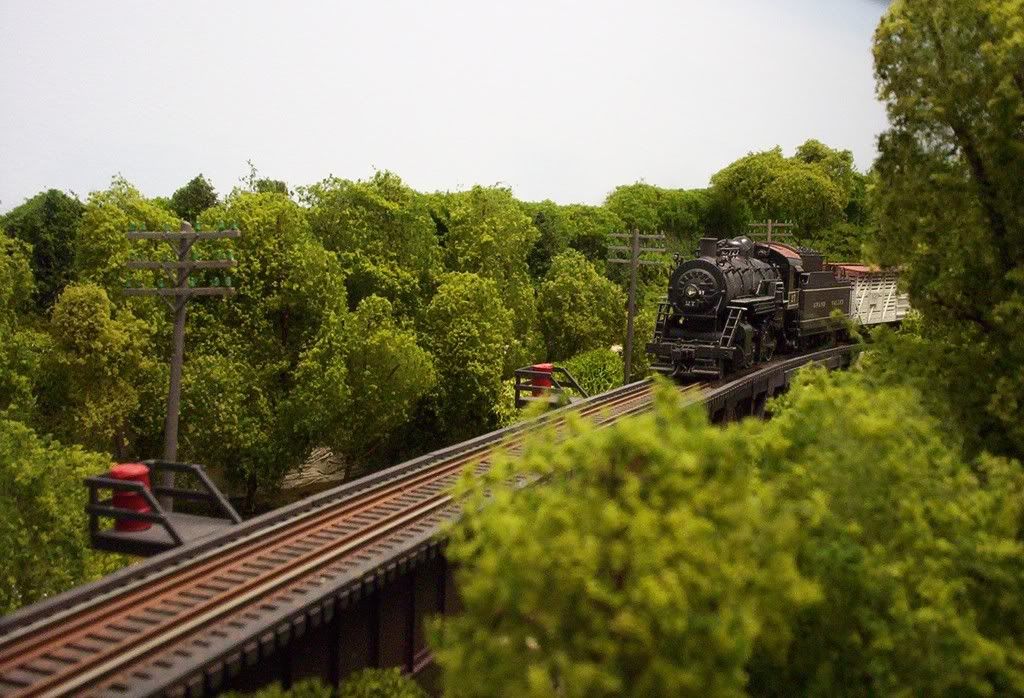
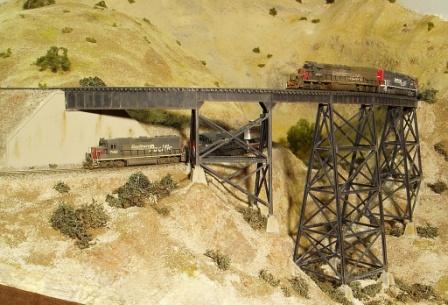
This is a short trestle I did in HO, using Code 100 Atlas flex track:
I used a piece of old brass flex track, also Code 100, as the “donor” track for my guardrails.
I shaped the pieces by hand, and glued them to the ties just inside the webbing. On the Atlas track, the webbing elevates the track just slightly above the tie level, so this put the running rails just a hair above the guardrails, which seems to be enough. The spacing is consistent because the webbing keeps it that way.
I don’t run big steam, but I’ve had no clearance problems with anything else, either. If you’re worried, I would first glue the rails down with Tacky Glue or rubber cement. This will hold them in place well enough to run trains over them, but will still give you the option to remove them easily without damaging anything should you have a problem.
The guard rails I have seen on bridges and trestles always seemed to be a much lighter weight rail, usually old rail removed from abandoned sidings, etc.
On my HO scale bridges and trestles, I use N scale rail, glued into position with CA right against the HO scale’s false spike heads.
For an N scale bridge, you might consider Z scale rail.
No matter what you use, it needs to be highly weathered and rusted since train wheels never touch it
It sounds as if you’re holding the curve of the rails with the rabbetted ties - you could do the same for your guard rails, although that sounds like a lot of work. If you pre-form the curve in the guard rails, you should be able to hold them in place with contact cement. Tack spacers in place to keep them a uniform distance from the running rails, which should be greater than the thickest wheel flanges in use, and be sure to remove the spacers before running trains.
I used Micro Engineering bridge ties, which have moulded-on guides for the guard rails on my HO scale bridges:
Not all open deck trestles employed guardrails, it varied upon the prototype, through bridge designs did employ guardrails and sometimes rerailers to prevent derailed equiptment from causing structual damage that often resulted in a total or partial failure of the span (s).
Too bad MR doesn’t provide this type of information to its readers anymore, RMC covered this and many related topics in exact detail in a series of articles last year. Just my [2c]
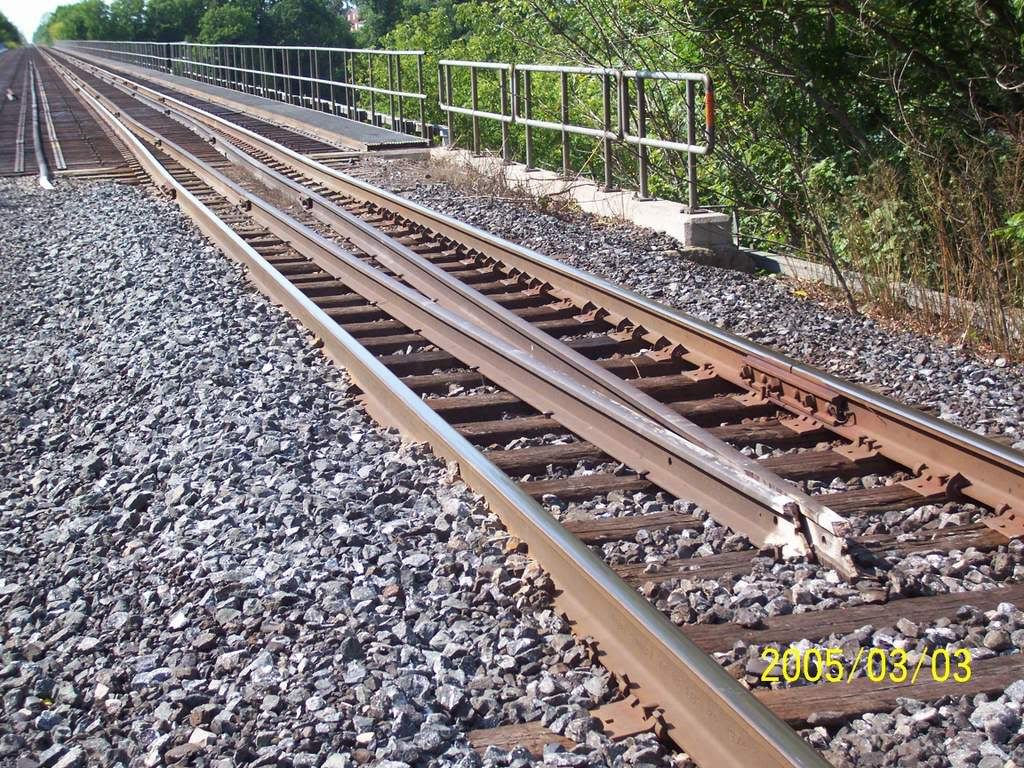
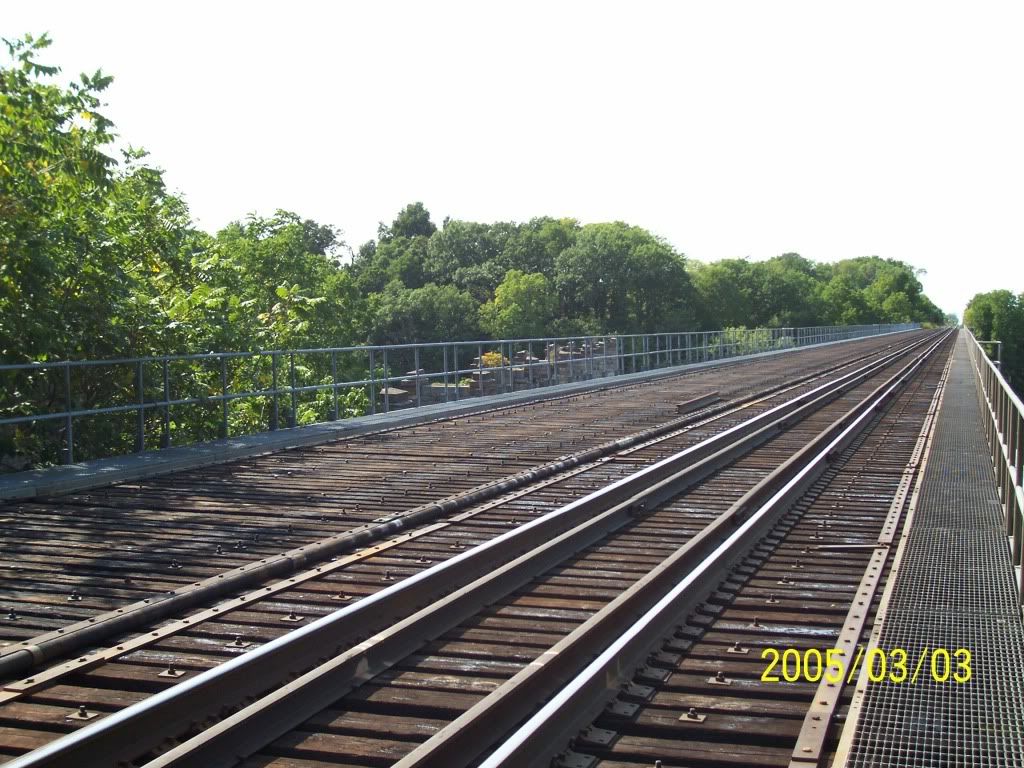
Did anyone notice how the guardrails on Selector’s Trent River deck bridge photo, and Doctor Wayne’s photo, extend beyond the bridge itself as per prototype practice?
Scratchbuilding can be a little more prototypical. When you buy a deck or warren truss “ready-to-run” model bridge – it ends the guardrails on their bridge by manufacturing necessity.
Thanks to all who have replied. The information and pictures will be very helpful. I still have one question: How did you install the guard rails? Did you use a styrene strip as a spacer or did you just eyeball it? I guess that’s two questions.
Mine are all installed on Micro Engineering bridge ties, which include moulded-on “spike” heads to aid in guardrail alignment. To hold the guardrails in place, use either ca or contact cement.
If you’re using wooden ties, place a row of partially-driven spikes along a line where you want the outer edge of the guardrail to be, spaced a suitable distance from the running rails. Apply contact cement to the appropriate area of the tie tops and to the bottom of the rail, and, when it’s dry to the touch, install the guardrails. You can then drive home the spikes.
This method will also work for a curved bridge: place the spikes on the outside of the curve of both guardrails, and add spikes along the inside of the curve as you place the guardrails. If the bridge is curved, it also helps to pre-curve the guardrails.
I just noticed this thread as I am also building a curved N-scale trestle. I’m also at the point of adding in the guard rails.
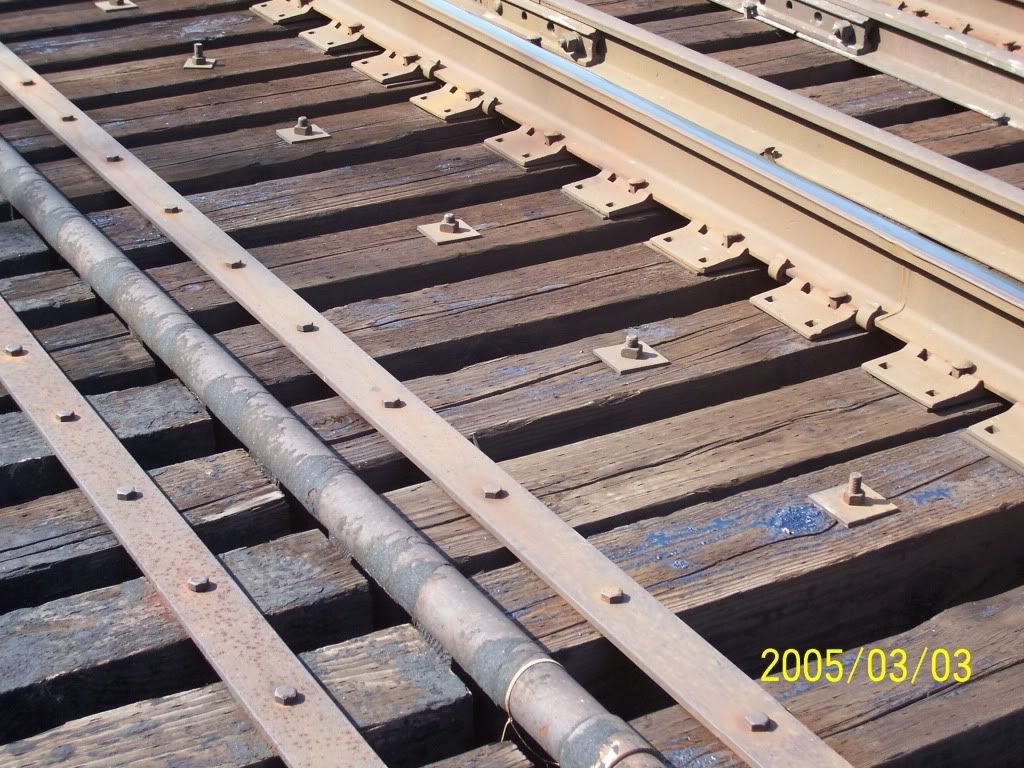
The only difference is that I used ME code 70 bridge track which comes with it’s own set of extra (detacted) rails. If you look at the picture below, you will notice two sets of numbs running down the center. The guard rails will be set just inside of them:
I’m not sure if the PECO track you used has the same set-up.
Now I just have to figure out what type of glue to use.
I used the Peco code 55 rail, but stripped off the plastic ties because they were spaced too far apart. I then used wood ties/timbers on top of the wooden trestle. I used CA for the rails, but after reading several posts, I’ve decided to use Pliobond for the guard rails. BTW, I like your trestle. It looks familiar, have I seen it before somewhere?
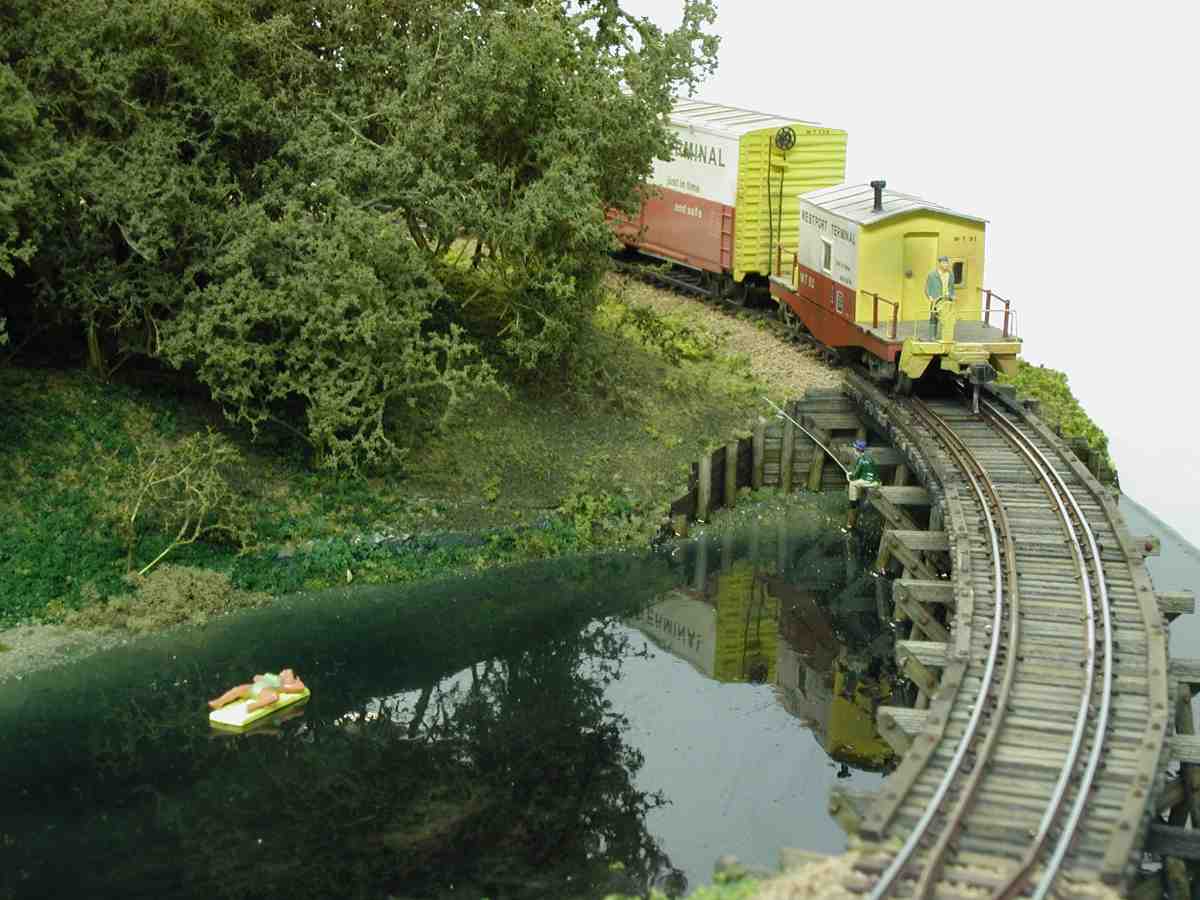
Thanks. I did post some progress shots on a WPF thread not too long ago. As for the prototype, it’s loosely modeled after a curved trestle at Winthrop Cove in New London CT (Providence & Worcester RR).
Maybe I missed this earlier in the thread, but I didn’t see mention of heat activating Pliobond. It’s an old trick: Coat the bottom of the rail with Pliobond and let it dry. Then you can heat the rail with a soldering iron to cause the glue to instantly flow and cure, thus “spiking” it in place. I’ve also done this with Goo and Weldwood contact cement. If you are using plastic ties, it may not be a good idea. It works well with wood ties.