I was wondering if it would be cheaper to hand build the long arm street lights, or pay the high price for manufactured ones.
Perhaps a picture or a link to what you’d like to build would help, along with some idea of how skilled you are with soldering and maybe fabrication with brass tubing.
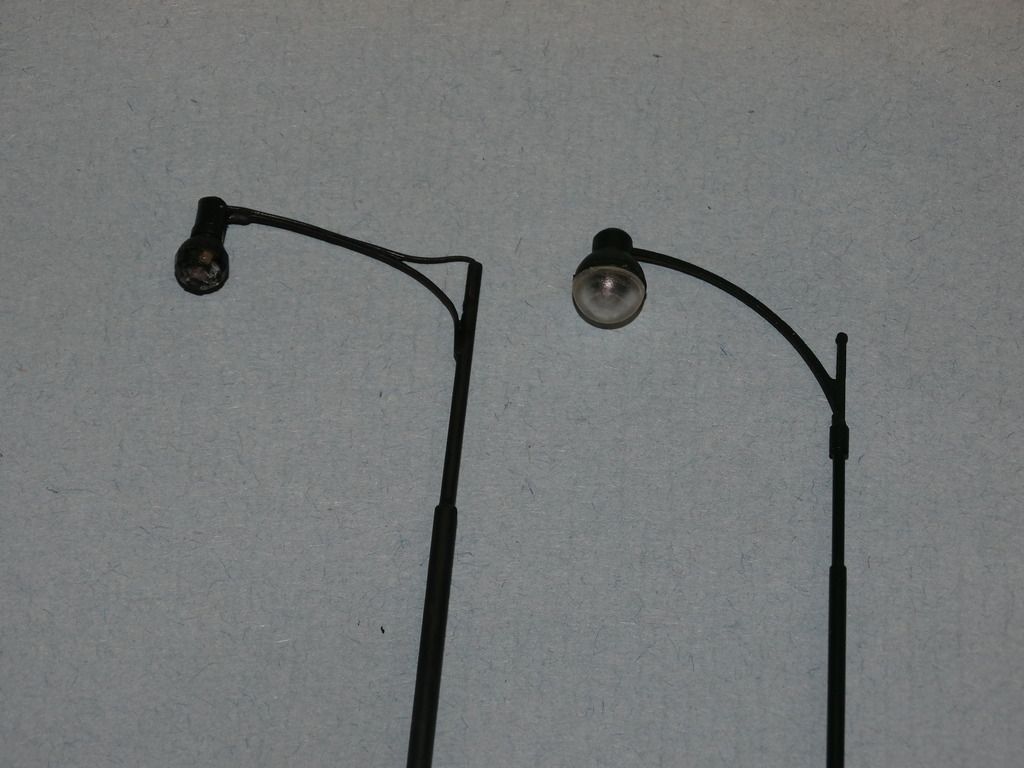
I guess this would qualify as a “long arm” street light.
It’s a Walthers Cornerstone model, and I think they’re out of production. It’s a nice model but kind of pricey. The tubing is very thin.
I have bought lights from E-Bay. They are dirt cheap and the shipping from China is cheaper than any state side outfit.
Hi Doug!
Welcome to the forums! [#welcome]
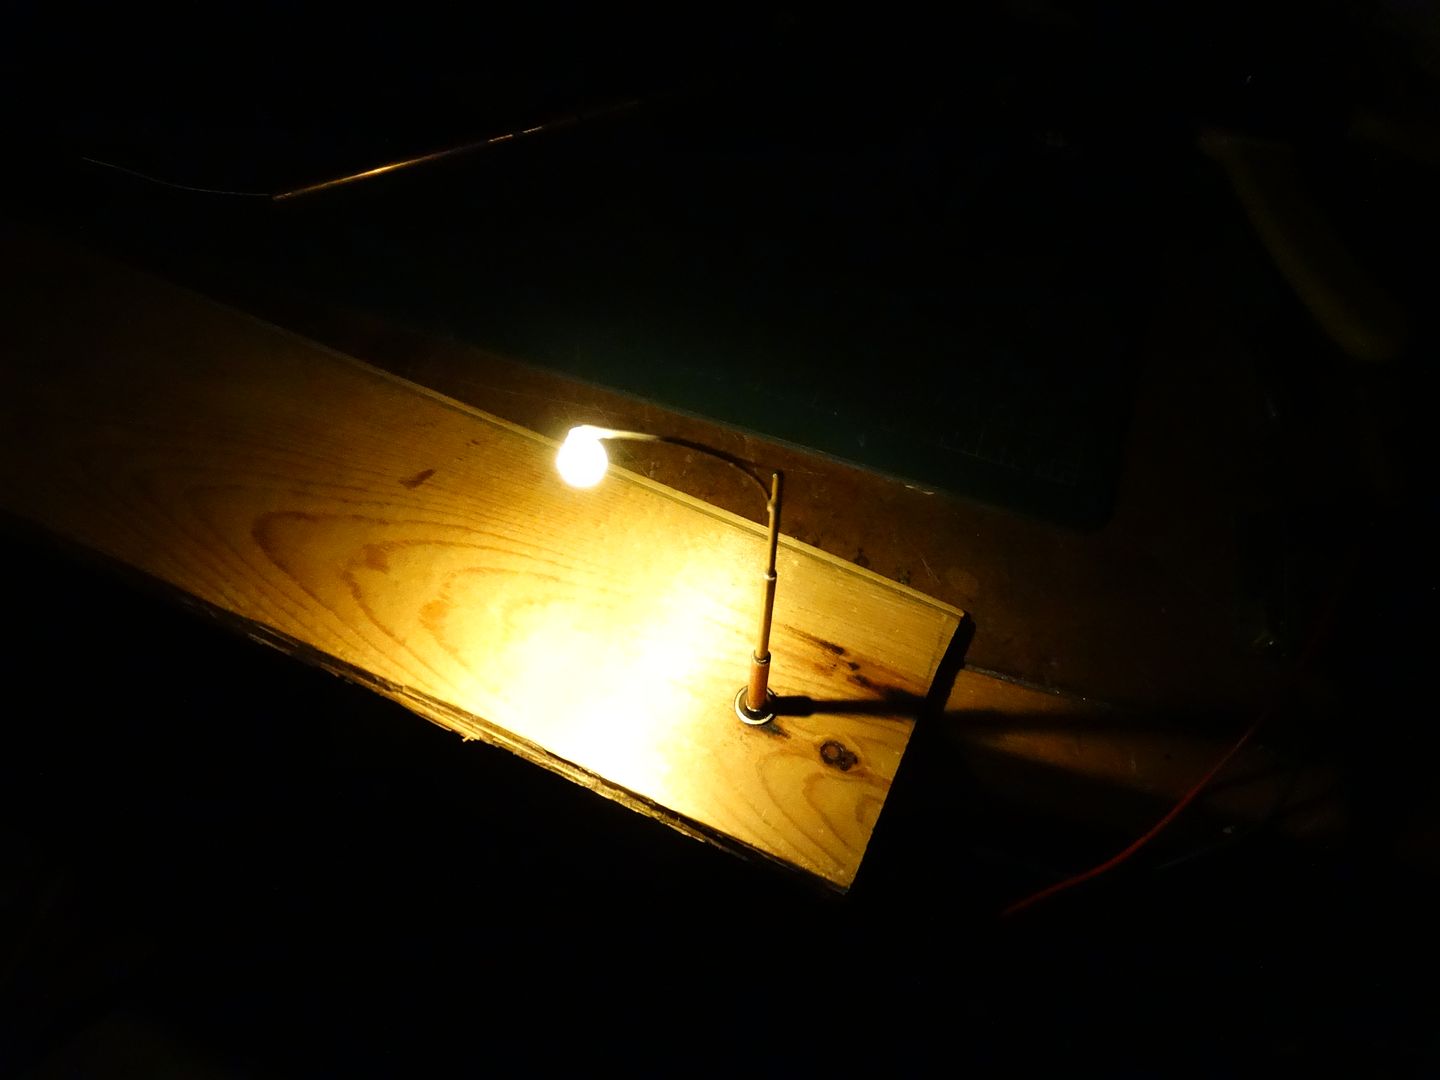
Not sure what your era is, but I built my own 1950s street lamps for about $2.00 each. Walthers current price is $19.98 each and they are not LEDs so they will burn out eventually. I can’t see a way to replace the Walthers bulbs:
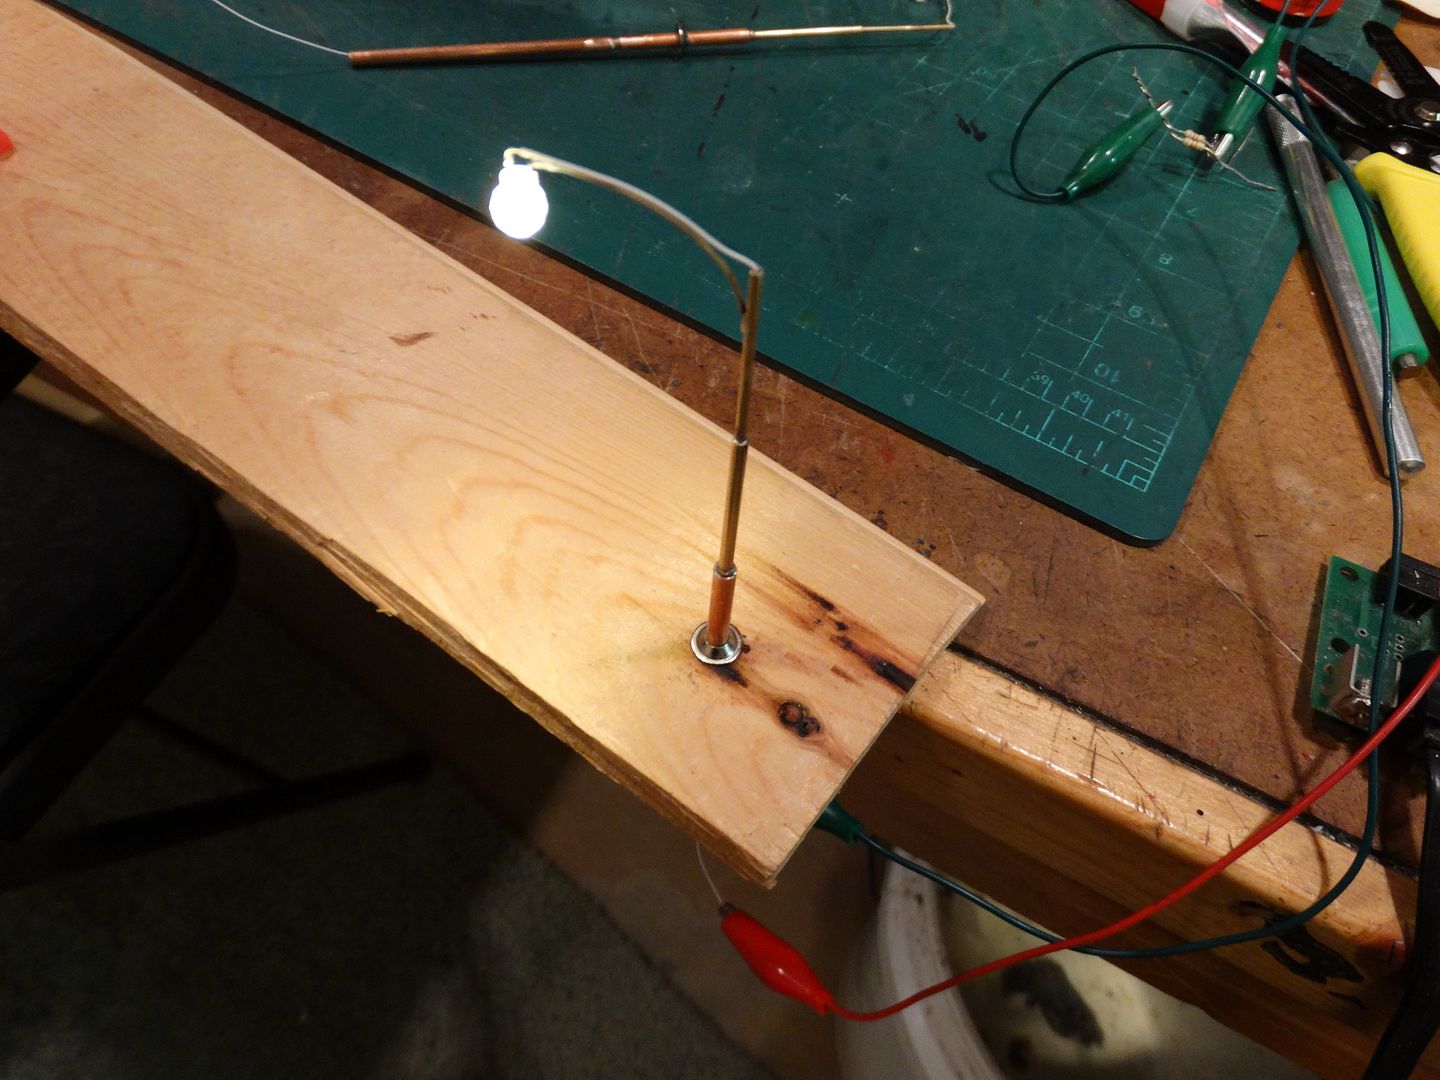
I designed a plug system so that they can be removed if needed. Its still in development:
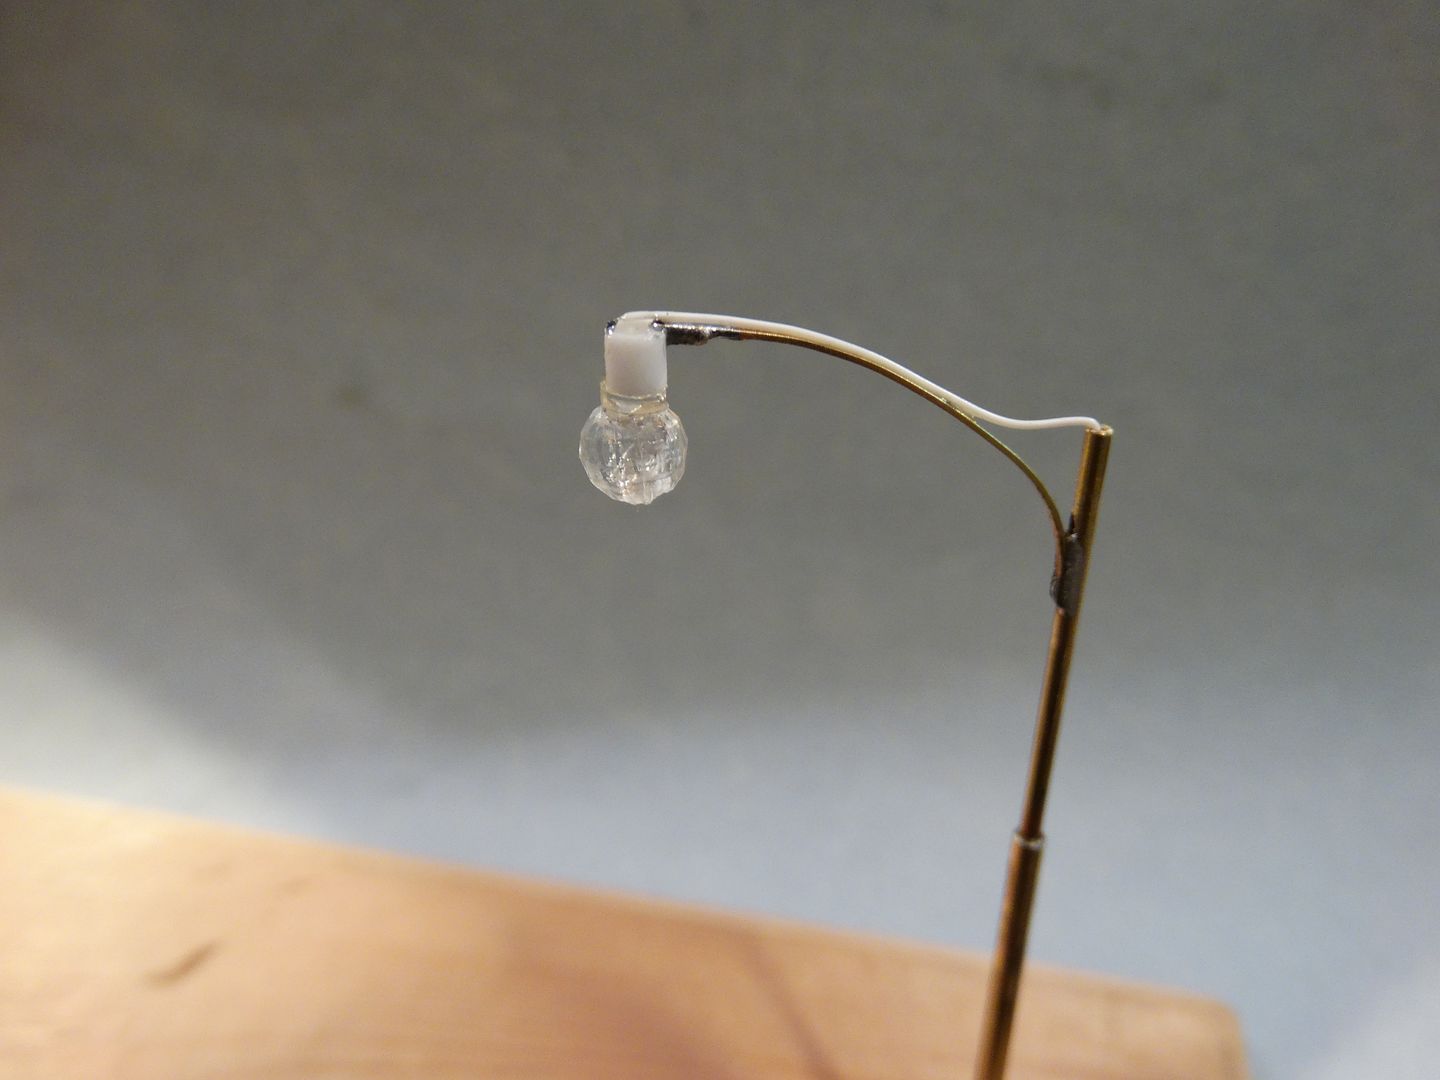
Here is a comparison shot of the Walthers on the right and my version. I think my lamp head is much closer to scale size than the Walthers. Its not a great photograph:
The lower part of the post has to be cut off. I haven’t done that yet because I haven’t made a final decision on how to mount them:
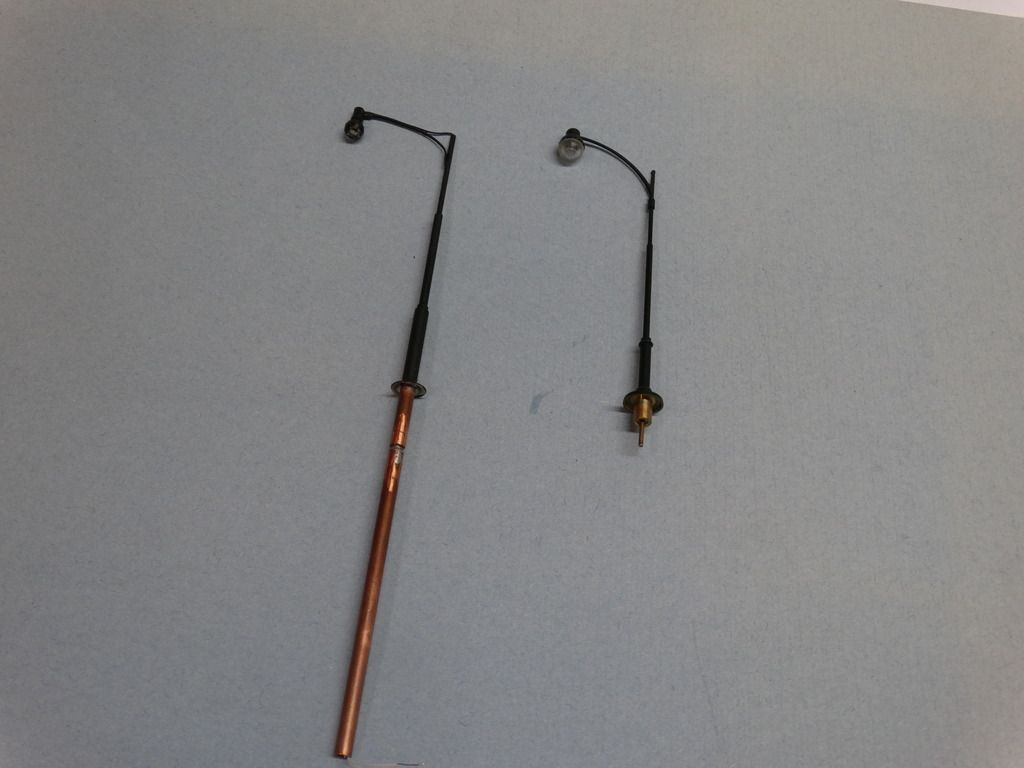
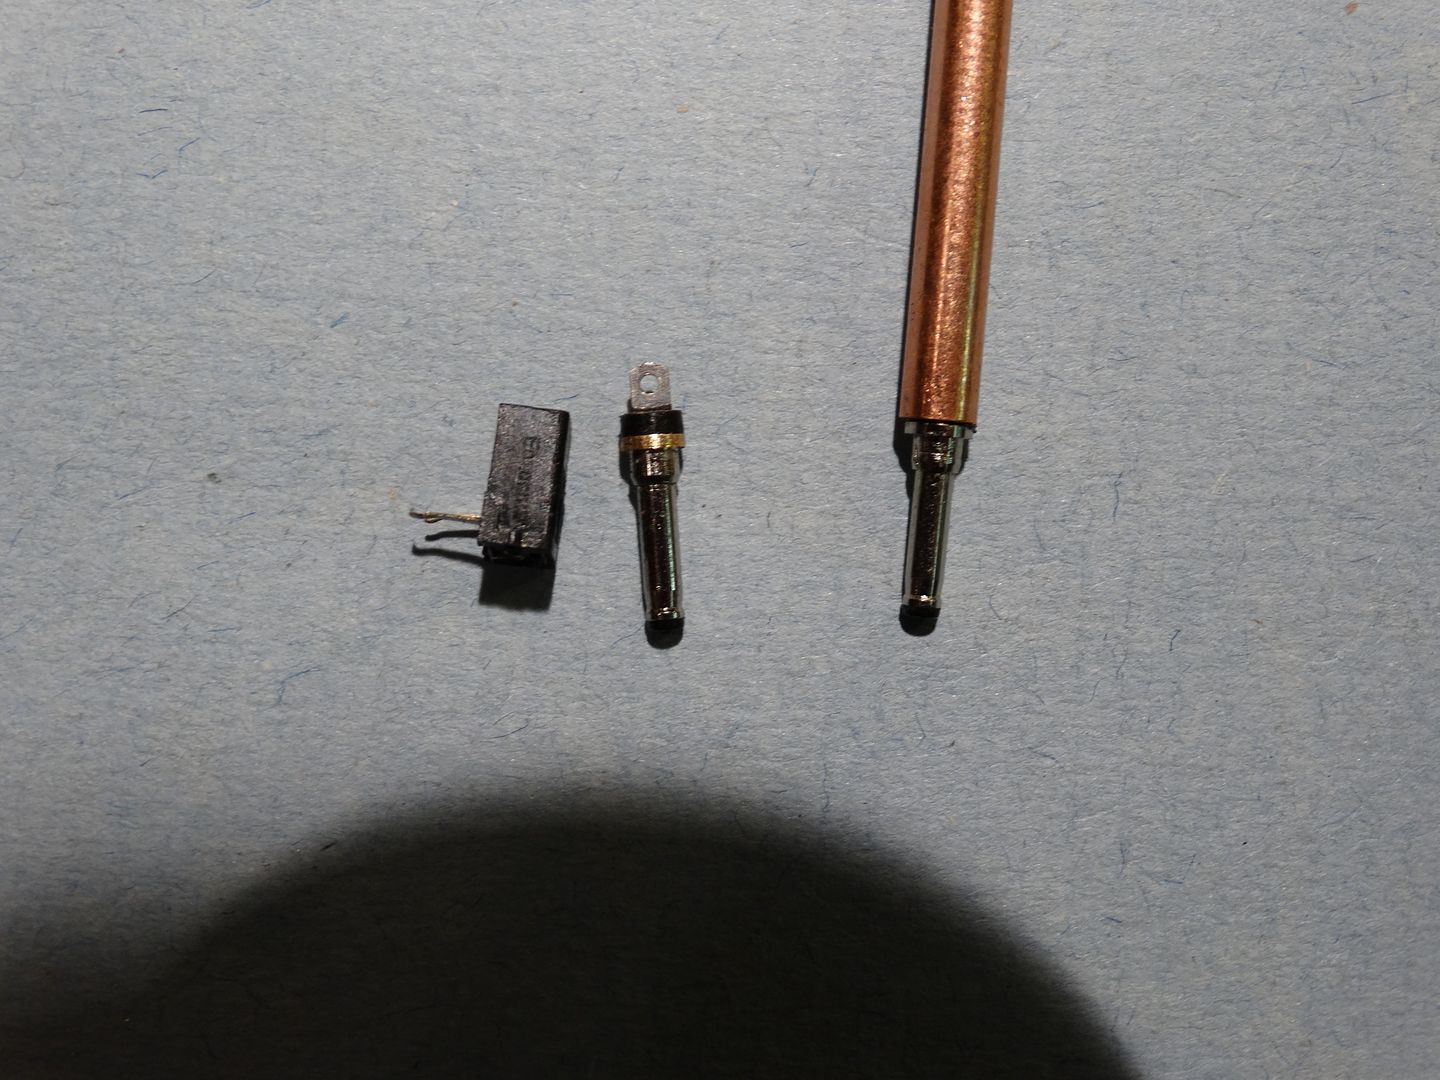
They use a 3 mm warm white LED with a 6 mm plastic bead drilled to fit the LED as the globe. The post acts as one conductor for power so only a single wire is required. The wire also forms the top brace for the arm. The brace isn’t exactly prototypical but I doubt anyone will notice. You could route the wire so that it enters the post just above the arm, and you could use magnet wire to make it less visible. The socket system parts were picked up on eBay as were the beads. The base is a recessed washer.
If you have questions don’t


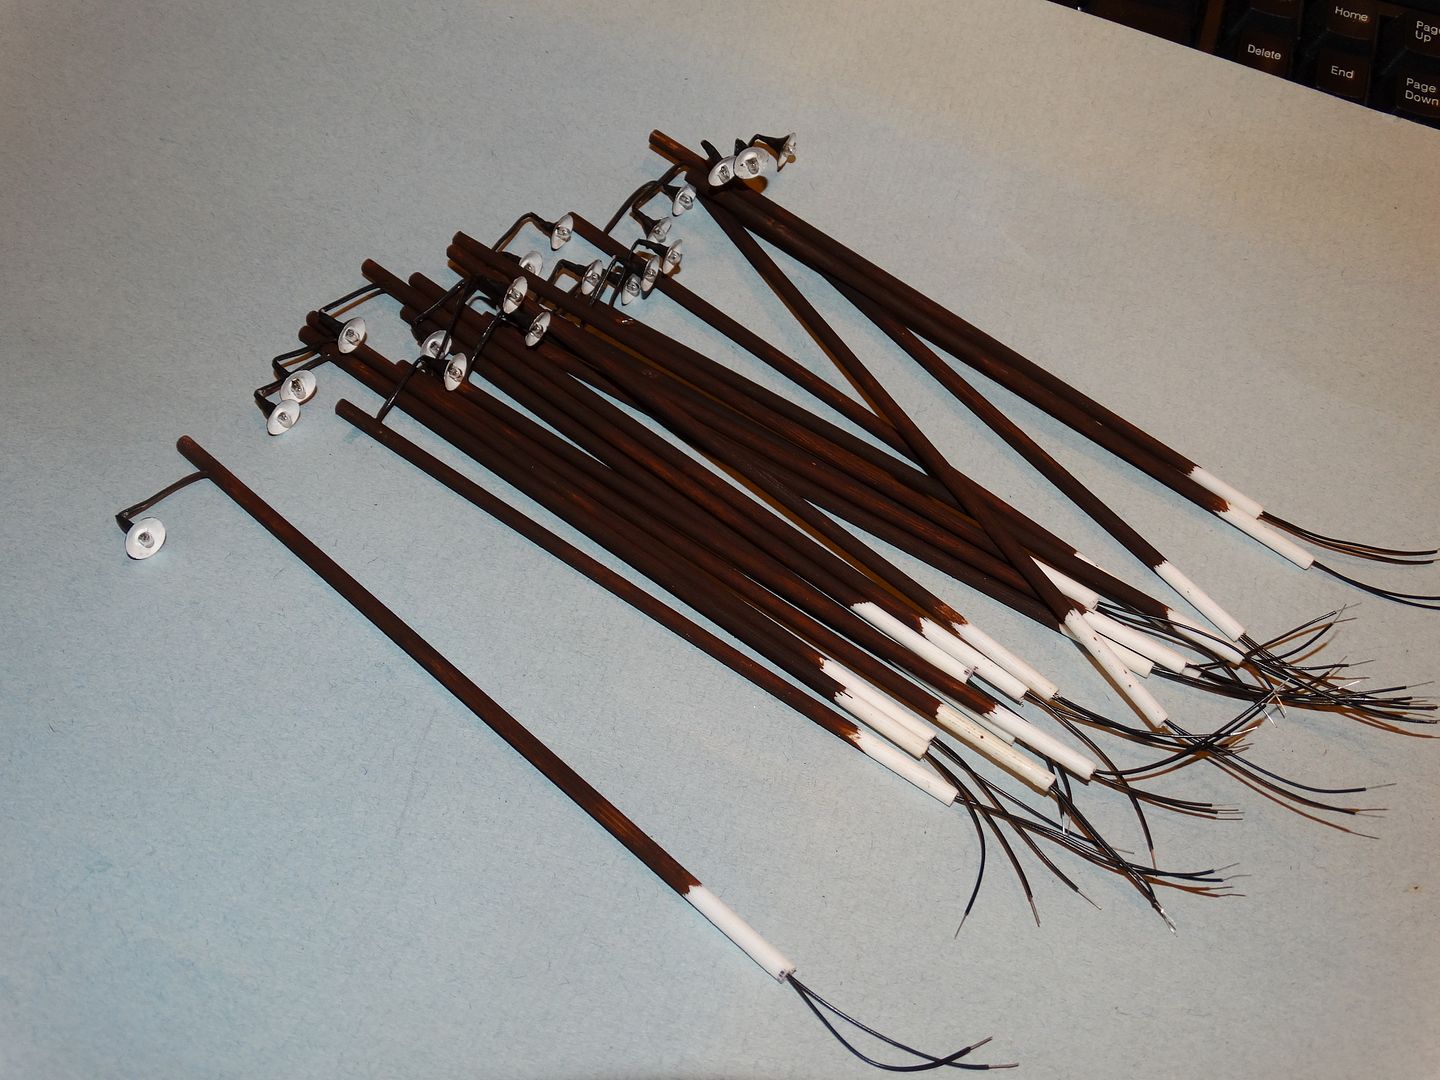
LION maked this object d’art from a coffee stirrer, some 1/16th" welding rod, an LED and a resistor.
I painted it with a brush, and the silver paint was way too thick. When I build more of them, I’ll spray paint them. I bought some silver spray paint, but have gone on, as I do, to other projects.
This last one is of a different style. Again the coffee stirrer (the kind with two channels) forms the upright, the LED sits on top, and the reflector is a thumb tack sans-a-point. Post and reflector are painted in advance of course. Spray paint this time.

ROAR
Welcome to the Forum! [#welcome]
I went with the China version ($1.10 each) of the Walthers Bishop’s Crook streetlight about 8 years ago. They have 12 volt incandescent bulbs but as my norm they run on 9½ VDC and I’ve yet to have a bulb burn out running on reduced voltage in close to twenty years. An incandescent bulb operating at or around 75% voltage lasts forever and they look more realistic dim than bright anyway.
My voltage reducer is a simple pair of high current diode bridge rectifiers (-2.8 V) in series from my 12 volt power supply.
Dave I like your plug! I built my own plugs using micro connectors, your way is much easier. I have to have everything easily removable from my layout, I didn’t get the handle “Clumsy Mel” for nothing. If it protrudes for my layout I’ll break it off.
Edit:
For da plug, if that is what ewe want, a simple 1/8th" RCA jack will do it. Instead of a wire, just stick your lamp post into the jack.
Burry the female end into the earth.
ROAR
Hi Mel:
Actually when I look at how you made your plugs and sockets I think yours might be simpler. I had to turn down the base of the male plugs to get them to fit into the brass tube. Getting them to the exact size was a bit tricky. Also, finding the right size plugs and sockets was difficult. Your method would be cheaper too although the jacks were not expensive.
Dave
Dave
Actually the connectors aren’t that hard to make. I used my fine tooth Atlas Snap Saw to cut everything. The 5/32” brass tube (lamp base) slides inside the 3/16” tube (mounting tube). I used a 1” length tube for the lamp base (male connector) and a ¼” length for the socket (female connector). The micro connectors with heat shrink are a snug fit inside the 5/32” tube and I just tacked them inside with super glue. After applying a drop of super glue to the heat shrink I slipped the two connectors together momentarily in the 3/16” tube for alignment. Then I solder tacked the bottom connector sleeve in place along with the black wire and it’s done. I guess I lucked out but every connector lined up perfectly and all twenty streetlights are interchangeable.
Hi Lion:
I am doing virtually the same thing as what you suggest but my intent with the base of the lamp post going below the surface was to make the street lights as sturdy as possible. In other words, I want the lights to stand up perfectly straight, or as close as I can get to that. I felt that the male portion of the jack would not properly support the street lights just by itself. I could be wrong but I have the smaller jacks already so I’m going to go with them and not take the chance on having wobbly street lights.
I still have to design some sort of device which will hold the female socket in place below the layout but I have some ideas in mind.
Thanks for your suggestion.
Dave
Mel:
Thanks for the explanation.
Your female socket is certainly easier to mount than mine will be. I could easily change my design to match yours.
Dave
I use the micro connectors for everything on my layout, they’re cheap, easily cut to size and simple to install. I buy them off eBay, here are a couple of links.
http://www.ebay.com/itm/111802157530?_trksid=p2060353.m1438.l2649&ssPageName=STRK%3AMEBIDX%3AIT
http://www.ebay.com/itm/400277707767?_trksid=p2060353.m1438.l2649&ssPageName=STRK%3AMEBIDX%3AIT
Here is a link to a post on my blog about the micro connectors.
http://melvineperry.blogspot.com/2014/04/april-4-2014-micro-connectors.html
</
Hey Mel!
Thanks for the links and the tutorial. I will order some of the strips as soon as the vendor is back to work (Feb. 14)
I have used micro connectors in the past but I was making mine from IC sockets. I got a bunch of the sockets for peanuts a long time ago but my supply is running low. It never occurred to me to try sticking them in the bottom of the street lights.
Thanks again!
Dave
Although not as stylish as Dave and Mel’s, here’s my version using styrene tubing and Miniatronics 1.7mm incandescent lamps and shades:

The how-to for it is on my website, which includes both a downloadable diagram and instruction sheet in .pdf format and a parts list. Cost is ~$1.50 for a single-light; <$3.00 for a double.

Tom
HI Dave, your lights really nice looking but, I was asking about the long arm street lights that cover residential streets in real life.
I like your idea with RCA plugs. Doug
Tom:
I think your yard lights look really good, so much so that I have followed your instructions and built a bunch for myself!
I’m still figuring out how to mount them. I want mine to be removable.
Dave
Glad you like 'em, Dave. [:D] My layout top was extruded foam so I just hand-drilled an undersized hole and pushed the light pole into it. It was a firm enough fit that they stayed upright but could be removed, if needed. Mayble I’ll think more on a mounting idea for harder surfaces like plywood.
Tom
Hi doug57:
Sorry, I kind of hijacked your thread with the wrong lights.
I take it you are modeling a more recent era than the 1950s which my lights were designed for. If that is the case, eBay has some that might suit you, although I couldn’t find any with really long arms. I didn’t go down the whole list.
Here is one example (can’t beat the price!), but they aren’t really tall and the LEDs are bright (bluish) white:
A couple of words of caution if you are buying streetlights on eBay. Make sure you are getting LEDs, not bulbs. The ones with bulbs often come with warnings that you can only operate them for short periods or they will melt the heads. Also, make sure you are getting HO scale, not 1/100 which many of them are.
Dave
Hi Dave The lights I was referring to is Walthers part #949-4315 long arm street light. Doug